
Related Manuals for Allen-Bradley 1756-DHRIO


Summary of Contents for Allen-Bradley 1756-DHRIO
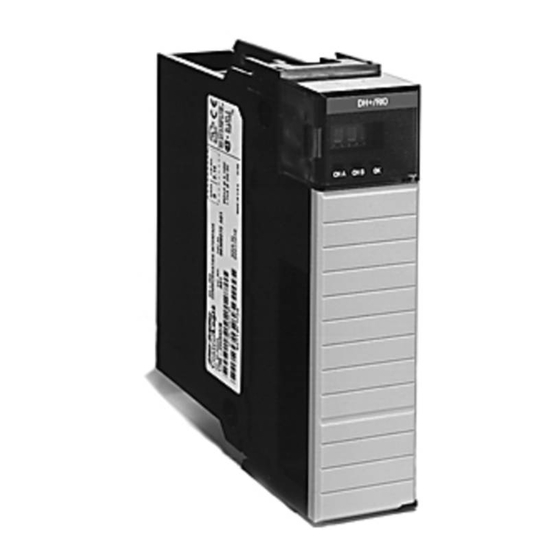
- Page 1 ControlLogix Data Highway Plus-Remote I/O Communication Interface Module 1756-DHRIO User Manual...
- Page 2 (to include intellectual property liability) for actual use based upon the examples shown in this publication. Allen-Bradley publication SGI-1.1, Safety Guidelines for the Application, Installation and Maintenance of Solid-State Control (available from your local Rockwell Automation office), describes...
- Page 3 For a full description of the manual’s organization, see Table Preface.1 on page Preface-2 or the Table of Contents. · The description of how to use software with 1756-DHRIO module is expanded, as follows: – Chapter 3 explains Using Programming Software in DH+ Applications.
-
Page 4: Publication 1756-Um514B-En-P - February
Summary of Changes Notes: Publication 1756-UM514B-EN-P - February 2003... - Page 5 (1756-DHRIO module). This manual also provides step-by-step procedures on how to: · use the 1756-DHRIO module to send DH+ messages between ControlLogix controllers, PLCs and SLCs in DH+ applications. · connect ControlLogix controllers to remote I/O and send block transfers via the 1756-DHRIO module.
- Page 6 Information Chapter 9 Using RSLogix 5000 in Remote I/O and Block Transfer Applications Chapter 10 Connecting a ControlLogix Controller to Remote Chapter 11 Block Transfers with the 1756-DHRIO Module General Chapter 12 Troubleshooting the 1756-DHRIO Module Module Appendix A Specifications...
-
Page 7: Table Of Contents
Table of Contents Chapter 1 1756-DHRIO Module Description What This Chapter Contains ..... . . 1-1 What the Module Does ......1-1 Routing Limitations . - Page 8 Messaging Between PLC-5s DH+ Messaging: PLC-5s With One 1756-DHRIO ..4-2 Set the Module Switches......4-3 and SLC-5/04s Set-Up a Routing Table for the 1756-DHRIO Module .
- Page 9 Set the Module Switches......6-5 Set-Up a Routing Table for the 1756-DHRIO Module . . . 6-5 Configure Message Instructions .
- Page 10 Setting the Data Exchange Rate Between the 1756-DHRIO Module and a Controller ....8-11 Requested Packet Interval (RPI) ....8-11 RIO Scanner Status Update Rate With the 1756-DHRIO in a Local Chassis .
- Page 11 Block Transfers to Remote FLEX I/O Modules Through a 1756-DHRIO in a Local Chassis ..... 11-3 Set the Module Switches......11-4 Configure the 1756-DHRIO Module .
- Page 12 Table of Contents Chapter 12 Troubleshooting the 1756-DHRIO What This Chapter Contains ..... . . 12-1 Checking Power Supply and Module Status ... . 12-1 Module Interpreting the Alphanumeric Indicators .
-
Page 13: What This Chapter Contains
Chapter 1756-DHRIO Module Description What This Chapter Contains This chapter describes the 1756-DHRIO module and what you must know and do before you begin to use it. For information about See page What the Module Does Routing Limitations Module Features... -
Page 14: Routing Limitations
1756-DHRIO Module Description Routing Limitations The 1756-DHRIO module can route a message through up to four communications networks and three chassis. This limit applies only to the routing of a message and not to the total number of networks or chassis in a system. -
Page 15: Remote I/O
1756-DHRIO Module Description Remote I/O When a channel on the module is configured for Remote I/O, the module acts as a scanner for the remote I/O network. The ControlLogix controller communicates to the module’s remote I/O scanner to send and receive the I/O on the remote I/O network. -
Page 16: Module Features
41277 41278 Other module features include: · routing table that allows DH+ devices to use the 1756-DHRIO module and ControlLogix chassis to access other networks · routing communications to and from other modules · no limit on number of modules per chassis, up to the number of available slots and the capabilities of the power supply ·... -
Page 17: Setting Switches
1756-DHRIO Module Description Setting Switches Before installing the module, you must set the network type switches for DH+ or RIO, depending on your application. For a channel configured as DH+, you must also select a node address within the range of 00-77. Node addresses are set and displayed in octal. -
Page 18: Alphanumeric Indicators
· A DH, A#14, A OK, B IO, SCAN, B OK For a detailed list of the status and error messages that may display across the alphanumeric indicators, and for troubleshooting information, see Chapter 12, Troubleshooting the 1756-DHRIO Module. Publication 1756-UM514B-EN-P - February 2003... -
Page 19: Preventing Electrostatic Discharge
1756-DHRIO Module Description Preventing Electrostatic The Data Highway Plus module is sensitive to electrostatic discharge. Discharge This equipment is sensitive to electrostatic discharge, ATTENTION which can cause internal damage and affect normal operation. Follow these guidelines when you handle this equipment: ·... -
Page 20: Chapter Summary And What's Next
1756-DHRIO Module Description Chapter Summary and In this chapter, you read a description of the 1756-DHRIO module. Chapter 2 describes Using the Data Highway Plus Network. What’s Next Publication 1756-UM514B-EN-P - February 2003... -
Page 21: What Is Data Highway Plus
Chapter Using the Data Highway Plus Network This chapter describes the basics of Data Highway Plus (DH+) and the operation of a DH+ network. For information about See page What is Data Highway Plus? Connecting Devices to the DH+ Network Two Methods of Communication Over DH+ Using DH+ Messaging Configuration Information in DH+ Messaging... -
Page 22: Link Design
Using the Data Highway Plus Network Link Design When you design your DH+ link, you should use good design practices, including laying out the link before installation. We also recommend you consider the following when designing your DH+ link: · All perfomance requirements ·... -
Page 23: Programming Terminal Port
230.4 kbps 762m (2,500 ft) For proper operation, terminate both ends of a DH+ link by using the external resistors shipped with the 1756-DHRIO. Table 2.2 lists the resistors you can use with each communication rate. Table 2.2 Choosing the Correct Resistor Rating... -
Page 24: Connecting Devices To The Dh+ Network
Using the Data Highway Plus Network Connecting Devices to the Table 2.3 lists the devices you can connect to a DH+ link. DH+ Network Table 2.3 Selecting Devices You Can Connect You can use: Catalog Required Number: Cables: Connect PLC-3 family processors to DH+ Scanner Communication Adapter Module 1775-S5 1770-CD... -
Page 25: Application Guidelines
Using the Data Highway Plus Network Application Guidelines Consider the following application guidelines when configuring a DH+ link for your system. · Minimize the number of DH+ nodes to achieve acceptable response times. Keep in mind the size and frequency of messages exchanged between devices. -
Page 26: Two Methods Of Communication Over Dh
Using the Data Highway Plus Network Two Methods of The 1756-DHRIO module acts as a bridge for two methods of communication. These methods are: Communication Over DH+ · DH+ Messaging · Control and Information Protocol (CIP) Messaging Table 2.4 lists the devices that support each communication method. -
Page 27: Local Dh+ Messaging
DH+ network. The example in Figure 2.2 shows a PLC-5 sending a message to port A on the 1756-DHRIO module. Because the controller slot for port A is configured to “0”, the message is forwarded to the ControlLogix controller in slot 0. - Page 28 Setting the Controller Slot, see page 3-7. There are some messages called PCCC commands that are not sent to the controller slot. In this case, the 1756-DHRIO module generates a response to the message. For a complete list of these messages, see Appendix B, PCCC Commands Supported by the Data Highway Plus Module.
- Page 29 Routing Error in Local DH+ Messaging If the 1756-DHRIO has a problem with routing a DH+ message, it may return a response with an error status of D0 hex. A PLC-5 displays this error as D000 hex when monitoring the message instruction. If you receive this error message, take the following actions: ·...
-
Page 30: Remote Dh+ Messaging
· local DH+ node = 020 · destination link ID = 2 · remote DH+ node = 030 Figure 2.3 1756-DHRIO module ControlLogix chassis Channel A - node: 020 Channel B - node: 025 Link ID 1 Link ID 2... - Page 31 ID. The 1756-DHRIO module requires these link IDs to be decimal values between 1-199. Each DH+ channel on a 1756-DHRIO must have its own unique link ID. The message originates on the source network. The destination network is the message’s target network.
- Page 32 · local DH+ node - The node on your local DH+ network capable of routing the message. If the message originates on Ethernet, ControlNet or ControlLogix, you must also include a CIP path to the first 1756-DHRIO module. Publication 1756-UM514B-EN-P - February 2003...
- Page 33 ControlLogix chassis, ControlNet or Ethernet. Routing Errors in Remote DH+ Messaging If the 1756-DHRIO module has a problem with routing a Remote DH+ Message, it may return a response with an error status of D0 hex. A PLC-5 displays this error as D000 hex when monitoring the message instruction.
-
Page 34: Configuration Information In Dh+ Messaging
DH+ channels is set to 0. Generating Configuration Faults When you insert a 1756-DHRIO module in a ControlLogix chassis, the configuration information stored in the module’s NVS memory is compared to the slot and serial number of the chassis it is entering. If any information does not match, the 1756-DHRIO module generates a configuration fault. -
Page 35: Application Timeout
· The originator increments its error count. The PLC-5/40 processor can retry to send the message later. Figure 2.4 shows an example of an application timeout. Figure 2.4 1756-DHRIO 1756-DHRIO ControlLogix chassis DH+ link 1 Routed messages sent over the backplane. -
Page 36: Example Dh+ Routing Configuration
IMPORTANT number because they are on different networks. Devices on the same network must have unique node numbers. You must assign the node numbers. Figure 2.5 1756-DHRIO module 1756-CNB module 1756-DHRIO module Ch. A node: 015 node: 20 node: 030 Ch. -
Page 37: Using Control And Information Protocol (Cip) Messaging
Your 1756-DHRIO module supports bridging CIP IMPORTANT messaging over a DH+ link. However, your 1756-DHRIO module does not support bridging CIP I/O data from a ControlLogix controller to an 1756-I/O module. The message originator, target, and all modules and links between them must support CIP to send a message using CIP protocol. -
Page 38: Limitations Of Cip Messaging
The 1756-DHRIO module supports 32 connections per DH+ channel. Up to 5 of the connections can be CIP connections. These 5 count against the 32 connections. So if a 1756-DHRIO module has used 30 connections for DH+ Message Routing, it can only use 2 connections to bridge a CIP message through the module on that channel. -
Page 39: Chapter 3 Using This Chapter
Connection path examples 3-21 Choosing the Correct The programming software you need is dependent on what products you are using with the 1756-DHRIO module. Table 3.1 explains what Software software is needed for your application. Table 3.1 Software Needed for 1756-DHRIO Applications... -
Page 40: Using Rslinx To Create A Routing Table
What Is a Routing Table? Before you can create a routing table for your 1756-DHRIO module, you must assign link IDs to all networks (including ENET and CNET) that route information through the module. Link IDs are numbers from 1 to 199. -
Page 41: Pyramid Integrator Emulation
Using Programming Software in DH+ Applications Pyramid Integrator Emulation Each Pyramid Integrator chassis has a routing table in it that tells the chassis where each DH+ link is in relation to that chassis. The routing table uses a link ID to identify each link. You must enter a port for each link that is local to that chassis and a bridge address for each link that is remote from that chassis. - Page 42 Using Programming Software in DH+ Applications Table 3.2 System A Routing Table Link ID Module and Port Type Bridge 1KA-2 Local 1KA-3 Local 2KA-2 Remote 2KA-3 Remote Table 3.3 System B Routing Table Link ID Module and Port Type Bridge 1KA-2 Remote 1KA-3...
-
Page 43: Controllogix Routing
A. Expand the configuration tree until your application appears on the right side of the screen. B. Right-click on the 1756-DHRIO module icon to see the menu. C. Click on Module Configuration. Publication 1756-UM514B-EN-P - February 2003... - Page 44 You must use RSLinx to build the routing table based on the 1756-DHRIO modules in the ControlLogix chassis. Each link ID (i.e. chassis backplane, channels A and B of any 1756-DHRIO module in the chassis) is initially undefined. 5. You must assign link IDs, as shown below.
-
Page 45: Setting The Controller Slot
Using Programming Software in DH+ Applications 6. To assign a Link ID for the chassis backplane, follow the procedure described in step 5. When you are finished assigning Link IDs, your screen should look similar to the one below. Click on OK. The software prompts you to download routing table changes. -
Page 46: Using Rslinx Software To Send Control And Information Protocol Messages
RSLinx uses the CIP protocol when it sends messages via EtherNet or ControlNet. Therefore, it cannot route an RSWho message from a 1756-ENET module to one 1756-DHRIO module, to channel A of a second 1756-DHRIO module in a second chassis, and then out of channel B of the second 1756-DHRIO module (see the X in Figure 3.3). -
Page 47: Using Rslogix 500
Using Programming Software in DH+ Applications Using RSLogix 5 RSLogix 5 is required to send read/write message instructions from PLC-5s in DH+ applications. To send messages, follow these steps: This section offers a brief description of how to send IMPORTANT a message via RSLogix 5. - Page 48 3-10 Using Programming Software in DH+ Applications 5. Change the MSG instruction Control. Type the new Control value here. This example uses a Control of MG10:0. 6. Configure the MSG instruction on the set-up screen. Double-click on Setup Screen to access the message instruction screen.
- Page 49 Using Programming Software in DH+ Applications 3-11 RSLogix 5 DH+ Application Example Figure 3.5 shows an example DH+ application where PLC-5/25 processor A writes data, via a message instruction and the 1756-DHRIO module, to PLC-5 processor B. Figure 3.5 1756-DHRIO ControlLogix chassis Channel A...
-
Page 50: Using Rslogix 500
3-12 Using Programming Software in DH+ Applications Using RSLogix 500 RSLogix 500 is required to send read/write message instructions from SLC-500s in DH+ applications. To send messages, follow these steps: This section offers a brief description of how to send IMPORTANT a message via RSLogix 500. - Page 51 Using Programming Software in DH+ Applications 3-13 5. Change the MSG instruction Control. Type the new Control value here. This example uses a Control of N7:20. 6. Configure the MSG instruction on the set-up screen. Double-click on Setup Screen to access the screen shown below.
- Page 52 3-14 Using Programming Software in DH+ Applications RSLogix 500 DH+ Application Example Figure 3.5 shows an example DH+ application that includes SLC-5s using the 1756-DHRIO module to write message instructions. Figure 3.7 1756-DHRIO 1756-DHRIO ControlLogix chassis Channel B node number: 030...
-
Page 53: Using Rslogix 5000
RSLogix 5000 is required to send read/write message instructions from a ControlLogix controller in DH+ applications. To send messages, follow these steps: You are not required to add the 1756-DHRIO module IMPORTANT to the Controller Organizer to send message instructions from a ControlLogix controller in a DH+ application. - Page 54 3-16 Using Programming Software in DH+ Applications 4. Add a message instruction (MSG) to the new ladder logic rung that appears. Click on the MSG button. 5. Add a new tag to the MSG instruction. A. Right-click on the question mark (?) the menu.
- Page 55 Using Programming Software in DH+ Applications 3-17 7. Access the message type configuration and communication parameters. Double-click on the ellipsis (. . .) button. 8. Change the message configuration. A. Choose the Message Type from the pull-down list. B. Choose the Source Element from the pull-down list if the tag already exists.
- Page 56 C. Fill in the appropriate information from the routing table for this module. RSLogix 5000 DH+ Application Example Figure 3.9 shows an example DH+ application that include a ControlLogix controller using the 1756-DHRIO module to write message instructions. Figure 3.9 ControlLogix controller 1756-DHRIO...
- Page 57 Configuration Pop-Up Screen Communication Pop-Up Screen 1 represents the ControlLogix 3 represents the location of the backplane (as the message leaves 1756-DHRIO module (i.e. slot 3) the ControlLogix controller) Publication 1756-UM514B-EN-P - February 2003...
-
Page 58: Defining Connection Paths
ControlNet port from a KTC card or a 1756-CNB module Ethernet port from a 1756-ENET module DH+ port over channel A from a 1756-DHRIO module DH+ port over channel B from a 1756-DHRIO module separates the first number and second number of the path... -
Page 59: Connection Path Examples
Using Programming Software in DH+ Applications 3-21 Connection path examples The following examples are based on this system: programming terminal ControlNet = port 2 DH+ = port 0 Ethernet ControlNet serial local chassis ControlNet = node 49 Ethernet IP address = 21.21.21.21 Ethernet IP address = 34.34.34.34 DH+ = node 037 remote chassis... - Page 60 3-22 Using Programming Software in DH+ Applications Network Example Description serial Programming terminal to controller module Configure DF1 driver. in logical rack. Leave connection path blank. Use DF1 Upload logic from local controller. (controller is directly connected to the programming terminal) Programming terminal to controller module Configure the DF1 driver.
- Page 61 0 = DH+ port of the KT communications card in the workstation Bridge to the remote chassis over 8#37 = octal DH+ node of the 1756-DHRIO module in slot 9 of the local chassis ControlNet. 1 = backplane port of the 1756-DHRIO module in slot 9 of the local chassis...
-
Page 62: Chapter Summary And What's Next
3-24 Using Programming Software in DH+ Applications Chapter Summary and In this chapter, you read about using programming software in DH+ applications. Chapter 4 explains Messaging Between PLC-5s and What’s Next SLC-5/04s. Publication 1756-UM514B-EN-P - February 2003... - Page 63 This chapter describes how to use DH+ messaging between PLC-5s and between SLC-5/04s. For information about using See page DH+ Messaging: PLC-5s With One 1756-DHRIO DH+ Messaging: SLC-5/04s With Two 1756-DHRIOs in One ControlLogix Chassis DH+ Messaging: PLC-5s With Multiple...
-
Page 64: Dh+ Messaging: Plc-5S With One 1756-Dhrio
Messaging Between PLC-5s and SLC-5/04s DH+ Messaging: PLC-5s This application sends a DH+ message from PLC-5 processor A through a 1756-DHRIO module to PLC-5 processor B. Remote DH+ With One 1756-DHRIO messaging is required to send the message. Figure 4.1 illustrates the steps you must follow in this application: Figure 4.1... -
Page 65: Set The Module Switches
Messaging Between PLC-5s and SLC-5/04s Set the Module Switches In this example, both Channel A and Channel B on the 1756-DHRIO module must be set for DH+. For more information on setting switches, see page 1-5. Set-Up a Routing Table for the 1756-DHRIO Module Use RSLinx to set-up a routing table for the 1756-DHRIO module. -
Page 66: Configure Message Instructions
Messaging Between PLC-5s and SLC-5/04s Configure Message Instructions Use RSLogix 5 to configure the remote PLC-5 message instructions being sent to ControlLogix controller B. Figure 4.3 shows message instruction for this example. See PLC-5 Instruction set Figure 4.3 reference, publication 1785-6.1 For more information on how to configure message instructions using RSLogix 5, see page 3-9 or the RSLogix 5 online help. -
Page 67: Dh+ Messaging: Slc-5/04S With Two 1756-Dhrios In One Controllogix Chassis
Messaging Between PLC-5s and SLC-5/04s DH+ Messaging: SLC-5/04s This application sends a DH+ message from SLC-504 processor A through two 1756-DHRIO modules in the same chassis to SLC-5/04 With Two 1756-DHRIOs in processor B. Remote DH+ messaging is required to send the message. -
Page 68: Set The Module Switches
Messaging Between PLC-5s and SLC-5/04s Set the Module Switches In this application, Channel B on both 1756-DHRIO modules must be set for DH+. For more information on setting switches on the 1756-DHRIO module, see page 1-5. Set-Up a Routing Table for the 1756-DHRIO Modules Use RSLinx to set-up a routing table for the 1756-DHRIO module. -
Page 69: Configure Message Instructions
Messaging Between PLC-5s and SLC-5/04s Configure Message Instructions Use RSLogix 500 to configure the SLC-500 message instructions. Figure 4.6 shows a message instruction for this example. See SLC-500 Instruction Set RSLogix 500 displays Nodes and link IDs in decimal. IMPORTANT Reference, publication 1747-6.15 Also, in this application, a remote bridge address is not required. -
Page 70: Dh+ Messaging: Plc-5S With Multiple Controllogix Chassis
Messaging Between PLC-5s and SLC-5/04s DH+ Messaging: PLC-5s This application sends a DH+ message from PLC-5 processor A through 1756-DHRIO modules in separate chassis over ControlNet to With Multiple ControlLogix PLC-5 processor B. Remote DH+ messaging is required to send Chassis the message. -
Page 71: Set The Module Switches
Messaging Between PLC-5s and SLC-5/04s Set the Module Switches In this application, you must set switches on the 1756-DHRIO modules for DH+ and the switches on the 1756-CNB modules to Node addresses 22 for the 1756-CNB module in system #1 and 23 for the 1756-CNB module in system #2.. -
Page 72: Set-Up Routing Tables For The 1756-Dhrio Modules
Messaging Between PLC-5s and SLC-5/04s Set-Up Routing Tables for the 1756-DHRIO Modules You must set up routing tables for each 1756-DHRIO module in this example. Figure 4.9 shows the routing table for the 1756-DHRIO module in ControlLogix system #1 this example. -
Page 73: Configure Message Instructions
Messaging Between PLC-5s and SLC-5/04s 4-11 Configure Message Instructions Use RSLogix 5 to configure the remote PLC-5 message instructions being sent to ControlLogix controller B. Figure 4.11 shows a message instruction for this example. See SLC-500 Instruction Set Figure 4.11 Reference, publication 1747-6.15 For more information on how to configure message instructions using RSLogix 5, see page 3-9 or the RSLogix 5 online help. -
Page 74: Dh+ Messaging: Plc-5 To Plc-5/C On Controlnet
Messaging Between PLC-5s and SLC-5/04s DH+ Messaging: PLC-5 to This application sends a DH+ message from PLC-5 processor A through 1756-DHRIO and 1756-CNB modules to PLC-5C processor B PLC-5/C on ControlNet on ControlNet. Remote DH+ messaging is required to send the message. -
Page 75: Set The Module Switches
Messaging Between PLC-5s and SLC-5/04s 4-13 Set the Module Switches In this application, you must set switches on the 1756-DHRIO module for DH+ and the switches on the 1756-CNB module to Node address 22. For more information on setting switches on the 1756-DHRIO module, see page 1-5. -
Page 76: Configure Message Instructions
4-14 Messaging Between PLC-5s and SLC-5/04s Configure Message Instructions Use RSLogix 5 to configure the remote PLC-5 message instructions being sent to ControlLogix controller B. Figure 4.14 shows a message instruction for this example. See SLC-500 Instruction Set Figure 4.14 Reference, publication 1747-6.15 For more information on how to configure message instructions using RSLogix 5, see page 3-9 or the RSLogix 5 online help. -
Page 77: What This Chapter Contains
IMPORTANT DH+ messages. In each case, the use of these devices is strictly for example purposes and not an indication of restrictions on the 1756-DHRIO module. Examples using PLC-5s could, in fact, use SLC-5/04s and examples using SLC-5/04s could use PLC-5s. -
Page 78: Dh+ Messaging: Plc-5 To One Controllogix Controller With One Controllogix Chassis
Messaging Between PLC-5s or SLC5/04s and ControlLogix Controllers DH+ Messaging: PLC-5 to This application sends a DH+ message from PLC-5/60 processor A through a 1756-DHRIO module to ControlLogix controller B. Local One ControlLogix Controller DH+ messaging may be used to send the message. -
Page 79: Set The Module Switches
Messaging Between PLC-5s or SLC5/04s and ControlLogix Controllers Set the Module Switches In this example, Channel A on the 1756-DHRIO module must be set for DH+. For more information on setting switches on the 1756-DHRIO module, see page 1-5. Set-Up a Controller Slot for the 1756-DHRIO Module In this example, the controller is not located in the default slot (slot 0) of the ControlLogix chassis. -
Page 80: Configure Message Instructions
Messaging Between PLC-5s or SLC5/04s and ControlLogix Controllers Configure Message Instructions You must use RSLogix 5 to configure the PLC-5 message instructions. Figure 5.3 shows a message instruction necessary for this example. See PLC-5 Instruction set If the ControlLogix controller in this example is the IMPORTANT reference, publication 1785-6.1 destination of a PCCC-typed message, you must... -
Page 81: Dh+ Messaging: Plc-5 To Multiple Controllogix Controllers In One Controllogix Chassis
Messaging Between PLC-5s or SLC5/04s and ControlLogix Controllers DH+ Messaging: PLC-5 to This application sends a DH+ message from PLC-5/60 processor A through a 1756-DHRIO module to multiple ControlLogix controllers. Multiple ControlLogix Controllers in One In this example, we use both local and remote DH+... -
Page 82: Set The Module Switches
Messaging Between PLC-5s or SLC5/04s and ControlLogix Controllers Set the Module Switches In this example, Channel A on the 1756-DHRIO module must be set for DH+. For more information on setting switches on the 1756-DHRIO module, see page 1-5. Set-Up a Controller Slot for the 1756-DHRIO Module In this example, the controller is not located in the default slot (slot 0) of the ControlLogix chassis. -
Page 83: Set-Up A Routing Table For The 1756-Dhrio Module
Messaging Between PLC-5s or SLC5/04s and ControlLogix Controllers Set-Up a Routing Table for the 1756-DHRIO Module Use RSLinx to set-up a routing table for the 1756-DHRIO module. Figure 5.6 shows the routing table necessary for this example. Figure 5.6 For more information on how to set-up a routing table, see page 3-5 or the RSLinx online help. -
Page 84: Configure Remote Message Instructions
Messaging Between PLC-5s or SLC5/04s and ControlLogix Controllers Configure Remote Message Instructions Use RSLogix 5 to configure the remote PLC-5 message instructions being sent to ControlLogix controller B. Figure 5.8 shows a remote message instruction necessary for this example. PLC-5 Instruction Set Figure 5.8 Reference, publication 1785-6.1 For more information on how to configure message instructions using... -
Page 85: Multiple Controllogix Chassis
Messaging Between PLC-5s or SLC5/04s and ControlLogix Controllers DH+ Messaging: SLC-5/04 This application sends a DH+ message from SLC-5/04 processor A through a 1756-DHRIO module in ControlLogix system #1 to a to a ControlLogix Controller 1756-DHRIO module in ControlLogix system #2 to ControlLogix With Multiple ControlLogix controller B. -
Page 86: Set The Module Switches
1-5. For more information on setting the switches on the 1756-CNB module, see page 4-9. Set-Up a Routing Table for the 1756-DHRIO Module Use RSLinx to set-up a routing table for the 1756-DHRIO module. Figure 5.10 shows the routing table necessary for this example. Figure 5.10 For more information on how to set-up a routing table, see page 3-5 or the RSLinx online help. -
Page 87: Configure Message Instructions
Messaging Between PLC-5s or SLC5/04s and ControlLogix Controllers 5-11 Configure Message Instructions Use RSLogix 500 to configure the SLC-500 message instructions. Figure 5.11 shows a message instruction necessary for this example. See PLC-5 Instruction Set RSLogix 500 displays nodes and link IDs in decimal. IMPORTANT Reference, publication 1785-6.1 Also, in this application, a remote bridge address is... - Page 88 5-12 Messaging Between PLC-5s or SLC5/04s and ControlLogix Controllers Notes: Publication 1756-UM514B-EN-P - February 2003...
-
Page 89: What This Chapter Contains
IMPORTANT DH+ messages. In each case, the use of these devices is strictly for example purposes and not an indication of restrictions on the 1756-DHRIO module. Examples using PLC-5s could, in fact, use SLC-504s and examples using SLC-5/04s could use PLC-5s. -
Page 90: Single Chassis To A Plc-5
Local DH+ Messaging: This application sends a DH+ message from a ControlLogix controller A through a 1756-DHRIO module to a PLC-5 processor B on a DH+ ControlLogix Controller in a link. Local DH+ messaging may be used to send the message. In this Single Chassis to a PLC-5 case, local DH+ messaging is used. -
Page 91: Set The Module Switches
Messaging Between ControlLogix Controllers and PLC-5s or SLC-5/04s Set the Module Switches In this application, channel A on the 1756-DHRIO module must be set for DH+. For more information on setting switches on the 1756-DHRIO module, see page 1-5. Configure Message Instructions Use RSLogix 5000 to configure the ControlLogix controller message instructions. -
Page 92: Controlnet And Dh+
Figure 6.3 illustrates the steps you must use in this application: and DH+ Figure 6.3 ControlLogix system #1 ControlLogix system #2 Link ID 1 Link ID 2 ControlLogix controller 1756-CNB 1756-DHRIO 1756-CNB Slot number: 0 Node number:23 Slot number: 0 Node number:22 Slot number:3 Slot number:3 DH+ link... -
Page 93: Set The Module Switches
1-5. For more information on setting the switches on the 1756-CNB module, see page 4-9. Set-Up a Routing Table for the 1756-DHRIO Module Use RSLinx to set-up a routing table for the 1756-DHRIO module in ControlLogix system #2. Figure 6.4 shows the routing table necessary for this example. -
Page 94: Configure Message Instructions
Messaging Between ControlLogix Controllers and PLC-5s or SLC-5/04s Configure Message Instructions Use RSLogix 5000 to configure the ControlLogix controller message instructions. Figure 6.5 shows the message instruction tabs necessary for this example. See Logix5000 Controllers Figure 6.5 General Instructions Reference Manual, publication 1756-RM003 Configuration tab Communication tab... -
Page 95: What This Chapter Contains
CIP Messaging Between This application sends a CIP message from ControlLogix controller A through a 1756-DHRIO module to ControlLogix controller B controller ControlLogix Controllers B. Figure 7.1 illustrates the steps you must use in this application: Over One Link Figure 7.1... -
Page 96: Set The Module Switches
Messaging Between ControlLogix Controllers Set the Module Switches In this application, Channel B on both 1756-DHRIO modules must be set for DH+. For more information on setting switches on the 1756-DHRIO module, see page 1-5. Configure Message Instructions Use RSLogix 5000 to configure the ControlLogix controller message instructions. -
Page 97: Over Two Links
Messaging Between ControlLogix Controllers CIP Message Routing This application sends a CIP message from ControlLogix controller A through a 1756-DHRIO module to ControlLogix controller B processor Between ControlLogix B over two links. Controllers Over Two Links Figure 7.3 illustrates the steps you must use in this application: Figure 7.3... - Page 98 Messaging Between ControlLogix Controllers Set the Module Switches In this application, Channel A on the first and last 1756-DHRIO modules must be set for DH+. Both channels on the second 1756-DHRIO module must both be set for DH+. For more information on setting switches on the 1756-DHRIO module, see page 1-5.
-
Page 99: What This Chapter Contains
Chapter Using the 1756-DHRIO Module in Remote I/O Applications What This Chapter Contains This chapter describes the basic procedures of using the 1756-DHRIO module in remote I/O scanner mode and configuring a remote I/O network. For information about using See page... -
Page 100: Introduction To Remote I/O
Introduction to Remote I/O The remote I/O system lets you control I/O devices that are not in the controller’s chassis. A 1756-DHRIO channel, configured as a remote I/O scanner, transfers discrete and block-transfer data between a ControlLogix controller and remote I/O devices. -
Page 101: Selecting Devices That You Can Connect
Using the 1756-DHRIO Module in Remote I/O Applications Selecting Devices That You Table 8.1 lists some of the devices you can use on a remote I/O net- Can Connect work as an adapter: Table 8.1 Devices You Can Connect to a Remote I/O Network... -
Page 102: Designing A Remote I/O Network
– 230.4kbps · Assign unique partial and full racks to each channel used in remote I/O scanner mode. Both channels of a 1756-DHRIO module cannot scan the same partial or full rack address. Both module channels can communicate to 00-37 octal or 40-77 octal, but each channel can only communicate with address in one of the ranges at a time. -
Page 103: Cable Design Guidelines
Using the 1756-DHRIO Module in Remote I/O Applications Cable Design Guidelines Follow these cable design guidelines in your remote I/O network: · Specify 1770-CD (Belden 9463) cable. · Connect a remote I/O network using a daisy chain or trunk line/drop line configuration. - Page 104 762m (2,500 ft) For proper operation, terminate both ends of a remote I/O network by using the external resistors shipped with the 1756-DHRIO module. Selecting either a 150W or a 82W terminator determines how many devices you can connect on a single remote I/O network.
-
Page 105: 1756-Dhrio Module
If only one channel is needed for RIO, use Channel B. When a channel is configured for remote I/O, the 1756-DHRIO module is designed to function as an remote I/O scanner for a ControlLogix controller. In this case, the following occurs: ·... -
Page 106: And Adapters
Using the 1756-DHRIO Module in Remote I/O Applications Exchanging I/O Data Between the 1756-DHRIO Module and Adapters I/O data is exchanged between the 1756-DHRIO module and adapters on the remote I/O link based on a list of adapters generated in RSLogix 5000. -
Page 107: Controller Organizer
I/O Configuration Tree in RSLogix 5000 Controller Organizer The I/O configuration tree in the RSLogix 5000 Controller Organizer specifies the connections to the 1756-DHRIO module, in addition to generating the adapter list of the 1756-DHRIO module to scan. The 1756-DHRIO module entry in the I/O configuration tree specifies the status connection between the scanner function on the 1756-DHRIO module and the ControlLogix controller. -
Page 108: Adapter Module I/O
Using the 1756-DHRIO Module in Remote I/O Applications Adapter Module I/O The 1756-DHRIO module scans the remote I/O devices as they appear in the ControlLogix controller’s controller organizer. The entries in the organizer represent logical adapters. The physical adapter modules on remote I/O may act as several racks. -
Page 109: Dhrio Module And A Controller
Controller Requested Packet Interval (RPI) This interval specifies the rate at which the 1756-DHRIO module and the ControlLogix controller produce data. The time ranges from 3mS to 750mS and is sent to the module with all other configuration parameters. -
Page 110: Setting The Baud Rate
Using the 1756-DHRIO Module in Remote I/O Applications Setting the Baud Rate The rate of I/O data exchange is directly related to the configured remote I/O scanner baud rate. Your 1756-DHRIO module allows the following baud rates: · 57.6Kbaud · 115.2Kbaud ·... - Page 111 Using the 1756-DHRIO Module in Remote I/O Applications 8-13 Figure 8.3 Adapter Update Rates Adapter Update Rates for Remote I/O at 230.4Kbaud Rate Number of Controller Organizer Entries Under a 1756-DHRIO module 3ms/adapter Valid operating RPI rate Adapter Update Rates for Remote I/O at 115.2Kbaud Rate...
-
Page 112: Module In The Local Chassis
Adapter Module I/O Update Rate with the 1756-DHRIO Module in the Local Chassis When the 1756-DHRIO module resides in the same chassis as the owner-controller, updated output data (refreshed to new values via the control program) is delivered to the adapter module at:... -
Page 113: Module In The Remote Chassis
Adapter Module I/O Update Rate with the 1756-DHRIO Module in the Remote Chassis When the 1756-DHRIO module resides in the remote chassis from the owner-controller, updated output data (refreshed to new values via the control program) is delivered to the adapter module at:... -
Page 114: Remote I/O Scanner Fault Notification
8-16 Using the 1756-DHRIO Module in Remote I/O Applications Remote I/O Scanner A 1756-DHRIO module using one of its channels for remote I/O has a connection open between the module and its owner-controller. The Fault Notification remote I/O scanner status is continually being exchanged over this connection. -
Page 115: Remote I/O Adapter Failure Notification
Connector Adapter adapter is terminated. In this case, the 1756-DHRIO scanner (Channel A or B) continues to scan the remote I/O rack on the remote I/O network and switches the affected chassis of I/O into program mode. Only the ControlLogix... -
Page 116: Increased Remote I/O System Throughput
8-18 Using the 1756-DHRIO Module in Remote I/O Applications Increased Remote I/O Because of the unique design of the 1756-DHRIO module system, performance may be greatly enhanced by splitting the remote I/O System Throughput adapters across both channels. An example of a simple system has the following devices: ·... -
Page 117: Remote I/O Applications
Remote I/O Applications Using RSLogix 5000 in 1756-DHRIO Module Block Transfer Applications Using RSLogix 5000 in When you use the 1756-DHRIO module for remote I/O, you must follow these basic steps: 1756-DHRIO Module Remote I/O Applications When using the 1756-DHRIO module in remote I/O IMPORTANT mode on channels A &... -
Page 118: Adding The 1756-Dhrio Module
Using RSLogix 5000 in Remote I/O and Block Transfer Applications Adding the 1756-DHRIO Module After you start RSLogix 5000 and create a new project, you must create a new 1756-DHRIO module. A. Right-click on I/O Configuration. B. Click on New Module. -
Page 119: Configuring The 1756-Dhrio Module
Using RSLogix 5000 in Remote I/O and Block Transfer Applications Configuring the 1756-DHRIO Module Configure the newly added 1756-DHRIO module in the wizard screens that appear. Table 9.1 describes the configurable parameters that appear on the wizard screens. Publication 1756-UM514B-EN-P - February 2003... - Page 120 Location of module in the chassis. Type Application for each module channel. This field must be changed to RIO. Baud Rate Rate of communication at which the 1756-DHRIO module scans the remote I/O. Available options are: · 57.6K bps · 115.2K bps · 230.4K bps Revision Minor revision of the 1756-DHRIO module.
-
Page 121: Adding The Remote I/O Adapter
Using RSLogix 5000 in Remote I/O and Block Transfer Applications Adding the Remote I/O Adapter Add the remote I/O adapter to your project. A. Right-click on the 1756-DHRIO module. B. Click on New Module. C. Choose the appropriate adapter. D. Click here. -
Page 122: Configuring The Remote I/O Adapter
Using RSLogix 5000 in Remote I/O and Block Transfer Applications Configuring the Remote I/O Adapter Configure the newly added remote I/O adapter in the wizard screens that appear. Table 9.2 on page 9-7 describes the configurable parameters that appear on the wizard screens. Publication 1756-UM514B-EN-P - February 2003... - Page 123 Using RSLogix 5000 in Remote I/O and Block Transfer Applications The screens on page 9-6 show a 1794-ASB remote I/O adapter. However, the parameters described in Table 9.2 apply to all remote I/O adapters that can be connected to the 1756-DHRIO module. Table 9.2 1756-DHRIO Module Configurable Parameters...
-
Page 124: Downloading The Project To The Controller
Using RSLogix 5000 in Remote I/O and Block Transfer Applications Downloading the Project to the Controller After you have written all configuration for your project, you must download the configuration to the controller. A. Click on the menu. B. Click on Go Online. Editing Configuration After you have completed configuration for a project, you can review and change your choices. -
Page 125: Block Transfer Applications
When you use the 1756-DHRIO module for block transfers, you must follow these basic steps: 1. Add the 1756-DHRIO module to the project. -
Page 126: Adding The 1756-Dhrio Module
9-10 Using RSLogix 5000 in Remote I/O and Block Transfer Applications Adding the 1756-DHRIO Module After you start RSLogix 5000 and create a new project, you must create a new 1756-DHRIO module. A. Right-click on I/O Configuration. B. Click on New Module. -
Page 127: Configuring The 1756-Dhrio Module
Using RSLogix 5000 in Remote I/O and Block Transfer Applications 9-11 Configuring the 1756-DHRIO Module Configure the newly added 1756-DHRIO module in the wizard screens that appear. Table 9.3 describes the configurable parameters that appear on the wizard screens. Publication 1756-UM514B-EN-P - February 2003... - Page 128 Location of module in the chassis. Type Application for each module channel. This field must be changed to RIO. Baud Rate Rate of communication at which the 1756-DHRIO module scans the remote I/O. Available options are: · 57.6K bps · 115.2K bps · 230.4K bps Revision Minor revision of the 1756-DHRIO module.
-
Page 129: Adding The Remote I/O Adapter
Using RSLogix 5000 in Remote I/O and Block Transfer Applications 9-13 Adding the Remote I/O Adapter Add the remote I/O adapter to your project. A. Right-click on the 1756-DHRIO module. B. Click on New Module. C. Choose the appropriate adapter. In this... -
Page 130: Configuring The Remote I/O Adapter
9-14 Using RSLogix 5000 in Remote I/O and Block Transfer Applications Configuring the Remote I/O Adapter Configure the newly added remote I/O adapter in the wizard screens that appear. Table 9.2 on page 9-7 describes the configurable parameters that appear on the wizard screens. Publication 1756-UM514B-EN-P - February 2003... - Page 131 9-15 The screens on page 9-6 show a 1794-ASB remote I/O adapter. However, the parameters described in Table 9.2 apply to all remote I/O adapters that can be connected to the 1756-DHRIO module. Table 9.4 1756-DHRIO Module Configurable Parameters Naming Screen...
-
Page 132: Adding The Remote I/O Modules
9-16 Using RSLogix 5000 in Remote I/O and Block Transfer Applications Adding the Remote I/O Modules Add the remote I/O modules to your project. A. Right-click on the remote I/O adapter. B. Click on New Module. C. Choose the RIO-MODULE. D. -
Page 133: Configuring The Remote I/O Modules
Configuring the Remote I/O Modules Configure the newly added remote I/O modules in the wizard screen that appears. Table 9.5 describes the configurable parameters that appear on the wizard screens. Table 9.5 1756-DHRIO Module Configurable Parameters Naming Screen Parameter: Definition: (first screen): Name Module name. -
Page 134: Message Instruction
9-18 Using RSLogix 5000 in Remote I/O and Block Transfer Applications Creating a Block Transfer (Read or Write) Message Instruction After you add all modules to the block transfer project, you must write message instructions to transfer data between the controller and the remote I/O modules. - Page 135 Using RSLogix 5000 in Remote I/O and Block Transfer Applications 9-19 3. Add a new tag to the MSG instruction. A. Right-click on the question mark (?) the menu. B. Click on New Tag. 4. Name and define the new tag. A.
- Page 136 9-20 Using RSLogix 5000 in Remote I/O and Block Transfer Applications To create Block Transfer Read messages, see step 6. To create Block Transfer Write messages, see step 8. 6. Change the message configuration. In this step, we create a Block Transfer Read (i.e.
- Page 137 Using RSLogix 5000 in Remote I/O and Block Transfer Applications 9-21 8. To create a Block Transfer Write message, change the message configuration as shown below. A. Choose the Message Type from the pull-down list. B. Specify the Source Element. You can: ·...
-
Page 138: Chapter Summary And What's Next
9-22 Using RSLogix 5000 in Remote I/O and Block Transfer Applications Chapter Summary and In this chapter, you read about using RSLogix 5000 in remote I/O and block transfer applications. Chapter 10 explains Connecting a What’s Next ControlLogix Controller to Remote I/O. Publication 1756-UM514B-EN-P - February 2003... - Page 139 Chapter Connecting a ControlLogix Controller to Remote I/O What This Chapter Contains This chapter describes how to use the 1756-DHRIO module in remote I/O scanner mode to connect a ControlLogix controller to remote I/O. For information about using See page...
- Page 140 10-2 Set the Module Switches In this application, channel B on the 1756-DHRIO module must be set for RIO. Channel A can be used for remote I/O or DH+, regardless of the usage assigned to channel B. For more information on setting switches on the 1756-DHRIO module, see page 1-5.
- Page 141 Connecting a ControlLogix Controller to Remote I/O 10-3 Configure 1756-DHRIO Module Use RSLogix 5000 to configure the 1756-DHRIO module. Figure 10.2 shows some sample configuration screens for the 1756-DHRIO module in this example. Figure 10.2 For more information on configuring a 1756-DHRIO module in a remote I/O application, see Chapter 9, or the RSLogix 5000 online help.
-
Page 142: Modules In A Local Chassis
10-4 Connecting a ControlLogix Controller to Remote I/O Scanning Remote FLEX In this application, a ControlLogix controller scans multiple FLEX remote I/O adapters through multiple 1756-DHRIO modules in the Adapters Through Multiple local chassis. 1756-DHRIO Modules in a Figure 10.4 illustrates the steps you must use in this example: Local Chassis Figure 10.4... -
Page 143: Set The Module Switches
Connecting a ControlLogix Controller to Remote I/O 10-5 Set the Module Switches In this application, channel B on the 1756-DHRIO module must be set for RIO. Channel A can be used for remote I/O or DH+, regardless of the usage assigned to channel B. - Page 144 For more information on configuring a FLEX adapter in a remote I/O application, see Chapter 9, or the RSLogix 5000 online help. Configure Second 1756-DHRIO Module Use RSLogix 5000 to configure the 1756-DHRIO module. Figure 10.7 shows some sample configuration screens for the second 1756-DHRIO module in this example.
- Page 145 Connecting a ControlLogix Controller to Remote I/O 10-7 Configure 2nd FLEX Adapter Use RSLogix 5000 to configure the second FLEX adapter. Figure 10.8 shows some sample configuration screens for the second FLEX adapter in this example. Figure 10.8 For more information on configuring a FLEX adapter in a remote I/O application, see Chapter 9, or the RSLogix 5000 online help.
- Page 146 Connecting a ControlLogix Controller to Remote I/O Scanning 1771 Remote I/O In this application, a ControlLogix controller scans remote FLEX I/O modules through a 1756-DHRIO module in a remote chassis over a Adapters Through a ControlNet network. Figure 10.9 illustrates the steps you follow to use...
-
Page 147: Set The Module Switches
10-9 Set the Module Switches In this application, channel B on the 1756-DHRIO module must be set for RIO. Channel A can be used for remote I/O or DH+, regardless of the usage assigned to channel B. For more information on setting switches on the 1756-DHRIO module, see page 1-5. - Page 148 For more information on configuring a 1756-CNB module in a remote I/O application, see Chapter 9, or the RSLogix 5000 online help. Configure 1756-DHRIO Module Use RSLogix 5000 to configure the 1756-DHRIO module. Figure 10.12 shows some sample configuration screens for the 1756-DHRIO module in this example.
-
Page 149: Configure 1771-Asb Adapter
Connecting a ControlLogix Controller to Remote I/O 10-11 Configure 1771-ASB Adapter Use RSLogix 5000 to configure the 1771-ASB adapter. Figure 10.13 shows some sample configuration screens for the 1771-ASB adapter in this example. Figure 10.13 For more information on configuring a 1771-ASB adapter in a remote I/O application, see Chapter 9, or the RSLogix 5000 online help. -
Page 150: Chapter Summary And What's Next
10-12 Connecting a ControlLogix Controller to Remote I/O Chapter Summary and In this chapter, you learned about connecting a ControlLogix controller to remote I/O. Chapter 11 describes Block Transfers with What’s Next the 1756-DHRIO Module. Publication 1756-UM514B-EN-P - February 2003... -
Page 151: Block Transfers To Remote Flex I/O Modules Through A
Chapter Block Transfers with the 1756-DHRIO Module What This Chapter Contains This chapter describes how to use the 1756-DHRIO module to connect a ControlLogix controller to a remote I/O Block Transfer (BT) module. For information about using See page Block Transfers to Remote FLEX I/O Modules... - Page 152 1756-DHRIO module (module with the remote I/O channel). For example, if the target is an remote I/O channel on a 1756-DHRIO module in slot 5 of a ControlLogix chassis and remote DH+ messaging is used, the destination link ID is set to the ControlLogix chassis link ID and the remote destination node is set to 5.
-
Page 153: Dhrio In A Local Chassis
Block Transfers with the 1756-DHRIO Module 11-3 Block Transfers to Remote This application allows a ControlLogix controller to initiate block transfers to remote FLEX I/O modules through a 1756-DHRIO module FLEX I/O Modules Through in the local chassis. a 1756-DHRIO in a Local Figure 11.1 illustrates the steps you must use in this example:... -
Page 154: Set The Module Switches
11-4 Block Transfers with the 1756-DHRIO Module Set the Module Switches Channel B on the 1756-DHRIO module must be set for RIO. Channel A can be used for remote I/O or DH+, regardless of the usage assigned to channel B. -
Page 155: Configure Block Transfer Module
Block Transfers with the 1756-DHRIO Module 11-5 Configure FLEX Adapter Use RSLogix 5000 to configure the FLEX adapter. Figure 11.3 shows some sample configuration screens for the FLEX adapter in this example. Figure 11.3 For more information on configuring a FLEX adapter in a remote I/O application, see Chapter 9, or the RSLogix 5000 online help. -
Page 156: Configure Message Instruction
11-6 Block Transfers with the 1756-DHRIO Module Configure Message Instruction Use RSLogix 5000 to configure the block transfer message instructions. Figure 11.5 shows the message instruction tabs necessary for this example. Figure 11.5 Configuration tab Communication tab For more information on how to configure message instructions using RSLogix 5000, see page 9-18 or the RSLogix 5000 online help. -
Page 157: Block Transfers To Remote 1771-Asb I/O Modules Through A 1756-Dhrio In A Remote Chassis
11-7 Block Transfers to Remote This application allows a ControlLogix controller to write block transfers to remote 1771-ASB I/O modules through a 1756-DHRIO 1771-ASB I/O Modules module in a remote chassis over a ControlNet link. The following Through a 1756-DHRIO in a... -
Page 158: Set The Module Switches
Block Transfers with the 1756-DHRIO Module Set the Module Switches In this application, channel B on the 1756-DHRIO module must be set for RIO. Channel A can be used for remote I/O or DH+, regardless of the usage assigned to channel B. For more information on setting Also described on page 1-5 switches on the 1756-DHRIO module, see page 1-5. -
Page 159: Configure Second 1756-Cnb Module
For more information on configuring a 1756-CNB module in a remote I/O application, see Chapter 9, or the RSLogix 5000 online help. Configure 1756-DHRIO Module Use RSLogix 5000 to configure the 1756-DHRIO module. Figure 11.9 shows some sample configuration screens for the 1756-DHRIO module in this example. -
Page 160: Configure 1771-Asb Adapter
11-10 Block Transfers with the 1756-DHRIO Module Configure 1771-ASB Adapter Use RSLogix 5000 to configure the 1771-ASB adapter. Figure 11.10 shows some sample configuration screens for the 1771-ASB adapter in this example. Figure 11.10 For more information on configuring a 1771-ASB adapter in a remote I/O application, see Chapter 9, or the RSLogix 5000 online help. -
Page 161: Configure Message Instruction
Block Transfers with the 1756-DHRIO Module 11-11 Configure Message Instruction Use RSLogix 5000 to configure the block transfer message instructions. Figure 11.12 shows the message instruction tabs necessary for this example. Figure 11.12 Configuration tab Communication tab For more information on how to configure message instructions using RSLogix 5000, see page 9-18 or the RSLogix 5000 online help. - Page 162 11-12 Block Transfers with the 1756-DHRIO Module Notes: Publication 1756-UM514B-EN-P - February 2003...
-
Page 163: What This Chapter Contains
Chapter Troubleshooting the 1756-DHRIO Module What This Chapter Contains This chapter describes your module’s diagnostics and methods of troubleshooting your module. For information about using See page Checking Power Supply and Module Status 12-1 Interpreting the Alphanumeric Indicators 12-2 Interpreting the Status Indicators... -
Page 164: Interpreting The Alphanumeric Indicators
12-2 Troubleshooting the 1756-DHRIO Module If the alphanumeric indicator on the 1756-DHRIO module does not cycle through these messages on power-up, refer to the following table and to the Troubleshooting section that follows. Table 12.1 If the Power Supply Recommended Action:... -
Page 165: Interpreting The Status Indicators
Troubleshooting the 1756-DHRIO Module 12-3 Table 12.2 Interpreting the Alphanumeric Display Code Description Recommended Action Remote I/O MUTE No adapters found on Add an adapter to the remote I/O LINK remote I/O. network. RACK Rack overlap on Reconfigure remote I/O racks. -
Page 166: Minimizing False Received Frame With Bad Crc Messages
Duplicate node Check node address. detected. Minimizing False Received A 1756-DHRIO module that communicates with a 1784-KT or 1784-PCMK communication card on its DH+ link may receive the Frame with Bad CRC following error message: Messages Received Frame with Bad CRC This error does not affect DH+ link operations. - Page 167 Appendix Specifications Module Location ControlLogix chassis Maximum Backplane 850mA @ +5.1V dc and 1.7mA @ 24 V dc Current Load from I/O chassis backplane Power Dissipation 4.5W maximum Thermal Dissipation 15.4 BTU/hr maximum Available Baud Rates 57.6Kbaud 115.2Kbaud 230.4Kbaud Environmental Conditions: Operating Temperature IEC 60068-2-1 (Test Ad, Operating Cold), IEC 60068-2-2 (Test Bd, Operating Dry Heat),...
- Page 168 Specifications EFT/B Immunity IEC 61000-4-4: ±2kV at 5kHz on communications ports Surge Transient Immunity IEC 61000-4-5: +2kV line-earth (CM) on shielded ports Conducted RF Immunity IEC 61000-4-6: 3Vrms with 1kHz sine-wave 80%AM from 10kHz to 80MHz 10Vrms with 1kHz sine-wave 80%AM from 150kHz to 80MHz Enclosure Type Rating None (open-style)
-
Page 169: What This Appendix Contains
1756-DHRIO if the DH+ message's network destination address is the network address of one of the DH+ ports on the 1756-DHRIO or if the DH+ message's network destination link ID is 0 and the network destination node is the 1756-DHRIO's DH+ port node address. -
Page 170: Id Host And Status
PCCC Commands Supported by the Data Highway Plus Module ID Host and Status This command allows you to check the location and status of the controlling intelligent device, such as a PLC-5, that is connected to the DHRIO network. CMD = 06h, FNC = 03 The definition of the data returned is: Table B.1 ID Host and Status... - Page 171 0 = DH+ 1 = remote I/O 2 = disabled 14 - 26 Bulletin Number / Name (In ASCII) 1756-DHRIO/x – where x is the Series letter, and there is a space after the Series letter Publication 1756-UM514B-EN-P - February 2003...
-
Page 172: Read Dh+ Diagnostic Counters
PCCC Commands Supported by the Data Highway Plus Module Read DH+ Diagnostic Counters Diagnostic counters are bytes of information stored in RAM in you 1756-DHRIO module. The counters occupy a block of the module’s internal scratch RAM. Your module’s counters wrap around to zero when they overflow. -
Page 173: Reset Dh+ Diagnostic Counters
If bit = 0, the node is not present If bit = 1, the node is present Reset DH+ Diagnostic Counters After reading your 1756-DHRIO module’s diagnostic counters, you may want to reset them back to zero to clear that block of your module’s internal scratch RAM. - Page 174 PCCC Commands Supported by the Data Highway Plus Module Notes: Publication 1756-UM514B-EN-P - February 2003...
-
Page 175: Cached And Uncached Connections
Appendix Application Guidelines and Tips Use this appendix to better understand how to use your 1756-DHRIO module in DH+ and remote I/O applications. The module, and its corresponding applications, can be difficult to use in the most efficient and effective manner. The information in this appendix should assist you when using the 1756-DHRIO module. -
Page 176: Cached Connections
Application Guidelines and Tips Cached Connections A cached connection is connection between two points that remains open all the time. Remember the following: · When using cached connections, more than 1 message from identical points consume only 1 connection. In this case, ALL the identical point messages must be cached. -
Page 177: Message Manager
PLC Devices accessed from the following location: http://support.rockwellautomation.com · Requested Packet Interrupt (RPI) setting on the 1756-DHRIO RPI Configuration Settings module is the time where the DHRIO module will send status information to the controller. It is not the time where data is transferred from the DHRIO to the controller. -
Page 178: Rpi Formula Without Block Transfer Modules
Application Guidelines and Tips RPI Formula without Block Digital Modules Only Transfer Modules This formula is for a worst case scenario with discrete modules only. · Scan Rate = – 3ms/adapter for 230.4K Baud – 5ms/adapter for 115.2K Baud – 8ms/adapter for 57.6K Baud ·... -
Page 179: Increasing Unconnected Message Buffer Set-Up
Application Guidelines and Tips Increasing Unconnected Message Buffer Set-Up Set up the message as shown below Increasing Unconnected Message Buffer Source Data The source array tag needs to have data manually placed into some of the locations. Set element #4 to the value desired of the UCB. The other values cannot be varied. -
Page 180: Remote I/O Performance: Controllogix Vs. Plc-5
Application Guidelines and Tips Remote I/O Performance: In Figure C.1, block transfer write messages are sent from a ControlLogix controller (via the 1756-DHRIO module) to a 1771-DCM ControlLogix vs. PLC-5 over cached remote I/O connections. Figure C.1 ControlLogix controller 1756-DHRIO... -
Page 181: Dh+ Baud Rate Comparison
Figure C.4 57.6K 115K Messages per Second 230K 9 10 11 12 13 14 15 Number of Nodes (i.e. number of messages) Version 5 of the 1756-DHRIO module added baud rates of 115.2K and 230.4K. Publication 1756-UM514B-EN-P - February 2003... -
Page 182: Using Uncached Connections
9 10 11 12 13 14 15 Number of Nodes (i.e. number of messages) Version 5 of the 1756-DHRIO module added baud rates of 115.2K and 230.4K. Maintaining PCCC The 1756-DHRIO module does not necessarily send PCCC messages in the same order in which it receives them. To make sure of proper... - Page 183 Connections C-1–C-2, C-7 Cached C-1–C-2, C-8 Uncached Control and information protocol (CIP) Baud rates 1-1, 2-6, 2-17 messaging Available on the 1756-DHRIO module 3-7, 5-3, 5-6 Controller slot 8-4, 8-12–8-13 Controllers C-7– Cached vs uncached connections Constraints Preface-1 Using with the 1756-DHRIO...
- Page 184 When the remote I/O adapter faults Limitations 8-17 Programming message block instructions When the remote I/O scanner faults in a controller 8-16 Receiving messages 1-4– Features of the 1756-DHRIO module Routing errors Sending messages 1-6, 12-2– Alphanumeric indicators 12-3 Programming terminal port Message instructions Switches Block transfer application example 9-18–9-21...
- Page 185 In remote data highway plus (DH+) B-4–B-5 Read DH+ diagnostic counters 2-13 messaging Reset DH+ diagnostic counters Routing limitations Preventing electrostatic discharge (ESD) For messages sent via the 1756-DHRIO module Programming terminal port 3-2–3-7 Routing tables Pyramid integrator Definition As related to routing tables 3-3–3-4...
- Page 186 Index 12-3–12-4 RSLogix 5000 (continued) For use in troubleshooting 9-1– Switches Using in remote I/O applications 9-8, 10-3, 10-5–10-7, Setting on the 1756-DHRIO module 10-9–10-11 12-1–12-4 Troubleshooting Software 12-1– Power supply and module status 12-2 Choosing the correct software for data...
- Page 187 ___Yes, please call me ___Yes, please e-mail me at __________________________ ___Yes, please contact me via ________________________ Return this form to: Allen-Bradley Marketing Communications, 1 Allen-Bradley Dr., Mayfield Hts., OH 44124-9705 Phone: 440-646-3176 Fax: 440-646-3525 E-mail: RADocumentComments@ra.rockwell.com Publication ICCG-5.21- January 2001...
- Page 188 PLEASE FASTEN HERE (DO NOT STAPLE) Other Comments PLEASE FOLD HERE NO POSTAGE NECESSARY IF MAILED IN THE UNITED STATES BUSINESS REPLY MAIL FIRST-CLASS MAIL PERMIT NO. 18235 CLEVELAND OH POSTAGE WILL BE PAID BY THE ADDRESSEE 1 ALLEN-BRADLEY DR MAYFIELD HEIGHTS OH 44124-9705...
- Page 190 Rockwell Automation Rockwell Automation tests all of our products to ensure that they are fully operational when shipped from the manufacturing facility. Support If you are experiencing installation or startup problems, please review the troubleshooting information contained in this publication first. If you need technical assistance to get your module up and running, please contact Customer Support (see the table below);...
Need help?
Do you have a question about the 1756-DHRIO and is the answer not in the manual?
Questions and answers