Table of Contents
Advertisement
Advertisement
Table of Contents

Related Manuals for Samsung DV350AE series


Summary of Contents for Samsung DV350AE series
-
Page 1: User Manual
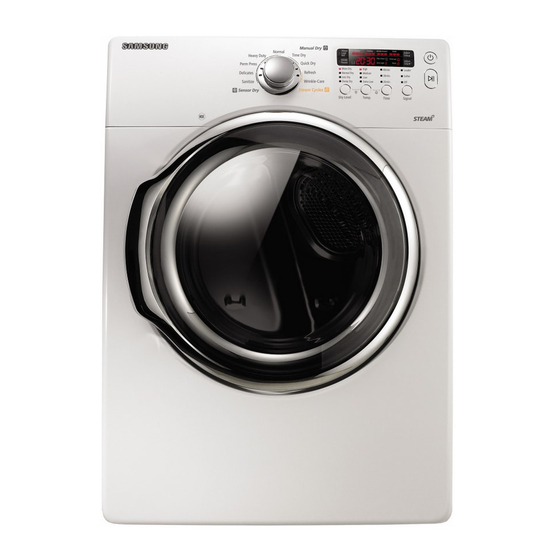
DV350AE* DV350AG* Gas and Electric Dryer user manual imagine the possibilities Thank you for purchasing this Samsung product. To receive more complete service, please register your product at www.samsung.com/register DV350-02821A_EN.indd 1 2010-01-28 ø¿»ƒ 3:25:56... -
Page 2: Energy Saving
42 minutes! Giving you time for more important things in life. 6. Energy Saving Samsung dryers are super energy efficient. You can dry up to 3.06 pounds of laundry with 1kWh. Also, both the large capacity and Fuzzy Logic Control save energy by automatically drying your clothes the most efficient way. -
Page 3: Safety Instructions
Congratulations on your new Samsung Dryer. This manual contains valuable information on the installation, use, and care of your appliance. Please take the time to read this manual to take full advantage of your dryer’s many benefits and features. -
Page 4: What To Do If You Smell Gas
safety instructions WHAT TO DO IF YOU SMELL GAS: • Do not try to light any appliance. • Do not turn on the appliance. • Do not touch any electrical switch. • Do not use any phone in your building. •... -
Page 5: California Safe Drinking Water And Toxic Enforcement Act
Do not sit on top of the dryer. Because of continuing product improvements, Samsung reserves the right to change specifications without notice. For complete details, see the Installation Instructions packed with your product before selecting cabinetry, making cutouts, or beginning installation. -
Page 6: Table Of Contents
contents INSTALLING YOUR DRYER OPERATING INSTRUCTIONS, TIPS CARE AND CLEANING SPECIAL LAUNDRY TIPS TROUBLESHOOTING 6_ Contents DV350-02821A_EN.indd 6 Tools needed for installation See Dryer Exterior Ducting requirements Important to installer Location considerations Alcove or closet installation Mobile home installation Exhausting Gas requirements Electrical requirements Grounding... -
Page 7: Installing Your Dryer
installing your dryer TOOLS NEEDED FOR INSTALLATION Hire a professional to install this dryer properly. If there is a service call performed as a result of poor setup, adjustment, and connection, it is considered the responsibility of the installer. If you install the dryer, you are responsible. -
Page 8: Ducting Requirements
installing your dryer DUCTING REQUIREMENTS • Use a 4-inch (10.2 cm) diameter rigid aluminum or rigid galvanized steel duct. • Do not use a smaller duct. • Ducts larger than 4 inches (10.2 cm) in diameter can result in increased lint accumulation. Lint accumulation should be cleaned regularly. -
Page 9: Important To Installer
If the new dryer is installed into an existing exhaust system you must make sure: • The exhaust system meets all local, state, and national codes. • That a flexible plastic duct is not used. • To Inspect and clean all lint buildup from inside the existing duct. •... -
Page 10: Mobile Home Installation
A minimum of 72 in² (183 cm²) of unobstructed space is required. Call 1-800-SAMSUNG for information on purchasing the Floor Anchoring Kit as an accessory. All mobile home installations must be exhausted to the outside with the exhaust duct termination securely fastened to the mobile home structure, using materials that will not support combustion. -
Page 11: Gas Requirements
GAS REQUIREMENTS Use only natural or LP (liquid propane) gases. THE INSTALLATION MUST CONFORM WITH LOCAL CODES, OR IN THE ABSENCE OF LOCAL CODES, WITH THE NATIONAL FUEL GAS CODE ANSI/Z223.1, LATEST REVISION (FOR THE UNITED STATES), OR WITH THE CAN/CGA-B149 INSTALLATION CODES (FOR CANADA). Gas dryers are equipped with a burner vent for use with natural gas. -
Page 12: Electrical Requirements
installing your dryer ELECTRICAL REQUIREMENTS Wiring diagram is located on the plate below the control panel. • Improper connection of the equipment grounding conductor can result in a risk of electric shock. Check with a qualified electrician or serviceman if you are in doubt as to whether your dryer is WARNING properly grounded. -
Page 13: Electrical Connections
ELECTRICAL CONNECTIONS Before operating or testing, follow all grounding instructions in the Grounding section. An individual branch (or separate) circuit serving only your dryer is recommended. DO NOT USE AN EXTENSION CORD. Gas models – U.S. and Canada A 120 volt, 60 Hz AC approved electrical service, with a 15-ampere fuse or circuit breaker is required. -
Page 14: Connecting The Inlet Hose
installing your dryer CONNECTING THE INLET HOSE Method1 The dryer must be connected to the cold water faucet using the new inlet hoses. Do not use old hoses. 1. If space permits, attach the brass female end of the “Y” connector to the cold water faucet. -
Page 15: Replacement Parts And Accessories
REPLACEMENT PARTS AND ACCESSORIES If your dryer requires replacement parts or accessories, contact the dealer from whom you purchased your dryer or the SAMSUNG customer care center at 1-800-SAMSUNG (726-7864). INSTALLATION Gather the required tools and parts before starting the installation. - Page 16 installing your dryer 4. Review the Exhausting section before installing the exhaust system. Install the ductwork from your dryer to the exhaust hood. The crimped end of the duct sections must point away from your dryer. DO NOT use sheet metal screws when assembling ducting. These joints should be taped. Never use plastic flexible exhaust material.
- Page 17 6. Review Gas Requirements section. Remove the pipe thread protective cap. Apply pipe joint compound or about 1 1/2 wraps of Teflon tape over all threaded connections. Pipe joint compound must be resistant to the action of any liquefied petroleum gas. Connect the gas supply to your dryer.
-
Page 18: Final Installation Checklist
installing your dryer 4-WIRE system connections 1. Remove the center terminal block screw. 2. Connect the ground wire (green or unwrapped) of the power cord to the external ground conductor screw. 3. Connect the neutral wire (white or center wire) of the power cord and the appliance ground wire (green with yellow stripes) under the central screw of the terminal block. -
Page 19: Dryer Exhaust Tips
DRYER EXHAUST TIPS Plastic or non-metal flexible duct presents a potential fire hazard. WARNING 1. Make sure your dryer is installed properly so it exhausts air easily. 2. Use a 4” diameter rigid metal duct. Tape all joints, including at the dryer. Never use lint-trapping screws. -
Page 20: Door Reversal
installing your dryer DOOR REVERSAL 1. Unplug the power cord. 2. Remove two door hinge screws. 3. Lift the door and remove 4. Remove a screw on the Frame Front. 5. Remove the two screws on the opposite side of the door hinge. -
Page 21: Operating Instructions, Tips
operating Instructions, tips OVERVIEW OF THE CONTROL PANEL Cycle Selector DV350-02821A_EN.indd 21 To select a cycle, rotate the Cycle Selector dial to the desired cycle. The indicator light by the cycle name will illuminate. The Normal, Heavy Duty, Towels, Perm Press, Delicates and Sanitize cycles are Sensor Dry cycles. Sensor Dry automatically senses the moisture in the load and shuts the dryer off when the selected dryness level (very dry to damp dry) is reached. - Page 22 operating Instructions, tips The display window shows the estimated time remaining in the cycle after the Start/Pause button is pressed. The estimated time remaining may fluctuate as the cycle progresses. The Drying light will illuminate and remain lit until the cycle is complete. When your dryer is in the cool-down phase, the Cooling light will illuminate.
-
Page 23: Child Lock
Select Cycle Option Start/Pause selection button Power button CHILD LOCK A function to prevent children from playing with your dryer. Setting/Releasing If you want to set or release the Child Lock, press both the Temp. and Time buttons simultaneously for 3 seconds. How to Set: 1. -
Page 24: Drum Light
operating Instructions, tips DRUM LIGHT Lights the dryer drum while the dryer is running. Setting & releasing If you want to set or release the Drum Light, press both the Dry Level and Temp. buttons simultaneously. It can be set while your dryer is not only running but also when it is stopped. If you do not turn the Drum Light off within 4 minutes of turning it on, it is automatically turned off. -
Page 25: Rack Dry
RACK DRY Installing the drying rack 1. Open the dryer door. 2. Position the drying rack in the tumbler, placing the front lip of the drying rack on the top of the lint filter. 3. Place the rear legs in the two recessed areas of the dryer’s back wall, then push down the middle of the drying rack to fix. -
Page 26: Clean The Lint Filter
operating Instructions, tips CLEAN THE LINT FILTER • After each load. • To shorten drying time. • To operate more energy efficiently. Cleaning the Lint filter 1. Pull the case-filter out of the dryer. 2. Scrape the dust from the top part of the filter using your fingers. 3. -
Page 27: Care And Cleaning
care and cleaning CONTROL PANEL Clean with a soft, damp cloth. Do not use abrasive substances. Do not spray cleaners directly on the panel. The control panel finish may be damaged by some laundry pre-treatment soil and stain remover products. Apply such products away from your dryer and wipe up any spills or overspray immediately. -
Page 28: Special Laundry Tips
special laundry tips SPECIAL LAUNDRY TIPS Please follow the care label or manufacturer’s instructions for drying special items. If care label instructions are not available, use the following information as a guide. Bedspreads & Comforters Blankets Curtains & Draperies Cloth Diapers Down–filled Items (jackets, sleeping bags, comforters, etc.) -
Page 29: Troubleshooting
troubleshooting CHECK THESE POINTS IF YOUR DRYER… PROBLEM Doesn’t run. Doesn’t heat. Doesn’t dry. Is noisy. Dries unevenly. Has an odor. DV350-02821A_EN.indd 29 SOLUTION • Make sure the door is latched shut. • Be sure the power cord is plugged into a live electrical outlet. •... - Page 30 troubleshooting PROBLEM Shuts off before load is dry Lint on clothes Garments still wrinkled after Wrinkle-Care Odors remain in clothing after Refresh. Water drips from nozzle when Steam-Care starts Sprayed water is not visible during Steam-Care 30_ Troubleshooting DV350-02821A_EN.indd 30 SOLUTION •...
-
Page 31: Information Codes
Invalid Dry time Invalid heating Temp EEPROM is not communicating properly Invalid power source Frequency For any codes not listed above, call 1–800–726–7864 (1–800–SAMSUNG) DV350-02821A_EN.indd 31 MEANING Clean the screen or vent. If the problem continues call for service. Close the door and then restart. -
Page 32: Appendix
appendix FABRIC CARE CHART The following symbols provide garment care direction. The Clothing care labels include symbols for washing, bleaching, drying and ironing, or dry cleaning when necessary. The use of symbols ensures consistency among garment manufacturers of domestic and imported items. Follow care label directions to maximize garment life and reduce laundering problems. -
Page 33: Protecting The Environment
PROTECTING THE ENVIRONMENT This appliance is manufactured from recyclable materials. If you decide to dispose of this appliance, please observe local waste disposal regulations. Cut off the power cord so that the appliance cannot be connected to a power source. Remove the door so that animals and small children cannot get trapped inside the appliance. -
Page 34: Cycle Chart
appendix CYCLE CHART Cycle Normal Heavy Duty Sensor Dry Perm Press Delicates Sanitize Time Dry Manual Dry Quick Dry Refresh Steam Cycles Wrinkle-Care 34_ Appendix DV350-02821A_EN.indd 34 Default Temp Sensor dry Time control level High Normal dry 42 min (Medium) High Normal dry 58 min... - Page 35 Warranty service can only be performed by a SAMSUNG authorized service center. The original dated bill of sale must be presented upon request as proof of purchase to SAMSUNG or SAMSUNG’s authorized service center. SAMSUNG will provide in-home service during the warranty period at no charge, subject to availability within the contiguous United States.
- Page 36 SAVINGS OR OTHER BENEFITS, OR ANY OTHER SPECIAL, INCIDENTAL OR CONSEQUENTIAL DAMAGES CAUSED BY THE USE, MISUSE, OR INABILITY TO USE THIS PRODUCT, REGARDLESS OF THE LEGAL THEORY ON WHICH THE CLAIM IS BASED, AND EVEN IF SAMSUNG HAS BEEN ADVISED OF THE POSSIBILITY OF SUCH DAMAGES.
- Page 37 memo DV350-02821A_EN.indd 37 2010-01-28 ø¿»ƒ 3:26:35...
- Page 38 QUESTIONS OR COMMENTS? Country CALL OR VISIT US ONLINE AT U.S.A 1-800-SAMSUNG(726-7864) www.samsung.com MEXICO 01-800-SAMSUNG(726-7864) www.samsung.com Code No. DC68-02821A_EN DV350-02821A_EN.indd 38 2010-01-28 ø¿»ƒ 3:26:35...