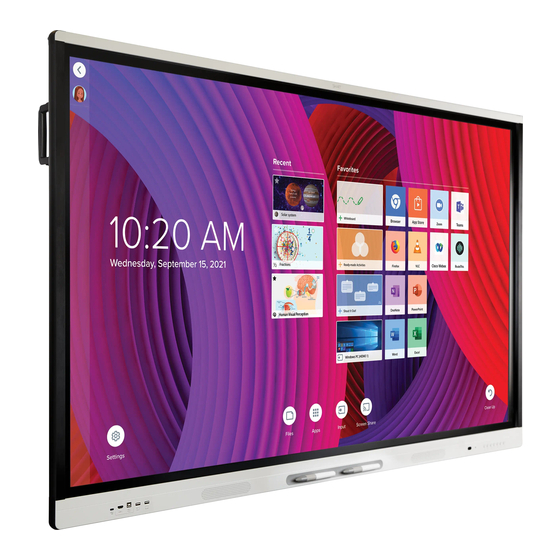
SMART Board SBID-MX265 User Manual
Mx series
Hide thumbs
Also See for SBID-MX265:
- Installation and maintenance manual (92 pages) ,
- Installation and maintenance manual (60 pages)

Subscribe to Our Youtube Channel
Related Manuals for SMART Board SBID-MX265


Summary of Contents for SMART Board SBID-MX265
- Page 1 Was this document helpful? smarttech.com/docfeedback/171284 SMART Board MX series interactive displays USER’S GUIDE FOR MODELS: SBID-MX265 SBID-MX275 SBID-MX286...
- Page 2 Trademark notice SMART Board, smarttech, the SMART logo and all SMART taglines are trademarks or registered trademarks of SMART Technologies ULC in the U.S. and/or other countries. All third-party product and company names may be trademarks of their respective owners. Copyright notice © 2018 SMART Technologies ULC. All rights reserved. No part of this publication may be reproduced, transmitted, transcribed, stored in a retrieval system or translated into any language in any form by any means without the prior written consent of SMART Technologies ULC.
-
Page 3: Important Information
Important information NOTE Refer to the installation and maintenance guide for important information about installing and maintaining the display (see More information on page 7). WARNING Do not open or disassemble the display. You risk electrical shock from the high voltage inside the casing. -
Page 4: Federal Communication Commission Interference Statement
IMPORTANT INFORMATION Federal Communication Commission interference statement This device complies with Part 15 of the FCC Rules. Operation is subject to the following two conditions: 1. This device may not cause harmful interference, and 2. this device must accept any interference received, including interference that may cause undesired operation. NOTE This equipment has been tested and found to comply with the limits for a Class A digital device, pursuant to part 15 of the FCC Rules. -
Page 5: Table Of Contents
Contents Important information Federal Communication Commission interference statement Innovation, Science and Economic Development Canada statement Chapter 1: Welcome Identifying your specific model Features Components Accessories More information Chapter 2: Getting started Waking up the display and putting it back to sleep Using the front control panel Using the remote control Using touch... -
Page 7: Chapter 1: Welcome
SMART offers several different models of the SMART Board MX series interactive display and iQ appliance. Identifying your SMART Board MX series interactive display model The following models of SMART Board MX series interactive display are available: Model Screen size (approximate) SBID-MX265 65" (165 cm) smarttech.com/kb/171284... -
Page 8: Features
CHAPTER 1 WELCOME Model Screen size (approximate) SBID-MX275 75" (190 cm) SBID-MX286 86" (218 cm) Refer to the specifications for detailed technical information for this model, including product dimensions and weights (see More information on page 7). For help identifying your display, see Appendix B: Identifying the display on page 23. Features The SMART Board MX series interactive display is the hub of your classroom or meeting room. -
Page 9: Components
CHAPTER 1 WELCOME Components The display consists of the following components: Name More information Pictured Screen Page 4 Front control panel Page 5 Light sensor Page 6 Remote control sensor / status light Page 5 Pen (×2) Page 4 Speakers Page 6 Page 5 Front connector panel Side connector panel See SMART Board MX series interactive... -
Page 10: Iq Appliance
( smarttech.com/kb/171257 Remote control Page 5 iQ appliance The iQ appliance is inserted in the accessory slot on the back of the SBID-MX265, SBID-MX275 and SBID-MX286 models. Screen The following are the dimensions for the display: Model Diagonal... -
Page 11: Front Connector Panel
CHAPTER 1 WELCOME CAUTION When you return a pen to the magnetic holder, make sure it’s centered in its holder to keep it from falling and being damaged. Front connector panel The front connector panel includes connectors for USB peripherals and a computer or other input source. Name Procedure USB Type-A connector... -
Page 12: Accessories
CHAPTER 1 WELCOME control. Status light The status light blinks green and red when it registers a button being pressed on the remote control. When the status light is red, the display is in a low power state. To wake the display, press the Power button on the front control panel or POWER on the remote control. -
Page 13: More Information
CHAPTER 1 WELCOME SMART Audio 400 classroom amplification system The SMART Audio 400 classroom amplification system provides high-quality audio amplification. The system comes with a teacher microphone and optional student microphone. Multiple speaker options are available, including wall- and ceiling-mounted speakers. The amplifier receives audio signals from the microphones and translates them into crystal-clear sound through the speakers. - Page 14 WELCOME Document Link SBID-MX165, MX175, MX186, MX265, MX275 and MX286 smarttech.com/kb/171274 installation instructions Installation and maintenance guide smarttech.com/kb/171257 SBID-MX265 specifications smarttech.com/kb/171240 SBID-MX275 specifications smarttech.com/kb/171259 SBID-MX286 specifications smarttech.com/kb/171260 Comparison smarttech.com/kb/171161 These documents are available in the Support section of the SMART website (smarttech.com/support).
-
Page 15: Chapter 2: Getting Started
Chapter 2 Getting started Waking up the display and putting it back to sleep Using the front control panel Adjusting audio Using the remote control Using touch Writing, drawing and erasing This chapter explains how to wake the display when it’s asleep, how to view connected computers’... -
Page 16: Using The Remote Control
CHAPTER 2 GETTING STARTED Name SMART Board MX procedure Menu Press to open the display’s settings. [N/A] Freeze Mute Press to mute or unmute the volume. Volume decrease Press to turn down the volume. Volume increase Press to turn up the volume. Adjusting audio You can use the buttons on the front control panel to increase and decrease the volume. -
Page 17: Using Touch
CHAPTER 2 GETTING STARTED Name Function MUTE Mute or unmute the volume SOURCE Open the input source menu INFO Press to show the display’s detected resolution and refresh rate for the current input source Open the display’s settings AUDIO Change the display’s audio mode VOL + / VOL - Increase or decrease volume [Number buttons]... -
Page 18: Writing, Drawing And Erasing
CHAPTER 2 GETTING STARTED Pinch to zoom in / scale (enlarge) Pinch to zoom out / scale (reduce) Rotate Flick Writing, drawing and erasing The display includes two pens, which you can use to write or draw in digital ink. You can erase digital ink using gestures or the eraser tool in the apps. -
Page 19: Chapter 3: Using The Iq Experience
Chapter 3 Using the iQ experience Using the launcher Using Whiteboard Using SMART Notebook Player Using Browser Using Input Using Screen Share Using acetates Cleaning up the display Using the launcher Use the launcher to open the Whiteboard, SMART Notebook® Player, Browser, Input and Screen Share apps, and to access settings. -
Page 20: Using Whiteboard
CHAPTER 3 USING THE IQ EXPERIENCE Using Whiteboard Using Whiteboard, you can write and erase notes on the display just as you do on a traditional dry erase board. You can also save your notes for later reference and share them using the SMART kapp®... -
Page 21: Using Acetates
CHAPTER 3 USING THE IQ EXPERIENCE Screen Share supports the following devices: Chromebook™ laptops, using Google™ Cast Chrome™ browser extension Windows® computers, using Miracast , Google Cast Chrome browser extension or AirParrot Mac computers and iOS devices, using AirPlay Android™ devices, using Cast Screen Using acetates When using the Browser app or Screen Share app, you can write or draw on acetates and save them to the Whiteboard library. -
Page 23: Chapter 4: Connecting And Using Computers
Installing SMART software on computers you want to connect to the display To take full advantage of the SMART Board MX series display’s interactive features, download and install SMART software on computers you connect to the display. SMART Learning Suite includes SMART Notebook software, SMART Ink, SMART Product Drivers and other software. -
Page 24: Connecting Computers To The Display
CHAPTER 4 CONNECTING AND USING COMPUTERS Connecting computers to the display You can connect computers to the display and then view the computers’ input on the display’s screen. NOTES To connect computers using the side and bottom connector panels, see SMART Board MX200 series interactive displays installation and maintenance guide (smarttech.com/kb/171257). -
Page 25: Using Smart Software On Connected Computers
CHAPTER 4 CONNECTING AND USING COMPUTERS 2. Press Input on the front control panel. The Input selection menu appears. NOTE Inputs that have a device connected to it are blue while inputs without a connection are black. 3. Tap the input you want to view. The display looks for a connection, and the computer’s desktop appears on the display’s screen. -
Page 27: Appendix A: Troubleshooting Viewing Input From Computers
Appendix A Troubleshooting viewing input from computers This appendix explains how to troubleshoot issues with connected computers. NOTE For hardware troubleshooting information, see SMART Board MX series interactive displays installation and maintenance guide (smarttech.com/kb/171257). Issue Solutions There is an issue with the image. See the SMART Board MX series interactive displays installation and maintenance guide (smarttech.com/kb/171257). - Page 28 APPENDIX A TROUBLESHOOTING VIEWING INPUT FROM COMPUTERS Issue Solutions There is an issue with audio See the SMART Board MX series interactive displays installation and maintenance guide (smarttech.com/kb/171257). Make sure the computer isn’t muted. Turn up the computer’s volume. Turn up the display’s volume. See Front control panel on page 5.
-
Page 29: Appendix B: Identifying The Display
Appendix B Identifying the display To identify your display 1. Press Input on the front control panel. A list of input sources appears. 2. If the input source list doesn’t include SMART MX e³, the display is a SMART Board MX series interactive display. - Page 32 SMART TECHNOLOGIES smarttech.com/support smarttech.com/contactsupport smarttech.com/kb/171284...
Need help?
Do you have a question about the SBID-MX265 and is the answer not in the manual?
Questions and answers