Advertisement
Quick Links
9
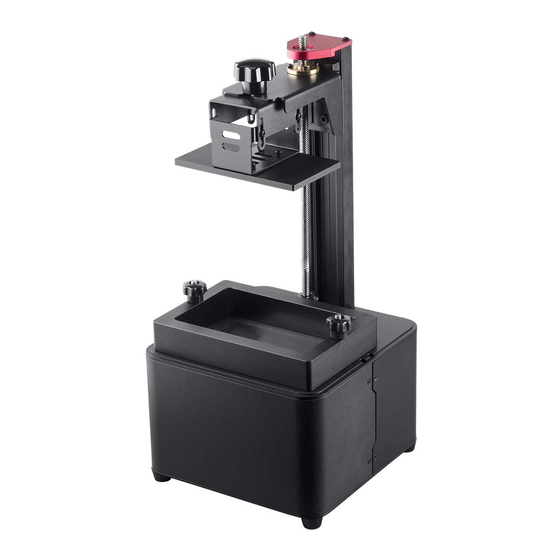
PREPARE DUPLICATOR 7 FOR PRINTING
Place the vat on top of the LCD screen and tighten
the screws to secure it to the printer. Do not over
don't tight
don't tight
the vat too hard that may damage
the vat too hard that may damage
tighten.
the LCD,
tight enough that the vat shouldn't
11
Tighten the build plate knob and loosen the four
screws at the sides so the platform can move freely
up and down.
NOTE: Ensure that building plate's screws are completely free when
lowering the platform to avoid damage to the screen.
Smoothly press the build platform with one hand and tighten the 4 screws. All 4 screws should now be tight. Lift the
13
build plate and fill the vat with resin. Printing doesn't consume a lot of resin, so a quarter full vat is usually enough for a
medium sized print.
a.
b.
NOTE: Don't push the build platform too
hard to avoid breaking the LCD screen.
Ensure the platform touches the screen
sufficiently.
Place the hood back onto the printer. In control
14
panel, select Z home and place the platform in
the home position.
III P
Z Axi S
Z Axi S
10
Slide the build plate onto the build plate holder.
Ensure that the build assembly has the grooved side
toward the printer.
Click the Control tab, then click the Home button
12
to lower the platform towards the screen. The
platform will move down to sit on the screen
(level 0 in Z axis) and stop.
c.
NOTE:once started, the print can't be paused and
refilled, so it's safer to overfill and reuse the resin.
Now you are ready to print. Press Play after you
15
sliced the model. Once the print has finished, the
MPCW software shows Print 100% complete and will
stop printing.
GETTING STARTED GUIDE
DOWNLOAD AND INSTALL SOFTWARE
1
Go to www.monoprice.com, go to the 21824 page and download
the latest version of MPCW. The latest version is always online.
Extract the file and install the software by clicking on MPCW.exe.
2
UNPACK AND CONNECT CABLES
With the printer switched off:
A. Connect the HDMI
cable to your
®
computer and printer.
B. Connect the USB cable to your
computer and printer.
C. Turn off the power saving mode on
your PC. Sleep mode may have an
negative effect on print quality.
D. Connect the power supply to the printer.
5
CONNECT SOFTWARE AND PRINTER
In Creation Workshop, click
Configure, then open the
Configure Machine subfolder.
In the configuration folder,
connect the printer to the
computer by clicking on the
Configure button. Select the
USB port you have connected to,
then set the speed to 115200
and the data bits to 8. Click OK,
then click the
Apply button.
Connect
your computer to the Duplicator 7 by clicking the
highlighted Connect
button. After connecting, the
Disconnect
button will be highlight ed.
7
SLICE OBJECT
Select Configure > Slicing profile. Change
the Slice Thickness from 0.02 to 0.1, the
Exposure Time from 4000 to 12000, and
the Bottom Exposure Time from 50000
to 200000. Click the Apply Changes
button.
REV.A
3
CONFIGURE SCREEN RESOLUTION
Ensure you have the correct screen resolution set to
2560x1440. This may appears sometimes as
1440x2560, but note that the correct resolution
is 2560x1440.
SWITCH ON PRINTER
4
Power on your computer and the printer.
Open the software and load the object
(STL, OBJ, or AMF).
6
CONFIGURE BUILD SIZE AND SLICE THE OBJECT
Once the printer is connected
to the computer, select
Configure > Machine.
Change the build size exactly
as shown in the image to the
right. First set the display
resolution to 2560x1440,
then click
to add the
display to the software
setting. Finally click the Apply
button
to save the
changes.
8
Click the Load
button
to load the object into the
build area. Now click 3D
View and check that the
object is fully within the
build area. Change the size
of the object as necessary.
Press the Slice button
to start the slicing
slicing operation.
operation.
Now select Slice View
and check that the first
layer of every object is in
contact with the platform.
REV.A
Advertisement

Related Manuals for Monoprice MP Mini SLA LCD


Summary of Contents for Monoprice MP Mini SLA LCD
- Page 1 DOWNLOAD AND INSTALL SOFTWARE CONFIGURE SCREEN RESOLUTION Go to www.monoprice.com, go to the 21824 page and download Ensure you have the correct screen resolution set to the latest version of MPCW. The latest version is always online.
- Page 2 CLEANING AND FINISHING THE PRODUCT When the print is finished, wait 5 minutes to allow time for excess resin to drain away from the model and back into the resin vat. Place the hood back on the printer to protect the resin. GETTING III P STARTED...
Need help?
Do you have a question about the MP Mini SLA LCD and is the answer not in the manual?
Questions and answers