
Related Manuals for Ryobi 767rj


Summary of Contents for Ryobi 767rj
- Page 1 767rj 2-Cycle Gas Trimmer OPERATOR’S MANUAL FOR QUESTIONS, CALL 1-800-345-8746 in U.S. or 1-800-265-6778 in CANADA www.ryobi.com IMPORTANT MANUAL DO NOT THROW AWAY...
-
Page 2: Table Of Contents
VI. Operating Instructions ..... 11-12 A. Holding the Trimmer ..... . . 11 B. -
Page 3: California Emission Regulations
CALIFORNIA EMISSION REGULATIONS This unit meets the 1995 and later California emissions regulations for small off-road engines. These units are identified by the label on the engine of your product. A typical identification label is shown. To ensure that your unit continues to meet these regulations, refer to the following information and instructions in this operator’s manual. -
Page 4: Important Safety Information
Failure to so can result in personal injury to the operator and bystanders, as well as damage to the unit. • Use only 0.080 inch (2.03 mm) diameter genuine Ryobi replacement line. Never use metal-reinforced line, wire, or rope, etc.. These can break off and become a dangerous projectile. -
Page 5: Safety And International Symbols
• Use only genuine Ryobi replacement parts and accessories for this unit. These are available from your authorized service dealer. Use of any non Ryobi parts or accessories could lead to serious injury to the user, or damage to the unit, and void your warranty. - Page 6 RULES FOR SAFE OPERATION SYMBOL MEANING • PRIMER BULB Push primer bulb, fully and slowly, 5 to 7 times. • UNLEADED FUEL Always use clean, fresh unleaded fuel. • THROWN OBJECTS AND ROTATING CUTTER CAN CAUSE SEVERE INJURY WARNING: Do not operate without the cutting attachment shield in place. Keep away from the rotating cutting attachment.
-
Page 7: Know Your Unit
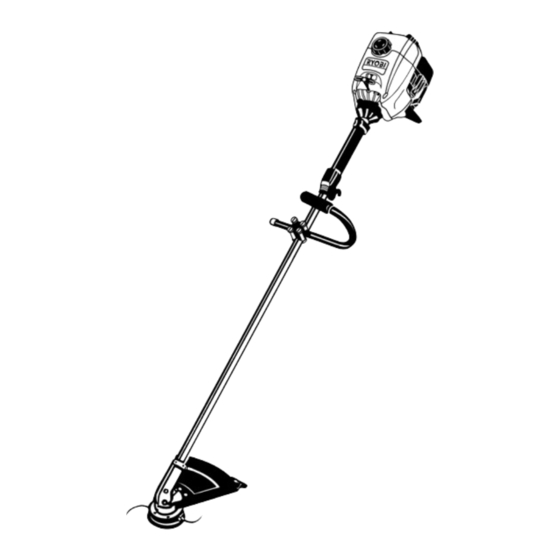
KNOW YOUR UNIT APPLICATIONS • Cutting grass and light weeds. • Decorative trimming around trees, fences, etc. Handle Hardware Shaft Housing Cutting Attachment RULES FOR SAFE OPERATION Fuel Cap On/Off Stop Control Starter Rope Grip Line Cutting Blade Cutting Attachment Shield Spark Plug Shaft Grip Throttle Control... -
Page 8: Assembly Instructions
2. Place a hex lock nut into one of the three recessed holes on the top of the cutting attachment shield (Fig 5). WARNING: Never operate the trimmer without the cutting attachment shield in place to prevent serious personal injury. -
Page 9: Oil And Fuel Information
NOTE: Dispose of the old fuel/oil mix in accordance to Screws Fig. 6 with one 4 oz. (120 ml.) bottle of RYOBI 2 CYCLE OIL makes a 32:1 fuel/oil ratio. RYOBI 2 CYCLE OIL 1 US. GALLON + 4.0 FL. OZ. -
Page 10: Starting/Stopping Instructions
STARTING/STOPPING INSTRUCTIONS STARTING INSTRUCTIONS WARNING: Avoid accidental starting. Be in the starting position when pulling the starter rope (Fig. 9). The operator and unit must be in a stable position while starting to avoid serious personal injury. 1. Mix gas with oil. Fill fuel tank with fuel/oil mixture. See Oil and Fuel Mixing Instructions Pg. -
Page 11: Operating Instructions
Clippings are thrown away from the operator. • Slowly move the trimmer into and out of the cutting area at the desired height. Move either in a forward- backward or side-to-side motion. Cutting shorter lengths produces the best results. -
Page 12: Decorative Trimming
Clean and re-oil air filter. Every 50 Hours Check spark plug condition and gap. LINE INSTALLATION FOR THE SPEEDSPOOL Always use genuine Ryobi 0.080 in. (2.03 mm.) replacement line. Larger line may make the engine overheat or fail. WARNING: Never use metal-reinforced line, wire, or rope, etc.. -
Page 13: Installing A Prewound Reel
MAINTENANCE AND REPAIR INSTRUCTIONS 3. Pull old line out of the line loading and line locking holes (Figs. 14 and 15). 4. Insert a piece of trimming line into one of the two eyelets in the outer spool. Push it up through the line loading hole in the inner reel (Fig. -
Page 14: Cleaning The Speedspool
MAINTENANCE AND REPAIR INSTRUCTIONS 2. Pull the old inner reel with existing line from the outer spool. 3. Insert the ends of the prewound inner reel line into the outer spool eyelets (Fig. 20). Push the new inner reel, arrow side up, into the outer spool. Fig. -
Page 15: Air Filter Maintenance
AIR FILTER MAINTENANCE Removing the Air Filter/Muffler Cover WARNING: To avoid serious personal injury, always turn your trimmer off and allow it to cool before you clean or do any maintenance on it. 1. Place the choke lever in the PARTIAL choke position (B). -
Page 16: Carburetor Adjustment
MAINTENANCE AND REPAIR INSTRUCTIONS CARBURETOR ADJUSTMENT The idle speed of the engine is adjustable through the Air filter/Muffler cover (Fig. 29). NOTE: Careless adjustments can seriously damage your unit. An authorized service dealer should make carburetor adjustments. Check Fuel Mixture Old and/or improperly mixed fuel is usually the reason for the unit not running properly. -
Page 17: Cleaning And Storage
CLEANING WARNING: To avoid serious personal injury, always turn your trimmer off and allow it to cool before you clean or do any maintenance on it. Use a small brush to clean off the outside of the unit. Do not use strong detergents. Household cleaners that... -
Page 18: Troubleshooting Chart
ENGINE WILL NOT START C A U S E On/Off Stop Control is in OFF position Empty fuel tank Primer bulb wasn't pressed enough Engine flooded Old or improperly mixed fuel Fouled spark plug ENGINE WILL NOT IDLE C A U S E Air Filter is Plugged Old or improperly mixed fuel Improper carburetor adjustment... -
Page 19: Specifications
Operating RPM (Trimmer) ........ - Page 20 NOTES...
-
Page 21: California Emission Control Warranty Statement Your Warranty Rights And Obligations
• In order to file a claim, go to your nearest Authorized Ryobi Service Center. Warranty services or repairs will be provided at all Authorized Ryobi Service Centers. • Any manufacturer approved replacement part may be used in the performance of any warranty maintenance or repair of emission related parts and will be provided without charge to the owner. -
Page 22: Warranty
RYOBI Operator’s Manual. This warranty does not apply to any damage to the RYOBI Product that is the result of improper maintenance or to any RYOBI Product that has been altered or modified so as to...
Need help?
Do you have a question about the 767rj and is the answer not in the manual?
Questions and answers