Ryobi 700r Operator's Manual
2-cycle gas trimmer
Hide thumbs
Also See for 700r:
- Parts list (2 pages) ,
- Operator's manual (64 pages) ,
- Operator's manual (22 pages)

Related Manuals for Ryobi 700r


Summary of Contents for Ryobi 700r
- Page 1 700r 2-Cycle Gas Trimmer OPERATOR’S MANUAL FOR QUESTIONS, CALL 1-800-345-8746 in U.S. or 1-800-265-6778 in CANADA www.ryobi.com IMPORTANT MANUAL DO NOT THROW AWAY...
-
Page 2: Table Of Contents
VI. Operating Instructions ... 13-14 A. Holding the Trimmer ....13 B. Adjusting Trimming Line Length ..13 C. -
Page 3: California Emission Regulations
CALIFORNIA EMISSION REGULATIONS This unit meets the 1995 to 1998 California emissions regulations for small off-road engines. These units are identified by the label on the engine of your product. A typical identification label is shown. To ensure that your unit continues to meet these regulations, refer to the following information and instructions in this operator’s manual. -
Page 4: Rules For Safe Operation
• Use only 0.080 in. (2.03 mm) diameter genuine Ryobi replacement line. Never use metal-reinforced line, wire, or rope, etc.. These can break off and become a dangerous projectile. -
Page 5: While Operating
• Stop and switch the engine to off for maintenance, repair, or for changing the cutting attachment or other attachments. • Use only genuine Ryobi replacement parts when servicing this unit. These parts are available from your authorized service dealer. Do not use parts, accessories or attachments not authorized by Ryobi for this unit. -
Page 6: Other Safety Warnings
RULES FOR SAFE OPERATION OTHER SAFETY WARNINGS • Never store the unit, with fuel in the tank, inside a building where fumes may reach an open flame or spark. • Allow the engine to cool before storing or transporting. Be sure to secure the unit while transporting. - Page 7 RULES FOR SAFE OPERATION SYMBOL • THROWN OBJECTS AND ROTATING CUTTER CAN CAUSE SEVERE INJURY WARNING: Do not operate without the cutting attachment shield in place. Keep away from the rotating cutting attachment. • ON/OFF STOP CONTROL ON / START / RUN •...
-
Page 8: Know Your Unit
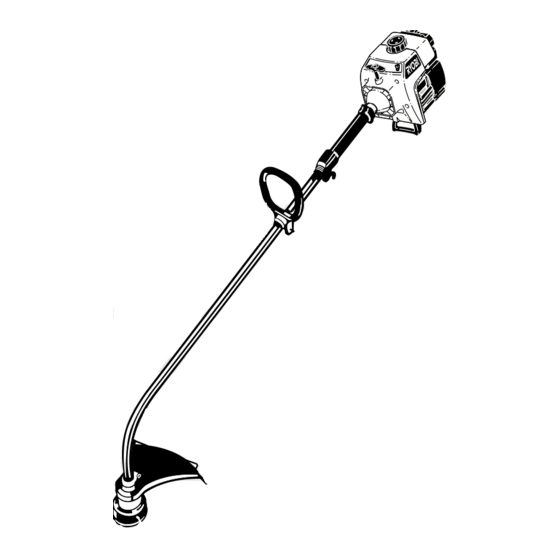
RULES FOR SAFE OPERATION KNOW YOUR UNIT APPLICATION Use this unit for; • Cutting grass and light weeds. • Decorative trimming around trees, fences, etc. D-handle Shaft Housing Cutting Attachment Fuel Cap On/Off Stop Control Starter Rope Shaft Grip Throttle Control Power Head Primer Bulb Line Cutting Blade... -
Page 9: Assembly Instructions
ASSEMBLY INSTRUCTIONS INSTALLING AND ADJUSTING THE D-HANDLE 1. Push the D-handle down onto the shaft housing so that the handle slants to the powerhead (Fig. 1). The squared bolt hole in the handle is to the right. Bolt Fig. 1 2. -
Page 10: Installing Cutting Attachment Shield
Use the following instructions if the cutting attachment shield on your unit is not installed. WARNING: Never operate the trimmer without the cutting attachment shield in place to prevent serious personal injury. 1. Place the cutting attachment shield onto the... -
Page 11: Oil And Fuel Information
Thoroughly mix the proper ratio of 2-cycle engine oil with unleaded gasoline in a separate gasoline mixed with one 4 oz. (120 ml.) bottle of RYOBI 2 CYCLE OIL makes a 32:1 fuel/oil ratio. RYOBI 2 CYCLE OIL 1 US. GALLON 4.0 FL. -
Page 12: Starting/Stopping Instructions
STARTING/STOPPING INSTRUCTIONS STARTING INSTRUCTIONS WARNING: Avoid accidental starting. Be in the starting position when pulling the starter rope (Fig. 8). The operator and unit must be in a stable position while starting to avoid serious personal injury. 1. Mix gas with oil. Fill fuel tank with fuel/oil mixture. -
Page 13: Operating Instructions
To release more line, lightly tap the cutting attachment on the ground (Fig. 10) while operating the trimmer at high speed. NOTE: Always keep the trimming line fully extended. Line release becomes more difficult as cutting line becomes shorter. -
Page 14: Tips For Best Trimming Results
Cutting to the left improves the unit's cutting efficiency. Clippings are thrown away from the operator. • Slowly move the trimmer into and out of the cutting area at the desired height. Move either in a forward-backward or side-to-side motion. Cutting shorter lengths produces the best results. -
Page 15: Line Installation
MAINTENANCE AND REPAIR INSTRUCTIONS LINE INSTALLATION Always use genuine Ryobi 0.080 in. (2.03 mm.) replacement line. Larger line may make the engine overheat or fail. WARNING: Do not use metal reinforced line. There are two methods to replace the trimming line. - Page 16 MAINTENANCE AND REPAIR INSTRUCTIONS 6. Take approximately 25 feet (7.6 m) of new 0.080 in. (2.03 mm.) trimming line, loop it into two equal lengths. Insert each end of the line through one of the two holes in the inner reel (Fig.
-
Page 17: Installing A Prewound Reel
AIR FILTER MAINTENANCE Removing the Air Filter/Muffler Cover WARNING: To avoid serious personal injury, always turn your trimmer off and allow it to cool before you clean or do any maintenance on it. 1. Place the choke lever in the PARTIAL choke position (B). -
Page 18: Cleaning The Air Filter
MAINTENANCE AND REPAIR INSTRUCTIONS Cleaning the Air Filter WARNING: To avoid serious personal injury, always turn your trimmer off and allow it to cool before you clean or do any maintenance on it. Clean and re-oil the air filter every 10 hours of operation. -
Page 19: Carburetor Adjustment
MAINTENANCE AND REPAIR INSTRUCTIONS CARBURETOR ADJUSTMENT The idle speed of the engine is adjustable through the air filter/muffler cover (Fig. 25). NOTE: Careless adjustments can seriously damage your unit. An authorized service dealer should make carburetor adjustments. Check Fuel Mixture Old and/or improperly mixed fuel is usually the reason for the unit not running properly. -
Page 20: Replacing The Spark Plug
MAINTENANCE AND REPAIR INSTRUCTIONS REPLACING THE SPARK PLUG Use a Champion RDJ7Y spark plug (or equivalent). The correct air gap is 0.020 in. (0.5 mm.). Remove the plug after every 50 hours of operation and check its condition. 1. Stop the engine and allow it to cool. Grasp the plug wire firmly and pull it from the spark plug. -
Page 21: Long Term Storage
CLEANING AND STORAGE CLEANING WARNING: To avoid serious personal injury, always turn your trimmer off and allow it to cool before you clean or do any maintenance on it. Use a small brush to clean off the outside of the unit. -
Page 22: Troubleshooting Chart
PROBLEM Engine will not start Engine will not idle Low idle speed Engine will not accelerate Engine lacks power or stalls when cutting Cutting head will not advance line TROUBLESHOOTING CAUSE Ignition switch is OFF Empty fuel tank Primer bulb wasn't pressed enough Engine flooded Old or Improperly Mixed Fuel... -
Page 23: Specifications
SPECIFICATIONS ENGINE Engine Type ........... . . Air-Cooled, 2-Cycle Stroke . - Page 24 NOTES...
-
Page 25: California Emission Control Warranty Statement Your Warranty Rights And Obligations
CALIFORNIA EMISSION CONTROL WARRANTY STATEMENT YOUR WARRANTY RIGHTS AND OBLIGATIONS The California Air Resources Board and Ryobi Outdoor Products (ROP), are pleased to explain the emission control system warranty on your 1995 and later small off-road engine. In California, new small off-road engines must be designed, built and equipped to meet the State's stringent anti-smog standards. -
Page 26: Limited Two-Year Warranty
RYOBI Operator’s Manual. This warranty does not apply to any damage to the RYOBI Product that is the result of improper maintenance or to any RYOBI Product that has been altered or modified so as to...
Need help?
Do you have a question about the 700r and is the answer not in the manual?
Questions and answers