
Related Manuals for Blomberg DW51600SS


Summary of Contents for Blomberg DW51600SS
- Page 1 Dishwasher User manual DW51600SS DW51600FBI DWT 51600 SS DWT 51600 FBI DWT 51600 W...
- Page 2 Dishwasher User manual DW51600SS DW51600FBI DWT 51600 SS DWT 51600 FBI DWT 51600 W...
-
Page 3: Table Of Contents
10.1 CARING FOR YOUR DISHWASHER EXTERIOR 10.2 CARING FOR YOUR DISHWASHER INTERIOR 10.3 CLEANING THE FILTERS 10.4 CLEANING THE HOSE FILTER 10.5 CLEANING THE WASH ARMS 11. TROUBLESHOOTING 12. TECHNICAL FEATURES 13. WARRANTY STATEMENT FOR THE BLOMBERG DISHWASHERS 42 14. HOW TO GET SERVICE... -
Page 4: Important Safety Instructions
1. IMPORTANT SAFETY INTRODUCTION Please read this user manual and INSTRUCTIONS particularly the safety instructions WARNING:When using the completely and carefully. They will save dishwasher, follow basic you time and effort and help to ensure precautions, including the optimum dishwasher performance. following: Read all instructions before Be sure to observe all listed warnings... - Page 5 Use only detergents or rinse plug and turn off the water supply. • aids recommended for use in a Repairs and technical • household dishwasher and keep modifications must be carried them in a dry place out of the out exclusively by a Authorized reach of children.
-
Page 6: Recycling
2. RECYCLING Chidren should not operate this • machine without adult supervision. Remove the door to the washing • Be Careful to not leave the door • compartment when removing fully open when not being loaded an old dishwasher from service or unloaded to prevent someone or discarding it. -
Page 7: Getting To Know Your Dishwasher
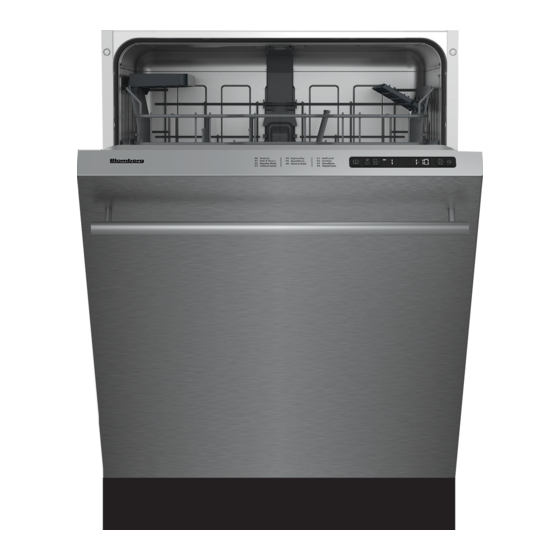
3. GETTING TO KNOW YOUR DISHWASHER 1. Upper basket 2. Upper impeller 3. Lower impeller 4. Cutlery basket 5. Door 6. Model and Serial Tag 7. Control panel 8. Detergent and rinse agent dispenser 9. Lower basket 10. Filters 11. Salt container (Select Models) 12. -
Page 8: Loading The Dishwasher
4. LOADING THE Upper rack ( International Pattern) DISHWASHER Pull the handle to open the door. If the door is opened during operation, the dishwasher will stop running. Once the door is closed the program will continue. Remove coarse food leftovers from tableware. - Page 9 Upper cutlery basket ( Lower rack ( Select Select Models) Models) Additional Loading Pattern – Bottom rack (10 place settings) International Loading Pattern – Upper cutlery basket (12 place settings) Upper cutlery basket ( Select Upper rack ( Select Models) Models) Upper cutlery basket ( MODEL...
- Page 10 Do not overload your dishwasher • CAUTION:Large knives and and pay attention to manufacturer other utensils with sharp tips instructions regarding dishes and edges must be placed which are appropriate for use in for horizontally into the upper a dishwasher. Only with suitable rack due to risk of injury.
-
Page 11: Upper Rack
4.1 UPPER RACK Load the upper rack with dessert plates, cups, glasses etc. ADJUSTABLE SHELVES (Select Models) Depending on the size of the glasses and cups, the shelf height setting may be adjusted. 1. Fold the shelf upwards A. 2. Positioning at the desired height B. 3. - Page 12 COLLAPSIBLE UPPER BASKET UPPER BASKET MULTIPURPOSE WIRES SERVICE RACK (Select Models) (Select Models) You can use collapsible wires when This accessory located at the upper you need a larger space for your basket of your machine allows you to dishes in the upper basket of your easily wash pieces such as extra long machine.
- Page 13 ADJUSTING THE HEIGHT OF THE To lower the basket, while it is in the UPPER BASKET uppermost position; (Select Models) 1. Hold the upper basket wires with The upper basket height adjustment both hands, slightly lift up the mechanism has been designed for basket and simultaneously push you to create large spaces in the lower and release the latches shown in...
-
Page 14: Lower Rack
HEIGHT SETTING (Select Models) In certain models, the height setting of the upper rack may be changed using the wheels which are present at two height levels. CAUTION:Make sure that the rack is empty. Changing the height setting while the rack contains tableware Push the latches back into the could cause the contents to... - Page 15 COLLAPSIBLE LOWER BASKET COLLAPSIBLE LOWER BASKET TINES TINES (Select Models) (Select Models) There are foldable tines (A) located There are foldable tines (A) located at the lower basket of the machine at the lower basket of the machine are designed for an easier placement are designed for an easier placement of large pieces such as pans, bowls, of large pieces such as pans, bowls,...
- Page 16 SILVERWARE BASKET SILVERWARE BASKET (Select Models) (Select Models) Silverware basket is designed to wash Silverware basket is designed to wash your dishes such as knife, fork, spoon, your dishes such as knife, fork, spoon, etc. in an efficient manner. etc. in a cleaner manner. Since the silverware basket can be Since the cutlery basket can be moved moved (A, B), you can create more...
- Page 17 TRAY WASH SUPPORTS SOFTTOUCH ACCESSORY (Select Models) (Select Models) Use the supports to wash trays in the The SoftTouch Accessory found in the bottom basket. lower basket of your machine enables See the Auxiliary functions section a safe washing for your fragile glasses. for appropriate program and function selection.
- Page 18 LOWER BASKET MULTIPURPOSE To close the racks: / HEIGHT ADJUSTABLE SERVICE 1. Fold the rack (A). RACK 2. Slide the rack up (B). (Select Models) 3. Put the rack in vertical position (C). This accessory located at the lower 4. Slide the rack down and lock it by basket of your machine allows you the tabs (D).
- Page 19 CEILING CUTLERY BASKET (Select Models) Ceiling cutlery basket is designed to wash your cutlery items such as forks, spoons and etc. by placing them between the bars on the basket. When the central tray is in the lower position, you can load long/high items such as coffee cups, ladles, etc.
-
Page 20: Proper And Improper Loading Of Dishware
4.3 PROPER AND IMPROPER LOADING OF DISHWARE 4 4 4 1: Salad Fork 2: Teaspoon 3: Dinner fork 4 4 4 4: Knife-solid handle 5: Serving spoon Sliding Cutlery Basket load pattern for 12 6: Serving fork place settings according to the AHAM DW-1 Standards •... -
Page 21: What Should Not Be Washed In Your Dishwasher
5. WHAT SHOULD NOT Crystal and very fine glassware • may become opaque (etch) losing BE WASHED IN YOUR their shine over time. You may DISHWASHER prefer to wash them by hand. Rust-sensitive steel parts like iron • Do not wash sponges or dish •... -
Page 22: Operating The Product
6. OPERATING THE PRODUCT NOTICE: If you do not perform any operation after switching on the machine, it will be automatically switched off within 5 seconds. 1. On/Off key 2. Program Selection / Program Cancel (3 seconds) key 3. Function keys & indicators Half Load Function Sanitize Function Extra Rinse function... -
Page 23: Keys
6.1 KEYS 6.2 PREPARING THE MACHINE On/Off key When you press On / Off key, indicator 1. Open the door of the dishwasher. lights illuminate on the display for ON 2. Place the dishes in accordance position. The lights turn off in OFF with the instructions in the user position. -
Page 25: Auxiliary Functions
6.4 AUXILIARY FUNCTIONS Sanitize Function Sanitize function raises the water Washing programs of your dishwasher temperature in the final rinse to are designed to obtain the best meet the requirements of NSF/ANSI cleaning effect, considering the type STANDARD 184 for Residential of the soiling, soiling degree and Dishwashers. -
Page 26: Scheduling The Washing Time
Floor illumination until the countdown 3, 2, 1 is completed on the display. Illuminates to show program is still running. 2. Press P+ key to activate the L: (Select Models) option. The interior lighting is Your machine reflects a light to the turned off at "L:0"... -
Page 27: Starting The Program
6.6 STARTING THE PROGRAM 2. Once you press the Time Delay key, Display Information Line Close the door of your machine to will show "0:30" and Time Delay start it after selecting the program and indicator will start flashing. auxiliary functions. 3. -
Page 28: Cancelling The Program
The machine will remain 6.9 RINSE AID INDICATOR ( ) silent in pause mode for Please check the rinse aid indicator some time in order to on the display to see whether there is remove the water from the adequate amount of rinse aid in the machine and on the dishes dishwasher or not. -
Page 29: End Of Program
End of Program indicator will light up detect this and E:01 icon will flash on when the washing program is over. the Program indicator. As long as the 1. Open the door of the machine. overflowing continues safety algorithm will be active and try to discharge the 2. -
Page 30: Detergent
7. DETERGENT Inside the detergent You can use powder, liquid/gel or tablet dispenser there are level detergents in the machine. markings that help you use appropriate amount of Only use in the machine powder detergent. When the detergents produced brimful, detergent dispenser particularly for use will contain 1.5 Ounces with dishwashers. -
Page 31: Tablet Detergents
The best washing performance in dishwashers is obtained by using detergent, rinse aid and water softening salt individually. Observe the instructions of the detergent manufacturer on the package when using tablet detergents. Contact the detergent Use powder or liquid/ manufacturer if your dishes gel detergent in short are wet and/or if you notice programs without prewash... -
Page 32: Rinse Aid
7.3 RINSE AID 4. If there are stains on tableware items after washing, level must The rinse aid used in be increased and if there is a blue dishwashers is a special trace after wiping them by hand, it combination that aims to must be decreased. -
Page 33: Adjusting The Water Softening System
8. ADJUSTING THE WATER SOFTENING SYSTEM (Select Models) Cleaning, rinsing and drying performance of your dishwasher will increase when water softening system is adjusted properly. Adjust the new water hardness level according to the Water hardness level instruction in this booklet. Use the test strip supplied with the product according to the steps given below to determine hardness level of your supply water. -
Page 34: Filling The Dishwasher Salt Dispenser
If you move your house, it is necessary to readjust water hardness level of your machine by considering the information given above according to the hardness level of the supply water in your new location. Your machine will display the most recently adjusted water hardness level. - Page 35 You can put about 4.4 Pounds of softening salt into the salt reservoir. 5. Replace the lid and tighten it when the reservoir is full. You need to add salt right before starting the machine. Thus, the overflowing salty water will be flushed immediately, preventing the risk of corrosion in machine.
-
Page 36: Care And Maintenance
10. CARE AND MAINTENANCE Cleaning the control panel: Use only soft cloth that is lightly dampened with WARNING:Before cleaning mild detergent. Clean the control panel or carrying out maintenance, only with a moist cloth and clear water. switch off the appliance, disconnect the mains plug Cleaning the colored doors: Use only and turn off the water tap. -
Page 37: Cleaning The Filters
10.3 CLEANING THE FILTERS Clean the filters at least once a week in order for the machine operates efficiently. Check if food residues are left on the filters. If there are food residues on filters, take them out and clean well under running water. 1. -
Page 38: Cleaning The Hose Filter
10.4 CLEANING THE HOSE LOWER WASH ARMS Check if the holes on the lower FILTER wash arms (1) are clogged. If they Damages on the machine that may be are clogged, remove and clean the caused by impurities coming from the impeller. -
Page 39: Troubleshooting
11. TROUBLESHOOTING Machine does not start. Power cable is unplugged. >>> Check if the power cable is plugged in. • Cicuit Breaker is blown. >>> Check the Cicuit Breaker in your house. • Water is cut. >>> Make sure that the water inlet tap is open. •... - Page 40 wait for evacuation of the steam inside for a while. Unload the dishes after the pieces cool down to a touchable level. Start unloading process from the lower basket. Thus, dropping of water remained on a piece at upper basket onto the pieces at lower basket is prevented.
- Page 41 There is a different odor in the machine A new machine has a peculiar odor. It will fade out after a couple of washing. Filters are clogged. >>> Check if the filter system is clean. Clean the filter • system regularly as illustrated in section “Cleaning and Care”. Dirty dishes are kept in dishwasher for 2-3 days.
- Page 42 Detergent remains in detergent dispenser. Detergent dispenser was damp when adding detergent. >>> Make sure that • the detergent dispenser is dried well prior to filling it with detergent. Detergent is added long before the washing process. >>> Pay attention to •...
- Page 43 A smear remains on glasses that resembles milk stain which can not be removed when wiped by hand. A bluish / rainbow appearance occurs when the glass is pointed to light. Excessive rinse aid is used. >>>Lower rinse aid setting. Clean the spilled •...
-
Page 44: Technical Features
12. TECHNICAL FEATURES Load capacity 14 place settings Permissible water 4.35 - 145 psi (0.3 - 10 bars) pressure Electrical connection 120 V (volts), 12 A (amps), 60Hz (hertz) Total power 1400 W (watts) Heater power 1100 W (watts) NOTICE: Because we continually strive to improve our products, we may change our specifications... -
Page 45: Warranty Statement For The Blomberg Dishwashers
1 year * limited warranty from date of components. The dishwasher must have been used under normal first installation Blomberg will repair or replace at no household conditions and not cost to the consumer any defective commercially (Labor charges are the... - Page 46 PARTICULAR PURPOSE FOR Blomberg may, at its option, also replace the whole dishwasher with WHICH YOU MAY BE BUYING THIS the same and/or equivalent model PRODUCT, EXCEPT AS OTHERWISE PROVIDED IN THIS WARRANTY with equal or better functionality if the original model is no longer available.
-
Page 47: How To Get Service
Please contact the Distributor for your State or Province as listed on the Distributor Contact List, or call our Toll Free Number at 1 800 459 9848 for direction to an Authorized Blomberg Service Agent. Document Number : 15 9777 01 00_AA_BLOMBERG_D1_USA/ 23-01-18.(15:39) - Page 48 www.blomberginternational.com info@blomberginternational.com...
Need help?
Do you have a question about the DW51600SS and is the answer not in the manual?
Questions and answers