Table of Contents
Advertisement
Advertisement
Table of Contents

Related Manuals for Monoprice 33820


Summary of Contents for Monoprice 33820
- Page 1 MP Voxel 3D Printer P/N 33820 User's Manual...
-
Page 2: Table Of Contents
CONTENTS SAFETY WARNINGS AND GUIDELINES ............................4 FEATURES ..........................................6 CUSTOMER SERVICE ....................................6 PACKAGE CONTENTS ....................................7 PRODUCT OVERVIEW ....................................8 Internal View ........................................ 8 Exterior View ....................................... 9 OSD MENU SYSTEM ....................................9 Main Menu ........................................9 Build Menu ........................................10 File Screen ........................................ - Page 3 Calibration Screen ....................................21 Home Screen ......................................22 Move Screen ......................................22 Camera Screen ......................................23 About Screen ......................................24 Filament Menu ......................................25 CALIBRATION ........................................26 LOADING FILAMENT ....................................27 PRINTING MODELS ....................................29 REMOVING THE PRINTED MODEL ..............................30 REPLACING FILAMENT ....................................
-
Page 4: Safety Warnings And Guidelines
EU Declaration of Conformity ..............................41 WEEE Information ....................................41 Safety Notice ......................................42 SAFETY WARNINGS AND GUIDELINES Please read this entire manual before using this device, paying extra attention to these safety warnings and guidelines. Please keep this manual in a safe place for future reference. ... - Page 5 the device, immediately unplug it from the power outlet and allow it to fully dry before reapplying power. Do not touch the device, the power cord, or any other connected cables with wet hands. Prior to operation, check the unit and power cord for physical damage. Do not use if physical damage has occurred.
-
Page 6: Features
If you have any problem with your order, please give us an opportunity to make it right. You can contact a Monoprice Customer Service representative through the Live Chat link on our website www.monoprice.com during normal business hours (Mon-Fri: 5am-7pm PT, Sat-Sun: 9am-... -
Page 7: Package Contents
PACKAGE CONTENTS Please take an inventory of the package contents to ensure you have all the items listed below. If anything is missing or damaged, please contact Monoprice Customer Service for a replacement. 1x 3D Printer 1x Spool Filament 1x AC Power Cord... -
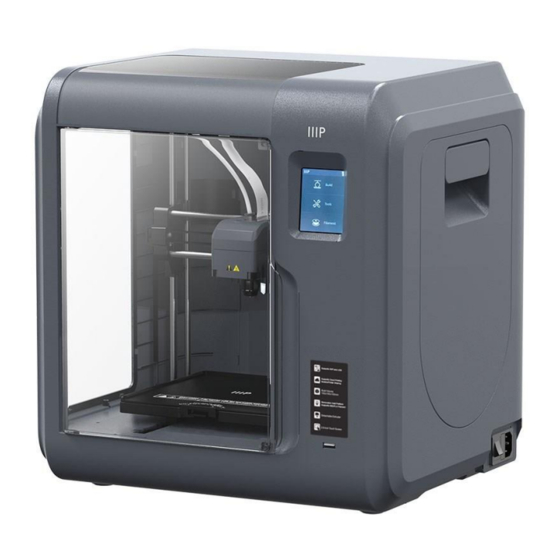
Page 8: Product Overview
PRODUCT OVERVIEW Internal View 1. Filament Guide Tube 8. LED Lamp 2. Filament Guide Tube Joint 9. Fan Duct 3. Extruder Base 10. Front Door 4. Cooling Fan 11. Y-Axis Sliding Slot 5. Removable Nozzle 12. Platform Base 6. Extruder Cables 13. -
Page 9: Exterior View
15. USB Port 20. Filament Cover Handle 16. Power Switch 21. Motor 17. Power Input 22. Filament Intake 18. Spool Holder 23. Filament Feeding Wheel 19. Filament Cover Exterior View 24. Top Cover 25. Air Outlet 26. Ethernet Port OSD MENU SYSTEM Main Menu Touch the Build icon to enter the Build Menu. -
Page 10: Build Menu
Build Menu Touch the Memory icon to read files from the printer's internal memory. Touch the USB Drive icon to read files from a USB flash drive plugged into the printer's USB port. Touch the Cloud icon to read files from the cloud. Touch the Back icon to return to the Main Menu. -
Page 11: Multiple File Selection Screen
Touch the ᐸ icon to go back to the previous page. Touch the ᐳ icon to advance to the next page. Touch the ← icon to return to the Network Menu. Multiple File Selection Screen Touch the button to the right of a file to select that file. -
Page 12: Tools Menu
Tools Menu Touch the Network icon to enter the Network Menu. Touch the Preheat icon to enter the Preheat Screen. Touch the Setting icon to enter the Setting Menu. Touch the About icon to enter the About Screen. Touch the Back icon to return to the Main Menu. Network Menu Touch the WiFi icon to enter the WiFi Screen. -
Page 13: Wifi Screen
WiFi Screen Touch the slider to turn Wi-Fi® on or off. Wi-Fi is on when the white ball is to the right and off when it is to the left. Touch a Wi-Fi icon to select a Wi-Fi network. If there are more available Wi-Fi networks than can fit on the Wi-Fi Screen, this number will indicate the selected page number on the left and the total number of pages on the right. -
Page 14: Hotspot Screen
Hotspot Screen The hotspot feature sets up your printer as a wireless access point (AP). You can then connect your mobile device to use it as the wireless network, allowing it to communicate directly with the printer. If you have already used the hotspot feature, this screen will display the hotspot information you used the last time, otherwise you will need to setup the hotspot. -
Page 15: Input Keypad Screen
Input Keypad Screen Touch the Check Mark icon to save the input value. Touch the Numbers icon to change the keypad to show numbers. Touch the Letters icon to change the keypad to show letters. Touch the Symbols icon to change the keypad to show special symbols. -
Page 16: Ethernet Screen
Ethernet Screen When the Ethernet Screen opens, the printer will attempt to establish a connection with the network. If it fails to find a network, it will prompt you to connect the printer to the network using an Ethernet cable. Once a connection is established, the screen will indicate that the connection was successful. -
Page 17: Preheating Screen
Touch the Start button to start preheating and display the Preheating Screen. Touch the Back icon to return to the Main Menu. Preheating Screen The Preheating Screen is displayed while preheating is in progress. The screen shows the actual and target temperature(s), while showing progress bars. - Page 18 Touch the Status icon to enter the Status Screen. Touch the Language icon to enter the Language Menu. Touch the Calibration icon to enter the Calibration Screen. Touch the Home icon to move extruder and build platform back to the mechanical zero point.
-
Page 19: Status Screen
There are three pages in the Setting Menu. This number indicates which of the three pages is being displayed. Touch the ᐸ icon to go back to the previous page. Touch the ᐳ icon to advance to the next page. Touch the Back icon to return to the Setting Menu. -
Page 20: Language Menu
Language Menu Touch the icon to select Chinese for the OSD menu system. Touch the En icon to select English for the OSD menu system. Touch the icon to select Japanese for the OSD menu system. Touch the De icon to select German for the OSD menu system. -
Page 21: Calibration Screen
Touch the Back icon to return to the Setting Menu. Calibration Screen When the Calibration option is selected, the printer will move the extruder and platform to the mechanical zero (Home) position, then will display the Calibration Screen. See the CALIBRATION section for calibration instructions. -
Page 22: Home Screen
Home Screen When the Home option is selected, the printer will move the extruder and build platform to the mechanical zero (home) position. Touch the Yes button to return to the Setting Menu. Move Screen The Move Screen allows you to manually move the extruder and build plate. In addition to the controls, the screen shows the real-time X, Y, and Z positions. -
Page 23: Camera Screen
Touch the ↙ icon to move the build platform towards the front of the printer. Touch the ↑ icon to move the extruder up. Touch the ↓ icon to move the extruder down. Touch the Back icon to return to the Setting Menu. Camera Screen The Camera Screen allows you to determine whether the built-in camera is on or off. -
Page 24: About Screen
About Screen The About Screen shows basic information about the printer. The About Screen has two pages. This number indicates which of the two pages is being displayed. Touch the ᐸ icon to go back to the previous page. Touch the ᐳ icon to advance to the next page. Touch the Back icon to return to the Setting Menu. -
Page 25: Filament Menu
Filament Menu Touch the Load icon to load filament. Touch the Change icon to unload filament. Touch the Back icon to return to the Main Menu. -
Page 26: Calibration
CALIBRATION Prior to making any prints, it is a good idea to calibrate the printer to ensure that the print nozzle is the proper distance above the build platform when in the Home position. Perform the following steps to calibrate the printer. 1. -
Page 27: Loading Filament
LOADING FILAMENT 1. Open the Filament Door on the printer. 2. Insert filament into the filament intake. Push the filament into the feeding wheel until some resistance is felt. - Page 28 3. With the printer turned on, touch Filament > Load. The printer will begin preheating, then will load the filament. Touch the OK button after a couple of centimeters of filament have been extruded. 4. Place the spool of filament on the filament holder, then close the door. Ensure that the filament is installed so that it feeds in a clockwise direction.
-
Page 29: Printing Models
PRINTING MODELS Perform the following steps to print a model. 1. With the printer turned on, touch Build, then select either Internal Memory, USB Stick, or Cloud for the source. 2. Locate the model you want to print, then either touch the model picture to see file details or touch the ►... -
Page 30: Removing The Printed Model
REMOVING THE PRINTED MODEL 1. Once the print is complete, allow the printer and finished model to fully cool before attempting to remove the model. 2. Grab the front of the removable build platform and pull it out of the printer. 3. -
Page 31: Replacing Filament
REPLACING FILAMENT 1. With the printer powered on, touch Filament > Change. The printer will automatically begin preheating the extruder, then will unload the filament. 2. Once the printer has finished unloading the filament from the extruder, it will prompt you to remove the filament, then will prompt you to insert new filament. Touch OK once several centimeters of filament has been extruded. -
Page 32: Using The Camera
USING THE CAMERA The MP Voxel 3D Printer features a built-in camera, which allows you to monitor the print. Camera Mode The built-in camera is incompatible with the USB port in that only one can be used at a time. There are two modes that control whether the camera or the USB port is in use: Auto Mode and Manual Mode. -
Page 33: Clearing A Clogged Nozzle
When the camera is on, a camera icon will appear in the status bar, as shown in the image below and to the left. When the USB port is activated and a USB drive has been successfully connected, a USB disk icon will appear in the status bar, as shown in the image below and to the right. -
Page 34: Replacing The Nozzle
5. Once several centimeters of filament has been extruded, touch the OK button to stop extrusion. REPLACING THE NOZZLE This printer features a quick disconnect nozzle, allowing for easy replacement. Perform the following steps to replace the nozzle. 1. Remove any installed filament, then turn the printer off and allow all parts to cool before touching the extruder and nozzle. -
Page 35: Faq
Q1: Do I need to perform extruder calibration after replacing the nozzle? CALIBRATION A1: Yes, perform extruder calibration as detailed in the section above. Q2: What do I do if the displayed extruder temperature is abnormal (e.g. 300°C) or is not showing at all? REPLACING A2: The nozzle is not installed correctly. - Page 36 Q8: Can the printer automatically turn off after a print job is complete? A8: No. Q9: Which file formats does the printer support? A9: The slicing software can accept .3mf, .stl, .obj, .fpp, .bmp, .png, .jpg, and .jpeg files. The printer itself can accept .gx or .g files, which are created by the slicing software.
-
Page 37: Specifications
SPECIFICATIONS Model 33820 Print Technology Fused Filament Fabrication (FFF) Screen Type 2.8" Color IPS Touch Screen Filament Size 1.75mm Nozzle Diameter 0.4mm Build Area 6.9" x 6.9" x 6.9" (150 x 150 x 150 mm) Layer Resolution 0.05 ~ 0.4 mm Build Accuracy ±0.2mm... -
Page 38: Technical Support
TECHNICAL SUPPORT Monoprice is pleased to provide free, live, online technical support to assist you with any questions you may have about installation, setup, troubleshooting, or product recommendations. If you ever need assistance with your new product, please come online to talk to one of our friendly and knowledgeable Tech Support Associates. -
Page 39: Radio Notice For Fcc
This FCC Part 15 radio device operates on a non-interference basis with other devices operating at this frequency. Any changes or modification to said product not expressly approved by Monoprice, including the use of non-approved antennas, could void the user’s authority to operate this device. -
Page 40: Radio Notice For Industry Canada
This IC RSS-210 radio device operates on a non-interference basis with other devices operating at this frequency. Any changes or modification to said product not expressly approved by Monoprice, including the use of non-approved antennas, could void the user’s authority to operate this device. - Page 41 EU Declaration of Conformity Monoprice, Inc. declares the product described within this user guide or manual is in compliance with below applicable directives. The full text of the EU Declaration of Conformity is available at the following internet address: https://www.monoprice.com/product?c_id=107&cp_id=10724&cs_id=1072403&p_id=33820 &seq=1&format=2 or the CE DoC can be found within this user manual...
- Page 42 electronics products via designated collection facilities appointed by the government or local authorities. Correct disposal and recycling will help prevent potential negative consequences to the environment and human health. For more detailed information about the disposal of your unwanted product, please contacts your local authorities, waste disposal service, or the shop where you purchased the product.
Need help?
Do you have a question about the 33820 and is the answer not in the manual?
Questions and answers