Table of Contents
Advertisement
Advertisement
Table of Contents

Related Manuals for Expobar Diamant Pro


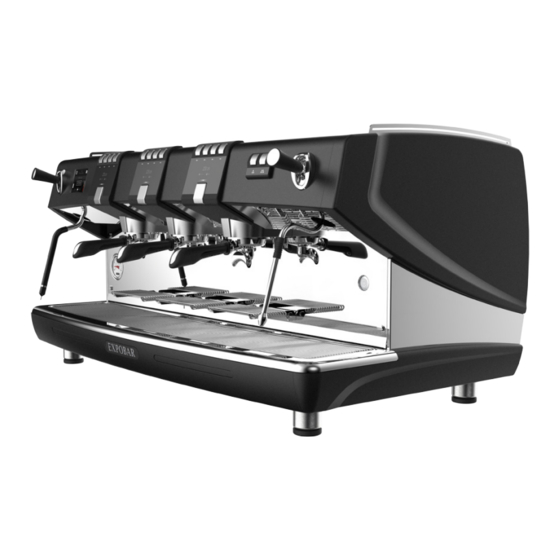
Summary of Contents for Expobar Diamant Pro
- Page 1 D I A M A N T USER MANUAL Part No.: 1764320_03...
-
Page 2: Table Of Contents
STORAGE AND DISPOSAL ..........................9 Long-term storage requirements ............................9 Machine disposal requirements............................9 TECHNICAL SPECIFICATIONS ........................10 Diamant Pro 2GR machine data ............................10 Diamant Pro 2GR versions external dimensions......................11 Diamant Pro 3GR machine data ............................12 Diamant Pro 3GR versions external dimensions......................13 BUTTONS AND CONTROLS .........................14... - Page 3 CONTENT D I A M A N T CLEANING AND CARE ............................27 Cleaning reminders ................................27 Daily cleaning ..................................27 Weekly cleaning ................................... 27 Daily flushing ..................................28 Weekly cleaning with espresso machine detergent ....................29 USER PROGRAMMING ............................30 Entering and exiting the user programming menu ...................... 30 User programming menu features ..........................
-
Page 4: Manual Revisions
MANUAL REVISIONS D I A M A N T Rev. # Date TSB# Description March 08, 2018 None First draft released for technical review and validation testing. Update based on Crem Tech. Serv. Dept. review feedback and March 13, 2018 None updated software programming. -
Page 5: Notifications
NOTIFICATIONS D I A M A N T Explanation of descriptions There are five different levels of notification intensity within this manual, as identified by the signal terms: DANGER, WARNING, IMPORTANT, NOTE and PRO TIP. The level of risk and importance of the notification is determined by the following definitions. -
Page 6: General Information
D I A M A N T Introduction Thank you for choosing a Diamant Pro espresso machine. We hope you enjoy it ! Please read this user manual carefully before Do not discard this manual, it will be useful for using the machine. -
Page 7: Warnings And Precautions
GENERAL INFORMATION D I A M A N T Warnings and Precautions Install the machine in a horizontal position and To ensure fault-free machine operation, only away from heat sources and flammable objects. use manufacturer-approved replacement parts This machine should only be installed on a and accessories. -
Page 8: Transport
TRANSPORT D I A M A N T Packaging The machine is shipped in a custom-designed carton which utilizes model-specific polystyrene cushions to protect it from damage. The machine’s carton features standardized handling symbols to explain proper shipping and storage methods. The machine must remain in a horizontal position during the transport. -
Page 9: Storage And Disposal
STORAGE AND DISPOSAL D I A M A N T Long-term storage requirements Before storage for a month or more be sure to: • Perform all weekly and periodic cleaning procedures described in this manual. • Disconnect and roll up the power cord (this should be performed by a qualified person). • Disconnect the machine’s water inlet hose from the domestic water supply and drain the boilers (this should be performed by a qualified person). • Clean the drip tray and exterior of the machine to remove any coffee or other residue. • Cover / re-pack the machine in its original carton and store it in a dry place where it will not be exposed to extreme temperatures or humidity. -
Page 10: Technical Specifications
TECHNICAL SPECIFICATIONS D I A M A N T Diamant Pro 2GR machine data 2GR versions Compliance codes: Pending certification Temperature control system: PID control Dispensing control system: Touchscreen control + individual group programming capability 2 units (non-SmartSteam versions) Steam wand:... -
Page 11: Diamant Pro 2Gr Versions External Dimensions
TECHNICAL SPECIFICATIONS D I A M A N T Diamant Pro 2GR versions front view Drink Keypads Group Displays Hot Water Touchscreen Keypad Steam Knob / Steam Knob SmartSteam Knob (optional) Steam Wand / Steam Wand SmartSteam Hot Water (optional not shown) -
Page 12: Diamant Pro 3Gr Machine Data
TECHNICAL SPECIFICATIONS D I A M A N T Diamant Pro 3GR machine data 3GR versions Compliance code: Pending certification Temperature control system: PID control Dispensing control system: Touchscreen control + individual group programming capability 2 units (non-SmartSteam versions) Steam wand:... -
Page 13: Diamant Pro 3Gr Versions External Dimensions
TECHNICAL SPECIFICATIONS D I A M A N T Diamant Pro 3GR versions front view Drink Keypads Group Displays Hot Water Keypad Touchscreen Steam Knob / Steam Knob SmartSteam Knob (optional) Steam Wand / Steam Wand SmartSteam Hot Water (optional not... -
Page 14: Buttons And Controls
D I A M A N T Machine controls Diamant Pro features an TFT LCD digital touchscreen display for monitoring machine status and performing user programming and machine adjustments, customization and cleaning along with push buttons at each brewing group for dispensing. Control functions are explained below. -
Page 15: Installation And Start Up
INSTALLATION AND START UP D I A M A N T Machine positioning MIN. 30 cm MIN. 10 cm Install within 0-3º horizontal. Installing the machine in the service area must be performed by a qualified person. As the machine may be quite heavy, at least two strong, capable individuals are recommend to work together to lift and position the machine. -
Page 16: Drain Connection Checklist
INSTALLATION AND START UP D I A M A N T Drain connection checklist 1. Connect one end of the flexible drain tube to the drain cup outlet by inserting it through the access hole in the panel mounted in the bottom of the chassis. (It is located under the drip tray and grill. -
Page 17: Water Connection Checklist
INSTALLATION AND START UP D I A M A N T Water connection checklist Domestic water supply Espresso machine Water Important: filter Only use the hoses supplied with the machine. Never reuse damaged hoses. If the machine is to be moved or relocated, replace the hose set with a new parts from the distributor/ manufacture. -
Page 18: Boiler Pressure And Temperature Information
INSTALLATION AND START UP D I A M A N T Boiler pressure and temperature information Boiler pressure is directly controlled by water temperature. The steam boiler’s optimal temperature operating range is from 116-120 C for milk steaming and brewing results. Relationship between boiler pressure and temperature Optimal operating pressure and temperature Pro Tip:... -
Page 19: Electrical Connection Checklist
INSTALLATION AND START UP D I A M A N T Electrical connection checklist DANGER! Important: If the mains cable or plug is damaged, it The manufacturer will not be held liable must be replaced by the manufacturer, its for damage to persons, animals or property service agent or similarly qualified persons resulting from incorrect installation of the in order to avoid a hazard. -
Page 20: Initial Starting Procedure
INSTALLATION AND START UP D I A M A N T Initial starting procedure Steam knob Power switch Heating symbol Before using the machine be sure to: Ensure the machine’s domestic water supply is opened at the tap. Turn on the main power switch and wait a few minutes for the boiler to heat up. Confirm that the heating icon is illuminated while the boiler is heating. -
Page 21: Operation
OPERATION D I A M A N T The portafilter set Filter basket locking spring Filter basket Portafilter spring slot Single espresso portafilter and filter basket (7g) Double espresso portafilter and filter basket (14g) Inserting the portafilter in the group Align the portafilter's two flanges with the two Insert the portafilter and rotate it slots in the group housing. -
Page 22: Espresso Brewing - Standard Mode
OPERATION D I A M A N T Espresso brewing - Standard Mode 1. Unlock and remove the 2. Fill the filter basket with 3. Compact the coffee. portafilter from the group espresso-grind coffee (approx. head. 7g for single or 14g for a double espresso). -
Page 23: Espresso Brewing - Barista Mode
OPERATION D I A M A N T Espresso brewing - Barista mode 1. Unlock and remove the 2. Fill the filter basket with 3. Compact the coffee. portafilter from the group espresso-grind coffee (approx. head. 7g for single or 14g for a double espresso). -
Page 24: Steaming And Frothing Milk
OPERATION D I A M A N T Steaming and frothing milk Steaming Flush Open Frothing 2. Immerse the steam wand into the milk, making sure the wand tip is 1. Place the steam wand over submerged. Open the steam knob/handle again to begin steaming the drip tray and open the or frothing the milk. -
Page 25: Steaming Milk With The Smartsteam
OPERATION D I A M A N T Steaming milk with the SmartSteam Start Flush 1. Aim the SmartSteam wand down towards the 2. Place the milk pitcher on the drip tray with the drip tray and tip the handle up to flush the SmartSteam wand immersed into the milk. -
Page 26: Dispensing Hot Water
OPERATION D I A M A N T Dispensing hot water WARNING! Never place hands and fingers directly under the hot water outlet during dispensing to avoid scalding or serious burns. Place a pitcher (or other heat resistant vessel) under the hot water outlet. Open the tap or press the desired hot water button to begin dispensing. -
Page 27: Cleaning And Care
CLEANING AND CARE D I A M A N T Cleaning reminders • To keep the machine looking and working like new, always follow all the cleaning and care instructions provided in this manual. • For safety always turn the machine off at the main power switch when cleaning the exterior surfaces. -
Page 28: Daily Flushing
CLEANING AND CARE D I A M A N T Daily flushing MAIN DISPLAY BARISTA MENU 10:05 Friday, 24 March DIAMANT AUTO ℃ 1. Remove the filter basket and place the blind 2. Enter the User Programming and select the Auto filter in the portafilter. -
Page 29: Weekly Cleaning With Espresso Machine Detergent
CLEANING AND CARE D I A M A N T Weekly cleaning with espresso machine detergent Professional espresso cleaning detergent Part no: 1104162 1. Remove the filter basket and place the blind 2. Add 7-10g of espresso machine detergent to filter in the portafilter. -
Page 30: User Programming
USER PROGRAMMING D I A M A N T Entering and exiting the user programming menu To enter the user programming menu simply press the Barista button: OFF SCREEN MAIN DISPLAY BARISTA MENU 10:05 10:05 Access Barista Menu Functions day, 24 March Friday, 24 March DIAMANT ℃... -
Page 31: Dose Programming Coffee
10:05 10:05 Friday, 24 March Friday, 24 March DIAMANT USER PROGRAMMING D I A M A N T Dose programming Coffee ℃ Use the following steps to program the espresso brew dosages for each drink button (each button can SETTINGS MENU be programmed for a different dosing volume if desired): Profiles menu BARISTA MENU... -
Page 32: Dose Programming (Coffee & Tea) Using The Touchpad
USER PROGRAMMING D I A M A N T Dose programming (Coffee & Tea) using the touchpad COFFEE DOSING: This section explains how to program the doses dispensed automatically by the drink buttons: 1. Keep the continuous button pressed over 8 seconds, all the lights in the keypad will light up and continuous button will flash. -
Page 33: Preinfusion Settings
USER PROGRAMMING D I A M A N T Preinfusion settings Use the following steps to to adjust the preinfusion settings: SETTINGS MENU Profiles menu BARISTA MENU ENTER PASSWORD SCREEN 10:05 10:05 .5 ℃ Friday, 24 March Friday, 24 March NAME / Alarm SETTINGS AUTO... -
Page 34: Group Cleaning
USER PROGRAMMING D I A M A N T Group cleaning SETTINGS MENU Profiles menu Use the following steps to activate the automatic group cleaning cycle for the brewing groups: PREINFUSION MENU BARISTA MENU PREINFUSION MENU ENTER PASSWORD SCREEN Pro Tip: 10:05 10:05 .5 ℃... -
Page 35: Date And Time Settings And Auto On/Off Functions
10:05 10:05 Friday, 24 March Friday, 24 March DIAMANT USER PROGRAMMING D I A M A N T AUTO Date and time settings and auto on/off functions User Settings Use the following steps to program the clock and calendar settings and program the daily automatic on/ ℃... -
Page 36: Smartsteam
Friday, 24 March Friday, 24 March DIAMANT AUTO USER PROGRAMMING D I A M A N T User Settings SmartSteam ℃ Use the following steps to program the SmartSteam settings: DOSE GR1 COUNTERS GR.1 SMART STEAM TEMP K1 80 K1 00000 K4 00000 K2 110 K2 00000... -
Page 37: Machine Alerts
D I A M A N T Display messages and alarms To alert users that routine service of the machine is due or against a situation that could possibly cause damage to the machine, Diamant Pro has the following alerts programmed into its software: 10:05 10:05... -
Page 38: Alarms Related With Smartsteam Functionality
MACHINE ALERTS D I A M A N T Alarms related with SmartSteam functionality Alarm Description If the SmartSteam temperature probe detects that the milk in the jug Cooler temp is above 10ºC the warning will appear and the steaming cycle will not recommended start until cold milk is used. -
Page 39: Alarms Related With Sensors Malfunction
MACHINE ALERTS D I A M A N T Alarms related with sensors malfunction Alarm Description Steam boiler sensor Warn the user the temperature sensor for steam boiler is in short- (AL1) circuit. Steam boiler sensor Warn the user the temperature sensor for steam boiler is not (AL2) connected or is not working properly. -
Page 40: Troubleshooting
TROUBLESHOOTING D I A M A N T Machine faults Problem Possible cause Solution Check that the plug is correctly The plug is not correctly inserted and that the power inserted into the power socket socket is operational. The machine does not start up The circuit breaker and/or Check that they are connected. -
Page 41: Service Information
SERVICE INFORMATION D I A M A N T Notes:... - Page 44 For the warranty to be valid the conditions for maintenance must have been followed according to our instructions, proper precaution has been made and warranty claim been issued without delay. The affected equipment may not be used during awaiting service if there is any risk that the damage or defect would worsen.
Need help?
Do you have a question about the Diamant Pro and is the answer not in the manual?
Questions and answers