Advertisement
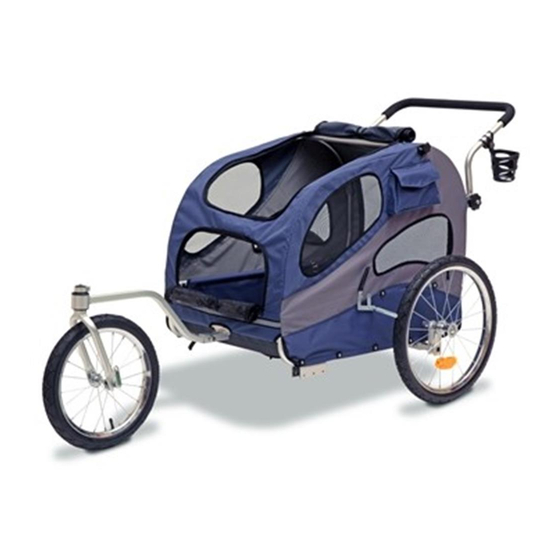
Thank you for your purchase of the Solvit Products HoundAbout™ Pet Stroller. The stroller assembles in about
20-30 minutes, using a Phillips screwdriver and an adjustable wrench (or 9mm and 10mm sizes).
Assembly: The package contains: one partially assembled main cabin; two large wheels, one smaller (front) wheel;
one front wheel fork assembly; one handlebar; one handlebar mounting tube kit; one cup holder kit; one parking
brake kit; one adjustable leash; and one cushion. If any parts are missing, contact Solvit for prompt replacement.
Step 1: Attach large wheels to cabin: Insert the spindle of each large wheel into either side of the axle. When
inserted, the spring lock mechanism on the underside of the axle will make an audible "click". Pull firmly to make
sure wheel is properly installed. To remove, depress the spring lock mechanism and withdraw the wheel.
Step 2: Attach the front wheel assembly: Assemble the smaller wheel to the front fork and check for
alignment. Slide the short square tube on the front wheel assembly over the m
tube at the
lower front edge of the stroller cabin. Align the holes in each tube, install
the "quick release" pin and tighten fully.
St
ep 3: The sides of the cabin are held in place by means of a roof support rod and
two black plastic "star knobs". With the wheels resting on the ground, rotate one si
panel into a vertical orientation. Position the support rod inside the trailer so one s
knob can be inserted through the grommet and frame on the side of the trailer and
into the threads on the end of the support rod. Repeat with the other star knob on th
other side of the trailer, and fully tighten both star knobs.
Step 5: Install the cushion: The four hook-and-loop straps on the cushion
should "loop" around the interior frame tubes and "hook" back onto each o
When installed correctly, the cushion should cover all tubing.
Step 6: Attach the handlebar: The two 4-inch handlebar mounting tubes
attach to the frame on the rear panel. With the open end of the mounting tube
facing up, align the holes on the tube to the holes on the frame. Insert screws
through the tube and frame and attach 10mm nuts from the inside of the cabin.
Tighten using a screwdriver and wrench. Slide the ends of the handlebars into
the mounting tubes, align the holes, and insert the lock pins with the head of
the lock pins facing forward. Secure the wire hoop on each lock pin.
Step 7: Install the cup holder: The large clamp fits over the cushioned section of the handlebar; the small clamp fits
over the non-cushioned section. Position the appropriate clamp and attach the cup holder with the nut and screw.
Adjust tightness so the cup holder does not "tilt" while in use.
HoundAbout
™
Care & Use Guide
Step 4: Install the parking brake. This is attached on the lower left side of the
cabin, in front of the wheel. Insert two screws through the brake assembly, bla
rubber washers , the holes in the cabin fabric and finally through the steel frame,
extending into the interior of the cabin. Install the washers and 9mm nuts to the
screws and tighten. The parking brake is engaged by moving the brake lever to
the forward position. Hint: if the brake seems difficult to operate, loosen the
mounting screws one-quarter turn and test again.
(The steps that follow are made easier by engaging the parking brake now.)
Pet Stroller
atching
de
tar
e
ther.
080312
ck
Advertisement
Table of Contents

Related Manuals for Solvit HoundAbout


Summary of Contents for Solvit HoundAbout
- Page 1 Pet Stroller Care & Use Guide Thank you for your purchase of the Solvit Products HoundAbout™ Pet Stroller. The stroller assembles in about 20-30 minutes, using a Phillips screwdriver and an adjustable wrench (or 9mm and 10mm sizes). Assembly: The package contains: one partially assembled main cabin; two large wheels, one smaller (front) wheel;...
- Page 2 Do not exceed the recommended weight capacity. Check tire inflation before every ride. Warranty: The HoundAbout Stroller is warranted to be free from defects in materials or workmanship for the This warranty does not apply to normal wear or damage from misuse, abuse, lifetime of the product.
Need help?
Do you have a question about the HoundAbout and is the answer not in the manual?
Questions and answers