Table of Contents
Advertisement
Advertisement
Table of Contents

Related Manuals for Void Airten


Summary of Contents for Void Airten
- Page 1 Airten User Guide V1.0...
- Page 2 This user guide is subject to change without notice. For the latest online version, visit: www.voidacoustics.com Void Acoustics and the Void logo are registered trademarks of Void Acoustics Research Ltd. in the United Kingdom, USA and other countries; all other Void trademarks are the property of Void Acoustics...
-
Page 3: Table Of Contents
System design principles Loudspeaker placement and positioning Mounting Installation safety Airten pole mounting Attaching the stud bracket Airten wall mounting over bracket Airten well mounting under bracket Airten ceiling mounting Pole mounting on U bracket Airten User Guide V1.0 Page 3... -
Page 4: Safety And Regulations
We declare the under our sole responsibility the following product models: Air Motion, Tri Motion, Airten, Air Stream, Air Vantage, Air 8 Safety instructions - read this first are intended to be used as loudspeakers and are in conformity with Read these instructions. -
Page 5: Limited Warranty
Air Series product (provided it was purchased make the defective or malfunctioning product at an Authorised Void Dealer) that it is free of available to Void free and clear of all liens or other defects in materials and workmanship and that each restrictions. -
Page 6: Unpacking And Checking
If your shipment is incomplete or any of its contents are found to be damaged; inform the shipping company and inform your dealer. Airten loudspeakers are heavy (20 kg/44.1 lbs) and require a minimum two people to lift. • Airten loudspeakers come double boxed and are stapled shut;... -
Page 7: About
In buying this product, you are now part of the Void family and we hope using it brings you years of satisfaction. This guide will help you both use this product safely and ensure it performs to its full capability. -
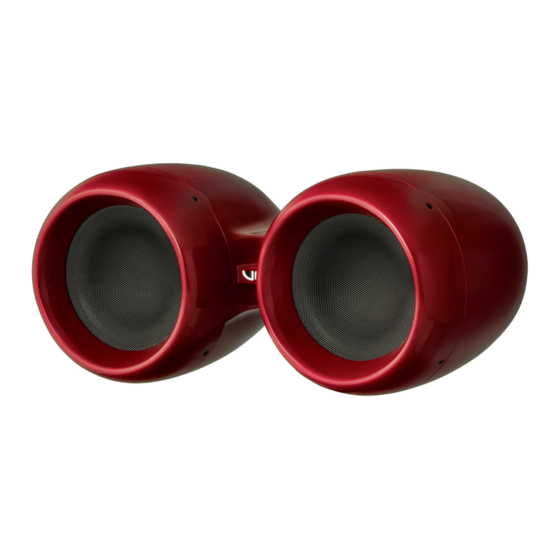
Page 8: Airten Specifications
Fibreglass composite Rigging Integral mounting plate Finish Smooth cellulose Colour Custom colours available upon request Measured in half space AES2 - 1984 compliant Calculated Figure 4.1: Horizontal directivity isobars Figure 4.2: Vertical directivity isobars Airten User Guide V1.0 Page 8... -
Page 9: Airten Dimension
4 About 4.5 Airten dimensions 50.8 (2”) 681 (26.8”) 330 (13”) 681 (26.8”) 681 (26.8”) Figure 4.3: Dimensions Airten User Guide V1.0 Page 9... -
Page 10: Cabling And Wiring
5 Cabling and wiring 5.1 Electrical safety To avoid electrical hazards please note the following: • Do not access the inside of any electrical equipment. Refer servicing to Void- approved service agents 5.2 Cable considerations for fixed installations We recommend specifying installation-grade Low Smoke Zero Halogen (LSZH) cables for permanent installations. -
Page 11: Bias V3/V9 Speakon
Max parallel units 5.5 Bias VQ speakON wiring Figure 5.4: Bias VQ Bias VQ Single channel Output LF (2 x 10”) and HF (1”) 1 (4 Ω load to amplifier) Max quantity per channel Airten User Guide V1.0 Page 11... -
Page 12: Bias D1/Q2 Phoenix Wiring
Max parallel units 5.7 Bias Q5 speakON wiring Figure 5.7: Bias Q5 Bias Q5 Output 1 Output LF (2 x 10”) and HF (1”) 2 (2 Ω load to amplifier) Max quantity per channel Airten User Guide V1.0 Page 12... -
Page 13: System Design
*100 Hz Linkwitz-Riley 24 dB 6.2 System design principles Airten loudspeakers can be arrayed as a single pair facing forward to provide a wide stereo image. Figure 6.1: Airten single pair arrangement For applications requiring wide horizontal coverage, use two Airten in pairs, angled at about 35°. - Page 14 For temporary installation, a popular system configuration is two stacks consisting of Stasys 118, with an Airten on a pole mount. This raises the Airten to a useful height above the audience, and the sensitivity of the Stasys 118 matches the Airten well. This system is suitable for events of up to 250 people.
-
Page 15: Loudspeaker Placement And
6 System design 6.3 Loudspeaker placement and positioning When deploying Airten, it is important to consider the speakers’ vertical position to maximise coverage in the vertical axis. Horizontal loudspeaker dispersion figures dictate the coverage of the loudspeaker, left to right, to the -3 dB points. - Page 16 6 System design Figure 6.7: Multi point loudspeaker arrangement In the horizontal plane rotate the Airten toward the audience area at an angle such that the centre line of the dispersion from each loudspeaker meets about two thirds of the way towards the rear of the audience area.
-
Page 17: Positioning
6 System design Avoid directing the Airten straight forward. This will result in a proportion of the power being directed towards the walls, creating possible reflective issues, as well as causing a gap in coverage at the centre of the audience area. -
Page 18: Mounting
Do not use a telephone (even if hands-free) whilst rigging. Always concentrate fully on the rigging operation • Do not rig equipment that is worn, damaged, corroded, mishandled or over-stressed in any way • Use only Void-approved mounting equipment and accessories. Airten User Guide V1.0 Page 18... -
Page 19: Airten Pole Mounting
Lay a soft lint free rug clear of debris on the ground to avoid damage to the loudspeaker. Place the Airten with the horns face down and remove all four M8 socket cap Allen bolts. Figure 7.2: M8 socket cap removal... - Page 20 Figure 7.4: Air Series pole mount bracket fixing Step 4: After erecting the pole use two people to lift the Airten loudspeaker into position taking care to use the safe handling positions in section 3. Figure 7.5: Air Series pole mount positioning...
-
Page 21: Attaching The Stud Bracket
Lay a soft lint free rug clear of debris on the ground to avoid damage to the loudspeaker. Place the Airten with the horns face down and remove all four M8 socket cap Allen bolts. Figure 7.8: M8 socket cap removal... - Page 22 The U bracket is threaded for the bolt on one side only. Insert the M10 x 70 mm bolt through the non-threaded side and tighten. Then tighten the M10 Aerotight nut. Figure 7.11: Air Series stud mount U bracket fixing Airten User Guide V1.0 Page 22...
-
Page 23: Airten Wall Mounting Over Bracket
3. Figure 7.13: Airten loudspeaker positioning Step 2: Lower the Airten into place and attach the with M10 Aerotight bolt below but do not tighten. Figure 7.14: Airten loudspeaker fixing Airten User Guide V1.0... - Page 24 7.4 Airten wall mounting over bracket Step 3: Rotate the Airten loudspeaker into the desired position and tighten the M10 Aerotight bolt. Figure 7.15: Airten loudspeaker positioning Airten User Guide V1.0 Page 24...
-
Page 25: Airten Well Mounting Under Bracket
7.5 Airten wall mounting under bracket Parts required: • WHD 75 wall/ceiling mount • Multi bracket extension Note: All eight bolts must be fitted when securing the bracket to the wall. Figure 7.16: WHD wall/ceiling mount with extension piece Step 1: Attach the extension piece to the WHD 75 wall/ceiling mount with the M10 Aerotight nut. - Page 26 7.5 Airten wall mounting under bracket Step 3: Rotate the Airten loudspeaker into the desired position and tighten the M10 Aerotight bolt. Figure 7.19: Airten fixing Airten User Guide V1.0 Page 26...
-
Page 27: Airten Ceiling Mounting
All eight bolts must be fitted when securing the bracket to the wall. Figure 7.20: Air series ceiling bracket Step 1: Lift the Airten into position making sure to hold it by the safe lifting positions detailed in section 3. Figure 7.21: Airten positioning... - Page 28 Attach the secondary bond (safety wire) to the central box section. The safety wire must be rated to 20 kg with a safety factor conforming to local regulations. Figure 7.23: Safety wire attachment Figure 7.24: Safety wire attachment detail Airten User Guide V1.0 Page 28...
-
Page 29: Pole Mounting On U Bracket
Step 1: Remove the M12 bolt from the pole mount bracket. Figure 7.26: Pole mount bracket removal Step 2: Mount the pole mount bracket to the U bracket. Figure 7.27: Mounting to the U bracket Airten User Guide V1.0 Page 29... - Page 30 7.7 Pole mounting on U bracket Step 3: Lift the Airten loudspeaker into position taking care to follow the safe handling positions detailed in section 3. Figure 7.28: Positioning the loudspeaker Step 4: Adjust the loudspeaker into the desired position and then tighten the wing nut on the pole mount bracket.
- Page 31 Before returning your faulty product for repair, please remember to get an R.A.N. (Return Authorisation Number) from the Void dealer who supplied the system to you. Your dealer will handle the necessary paperwork and repair. Failure to go through this return authorisation procedure could delay the repair of your product.
- Page 32 The external dimensions shall be (H) 303 mm x (W) 681 mm x (D) 330 mm (11.9” x 26.8” x 13”). Weight shall be 20 kg (44.1 lbs). The loudspeaker shall be the Void Acoustics Airten V2. Airten User Guide V1.0...
- Page 34 North America Void Acoustics North America 503-854-7134 sales.usa@voidacoustics.com Head Office Void Acoustics Research Ltd Unit 15 Dawkins Road Industrial Estate Poole Dorset BH15 4JY England +44 (0) 1202 666 006 info@voidacoustics.com Registered in England & Wales No. 07533536 www.voidacoustics.com...
Need help?
Do you have a question about the Airten and is the answer not in the manual?
Questions and answers