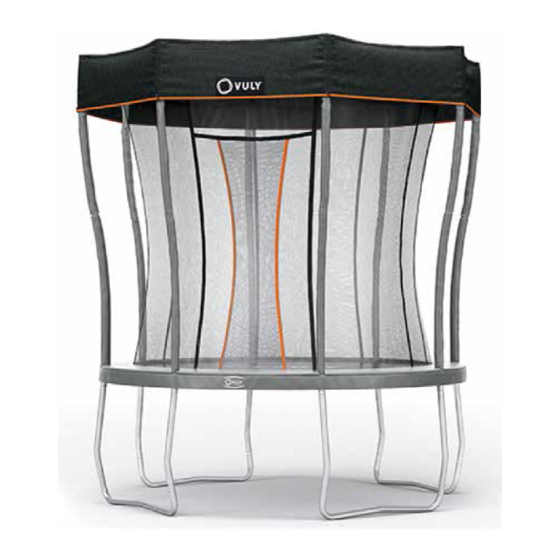
Summary of Contents for Vuly ULTRA
- Page 1 Ultra ASSEMBLY MANUAL ATTENTION! SAFETY INFORMATION, INSTALLATION, CARE AND MAINTENANCE INSTRUCTIONS. READ PRIOR TO ASSEMBLING AND USING THE TRAMPOLINE.
-
Page 3: Table Of Contents
Contents Read and follow all instructions in this manual before Responsibility rests with the owner and supervisors of using your trampoline, and do not use the trampoline in the trampoline to make sure that all users are aware of any way that is not described in this manual. the practices specified in this manual. -
Page 4: Disclaimer
The following Conditions of Sale will apply to, and bind the Vuly, its employees, directors and agents are not liable to purchaser of, any Vuly Trampolines Pty. Ltd. ABN: 91 160 793 the customer, their dependents or legal representatives 706 product. -
Page 5: Care And Maintenance
• Wipe dry with an absorbent cloth any water left after rain, Record your date of purchase here: cleaning or use of the Vuly Mister accessory. The mat may discolour or form spots, if left to dry in the sun. -
Page 6: Inspection Checklist
Improper use of, or behaviour on, your trampoline can lead to serious injury. Please follow these usage and behaviour If you discover any safety issues, do not use the trampoline. instructions to ensure safe play. Contact Vuly to order and replace any parts. 3.1. Safe use information Frame •... -
Page 7: Basic Trampolining Instructions
3.3. Basic trampolining instructions This trampoline is a domestic trampoline, not a gymnastics trampoline. You will get the safest and best use from it by following these basic principles: • Do not attempt or allow somersaults on the trampoline. Landing on your head or neck while doing somersaults can cause serious injury, paralysis or even death. -
Page 9: Installation
4.0. Installation 4.1. Location planning • Place the trampoline on a flat, level surface with impact attenuating properties – such as grass. • Ensure that the trampoline is sufficiently stable, to prevent the trampoline from tipping over or blowing away. Sandbags or pegs may be suitable anchorage devices. -
Page 10: Assembly Instructions
Lower Net Poles Curved Poles Straight Poles T-Joiner W-Pole Spring tool 4.3. Assembly instructions – Vuly Ultra PRE-ASSEMBLY REMEMBER: WEAR THE VULY • Find level ground, and make sure that there are no GLOVES AT ALL TIMES WHEN obstructions nearby. - Page 11 Frame STEP A. Lay out each Curved Pole in a circle. Ensure that the punch-lines are facing upwards. B. Position each T-Joiner in the gaps around the Curved Poles. Ensure that the push-button holes are facing downwards. C. Place Straight Poles with each T-Joiner. Ensure that they are bending inwards.
- Page 12 C. Repeat for each Spring, orange D-shackle and second Spring hole that is to the right of every T-Joiner. Remember: Check that the Vuly logo is horizontal when looking from between two W-Poles and that only orange D-shackles are connected.
- Page 13 Safety Net STEP Unravel your Safety Net and lay it atop your Jump Mat. STEP A. Find the the Batch Tag on the Safety Net that is to the left of the door, and rotate the Safety Net so that this Batch Tag lines up with the Batch Tag on the Jump Mat.
- Page 14 Place the Safety Padding onto the Jump Mat and Safety Net. Unfold and position it to cover the Springs. Ensure that all openings in the Safety Padding are over the Net Pole holes in the T-Joiners and that the Vuly logo lines up with the centre of the entrance. STEP A.
- Page 15 Remember: Ensure that the Safety Net is correctly assembled. A properly installed Safety Net is crucial to protect against injuries. WARNING: Make sure that all push buttons are locked and secured before using your trampoline. Bouncing on a trampoline with push buttons that are not locked will cause damage and injury. CONGRATULATIONS! You have finished assembling your Ultra trampoline.
-
Page 16: Product Registration
Customers who purchase directly from Vuly (through VulyPlay. Vuly offers the longest and most extensive warranties in com, at the Vuly Showroom or over the phone) automatically the market on all our trampoline models. We provide have their product registered. -
Page 17: Warranty Claims
As outdoor products that are actively used, trampolines and their accessories will experience wear and tear over time. 7.4. Warranty Claims If a customer believes that a Vuly product is faulty or defective, they must discontinue use and submit a Warranty Claim. 7.3.2. Damage through weather conditions A customer must not attempt to use a product if any part is Damage to the product that results from weather events –... -
Page 18: Australian Consumer Law
Products sold alongside Vuly that are not Vuly-branded are subject to the warranties provided by the companies that supply them. The customer must contact these external companies to make a warranty claim; Vuly itself will not assess claims made against non-Vuly products. 7.5. Australian Consumer Law Our Goods come with guarantees that cannot be excluded under the Australian Consumer Law. - Page 20 Vuly warranty policies, terms and conditions.


Need help?
Do you have a question about the ULTRA and is the answer not in the manual?
Questions and answers