
Related Manuals for Cyrus 6 DAC


Summary of Contents for Cyrus 6 DAC
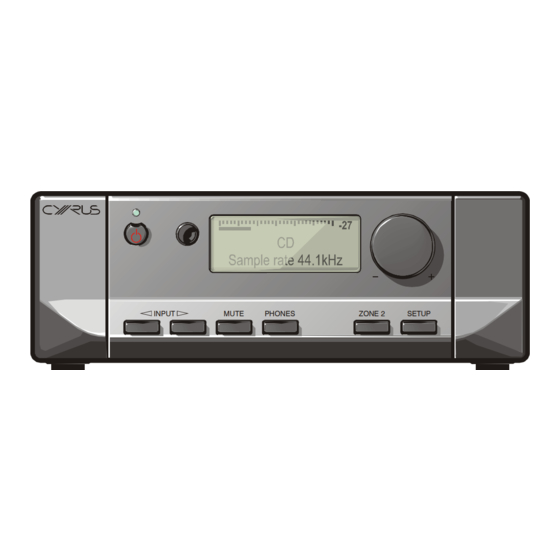
- Page 1 ENGINEERED TO EN TER TA IN Cyrus 6 DAC, Cyrus 8 DAC, Cyrus 8 Qx DAC Digital amplifiers Sample rate 44.1kHz INPUT MUTE PHONES ZONE 2 SETUP...
- Page 2 Cyrus factory. In addition, any solder or solder‐paste used in the repair process must not contain lead. If in any doubt about the correct procedures, contact the Cyrus Service department for advice. SOUND QUALITY Preservation of the ‘factory’ sound is a priority when servicing a product for a Cyrus owner. For this reason, please ensure that only original specification components are used, sourced where necessary from the Service Department at the Cyrus factory. Use of inferior substitute components may significantly degrade the sound quality. © Cyrus Audio Ltd June 2014 ...
-
Page 3: Table Of Contents
INDEX Model differences ................ 2 Technical specifications ............... 3 Type identification ............... 4 SMD component replacement ............. 5 Block diagram ................ 7 Technical description .............. 8 Front panel control PCB ............. 11 Fault finding ................ 12 Use with PSX‐R ................ 16 Quiescent current setting ............ 17 DC offset adjustment .............. 18 MC‐BUS operation .............. 19 Flash software ................ 20 Chassis parts list ................. 21 Front panel parts list .............. 23 Main PCB part list ............... 24 Sub PCB part list ................. 35 Circuit diagrams ................. 39 © Cyrus Audio Ltd June 2014 1 Cyrus 6 DAC, Cyrus 8 DAC service manual Issue 1 ... -
Page 4: Model Differences
Cyrus 6 DAC delivers 40W continuous power into 8 . Cyrus 8 DAC delivers 70W continuous power into 8 . The Qx high performance digital variant, the Cyrus 8 Qx DAC, adds an upgraded D/A converter module to the digital stage of the Cyrus 8 DAC. The Cyrus 8 DAC and Cyrus 8 Qx DAC include connection for a PSX‐R upgrade power supply. The power feed from the regulated PSX‐R is fed to the preamplifier stages. Model upgrades The Cyrus factory offers owners the opportunity to upgrade to a higher specification model. Some of these upgrades may be available as kits to enable a Cyrus authorised service agent to perform the upgrade. In these cases detailed instructions and kits of original parts will be available from the Cyrus service department. ... -
Page 5: Technical Specifications
TECHNICAL SPECIFICATIONS Cyrus 6 DAC analogue specification Continuous Power ....... 4 0W/CH (both driven into 8) 50W/CH (both driven into 4) Burst Power ......... 1 90W (IHF, one channel driven into 1) Distortion .......... 0 .003%, 1kHz (into 8) Frequency Response ...... ‐ 3 dB at 0.1Hz and 100kHz Damping Factor ........ 1 50 Sensitivity .......... L ine: 179mV for 40W Input impedance ........ 4 0k ... -
Page 6: Type Identification
This will be either 230V For use on nominal 220V ‐ 240V AC mains supply. 115V For use on nominal 110V ‐ 120V AC mains supply. Power consumption The maximum power consumption figure is indicated. Changing the supply voltage rating It is possible to change the supply voltage rating of an amplifier between 115V and 230V settings. The following additional parts will be required from the Cyrus parts department – Main power transformer of the correct rating. Mains fuse of the correct rating. Rating label that indicates the new supply voltage. Power cord with the correct termination. Replacement speaker sockets (4mm for 115V operation, BFA for 230V operation). ... -
Page 7: Smd Component Replacement
SMD COMPONENT REPLACEMENT Handling SMD resistors and capacitors are widely used in the Cyrus range of products. When handling SMD components, certain precautions should be observed‐ Handling SMD resistors and capacitors Always store SMD components in their original packaging or in a cool dry environment. Always handle SMD resistors and capacitors with tweezers or a vacuum pencil. Never handle SMD resistors and capacitors with fingers. Hold the SMD component by the body, not by the ends. Do not use SMD resistors or capacitors if the ends are dirty or discoloured. Do not use SMD resistors or capacitors if they have been dropped on the floor‐ they may be internally damaged. Always use replacement components of the correct size and shape. SMD components are available in many different packages. Where possible, order original parts from Cyrus. Handling SMD ICs Always store these components in their original packaging or in a cool dry environment. Always handle SMD transistors and ICs with tweezers or a vacuum pencil. Never handle SMD transistors and ICs with fingers. Ensure that the connection pins of larger multi‐pin ICs are not deformed or damaged ... - Page 8 1. Using fine tipped side cutters or tweezer cutters, snip all the leads of the device and remove the IC body. 2. Desolder the leads from the PCB pads. 3. Clean up the PCB with solder braid. Removing SMD ICs with a hot air SMD tool 1. Fit a suitable size tip for the IC being removed. 2. Heat the IC evenly until the solder melts. 3. Remove the IC with tweezers. Fitting replacement ICs to the PCB with a soldering iron 1. Check that the pins of the IC are not distorted. 2. Using tweezers, position the IC over the footprint. 3. Check that all the IC pins are correctly aligned with the pads. 4. With a very fine tip soldering iron, solder in the pins at the corners of the IC. 5. Re‐check the alignment and correct if necessary. 6. When the alignment is OK, solder the remaining pins of the IC to the PCB. © Cyrus Audio Ltd Jun 2014 6 Cyrus 6 DAC, Cyrus 8 DAC service manual Issue 1 ...
-
Page 9: Block Diagram
BLOCK DIAGRAM © Cyrus Audio Ltd Jun 2014 7 Cyrus 6 DAC, Cyrus 8 DAC service manual Issue 1 ... -
Page 10: Technical Description
USB type socket, the power supply for IC601 is powered down, stopping the clock for IC601. When enabled, and with a USB audio signal connected, IC601 will re‐format the audio signal to IEC958/SPDIF format which is routed to IC701, the digital input switch. The I S audio data from the input switch IC701 is fed to IC801, a stereo D/A Converter. The D/A Converter converts the digital audio into an analogue output. This is amplified and filtered by IC802 before being passed to the DIG input of IC101 (the input switch on the main analogue amplifier PCB) via CON100. The digital audio signals from IC801 are also fed to the Qx DAC upgrade connector CON902. If a Qx upgrade DAC is fitted to a Cyrus 8 DAC, a flexfoil cable is fitted between CON902 and the Qx DAC PCB to connect digital audio and power etc to the Qx DAC. The audio output of the Qx DAC is connected to CON100 on the main PCB. In this configuration, the audio output cable of the Digital Input module is connected to a spare connector CON905. The power for the digital input PCB is supplied from a separate low voltage winding of the main power transformer. This is then rectified and sub regulated to a number of individual supplies, one 3.3V and two 5.0V. The rectified and unregulated supply is also passed directly to the main analogue amplifier PCB to provide power for the LCD backlight. The 15V power supplies for the analogue post DAC filter are provided from the main analogue amplifier PCB. When the amplifier is set to standby the power to the whole digital input PCB is removed. ... - Page 11 Power for the display backlight and the digital input PCB is provided separately from a low voltage winding of the main power transformer. The power supplies for the main amplifier (VCC) are 42V (Cyrus 8 DAC) or 39V (Cyrus 6 DAC). These are protected by fast blow fuses FS401 and FS402 on the main PCB. In addition a regulated 42V is derived from a charge pump circuit and supplies the low current section of the power amplifiers. A regulated power supply of 15V is derived from the power supply for the main amplifier via regulators VR402 and VR403. The 15V supplies are used for the input ...
- Page 12 The front panel control system PCB is connected to the main PCB via a single 25 way flexible cable. A second 13 way flexible cable connects directly from the front panel PCB to the digital PCB. Note that this flexible cable is inverted compared to the 25 way cable. When correctly installed, the writing will be visible on the 13 way cable, and not visible on the 25 way cable. The front panel control PCB changed during the course of manufacturing these amplifiers. The second‐generation PCB includes a push function on the rotary encoder, whereas the first‐ generation PCB does not. More information about the differences between the two versions is shown on the next page. © Cyrus Audio Ltd Jun 2014 10 Cyrus 6 DAC, Cyrus 8 DAC service manual Issue 1 ...
-
Page 13: Front Panel Control Pcb
In the event that a front panel control PCB requires replacement, the replacement PCB supplied will be the same type as the original. When ordering a replacement PCB, always quote the serial number of the amplifier and state whether the rotary control has a push function. NOTE: The two types of control PCB are not directly interchangeable. To replace an original 'non‐push' type PCB with the later type 'push' PCB would require changes in other circuit areas and also updated user instructions. The amplifier operational software is located on the front panel control PCB. Front panel control PCBs without push control Replacement PCBs are supplied 'clean' of software so when replacing this type it will always be necessary to program the PCB via the amplifier programming connector. Front panel control PCBs with push control Replacement PCBs are supplied pre‐programmed so can be fitted without re‐programming via the amplifier. Refer to page 20 for more information about programming the amplifiers. © Cyrus Audio Ltd Jun 2014 11 Cyrus 6 DAC, Cyrus 8 DAC service manual Issue 1 ... -
Page 14: Fault Finding
This fault‐finding guide is not exhaustive, but should help a competent engineer trace faults within the amplifier. If you require more technical help than this guide, contact the Cyrus Service Department. CAUTION The high‐efficiency heat‐transfer insulation pads fitted between the power amplifier output ... - Page 15 If the amplifier switches on, check the DC offset voltage at the speaker terminals. The DC offset measured should read within ±50mV. If the voltage is greater than this then first try to set the DC offset voltage (see page 18). If the voltage will not set within the band specified, the power amplifier may well be faulty. If the DC offset is within limits, then it is safe to connect a dummy load or loudspeakers. At this point it is advisable to measure the power output and THD from the amplifier to establish if it will meet specification (front page of this service manual) and determine if there is a fault. Power amplifier faults DC rail fuses. If the DC offset cannot be adjusted to spec or if a power amplifier stage is not functioning correctly, then disconnect the power and check the DC rail fuses on the main PCB. Replace these if necessary. If they blow again, there is probably a semiconductor fault in the power amplifier or power supply. NOTE:‐ If the standby light flashes red when the amplifier is switched on this indicates that a DC fuse may be blown. Power supply voltage check. If the DC fuses are OK, then check initially all the voltages in the power supply of the amplifier, including the regulated power supply ±42V. If the regulated supply needs repair, then check against the schematic to find failed components and replace them. If the voltages check OK then there is probably a semiconductor fault in the left or right power amplifier. Semiconductor faults. There is no exact fault‐finding procedure for the power amplifier circuits, however it is recommended that a DVM set to ‘diode test’ should be used to thoroughly check each semiconductor in the power amplifier stage, also set the DVM to ohms and check all low value resistors such as R214‐219 (left channel). Remove any suspect transistors and re‐check them out of circuit. Replace as necessary with the correct original components supplied by the Cyrus Service Department. © Cyrus Audio Ltd Jun 2014 13 Cyrus 6 DAC, Cyrus 8 DAC service manual Issue 1 ...
- Page 16 PCB as this cannot be powered for tests once it is removed from the amplifier. Connect a digital input to one of the electrical or optical inputs of the amplifier. Select this input and check if the sample rate is correctly indicated on the display. If the sample rate reads OK, this suggests that the digital input IC (IC701) is working correctly. Check the other digital inputs in the same way. The USB input may be checked by connecting a computer as a source with an audio signal playing. If all digital inputs are working, but USB is not, then the USB decoder IC601 or one of the associated components may be faulty. If the input selector IC is working for all inputs, then check both left and right channels at the audio output of the amplifier using one of the digital inputs as a source. If one or both of the © Cyrus Audio Ltd Jun 2014 14 Cyrus 6 DAC, Cyrus 8 DAC service manual Issue 1 ...
- Page 17 FAULT FINDING audio channels is not working, there may be a fault with the DAC (IC801), filter IC (IC802) or one of the components associated with these. If a fault is found from these tests, the next step recommended is to check the power supplies to the plug‐in daughter PCB. Remove the PCB for these tests, then switch on the amplifier and check that the correct voltages are supplied at the PCB connector from the main PCB. If the voltages measure correctly, then the fault must be on the sub PCB. © Cyrus Audio Ltd Jun 2014 15 Cyrus 6 DAC, Cyrus 8 DAC service manual Issue 1 ...
-
Page 18: Use With Psx-R
USE WITH A PSX‐R Use with a PSX‐R When a PSX‐R power supply is connected to a Cyrus 8 DAC, the presence of power as the PSX‐R is switched from standby automatically disconnects the feed from the internal power supply to the preamplifier regulators (via switch transistors T406/T402). The power from the PSX‐R is then fed to the preamplifier regulators via D451/D454. No modification is necessary to the amplifier for use with a PSX‐R, it may be connected without any changes to the amplifier. The connections between the amplifier and PSX‐R function as follows‐ Pin 1 (Standby) This is an output from the amplifier to send a standby control message (logic 1, +5V) to the ... -
Page 19: Quiescent Current Setting
Switch on the power to the amplifier, and bring it out of standby. If a mains voltage adjuster (variac) is available, use it to set the mains voltage precisely. Adjust the quiescent setting preset RV201 so that the meter reads 8mV Proceed to connect the DVM to SK206. Adjust the quiescent setting preset RV202 so that the meter reads 8mV. Leave the amplifier to stabilise for fifteen minutes and repeat the adjustments for both channels, taking the setting to 3.2mV 0.25mV. Check periodically and adjust if necessary to 3.2mV 0.25mV until settled. Also ensure that the nominal mains voltage has not drifted. RV202 RV201 3.2mV SK205 SK206 © Cyrus Audio Ltd Jun 2014 17 Cyrus 6 DAC, Cyrus 8 DAC service manual Issue 1 ... -
Page 20: Dc Offset Adjustment
DC OFFSET ADJUSTMENT DC offset adjustment (no signal condition) The DC offset adjustment sets the DC voltage at the speaker output terminals. DC offset should always be checked as a matter of routine when an amplifier is returned for repair, whether the power amplifier section has required repair or not. The following procedure should be followed exactly to set the DC offset voltage to the correct value. If the DC offset voltage will not set correctly, this may indicate a power amplifier fault. Switch off the power to the amplifier. Disconnect all loudspeakers or dummy loads. Connect a DVM set to read mV to the left loudspeaker terminals (a short cable terminated with Cyrus speaker connectors is recommended to make certain contact with the terminals). Switch on the power to the amplifier, and bring it out of standby. Set the volume level to ‐ 15dB. Leave the amplifier to settle for 5 minutes. Check the voltage reading on the DVM. A voltage within the range 0V 50mV is acceptable and will not require any adjustment. If the voltage is outside of these limits, adjust RV203 to set the left channel offset within the range 0V 50mV. Connect the DVM to the right channel. Repeat the voltage check to the same limits and adjust RV204 to correct the right channel offset if necessary. ... -
Page 21: Mc-Bus Operation
MC‐BUS OPERATION MC‐BUS MC‐BUS is a system which provides communication between the control systems of a number of Cyrus products. The communication takes the form of a serial data stream which is sent from a 'master' product and received and repeated by 'slave' products. The data is thus passed from one product to another around a loop. The master product should then receive the message back which confirms that loop connections have been correctly made. Cyrus ... -
Page 22: Flash Software
CAUTION: Ensure you have a new firmware file to hand before starting the process. Do not disconnect the cable until the new software is installed. 1. Disconnect the mains from the product. 2. Connect a mini‐USB cable to a free USB port on a computer. 3. Whilst pushing the rotary control in on the front panel, connect the mini‐USB cable to the socket on the back of the display. 4. A new window will pop up on the PC which will show the current firmware.bin file. 5. Delete the existing firmware.bin file. 6. Copy the new firmware.bin file supplied by Cyrus to this folder. 7. Once the file has been copied, remove the USB cable. 8. Power up and check the new software version as described above. © Cyrus Audio Ltd Jun 2014 20 Cyrus 6 DAC, Cyrus 8 DAC service manual Issue 1 ... -
Page 23: Chassis Parts List
CHASSIS PARTS LIST 1& Under PCB © Cyrus Audio Ltd Jun 2014 21 Cyrus 6 DAC, Cyrus 8 DAC service manual Issue 1 ... - Page 24 T4AL AC mains fuse 115V 8 DAC only 16 AM‐CB13W/300 13 way flexfoil cable (sub PCB) AM‐TX230/5M2 Power transformer 230V 6 DAC only AM‐TX230/8M2 Power transformer 230V 8 DAC only 17 AM‐TX115/5M2 Power transformer 115V 6 DAC only AM‐TX115/8M2 Power transformer 115V 8 DAC only 18 AM‐TXWAS/95 Neoprene insulator 19 AM‐MBSTD/DXP* PCB assembly including main and sub PCBs. 6 DAC, 8 DAC 20 AM‐CBPOW/280 Power inlet cable 21 AM‐BACKP/8XP Rear panel *When replacing these PCBs ensure that for a 8 DAC amplifier R520 is not fitted, for a 6 DAC a zero ohm link is fitted. © Cyrus Audio Ltd Jun 2014 22 Cyrus 6 DAC, Cyrus 8 DAC service manual Issue 1 ...
-
Page 25: Front Panel Parts List
3 AM‐LENSM/02 Remote eye lens 4 AM‐DISPW/ Display window 5 AM‐RKNOB/B Volume control knob plastic insert AM‐CKNOB/ Volume control knob black 6 AM‐CKNOB/S Volume control knob silver 7 AM‐BPPLT/V0 Base plate 8 AM‐BFOOT/ Rubber foot AM‐FACXP/B Front facia black 9 AM‐FACXP/S Front facia silver AM‐FRONT/02 Technical moulding (black front panel) 10 AM‐FRONT/S Technical moulding (silver front panel) DX‐MBDIS/ Display PCB including LCD without push control* 11 DS‐MBDIS/ Display PCB including LCD with push control* * Refer to page 11 to identify the correct part number required. © Cyrus Audio Ltd Jun 2014 23 Cyrus 6 DAC, Cyrus 8 DAC service manual Issue 1 ... -
Page 26: Main Pcb Part List
MF 1/8W 1% R185 SMD0805 100k MF 1/8W 1% R186 SMD0805 100k MF 1/8W 1% R187 SMD0805 1k MF 1/8W 1% R188 SMD0603 1k5 MF 1/16W 1% R189 SMD0603 1k5 MF 1/16W 1% R190 SMD0603 1k5 MF 1/16W 1% R191 SMD0603 1k5 MF 1/16W 1% © Cyrus Audio Ltd Jun 2014 24 Cyrus 6 DAC, Cyrus 8 DAC service manual Issue 1 ... - Page 27 10k MF 1/8W 1% R256 SMD0805 750R MF 1/8W 1% R257 SMD0805 1k MF 1/8W 1% R258 AXIAL0.4 3R9 MF 1/2W 1% R259 AXIAL0.4 3R9 MF 1/2W 1% R260 SMD0603 8k2 MF 1/16W 1% R261 SMD0603 8k2 MF 1/16W 1% R262 SMD0603 Not fitted © Cyrus Audio Ltd Jun 2014 25 Cyrus 6 DAC, Cyrus 8 DAC service manual Issue 1 ...
- Page 28 MF 1/8W 1% R332 SMD0805 100R MF 1/8W 1% R333 SMD0805 100R MF 1/8W 1% R334 SMD0805 100R MF 1/8W 1% R335 SMD0805 100R MF 1/8W 1% R336 SMD0805 100R MF 1/8W 1% R337 SMD0805 100R MF 1/8W 1% R338 SMD0805 22k MF 1/8W 1% © Cyrus Audio Ltd Jun 2014 26 Cyrus 6 DAC, Cyrus 8 DAC service manual Issue 1 ...
- Page 29 R449 SMD0603 1M MF 1/16W 1% R450 SMD0805 470k MF 1/8W 1% R451 SMD0805 27k MF 1/8W 1% R452 SMD0805 130k MF 1/8W 1% 22k may be fitted for earlier R453 SMD0805 27k MF 1/8W 1% amplifier PCBs. If so, this should be changed to 27k. R454 SMD0805 160k MF 1/8W 1% R455 SMD0805 10k MF 1/8W 1% © Cyrus Audio Ltd Jun 2014 27 Cyrus 6 DAC, Cyrus 8 DAC service manual Issue 1 ...
- Page 30 R517 SMD0805 47k MF 1/8W 1% R518 SMD0805 47k MF 1/8W 1% R519 SMD0805 47k MF 1/8W 1% R520 SMD0805 0R MF 1/8W 1% Cyrus 6 variants SMD0805 Not fitted Cyrus 8 variants Key: MF = metal film. NFR = non‐flammable resistor. MRS25 = axial metal film resistor SMD‐0805 = refers to surface mount device size profile 0805 PRESETS RV201 100R 150mW 10% RV202 100R 150mW 10% ...
- Page 31 CP 50V 10% X7R dielectric C274 SMD0805 1uF CP 25V 10% X7R dielectric C275 SMD0805 1uF CP 25V 10% X7R dielectric C280 RB.2/.3 100uF BP 25V 20% NK101M025F115T C281 RB.2/.3 100uF BP 25V 20% NK101M025F115T C301 RB.2/.3 47uF EL 100V 20% YXF series 105 degC C302 RB.2/.3 47uF EL 100V 20% YXF series 105 degC C304 RB.2/.5 47uF EL 100V 20% RJ4 series 105 degC © Cyrus Audio Ltd Jun 2014 29 Cyrus 6 DAC, Cyrus 8 DAC service manual Issue 1 ...
- Page 32 300mA Signal diode D109 SOT23 BAV99 300mA Signal diode D110 SOT23 BAV99 300mA Signal diode D111 SOT23 BAV99 300mA Signal diode D112 SOT23 BAV99 300mA Signal diode D113 SOT23 BAV99 300mA Signal diode D114 SOT23 BAV99 300mA Signal diode D115 SOT23 BAV99 300mA Signal diode © Cyrus Audio Ltd Jun 2014 30 Cyrus 6 DAC, Cyrus 8 DAC service manual Issue 1 ...
- Page 33 D405 SOT23 BAS19 300mA Signal diode D406 SOT23 BAS19 300mA Signal diode D407 1SR154‐400 1A Rectifier Diode D408 1SR154‐400 1A Rectifier Diode D413 SOT23 BAS19 300mA signal diode D416 SOT23 BAS19 300mA signal diode D431 SOT23 BAS19 300mA signal diode D448 DF04S 1A 400v SMD Bridge © Cyrus Audio Ltd Jun 2014 31 Cyrus 6 DAC, Cyrus 8 DAC service manual Issue 1 ...
- Page 34 NPN Power Transistor T221 TO‐3P 2SA1386 PNP Power Transistor T222 TO‐126 2SA1358‐Y PNP Power Transistor T223 TO‐3P 2SC3519 NPN Power Transistor T225 SOT23 BC850C NPN Signal Transistor T226 SOT23 BC850C NPN Signal Transistor T227 SOT23 BC860C PNP Signal Transistor T228 SOT23 BC860C PNP Signal Transistor © Cyrus Audio Ltd Jun 2014 32 Cyrus 6 DAC, Cyrus 8 DAC service manual Issue 1 ...
- Page 35 IC201 SO‐8 TL072 op amp IC402 SO‐8 LM393 Comparator IC506 SO‐14 74HC14 Hex Invertor VOLTAGE REGULATORS VR100 SOT‐89 78L05 100mA SMD 78L00 series VR101 SOT‐89 79L05 100mA SMD 79L00 series VR401 TO220 7805 1A 78 series reg VR402 TO220 LM317T 1A 78 series reg VR403 TO220 LM337T 1A 78 series reg © Cyrus Audio Ltd Jun 2014 33 Cyrus 6 DAC, Cyrus 8 DAC service manual Issue 1 ...
- Page 36 RAD0.1 2 PIN HEADER OTHER PARTS FS401 20mm Fuse F6.3AL FS402 20mm Fuse F6.3AL FS403 20mm Fuse T2AL Cyrus 8 230V variants only! 20mm Fuse T4AL Cyrus 8 115V variants only! 20mm Fuse T800mAL Cyrus 6 230V variants only! 20mm Fuse T1.25AL Cyrus 6 115V variants only! FS404 T1A Axial fuse T1A FS405 T1A Axial fuse ...
-
Page 37: Sub Pcb Part List
MF 1/8W 1% R905 SMD0805 33k MF 1/8W 1% R906 SMD0805 33k MF 1/8W 1% R907 SMD0805 10k MF 1/8W 1% R908 SMD0603 8k2 MF 1/16W 1% R909 SMD0603 8k2 MF 1/16W 1% R910 SMD0603 1k5 MF 1/16W 1% R911 SMD0603 1k5 MF 1/16W 1% © Cyrus Audio Ltd Jun 2014 35 Cyrus 6 DAC, Cyrus 8 DAC service manual Issue 1 ... - Page 38 16V EL 20% EEEFK1C470UR C807 CAPSMD5.0 47uF 16V EL 20% EEEFK1C470UR C808 SMD0603 100nF CP 50V 10% X7R dielectric C809 SMD0603 100nF CP 50V 10% X7R dielectric C810 SMD0603 100nF CP 50V 10% X7R dielectric C811 SMD0603 100nF CP 50V 10% X7R dielectric C812 SMD0603 100nF CP 50V 10% X7R dielectric C813 SMD0603 1nF CP 50V 5% NPO dielectric © Cyrus Audio Ltd Jun 2014 36 Cyrus 6 DAC, Cyrus 8 DAC service manual Issue 1 ...
- Page 39 BZX84C3V6 3V6Zener D601 SOT23 BZX84‐C3V6 Diode BZX84C3V6 3V6Zener D602 SOT23 BZX84‐C3V6 Diode Dual signal Diode common D603 SOT23 BAV70 cathode Dual signal Diode common D604 SOT23 BAV70 cathode D901 DF04S 1A 400v SMD Bridge TRANSISTORS T601 SOT23 BC846C NPN Signal Transistor © Cyrus Audio Ltd Jun 2014 37 Cyrus 6 DAC, Cyrus 8 DAC service manual Issue 1 ...
- Page 40 SK601 USB type B socket Dual phono socket gold SK701 contacts black inserts SK702 Not fitted Stereo Audio Jack Socket. SK901 JACK3.5 Part 2 contains switch half. OTHER PARTS FS901 T1A Radial fuse T1A 396 series TE5 GP1FAV31RKOF Optical receiver GP1FAV31RKOF TORX701 TORX702 GP1FAV31RKOF Optical receiver GP1FAV31RKOF © Cyrus Audio Ltd Jun 2014 38 Cyrus 6 DAC, Cyrus 8 DAC service manual Issue 1 ...
-
Page 41: Circuit Diagrams
CIRCUIT DIAGRAMS Circuit diagram index The Cyrus 6 DAC and Cyrus 8 DAC circuit diagrams are listed below. Main PCB Input selector and volume control ........ 4 0 Power amplifier and DC servo .......... 4 1 Power amp regulator and standby control ...... 4 2 Main PCB power supplies, protection logic ...... 4 3 MC‐BUS, main PCB connectors .......... 4 4 Sub PCB USB decoder ................. 4 5 ... - Page 42 R115 330k C105 100pF R114 330k C104 100pF R113 330k C103 100pF R159 330k C145 100pF R158 330k C144 100pF C102 100pF C101 100pF © Cyrus Audio Ltd Jun 2014 Cyrus 6 DAC, Cyrus 8 DAC amplifier service manual Issue 1...
- Page 43 Main PCB schematic diagram Power amplifier and DC servo © Cyrus Audio Ltd Jun 2014 Cyrus 6 DAC, Cyrus 8 DAC amplifier service manual Issue 1...
- Page 44 Main PCB schematic diagram Power amp regulator and standby control FMMT593 © Cyrus Audio Ltd Jun 2014 Cyrus 6 DAC, Cyrus 8 DAC amplifier service manual Issue 1...
- Page 45 Main PCB schematic diagram Main PCB power supplies, protection logic © Cyrus Audio Ltd Jun 2014 Cyrus 6 DAC, Cyrus 8 DAC amplifier service manual Issue 1...
- Page 46 Main PCB schematic diagram MC-Bus, main PCB connectors © Cyrus Audio Ltd Jun 2014 Cyrus 6 DAC, Cyrus 8 DAC amplifier service manual Issue 1...
- Page 47 Sub PCB schematic diagram USB decoder © Cyrus Audio Ltd Jun 2014 Cyrus 6 DAC, Cyrus 8 DAC amplifier service manual Issue 1...
- Page 48 Sub PCB schematic diagram Digital inputs © Cyrus Audio Ltd Jun 2014 Cyrus 6 DAC, Cyrus 8 DAC amplifier service manual Issue 1...
- Page 49 Sub PCB schematic diagram D/A Converter © Cyrus Audio Ltd Jun 2014 Cyrus 6 DAC, Cyrus 8 DAC amplifier service manual Issue 1...
- Page 50 Sub PCB schematic diagram Power supplies, connectors and headphone amp © Cyrus Audio Ltd Jun 2014 Cyrus 6 DAC, Cyrus 8 DAC amplifier service manual Issue 1...
Need help?
Do you have a question about the 6 DAC and is the answer not in the manual?
Questions and answers