Table of Contents

Related Manuals for Worx S Basic LANDROID


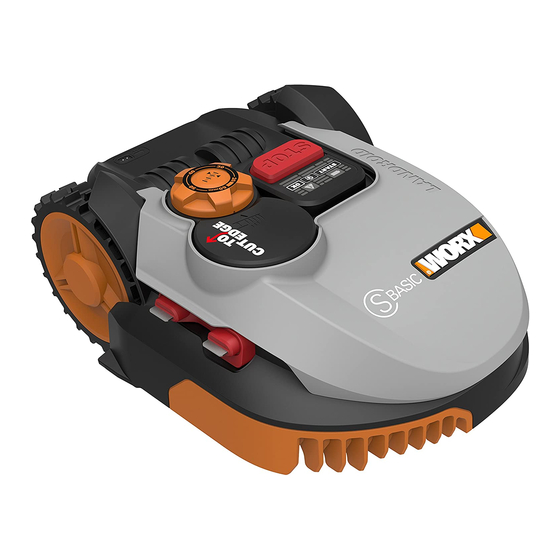
Summary of Contents for Worx S Basic LANDROID
- Page 1 Owner’s Manual of Lawn Mowing Robot Руководство по эксплуатации робота-газонокосилки Robotmuruniiduki kasutusjuhend Zāliena īpašnieka rokasgrāmata Pļaušanas robots Vejos pjovimo roboto naudotojo vadovas...
-
Page 2: Table Of Contents
ORIGINAL INSTRUCTIONS TABLE OF CONTENTS 1. Product Safety 1.1 General & Additional Safety Instruction ® 1.2 Information on the Landroid 2. Component list 3. Control Panel 4. Intended Use ® 5. Understanding Your Landroid ® 5.1 How does my Landroid know what to mow? ®... -
Page 3: Product Safety
1. Product Safety 1.1 General & Additional Safety Instruction WARNING: Read all safety warnings and all instructions. Failure to follow the warnings and instructions may result in electric shock, fire and/or serious injury. Carefully read the instructions for the safe operation of the machine. Save all warnings and instructions for future reference. - Page 4 Recharge only with the charger specified by WORX. Do not use any charger other than that specifically provided for use with the equipment. A charger that is suitable for one type of battery pack may create a risk of fire when used with another battery pack.
-
Page 5: Information On The Landroid
® 1.2 Information on the Landroid WARNING - Robotic lawnmower can be dangerous if incorrectly used. Read through the Operator’s manual carefully and understand the content before using your robotic lawnmower. WARNING - Keep a safe distance from the machine when operating. WARNING –Remove the disabling device before working on or lifting the machine. -
Page 6: Component List
2. Component List Owner’s Manual of Lawn Mowing Robot EN... - Page 7 PROTECTIVE COVER CONTACT PINS CHARGING BASE CHARGING STRIPS CUTTING HEIGHT ADJUSTMENT KNOB REAR DRIVING WHEEL RAIN SENSOR MAIN SWITCH STOP BUTTON 10. CONTROL PANEL 11. FRONT WHEEL 12. CUTTING BLADE 13. BLADE TURNING DISC 14. BATTERY PACK 15. HANDLE 16. POWER ADAPTOR 17.
-
Page 8: Control Panel
Control panel Error indication light Battery indication light Displays error messages Displays battery/machine status HOME ® Sends Landroid to its charging base during operation and activates START charging Starts mowing/Corrects the problem Confirms any setting/ Enters Wi-Fi connection mode STOP ®... -
Page 9: Understanding Your Landroid
® Understanding Your Landroid ® Congratulations on your new purchase of the Landroid and welcome to the care-free life of automatic mowing. In the ® following, we would like to help you better understand how your Landroid thinks. ® 5.1 How does my Landroid know what to mow? ®... -
Page 10: Finding The Charging Base
® 5.2 How does my Landroid know what to mow? ® ® Your Landroid is capable of doing things on its own. The Landroid knows when it needs to go to its Charging Base (3) to charge, can sense when it is raining, can stop itself if it senses a problem, and knows to stop, draw back, and turn around ®... -
Page 11: Cut To Edge
5.3 Cut to edge Off-centered Blade Turning Disc (13) design provides a clean cut with narrowest distance to the boundary or wall. It helps minimize the amount and frequency of manual trimming along the boundary. ® Additionally, the Landroid is designed with a protective cover underneath that prevents objects from touching the turning blades and/or injury. -
Page 12: Boundary Wire Basics
Boundary Wire Basics 6.1 Pegging the Boundary Wire Use the Boundary Wire Distance Gauge (20) to set the correct distance between the wire and the border of your lawn (more than 26cm*). * This is the recommended distance. The provided distance gauge ensures proper installation. -
Page 13: Maintenance
When the cutting blades are dull and worn out, they should be replaced with the ® spare blades provided with your Landroid . Spare blades are also available at your nearest WORX retailer. A. Replace the Blades ®... -
Page 14: Keep It Clean
® Before attempting to replace your Landroid ’s Blades, turn the power off and put on protective gloves and follow these steps: ® Gently flip the Landroid over. Remove the battery cover and remove the battery. Take the screws off the Blades with a screwdriver (See Fig. M) Firmly screw on the new Blades. -
Page 15: Battery Life
8.3 Battery life ® The heart of the Landroid is its 20V Li-Ion Battery. For proper storage of the battery, make sure it is fully charged and kept in a cool dry place between (20°C- 60°C). ® NOTE: The recommend Landroid operation temperature is between 0-55°C. -
Page 16: Function Messages
Function Messages ® The battery indication light on the interface of Landroid indicates the following status: Battery indication light Status Green light on Sufficient power for mowing Red light on Low power, need to recharge Green light flashing Auto charging Red light flashing Battery too hot. -
Page 17: Error Messages
Error indication light Status Blue light flashing four times per cycle Rain delay activated. 10. Error Messages Symptom Cause Action ® 1. Turn Landroid off; ® 2. Take Landroid to an area in your lawn free of obstacles; ® 3. Turn Landroid on. -
Page 18: Troubleshooting
If Landroid runs abnormally once in a while, please try to restart it. If the problem is not resolved, try to removing and reinstalling the battery. If the problem is still not resolved, please contact a WORX. • Do not wash the machine with a high pressure washer. This could cause damage to the battery or the machine. -
Page 19: Environmental Protection
Clean the Contact Pins located on the Poor connection caused by debris on Charging Base and the Charging Strip on the Charging Strip. The charging time is far more ® Landroid using a cloth. than 2h. The charging protection program has Place the charging base in a shady area or activated due to high temperature. - Page 20 Copyright © 2018, Positec. All Rights Reserved.
Need help?
Do you have a question about the S Basic LANDROID and is the answer not in the manual?
Questions and answers