Hakko Electronics FX-951 Instruction Manual
Hide thumbs
Also See for FX-951:
- Instruction manual (8 pages) ,
- Instruction manual (2 pages) ,
- Service manual (27 pages)
Advertisement
Quick Links
®
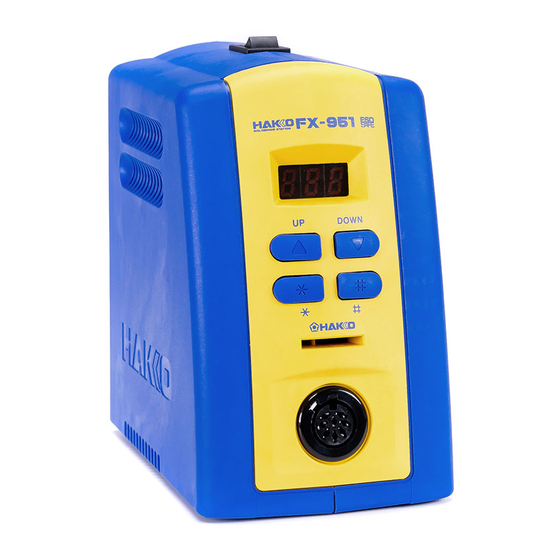
High-output, temperature controlled soldering station
Instruction Manual
Thank you for purchasing HAKKO FX-951 soldering station.
Please read this manual before operating the HAKKO FX-951.
Keep this manual readily accessible for reference.
1. PACKING LIST AND PART NAMES
Please check to make sure that all items listed
below are included in the package.
HAKKO FX-951 soldering station
1
Heat resistant pad
HAKKO FM-2025 soldering iron
1
Iron holder
Control card
1
Instruction manual
Power cord
1
Sleeve
assembly
HAKKO FM-2025
Tip (not included)
HAKKO FX-951
Soldering station
Power cord
Heat resistant pad
2. SPECIFICATIONS
HAKKO FX-951 soldering station
l HAKKO FM-2025 soldering iron
Power consumption
75W
Power consumption
Temperature range
200 - 450°C (400~840°F)
Tip to ground resistance
Temperature stability
±5°C (±9°F)
Tip to ground potential
Length of cord
l Station
Length, (w/o cord)
Output
24V
Weight, (w/o cord)
Dimensions
80 (W) × 130 (H) × 131 (D) mm
NOTE:
Weight
1.2kg
The temperature were measured using the HAKKO 191
thermometer.
This product is protected against electrostatic discharge.
Specifications and design are subject to change without
notice.
3. WARNINGS, CAUTIONS AND NOTES
Warnings, cautions and notes are placed at critical points in this manual to direct the operator's
attention to significant items. They are defined as follows:
WARNING: Failure to comply with a WARNING may result in serious injury or death.
CAUTION : Failure to comply with a CAUTION may result in injury to the operator, or damage to the
items involved. Two examples are given below.
NOTE
: A NOTE indicates a procedure or point that is important to the process being described.
EXAMPLE: An EXAMPLE is given to demonstrate a particular procedure point or process.
When power is ON, tip temperatures will be between 200°C and 450°C. (392°F to 840°F.) To avoid injury
or damage to personal and items in the work area, observe the following:
Do not touch the tip or the metal parts near the tip.
1
Do not allow the tip to come close to, or touch, flammable materials.
1
Inform others in the area that the unit is hot and should not be touched.
1
Turn the power off when not in use, or left unattended.
Turn the power off when changing parts or storing the HAKKO FX-951.
To prevent accidents or damage to the HAKKO FX-951, be sure to observe the following:
Do not use the HAKKO FX-951 for applications other than soldering.
Do not allow the HAKKO FX-951 to become wet, or use it when hands are wet.
Do not modify the HAKKO FX-951.
Use only genuine HAKKO replacement parts.
Do not bend or damage the control card. If the card does become damaged, do not force the card into
Control
the station slot.
card
Do not strike the iron against hard objects to remove excess solder. This will damage the iron.
Be sure the work area is well ventilated. Soldering produces smoke.
While using HAKKO FX-951, don't do anything which may cause bodily harm or physical damage.
4. INITIAL SETUP
A. Iron holder
l Loosen the adjusting screws to change the angle of
the iron receptacle as you like, then tighten the
screws.
Iron holder
l The sponge is compressed. It will swell when mois-
tened with water. Before using the unit, dampen the
70 W (24 V)
sponge with water and squeeze it dry.
< 2 Ω
1. Put the small cleaning sponge in one of the five
< 2 mV
holes in the iron holder base.
2. Add water to the iron holder base. The small
1.2 m (4 ft.)
sponge will keep the large sponge moist through
188 mm (7.4 in.) with 2.4D tip
capillary action.
30 g (0.07 lb.) with 2.4D tip
3. Wet the large sponge, squeeze it dry and put it
on the iron holder base.
B. Handpiece cord assembly
Pass the iron cord through the hole in the heat
resistant pad.
C. Soldering station
CAUTION
Be sure the power switch is OFF before connect-
ing or disconnecting the soldering iron cord. Fail-
ure to do so may result in damage to the circuit
board.
1. Insert the power cord into the receptacle at the
back of the station.
Insert the soldering iron cord into the receptacle at
the front of the station.
2. Set the iron in the iron holder.
3. Plug the power cord into a grounded wall socket.
CAUTION
The HAKKO FX-951 is protected against electro-
static discharge and must be grounded for full ef-
ficiency.
WARNING
CAUTION
CAUTION
Do not set up the iron recep-
tacle too high, the tempera-
ture of the soldering iron will
become very hot.
CAUTION
Do not lay down the iron re-
ceptacle too much, it can be
easy to fall down.
CAUTION
Using the sponge without dampen with water
may damage the tips.
Insert the plug into
the receptacle until
it seats.
Receptacle
To disconnect, pull the plug
from the receptacle whilst
pressing down the tub on
the plug.
5. OPERATION
Displays
Controls and displays
The HAKKO FX-951 has a three-digit display element.
Controls
Depending upon the selected mode, it will display:
• Normal mode:
Sensor temperature (tip temperature)
• Data entry:
Selected quantity (see 'data entry procedures' for
exact characteristics)
• Temperature scale:
°C or °F, depending upon selection
• Error detection:
Refer to 'ERROR MESSAGES' section
In addition, heater lamps will flash when the station
The front panel of the HAKKO FX-951 soldering
has reached the desired temperature, indicating
station has the following controls:
that it is ready for use.
• Four control buttons:
An audible buzzer is provided to alert the operator when:
• The station has reached the set temperature. The
– Initiates a data entry mode.
buzzer will sound once.
– End of sequence signal (terminates a phase
• When the low temperature threshold has been
of a data entry mode); when pressed for less
crossed, the buzzer will sound continuously. This
than one second, displays settings already
buzzer will shutoff when the sensed temperature
stored.
returns to the acceptable range.
• The buzzer will sound once when sleep function is
– Increases the value in the appropriate dis-
activated and the tip temperature starts to decrease.
play window.
• When a foreign substance, an incompatible tip, or
– Decreases the value in the appropriate
the soldering end of the tip is inserted into the
display window.
HAKKO FM-2025, the display will blink and the
buzzer will sound continuously.
• The auto power shutoff is activated and the pow-
er to the heating element is shutoff, the buzzer
will sound three times.
• When the error occurs with the HAKKO FM-
2025, the buzzer will sound continuously.
l Operation
CAUTION
1. Turn the power switch ON.
The HAKKO FX-951 is preset at 350°C at the factory.
Check the temperature setting by pressing the
2. Once the temperature is reached, the buzzer
The set temperature will be displayed for two seconds.
sounds. The heater lamp at the lower right of the
temperature display
starts blinking.
CAUTION
Place the iron in the iron holder when not in use.
l Changing the temperature setting
Example: 350°C to 400°C
1. Insert the control card into the slot in the
Press the
front of the unit.
• The hundreds digit will begin to flash, indicating
that the unit is in the TEMPERATURE SET
mode and data may be entered.
Press the
2. Entering the hundreds digit
• Press the
or
button to set the desired
figure. Only 2, 3, or 4 can be selected. (In °F
Press the
mode, 4, 5, 6, 7, or 8 can be selected). When
the desired figure is displayed, press the
button to enter. The tens digit will begin to flash.
3. Entering the tens digit
Press the
• Press the
or
button to set the desired
figure. Any value from 0 to 9 can be selected.
(In °F mode, the same value can be selected.)
Press the
When the desired figure is displayed, press
the
button to enter. The units digit will begin
to flash.
4. Entering the units digit
• Press the
or
button to set the desired
figure. Any value from 0 to 9 can be selected. (In
NOTE:
°F mode, the same value can be selected.)When
If power is switched off or lost during the execu-
the desired figure is displayed, press the
tion of this procedure, no data will be entered. The
button to enter. The desired temperature is now
entire procedure must be repeated from step 1.
entered into the system memory and heater con-
trol will begin.
When the station is ON and the card is in the
1. Hold the
button down for at least one second.
station, the data entry procedure follows:
The current temperature setting will be dis-
played, then the hundreds digit will begin to
flash. This indicates that the station has entered
the temperature setting mode.
Continue with the procedure of 2 - 4, above.
2. When the
one second, the current temperature setting is
displayed for two seconds, then returns to show
the actual tip temperatures.
button.
Insert the card.
or
button.
button once.
or
button.
button once.
button once.
button is pressed for less than
Advertisement

Related Manuals for Hakko Electronics FX-951


Summary of Contents for Hakko Electronics FX-951
- Page 1 Do not use the HAKKO FX-951 for applications other than soldering. • When a foreign substance, an incompatible tip, or Do not allow the HAKKO FX-951 to become wet, or use it when hands are wet. – Decreases the value in the appropriate the soldering end of the tip is inserted into the Do not modify the HAKKO FX-951.
- Page 2 5. OPERATION 6. PARAMETER SETTINGS 7. ERROR MESSAGES l Replacing the tip The HAKKO FX-951 comes from the factory with The HAKKO FX-951 has the following four parameters: l Sensor Error When there is the possibility that a failure has oc- the following values preset.
Need help?
Do you have a question about the FX-951 and is the answer not in the manual?
Questions and answers