Advertisement
Table of Contents
- 1 Table of Contents
- 2 Important Precautions
- 3 Before You Begin
- 4 Assembly
- 5 How to Use the Chest Pulse Sensor
- 6 Elliptical Exerciser Operation
- 7 Maintenance and Troubleshooting
- 8 Exercise Guidelines
- 9 Part List
- 10 Exploded Drawing
- 11 Ordering Replacement Parts
- 12 Limited Warranty
- Download this manual
Model No. RBEL4255.0
Serial No.
Write the serial number in the space
above for future reference.
Serial
Number
Decal
QUESTIONS?
As a manufacturer, we are com-
mitted to providing complete
customer satisfaction. If you
have questions, or if parts are
damaged or missing, PLEASE
CONTACT OUR CUSTOMER
SERVICE DEPARTMENT
DIRECTLY.
CALL TOLL-FREE:
1-877-994-4999
Mon.–Fri., 6 a.m.–6 p.m. MST
ON THE WEB:
www.reebokservice.com
CAUTION
Read all precautions and instruc-
tions in this manual before using
this equipment. Save this man-
ual for future reference.
USER'S MANUAL
Visit our website at
www.reebokhomefitness.com
new products, prizes,
fitness tips, and much more!
Advertisement
Table of Contents

Related Manuals for Reebok RL 1500 RBEL4255.0


Summary of Contents for Reebok RL 1500 RBEL4255.0
- Page 1 Model No. RBEL4255.0 Serial No. Write the serial number in the space above for future reference. Serial Number Decal QUESTIONS? As a manufacturer, we are com- mitted to providing complete customer satisfaction. If you have questions, or if parts are damaged or missing, PLEASE CONTACT OUR CUSTOMER SERVICE DEPARTMENT...
-
Page 2: Table Of Contents
ABLE OF ONTENTS IMPORTANT PRECAUTIONS ..............3 BEFORE YOU BEGIN . -
Page 3: Important Precautions
MPORTANT RECAUTIONS WARNING: To reduce the risk of serious injury, read the following important precau- tions before using the elliptical exerciser. 1. Read all instructions in this manual and all warnings on the elliptical exerciser before using the elliptical exerciser. 2. -
Page 4: Before You Begin
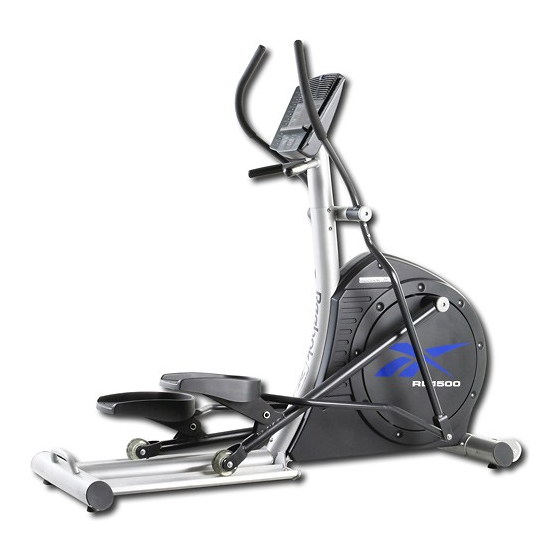
EFORE EGIN Congratulations for selecting the new REEBOK 1500 elliptical exerciser. The RL 1500 elliptical exer- ciser is an incredibly smooth exerciser that moves your feet in a natural elliptical path, minimizing the impact on your knees and ankles. And the RL 1500 elliptical exerciser offers an array of features designed to help you achieve your fitness goals in the convenience and privacy of your home. -
Page 5: Assembly
SSEMBLY To hire an authorized service technician to assemble the elliptical exerciser, call toll-free 1-800-445-2480. Assembly requires two persons. Set the elliptical exerciser in a cleared area and remove all packing materials. Do not dispose of the packing materials until assembly is completed. Assembly can be completed using the in- cluded hex keys and your own adjustable wrench Use the drawings below to identify the small parts used for assembly. - Page 6 1. Attach the Stabilizer (8) to the Frame (1) with two M10 x 116mm Carriage Bolts (38) and two M10 Nylon Locknuts (70). 2. Have another person hold the Upright (2) in the po- sition shown. Connect the Upper Wire Harness (77) to the Lower Wire Harness (78).
- Page 7 4. Apply a small amount of the included grease to the sides of two Wave Washers (88) and two Thrust Washers (66). Slide a Weld Spacer (89) onto the Left Crank Arm (83). Next, identify the Left Track Arm (12), which is marked with an “L.”...
- Page 8 7. Identify the Left Handlebar (19), which is marked with an “L.” Insert the Left Handlebar into one of the Handlebar Legs (17). Next, turn the Left Handlebar and the Handlebar Leg so that the wide side of the pivot tube on the Left Handlebar is above the hexagonal holes in the Handlebar Leg.
- Page 9 9. Apply a film of grease to the barrel of an M8 x 55mm Bolt Set (92) and to a 7mm Spacer (55). Slide an M8 Washer (69) and the Spacer onto the barrel. While another person holds the front end of the Left Pedal Leg (14) inside of the bracket on the left Handlebar Leg (17), insert the barrel of the Bolt Set (92) through both parts.
-
Page 10: How To Use The Chest Pulse Sensor
OW TO SE THE To get the best performance from the chest pulse sen- sor, please read the instructions below. HOW TO PUT ON THE CHEST PULSE SENSOR The chest pulse sensor consists of two components: the chest strap and the sensor unit. Follow the steps below to put on the chest pulse sensor. - Page 11 Next, hold the chest pulse sensor near the console. While holding one thumb stationary, begin tapping the other thumb against the electrode area at a rate of about one tap per second. Check the heart rate reading on the console. •...
-
Page 12: Elliptical Exerciser Operation
LLIPTICAL XERCISER HOW TO MOVE AND LEVEL THE ELLIPTICAL EXERCISER Due to the size and weight of the elliptical exer- ciser, moving it requires two persons. With the help of another person, lift the handle on the rear of the el- liptical exerciser until the elliptical exerciser will roll on the front wheels. -
Page 13: Features Of The Console
DIAGRAM OF THE CONSOLE FEATURES OF THE CONSOLE The advanced console offers a selection of features designed to make your workouts more enjoyable and effective. When the manual mode of the console is se- lected, the resistance of the pedals can be changed with the touch of a button. -
Page 14: How To Use The Manual Mode
HOW TO USE THE MANUAL MODE Begin pedaling to activate the console. The elliptical exerciser requires no batteries or external power source. Power is supplied by a generator while you are pedaling. To activate the console, begin pedaling at a moderate pace. After a few seconds, the console displays will light. - Page 15 Measure your heart rate if desired. To use the chest pulse sensor, see page 10. To use the handgrip pulse sensor, follow the instruc- tions below. Note: If you wear the chest pulse sensor and hold the handgrip pulse sensor at the same time, the console will not display your heart rate accurately.
- Page 16 HOW TO USE A PRESET PROGRAM Turn on the console. See step 1 on page 14. Select a preset program. To select a preset program, press one of the Quick Programs buttons numbered 3 through 12. When a preset program is selected, a profile of the resistance settings of the program will scroll across the matrix, the program time will appear in the Time display, the maximum pace setting of...
- Page 17 HOW TO USE A HEART RATE PROGRAM Each heart rate program helps you to keep your heart rate near target heart rate settings during your workout. Follow the steps below to use a heart rate program. Turn on the console. See step 1 on page 14.
- Page 18 During both heart rate programs, the console will regularly compare your heart rate to the target heart rate setting. If your heart rate is too far below or above the target heart rate setting, the resistance of the pedals will automatically in- crease or decrease to bring your heart rate closer to the target heart rate setting.
-
Page 19: Maintenance And Troubleshooting
AINTENANCE AND Most problems can be solved by following the simple steps below. Find the symptom that applies, and fol- low the steps listed. If further assistance is needed, please see the front cover of this manual. WEEKLY MAINTENANCE Inspect and properly tighten all external parts of the el- liptical exerciser. -
Page 20: Exercise Guidelines
XERCISE UIDELINES WARNING: Before beginning this or any exercise pro- gram, consult your physician. This is espe- cially important for persons over the age of 35 or persons with pre-existing health problems. The pulse sensors are not medical devices. Various factors, including the user's move- ment, may affect the accuracy of heart rate readings. -
Page 21: Suggested Stretches
SUGGESTED STRETCHES The correct form for several basic stretches is shown at the right. Move slowly as you stretch—never bounce. 1. Toe Touch Stretch Stand with your knees bent slightly and slowly bend forward from your hips. Allow your back and shoulders to relax as you reach down toward your toes as far as possible. - Page 22 OTES...
- Page 23 OTES...
-
Page 24: Part List
—M ODEL To locate the parts listed below, see the EXPLODED DRAWING on pages 25, 26, and 27. Key No. Qty. Description Frame Upright Track Track Frame Pedal Disk Left Side Shield Right Side Shield Stabilizer Crank Crank Spacer Right Track Arm Left Track Arm Right Pedal Leg Left Pedal Leg... -
Page 25: Exploded Drawing
XPLODED RAWING A—M RBEL4255.0 ODEL R1107A... - Page 26 B—M RBEL4255.0 XPLODED RAWING ODEL R1107A...
- Page 27 XPLODED RAWING C—M ODEL 90 91 RBEL4255.0 R1107A...
-
Page 28: Ordering Replacement Parts
RDERING EPLACEMENT To order replacement parts, please see the front cover of this manual. To help us assist you, be prepared to provide the following information: • the MODEL NUMBER of the product (RBEL4255.0) • the NAME of the product (REEBOK RL 1500 elliptical exerciser) •...
Need help?
Do you have a question about the RL 1500 RBEL4255.0 and is the answer not in the manual?
Questions and answers