Table of Contents
Advertisement
Quick Links
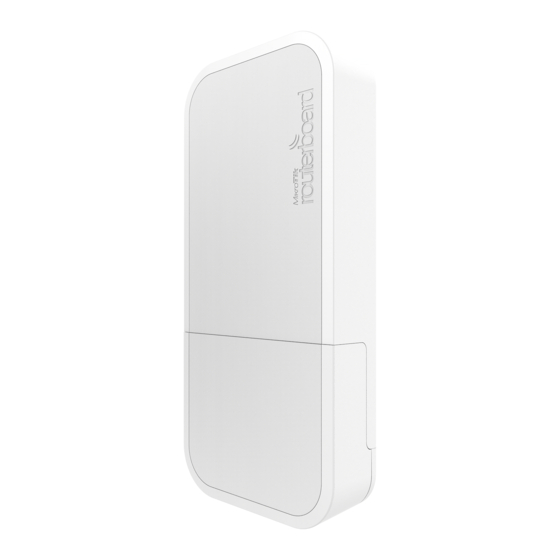
wAP series
The wAP is a solid and waterproof wall mountable wireless device. It has one Ethernet port, and can
be powered from a power jack, or from Ethernet. The device can be securely locked to the wall or
ceiling.
First use
1. Use the included screwdriver, to loosen the screw, which secures the bottom lid. Once the
screw snaps out of place, lid can be opened.
2. Slide open the lid, and connect the Ethernet cable to the provided Ethernet port
3. The device accepts 12-57V Passive or 802.3af/at PoE or from the power jack
4. The default IP address from Ether1 is 192.168.88.1 for configuration
Username is admin and there is no password
5. Device is preconfigured, but we suggest to set a wireless password and a device password to
secure your network
Powering
There are two ways how you can supply power to this device:
Ethernet port accepts passive or 802.3af/at Power over Ethernet 12-57V DC. Package
contains a 24V adapter and a PoE injector.
Power jack (5.5mm outside and 2mm inside diameter, female, pin positive plug) supports
12-57V powering, the device comes with a 24V 0.8A power adapter.
Maximum power consumption of the device is 4W at 24V.
Booting process
Connect to wireless SSID "MikroTik" and open 192.168.88.1 in your web browser. Username is
admin and there is no password. In case IP connection is not available, Winbox can be used to
connect to the MAC address of the device.
More information here:
In case you wish to boot the device from network, for example to use MikroTik Netinstall, hold the
RESET button of the device when starting it until the LED light turns off, and Metal will start to look
for Netinstall servers. See below for more details
Mounting
The device can be mounted in several ways: wall, ceiling and pole. The package includes a drill hole
template, to help you with the Ethernet cable installation and attachment to ceiling or wall. The
package also includes a steel bracket to put on the other side of a dropdown ceiling tile and two
screws and wall anchors.
To prepare the device for mounting, use a philips screwdriver to remove the screw inside the unit,
which will detach the mounting plate. Once the mounting plate is removed, use the drill hole
template, to help you with cable installation and attachment to ceiling or wall. The template includes
visual guides and instructions how to mount the unit.
Expansion Slots and Ports
Built in wireless access point module, AP/station/bridge/p2p modes supported
One 10/100 or 10/100/1000 Gigabit Ethernet port (depends on model), supporting automatic
cross/straight cable correction (Auto MDI/X), so you can use either straight or crossover cable
for connecting to other network devices. The Ethernet port accepts 12-57V DC powering from a
passive PoE injector or 802.3af/at source.
See
www.routerboard.com
for more information. Contact
http://wiki.mikrotik.com/wiki/First_time_startup
support@mikrotik.com
for support questions.
7-Dec-15
Advertisement
Table of Contents

Related Manuals for MikroTik wAP series


Summary of Contents for MikroTik wAP series
- Page 1 More information here: http://wiki.mikrotik.com/wiki/First_time_startup In case you wish to boot the device from network, for example to use MikroTik Netinstall, hold the RESET button of the device when starting it until the LED light turns off, and Metal will start to look for Netinstall servers.
- Page 2 ONLY if you purchased your equipment directly from MikroTik in Latvia. 2. MikroTik does not offer repairs for products that are not covered by warranty. Exceptions can be made for: CCR1016-12G, CCR1016-12G-BU, CCR1036-12G-4S, RB1100, RB1100AH, RB1100AHx2, RB1200, RB600, RB600A and RB800 as a paid service (fees apply).
-
Page 3: Federal Communication Commission Interference Statement
L'exploitation est autorisée aux deux conditions suivantes : (1) l'appareil ne doit pas produire de brouillage, et (2) l'utilisateur de l'appareil doit accepter tout brouillage radioélectrique subi, même si le brouillage est susceptible d'en compromettre le fonctionnement. www.routerboard.com for more information. Contact support@mikrotik.com for support questions. 7-Dec-15... -
Page 4: Ce Declaration Of Conformity
Connect the power adapter to turn on the device. Open 192.168.88.1 in your web browser, to configure it. More information on http://wiki.mikrotik.com Инструкция: Свържете адаптера на захранване, за да включите устройството. Отворете 192.168.88.1 в уеб браузър, за да настроите продукта. Повече информация в... - Page 5 192.168.88.1 vo webovom prehliadači pre konfiguráciu produktu. Viac informácií nájdete v http://wiki.mikrotik.com Navodila: Priključite napajalnik za vklop naprave. Odprite 192.168.88.1 v spletnem brskalniku nastaviti izdelek. Več informacij http://wiki.mikrotik.com Käyttöohje: Kytke virtalähde päälle laitteen. Avaa 192.168.88.1 in selaimen määrittää tuotteen. Lisää tietoa http://wiki.mikrotik.com...
Need help?
Do you have a question about the wAP series and is the answer not in the manual?
Questions and answers