
Related Manuals for Mira Select Flex


Summary of Contents for Mira Select Flex
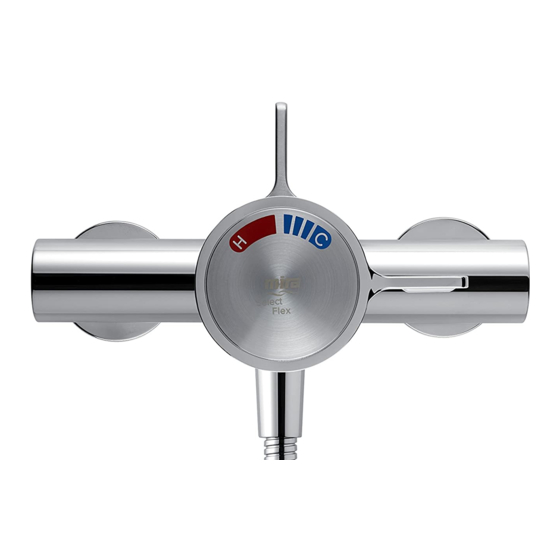
- Page 1 Mira Select Flex therMoStatic Mixer inStallation and USer GUide These instructions must be left with the user.
-
Page 2: Table Of Contents
Patents and design registration reference. Safety Warnings the Mira Select Flex is a thermostatic mixer with Pack Contents separate flow and temperature controls. The lever Specifications controls have been designed to be easily operated Pressures by users with restricted hand movement. -
Page 3: Guarantee
Guarantee SaFety WarninGS For domestic installations, Mira Showers Mira thermostatic mixers are precision engineered guarantee the Mira Select Flex against any defect in materials or workmanship for a period of five and should give continued safe and controlled performance, provided: years from the date of purchase (shower fittings for one year). -
Page 4: Pack Contents
1 x Mira Select Flex Built-in Shower control PacK contentS (attached to the building-in shroud) tick the appropriate boxes to familiarise yourself with the part names and to confirm that the parts are included. 1 x Mira Select Flex exposed Shower control 2 x Screws, no 8 x 1 ¼”... -
Page 5: Specifications
SPeciFicationS typical Flow rates on low Pressure Systems, For type 2 and type 3 Valves, the supply Mira Select Flex with Mira Select Flex Shower conditions specified in section: ‘Type 2 and Type Fittings: 3 Valves - Application’ take precedence over the operating parameters which follow. -
Page 6: Dimensions
Dimensions 139 - 153 Ø56 Ø183 all dimensions are in mm. -
Page 7: Installation
Note! Make sure that all site requirements double checkvalve, e.g. the Mira dcV-h, must be fitted. The inclusion of the Mira DCV-H correspond to the information given in section: ‘Specifications’. For type 2 and type 3 Valves will increase the required supply pressure typically by 10 kPa (0.1 bar), refer to section:... -
Page 8: Exposed Thermostatic Mixers
3. For solid walls drill the holes for the backplate Exposed Thermostatic Mixers with a 6 mm drill and insert the wall plugs. For other types of wall structure alternative fixings Installing the Thermostatic Mixer may be required (not supplied). 1. - Page 9 6. remove the backplate from the mixer by 12. Using a suitable tool, tighten the waterway loosening the grubscrew with a 2.5 mm securing ring until it abuts the adjustable inlet hexagonal key. preventing outward movement. 7. Secure the backplate to the wall using the screws.
-
Page 10: Built-In Thermostatic Mixers
16. Fit the shower fittings, refer to your shower Built-in Thermostatic Mixers fittings installation and user guide for Solid Wall or Stud Partition Fixing instructions. using Rear Mountings Note! For high pressure systems (above 0.5 bar) make sure that the flow regulator 1. - Page 11 6. Refit the building-in shroud to the mixer using 5. cut away the plasterboard and/or brick work to the required depth. the two shroud screws removed earlier. Important! this depth ‘x’ will depend on the 7. Make sure that the mixer is level and central finished wall thickness e.g.
- Page 12 16. Refit the building-in shroud to the mixer using 11. insert the wall plugs and attach the mixer to the wall with the screws provided. the two shroud screws removed earlier. Note! For stud partition installations alternative 17. Using the ‘Finished Wall indicator’ on the fixings may be required (not supplied) to fix the building-in shroud as a guide, finish the wall, mixer to the rear face of the wall cavity or to a...
- Page 13 Panel Fixing using Securing Brackets Note! For laminated panels the mixer must be positioned from the rear of the panel. Panel thickness must be between 4 and 12 mm (if a thicker panel is used, it will be necessary to recess the securing brackets into the rear of the panel).
- Page 14 Solid Wall or Stud Partition Fixing 6. Fit the hot and cold supply pipework (Hot - Left, Cold - Right). using Securing Brackets 7. Caution! It is essential at this point 1. refer to section: ‘Rear Fixing into Solid Walls that the supply pipework is thoroughly flushed through before connection to the or Stud Partitions’...
- Page 15 13. Refit the building-in shroud to the mixer using the two shroud screws removed earlier. 14. Using the ‘Finished Wall indicator’ on the building-in shroud as a guide, finish the wall, e.g. tiles. Caution! Make sure that the finished wall is within the maximum and minimum limits and to an even depth (no greater than 2 mm variation) or the control components will not fit...
- Page 16 4. For solid wall installations or stud partition RAC Assembly installations without rear access go to 1. Before the RAC assembly can be fitted you instruction 11. must have first installed your built-in shower For stud partition installations with access control and have connected the inlet and outlet to the rear of the partition continue with pipework.
- Page 17 9. Mark the positions of the two rac backplate 15. For solid walls drill two Ø6 mm holes for the fixing holes and drill two Ø5.5 mm holes. wall plugs. For other types of wall structure alternative fixings may be required (not Caution! Make sure that you do not drill into supplied).
- Page 18 rac Backplate Backplate Screws 22. Check that the blue ‘O’ seal is fitted inside the backplate nut. Fit the olive and the backplate nut over the outlet pipe and tighten the nut. 23. Check that the second ‘O’ seal (black) is fitted to the outside of the backplate nut.
-
Page 19: Control Assembly
5. Locate the flow control lever over the control Control Assembly assembly and push firmly into place. 1. Unscrew the grubscrew and pull off the 6. Fit the bearing onto the flow lever. temperature control knob, bearing and flow Note! align the bearing with the cutouts on the control lever. -
Page 20: Reversed Inlet Supplies
SUPPlieS and carefully push the cartridge back into the mixer body, aligning the lugs into the slots. the Mira Select Flex thermostatic mixer is Note! check that the cartridge lug stamped supplied with inlet connections Hot - Left, Cold ‘h’... -
Page 21: Operation
5. Pull off the red flow lever adaptor. the Mira Select Flex is a thermostatic mixer 6. Locate the ‘O’ Key (supplied) onto the cartridge with separate control levers for on/off and nut and turn anticlockwise. Unscrew fully and temperature. -
Page 22: Commissioning
Mira thermostatic mixing valves are fully performance tested and the maximum temperature is preset to approximately 41°c under ideal installation conditions at the factory. -
Page 23: Type 2 And Type 3 Valves
Models designation the recommendations contained in this guide (refer to the section ‘Maintenance, In-Service Mira Select Flex hP-S, lP-S Tests’ for in service test frequency that must be used as a minimum guide in type 2 and type 3 the permitted application details are: installations). -
Page 24: Maintenance
Maintenance 5. all connections and thermostatic mixing valve body are watertight. Planned maintenance for type 3 Valves must 6. operate the outlet flow divertor lever and use the ‘in-Service test’, at the frequency given check: in the guide to in-service test frequency, and (a) Flow rate is sufficient for purpose (low should employ temperature testing, performance pressure supplies may require removal... -
Page 25: Maintenance
Note! the cartridge contains no internally serviceable parts. Healthcare if you require a Mira trained engineer or agent, healthcare applications are hospitals, aged refer to section: ‘Customer Service’. person facilities, residential care homes, etc. and any other application where the user is similarly at risk. - Page 26 Frequency of In-service Tests Flow Diagram, In-service Test Program Healthcare Start Follow the procedure detailed in the flow diagram Measure and record supply “in-service test Procedure”. this procedure must temperature and pressures. Make sure be followed 6 to 8 weeks after commissioning that they are within valve specifications.
-
Page 27: Fault Diagnosis
Fault Diagnosis Symptom: • Only hot or cold water from the mixer outlet. • Outlet temperature too hot / too cold. Cause Rectification: • Inlets reversed (hot supply to cold supply). Refer to section: ‘Reversed Inlet Supplies’. • No hot water reaching mixer. •... -
Page 28: Inlet Filters
Inlet Filters Backplate The inlet filters should be checked and cleaned concealing Plate as necessary every 12 months. Note! The inlet filters must not be removed except Flow control for cleaning. if the thermostatic mixer is operated lever without the inlet filters fitted the warranty on the product will be void. -
Page 29: Notes
noteS... -
Page 30: Spare Parts
SPare PartS Note! all spare parts supplied individually unless stated otherwise. Exposed Models 1595.067 Screw Pack (identified ‘A’) 1679.044 Seal Pack (identified ‘B’) 1679.041 (2 off) 1679.043 concealing cap adjustable inlet 090.95 (2 off) connector 1062477 (2 off) Pipe concealing Plate Filter Pack 1062476 1679.042 (also includes 1679.043) -
Page 31: Built-In Models
Built-in Models 1679.034 Screw Pack (identified ‘A’) 1679.035 Seal Pack (identified ‘B’) 1592.070 component Pack 1679.038 inlet / outlet connector Pack 1595.036 Filter Pack (2 off) 1595.037 Filter Assembly (2 off) 1679.038 inlet / outlet 1595.036 connector Pack 1595.231 hub Pack ‘o’... -
Page 32: Customer Service
Our Service Force is available to provide a quality service modifi ed by any persons not authorised by Mira Showers at a reasonable cost. You will have the assurance of a Mira or our approved agents. trained engineer/agent, genuine Mira spare parts and a This guarantee is in addition to your statutory and other 12 month guarantee on the repair. - Page 33 Electric Showers Digital Showers Mixer Showers Power Showers Smart Showers Shower Towers From Top Shower Brands Mira Showers Aqualisa Showers Triton Showers Gainsborough Showers Shower Pumps can upgrade your showering experience even more Stuart Turner Shower Pumps Salamander Shower Pumps...
Need help?
Do you have a question about the Select Flex and is the answer not in the manual?
Questions and answers