Quantum Scalar i6000 User Manual
Tape library
Hide thumbs
Also See for Scalar i6000:
- User manual (711 pages) ,
- Installation manual (384 pages) ,
- Planning manual (92 pages)
Table of Contents
Advertisement
Quick Links
Advertisement
Table of Contents
Troubleshooting

Related Manuals for Quantum Scalar i6000


Summary of Contents for Quantum Scalar i6000
- Page 1 User’s Guide Scalar 6000 6-66879-15 Rev B...
- Page 2 Well-armored, SDLT, SiteCare, SmartVerify, StorageCare, Super DLTtape, and Vision are trademarks of Quantum. LTO and Ultrium are trademarks of HP, IBM, and Quantum in the U.S. and other countries. All other trademarks are the property of their respective companies.
-
Page 3: Table Of Contents
Cartridges ..........28 Quantum Scalar i6000 User’s Guide... - Page 4 Generating the Tickets Report......84 Suppressing Tickets and Ticket Notifications....90 Quantum Scalar i6000 User’s Guide...
- Page 5 FC Host Port Failover....... 177 Quantum Scalar i6000 User’s Guide...
- Page 6 Working With Data Path Conditioning ..... . . 250 Configuring Datapath Conditioning ....250 Quantum Scalar i6000 User’s Guide...
- Page 7 Auto Import Media ....... . 283 Chapter 7 Capacity on Demand Quantum Scalar i6000 User’s Guide...
- Page 8 Viewing FIPS Status on the Library ....292 Setting up EKM on the Scalar i6000 ......293 Step 1 —...
- Page 9 Step 1: Confirming the External Application is Supported . . 420 Step 2: Installing/Removing the Scalar i6000 API Client Plug-in . Step 3: Configuring External Access ....422...
- Page 10 Robot Access........496 Quantum Scalar i6000 User’s Guide...
- Page 11 Saving and Restoring Library Configuration ... . . 601 Viewing the Drive Resource Utilization Reports... 610 Quantum Scalar i6000 User’s Guide...
- Page 12 Taking Inventory ........706 Quantum Scalar i6000 User’s Guide...
-
Page 13: Preface
Scalar i6000 library. This guide is intended for system administrators, operators, or anyone interested in learning about or using the Scalar i6000 library after its initial installation and configuration. Be aware that you must have administrator privileges to use many of the features that this guide describes. - Page 14 Mercury Statement Projectors, LCD displays, and some multifunction printers may use lamp(s) that contain a small amount of mercury for energy-efficient lighting purposes. Mercury lamps in these products are labeled accordingly. Please manage the lamp Quantum Scalar i6000 User’s Guide...
-
Page 15: Product Model Number
Product Model Number The Scalar i6000 Regulatory Model Number is as follows: SCi6000. Explanation of Symbols and Notes The following symbols appear throughout this document to highlight important information. -
Page 16: Other Documents You Might Need
WARNING: Indicates a potentially hazardous situation which, if not avoided, could result in death or bodily injury. Other Documents you Might Need The following documents are also available for this product. These documents can be found at www.quantum.com/support. Scalar i6000 Planning Guide • (6-66882-xx) Scalar i6000 Release Notes •... -
Page 17: Getting More Information Or Help
Accelerate service issue resolution with these exclusive Quantum StorageCare services: • Service and Support Website - Register products, license software,... - Page 18 • eSupport - Submit online service requests, update contact information, add attachments, and receive status updates via e-mail. Online Service accounts are free from Quantum. That account can also be used to access Quantum’s Knowledge Base, a comprehensive repository of product support information. Sign up today at: http://www.quantum.com/osr...
-
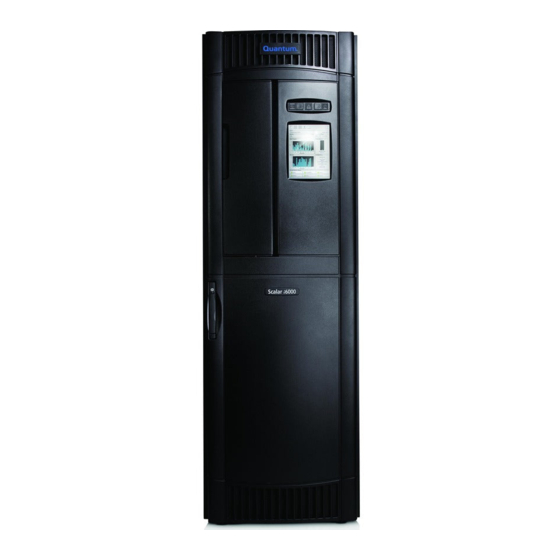
Page 19: Description
Chapter 1 Description The Scalar i6000 library automates the retrieval, storage, and control of tape cartridges. Application software on the host can use the library’s robotics to mount cartridges into tape drives and retrieve them without operator intervention. The library can be installed on a solid or raised floor. It has a standard 19-inch rack footprint and can be placed in a standard server rack space. - Page 20 Monitor > System from the menu, click the Components tab and look in the Name column. If you have MCB2 and RCU2, you have gen2 electronics. Any other MCB or RCU level means gen1 electronics. Quantum Scalar i6000 User’s Guide...
- Page 21 This chapter provides a description of the following features and components: Note: The library software features described in this guide apply to both the Scalar i2000 and the Scalar i6000. However, certain features are available on Scalar i6000 only. This chapter includes the following sections: •...
- Page 22 33 • Mixed Media Support and Rules on page 35 • Support for WORM on page 36 • Operator Panel on page 37 • Power System on page 38 • Library Features on page 39 Quantum Scalar i6000 User’s Guide...
-
Page 23: Front View
Figure 3 Front View of a Control Module and Expansion Module expansion module operator panel touch screen control module I/E station access doors Quantum Scalar i6000 User’s Guide... -
Page 24: Hardware Configuration Options
• 1 to 8 24-slot Import/Export (I/E) stations in the control module and first 7 expansion modules. • 1 24-slot I/E in the control module and up to 7 72-slot I/E stations and first 7 expansion modules. Quantum Scalar i6000 User’s Guide... -
Page 25: Dual Robotics Configurations And Parking Modules
If space considerations prohibit the addition of another module, then the right-most module will be swapped with another module in the library that does not contain a 72-slot I/E station. Quantum Scalar i6000 User’s Guide... - Page 26 Figure 4 Dual Robotics Library Right parking Left parking Control Expansion module module module module (Position 3) (Position 0) (Position 1) (Position 2) Right parking space (right-most two columns) Left parking space (left-most two columns) Quantum Scalar i6000 User’s Guide...
- Page 27 Chapter 1: Description Dual Robotics Configurations and Parking Modules Figure 5 Left Parking Module Slot Configuration (Dual Robotics Only) = Columns unavailable for storage = Calibration target Rack 2 (door) Rack 1 (rear wall) Quantum Scalar i6000 User’s Guide...
-
Page 28: Control Module
The control module manages library operations via the library management module and includes an operator panel touch screen for local operator use. For more information, see: • Library Management Module on page 18 • Support for WORM on page 36 Quantum Scalar i6000 User’s Guide... - Page 29 0.) Figure 7 Front and Back View of the Control Module front view back view magazines management cartridge unit slots station library drive management module clusters power supplies accessor picker Quantum Scalar i6000 User’s Guide...
- Page 30 Control Module Figure 8 Front and Back View of a Series 3 Control Module (CM3) rear view Magazines cartridge slots Power supplies Library management module 24-slot I/E station management unit Robot Drive clusters front view Quantum Scalar i6000 User’s Guide...
-
Page 31: Expansion Modules
• Robot on page 25 • Import/Export Stations on page 25 (optional) • Tape Drives and Media on page 33 (media only) • Cartridge Magazines on page 29 • Support for WORM on page 36 Quantum Scalar i6000 User’s Guide... - Page 32 Chapter 1: Description Expansion Modules • Power System on page 38 Figure 9 SEM with 24 Slot I/E Station cartridge magazines I/E station 24 slot (optional) drive cluster (optional) drive side door side Quantum Scalar i6000 User’s Guide...
- Page 33 Chapter 1: Description Expansion Modules Figure 10 Series 3 SEM with a 24-slot I/E Station magazines 24-slot I/E station DREM drive (optional in cluster DREM and (optional) SEM) drive side door side Quantum Scalar i6000 User’s Guide...
- Page 34 Chapter 1: Description Expansion Modules Figure 11 SEM with 72 Slot I/E Station magazines 72-slot I/E station drive cluster (optional) (optional) drive side door side Quantum Scalar i6000 User’s Guide...
- Page 35 Chapter 1: Description Expansion Modules Figure 12 Series 3 SEM with a 72-slot I/E Station magazines 72-slot I/E station DREM drive (optional in cluster DREM and SEM) (optional) drive side door side Quantum Scalar i6000 User’s Guide...
-
Page 36: Library Management Module
X and Y-axis circuits. It also distributes power to the touch screen. • Library power control (LPC) (Gen 2 libraries only) - Distributes power to the robot through the power rails. It also distributes power to the touch screen. Quantum Scalar i6000 User’s Guide... - Page 37 Chapter 1: Description Library Management Module Figure 13 Library Management Module Boards Library motor drive (LMD) or library power control (LPC) Robotics control unit (RCU) Management control blade (MCB) Quantum Scalar i6000 User’s Guide...
- Page 38 Chapter 1: Description Library Management Module Figure 14 Library Management Module Boards in Series 3 CM Management control blade (MCB) Quantum Scalar i6000 User’s Guide...
-
Page 39: I/O Management Unit
FC I/O blades and EEBs. Control Management The control management blade (CMB) performs unit status monitoring Blade including power and I/O present conditions, and internal network switch functions connecting I/O blades with the library management module. Quantum Scalar i6000 User’s Guide... -
Page 40: Fibre Channel I/O Blades
Each EEB has 6 Ethernet ports to allow attachment to 6 LTO-5 or later drives. The EEB provides Ethernet connectivity to the library's internal Ethernet only and should not be connected to an external Ethernet source. Quantum Scalar i6000 User’s Guide... - Page 41 Bay 1 - Not used Bay 3 - FCB #1 Bay 5 - FCB #3 Bay 7 - EEB for lower drive cluster CMB = Control management blade FCB = Fibre Channel I/O blade EEB = Ethernet Expansion blade Quantum Scalar i6000 User’s Guide...
- Page 42 Bay 2 - CMB Bay 4 - FCB or EEB Bay 6 - FCB or EEB Bay 8 - EEB CMB = Control Management Blade FCB = Fibre Channel I/O Blade EEB = Ethernet Expansion Blade Quantum Scalar i6000 User’s Guide...
-
Page 43: Robot
Note: The I/E station cannot be configured as a storage location, but it can be part of a logical division of library resources known as partitions. For information about partitions, see Working With Partitions on page 128. Quantum Scalar i6000 User’s Guide... -
Page 44: I/E Station Options
I/E area for host access. Conversely, to move/export tape cartridges from extended I/E area slots to the emptied physical I/E Station slots, you need to initiate the move/export operation from the user interface for physical access to the library. Quantum Scalar i6000 User’s Guide... - Page 45 Chapter 1: Description Import/Export Stations Note: By default, the extended I/E feature is disabled and is only available on Scalar i6000 libraries. Extended I/E can be enabled/ disabled from the 'Physical Library' dialog (Setup > System Settings > Physical Library). Refer to...
-
Page 46: Cartridges
Chapter 1: Description Cartridges Cartridges Cartridges are stored in magazines within the library, as shown in Figure Figure 17 Example of LTO Cartridge Insertion into a Magazine magazine barcode LTO cartridge LTO magazine cartridge barcode location Quantum Scalar i6000 User’s Guide... -
Page 47: Cartridge Magazines
The cartridge magazine is a storage assembly that installs on the drive side or door side of the control module or expansion module, as shown Figure 18. It contains the cartridge slots and provides flexibility when adding storage cartridges to a module. Quantum Scalar i6000 User’s Guide... - Page 48 Chapter 1: Description Cartridge Magazines Figure 18 Magazine and Drive Locations in the Control Module cartridge station magazines upper drive cluster drives or storage lower drive cluster drive side door side Quantum Scalar i6000 User’s Guide...
- Page 49 Chapter 1: Description Cartridge Magazines Figure 19 Magazine and Drive Location in the Single-Robotics Series 3 Control Module cartridge magazines 24-slot I/E station drives storage door side drive side Quantum Scalar i6000 User’s Guide...
- Page 50 An optional, snap-on dust cover is available for the magazines. Magazines with the dust cover have interlocked stacking that enables easier storage of the media when they are removed from the library for external storage. Quantum Scalar i6000 User’s Guide...
-
Page 51: Tape Drives And Media
Note: When you add drives, you lose storage slots. As of firmware version i11, drives can be installed in any module in the library except a left parking module or high-density expansion module. Quantum Scalar i6000 User’s Guide... -
Page 52: Lto Drives
Reads/ Write Drives Many Writes Once, Writes Once, Read Read Many Many LTO-6 Reads Read Reads/ Write Reads/ Write Reads/ Write Drives Many Writes Once, Writes Once, Writes Once, Read Read Read Many Many Many Quantum Scalar i6000 User’s Guide... -
Page 53: Mixed Media Support And Rules
• Multiple generations of LTO media can be mixed at the magazine level. • The supported multiple media are LTO-1, LTO-2, LTO-3, LTO-3 WORM, LTO-4, LTO-4 WORM, LTO-5, LTO-5 WORM, LTO-6, LTO-6 WORM, LTO-7 and LTO-7 WORM. • Drives can be installed in any frame. Quantum Scalar i6000 User’s Guide... -
Page 54: Support For Worm
Chapter 1: Description Support for WORM Support for WORM The Scalar i6000 library supports WORM (write once, read many) technology in LTO-3, LTO-4, LTO-5, LTO-6 and LTO-7 tape drives. WORM requirements include: • Cartridges • Firmware • WORM-supported LTO-3 tape drives •... -
Page 55: Operator Panel
Robotics Enabled touch screen button The touch screen is the library navigation point and provides access to the LMC. For more information about the touch screen and the LMC, Library Management Console (LMC) on page 442. Quantum Scalar i6000 User’s Guide... -
Page 56: Power System
(6) additional HDEMs if redundant power is installed. The additional HDEMs must be in consecutive positions to receive power from a single HDEM. Each power distribution unit has a circuit breaker located at the rear of the module. Quantum Scalar i6000 User’s Guide... -
Page 57: Library Features
(drives, power, robotics, cooling, connectivity, and control). You can configure the library to send notifications of problems to one or more e-mail accounts, including Quantum service personnel. For more information about the library’s monitoring and reporting capabilities, see Maintaining Your Library page 515. -
Page 58: Data Path Conditioning
Troubleshooting Your Library on page 43. Data Path Conditioning Quantum provides an automatic means of verifying, monitoring, and protecting data path integrity between hosts and library drives. This feature is referred to as data path conditioning. Using this feature, administrators can proactively detect and resolve data path problems before they affect backups, restore operations, and other data transfer operations. -
Page 59: Remote Management
Capacity on Demand allows you to purchase capacity for your library as needed. As your storage needs change, you can add storage in blocks of 100. Scalar i6000 licensing begins at 100 cartridges and can be Quantum Scalar i6000 User’s Guide... - Page 60 7,146 LTO cartridges (for a single-robot library) or 7,224 LTO cartridges (for a dual-robot library). Expansion modules are sold separately from the slot licensing. This separation provides the flexibility to order the exact modules needed (DREM, SEM or HDEM). Quantum Scalar i6000 User’s Guide...
-
Page 61: Troubleshooting Your Library
How Does the Library Report Issues? The library has advanced problem detection, reporting, and notification functionality. The library has many processors and sensors that monitor conditions and operations, such as temperatures, voltages, current, calibrations, firmware versions, and so forth. Quantum Scalar i6000 User’s Guide... -
Page 62: Status Indicator
• Reports that are associated with the ticket • A repair page that provides corrective actions In most cases, tickets indicate operational failures that do not always point to a single CRU/FRU as having failed or causing an issue. IN such Quantum Scalar i6000 User’s Guide... - Page 63 Examples of degraded situations include a redundant power supply that has failed or a connectivity problem that has caused failover to occur. Quantum Scalar i6000 User’s Guide...
-
Page 64: System Status Button Indicators
457. When the library creates a ticket, the status indicator button for the affected subsystem automatically changes from the following icon: Good (green) to one of the following icons: Warning Degraded (yellow) Failed (flashing red) Quantum Scalar i6000 User’s Guide... -
Page 65: E-Mail Notifications
Also, do not include the Quantum technical support e-mail address for severity level 2 or 3 notifications. The subject line of the e-mail notification indicates “Scalar i6000,” the library’s serial number, and the severity level of the ticket. The body of the message states that the library sent the message automatically. -
Page 66: Snmp Trap Notification
Basic SNMP Reference Guide for the Scalar i2000/ as discussed in the i6000 Library Working With Tickets Tickets are your primary troubleshooting tool when you experience problems with the library. A ticket provides details and reports about Quantum Scalar i6000 User’s Guide... -
Page 67: Ticket Guidelines
57 The FRU ID field on the Report tab of the Ticket Details dialog box indicates the type of FRU that is affected, and the FRU Instance field indicates the specific FRU by its location in the library. For more Quantum Scalar i6000 User’s Guide... - Page 68 You generate tape alert reports using the Report Criteria dialog box. You need an Advanced Reporting license in order to use view tape alerts reports. For more information on using the Report Quantum Scalar i6000 User’s Guide...
- Page 69 Closed state after determining that the issue is resolved. After you close the ticket, the library transitions it to the Verified state if it is able to do so. For Quantum Scalar i6000 User’s Guide...
-
Page 70: Displaying Ticket Lists
Using System Status Buttons to Display Ticket Lists on page 53. • By clicking Tools > Tickets This option displays the Tickets dialog box from which you can obtain a list of all tickets or a partial list of tickets according to Quantum Scalar i6000 User’s Guide... - Page 71 1 Click the system status button that corresponds with the subsystem for which you want to display a list of open tickets. The Ticket List dialog box appears with a list of open tickets for the subsystem. Quantum Scalar i6000 User’s Guide...
- Page 72 • Cooling • Robotics Posted Date The date and time on which the library created the ticket. The Details button displays the Ticket Details dialog box. For more information, see Viewing Ticket Details on page 57. Quantum Scalar i6000 User’s Guide...
- Page 73 Opened for state, 2 for severity, and Drives and Control for subsystem. • To display all tickets that users have manually closed for the robotics subsystem, select Closed for state, All for severity, and Robotics for subsystem. Quantum Scalar i6000 User’s Guide...
- Page 74 4 By default, the ticket list is sorted by ticket ID in ascending order with the oldest ticket at the top and the newest one at the bottom. To change the sorting (for example, by state or severity), click the Quantum Scalar i6000 User’s Guide...
-
Page 75: Viewing Ticket Details
1 On the Ticket List dialog box in the Select Ticket area, click the appropriate ticket row to highlight it. 2 Click Details. The Ticket Details dialog box appears with the Details tab displayed. Quantum Scalar i6000 User’s Guide... - Page 76 FRU (based on the FRU’s location in the library) as the one reported by this ticket. Table 4 on page 59 describes the elements on the Details tab. Quantum Scalar i6000 User’s Guide...
- Page 77 If the library has not reopened the ticket, the value is zero (0). Tickets that are in the Closed or Verified state for more than 30 minutes cannot be reopened. In this case, if the identical problem occurs again, the library creates a new ticket. Quantum Scalar i6000 User’s Guide...
- Page 78 All tickets that appear on the Details tab, including the ones in the FRU History Ticket List area and the Ticket # area, see the same specific FRU. State The current state of the history ticket. All history tickets are in the Closed or Verified state. Quantum Scalar i6000 User’s Guide...
- Page 79 Accessor, Picker, Drive, I/E Assembly, or Bar Code Label categories have applicable verification tests.) When you click FRU Test, the Verification Tests dialog box appears with the appropriate verification test already selected and ready to start. Quantum Scalar i6000 User’s Guide...
-
Page 80: Viewing History Ticket Details
FRU History Ticket List remains the same as what the initial ticket displayed. This list does not change. The Report and Repair tabs show information that is specific to the history ticket, but the Close Ticket and FRU Test buttons at the Quantum Scalar i6000 User’s Guide... -
Page 81: Viewing Ticket Details Reports
Typically, you should examine the key report because it represents the earliest time at which the ticket reached its highest severity level. It often isolates the most significant problem. Quantum Scalar i6000 User’s Guide... - Page 82 By default, the Report # area displays report details for either the key report or, if subordinate reports exist, the most recent subordinate report. Table 5 on page 65 describes the elements on the Report tab. Quantum Scalar i6000 User’s Guide...
- Page 83 If the library has not created duplicate reports, the value is zero (0). Status Group The subsystem that caused the ticket. Possible subsystems are: • Connectivity • Drives • Control • Power • Media • Robotics Quantum Scalar i6000 User’s Guide...
- Page 84 If a modifier does not exist for the error condition, this field is set to “0x0”. This information is for technical support use only. Repair Link The name of the repair page that is associated with the report. Report Description A summary description of the report. Quantum Scalar i6000 User’s Guide...
-
Page 85: Viewing Ticket Repair
CSE can perform. • The Customer Service Engineer Actions section provides additional corrective actions that the CSE can perform. If you are a user, do not perform these steps. Contact technical support for assistance. Quantum Scalar i6000 User’s Guide... -
Page 86: Viewing Tape Alerts And Generating Media Integrity Analysis
Conversely, tape alerts point to a media problem if a specific piece of media exhibits tape alerts against multiple drives. See Generating Media Integrity Analysis Reports on page 71. Quantum Scalar i6000 User’s Guide... - Page 87 • If the drive serial number given in the ticket is invalid or if the drive is not present in the library, the view displays the message, “Invalid serial number or drive is no longer present.” Quantum Scalar i6000 User’s Guide...
- Page 88 2 To change the date range, click the down arrow next to the date box and select the range you want. The Media Integrity Analysis tab displays the tape alert information available for the selected range. 3 To sort the lists, click the column heading you want to sort. Quantum Scalar i6000 User’s Guide...
- Page 89 • On the Media Integrity Analysis tab of the Ticket Details dialog box, click Report. • On the menu bar, click Tools > Reports > Media > Integrity Analysis. The Report Criteria dialog box appears. Quantum Scalar i6000 User’s Guide...
- Page 90 Specifies the range of time to cover in the report. Choices include: • Historical • Current Month • Last Month • Last 3 Months • Last 6 Months • Last 12 Months • Last 30 Days (default) • Last 7 Days Quantum Scalar i6000 User’s Guide...
- Page 91 • Last Occurrence Chart Determines the type of chart. Choices include: • Area • Bar • Bar 3D • Line • Stacked Area • Stacked Bar • Stacked Bar 3D • Pie • Pie 3D (default) Quantum Scalar i6000 User’s Guide...
- Page 92 Working With Tickets The Report Viewer dialog box appears. The content and appearance of the report varies depending on the selected criteria. 3 Click Preview. The report appears in the Media Integrity Analysis Print Preview window. Quantum Scalar i6000 User’s Guide...
- Page 93 The next or previous page appears. 5 To increase or decrease the magnification of the report, click the Zoom In or Zoom Out buttons. 6 In the report viewer, you can perform the following tasks: Quantum Scalar i6000 User’s Guide...
- Page 94 Note: The Print function is not available on the touch screen. Creating Report PDFs To create a PDF of a report: 1 In the Media Integrity Analysis Print Preview window, click the PDF button. The Saving Report into a PDF-File dialog box appears. Quantum Scalar i6000 User’s Guide...
- Page 95 4 In the Saving Report into a PDF-File dialog box, enter the settings you want and click Confirm. The PDF file is saved in the specified location. Note: The PDF function is not available on the touch screen. Quantum Scalar i6000 User’s Guide...
- Page 96 3 If you want, type a comment. 4 Click OK. To save the data to a folder: 1 Select Save. 2 Type the file name in the text box. Quantum Scalar i6000 User’s Guide...
- Page 97 Table 6 on page 72 summarizes the available report criteria options. 3 Under Templates, click Save. 4 Type a name for the template, and then click OK. The template appears in the list under Templates. Quantum Scalar i6000 User’s Guide...
-
Page 98: Mailing, Saving, And Printing Ticket Information
• Library states, such as physical library online or offline, partitions online or offline, or robotics varied on or varied off • Time stamps of recent activity • Report summary • Report details for the ticket The RAS repair page attachment is in HTML format. Quantum Scalar i6000 User’s Guide... - Page 99 Note: The Save option is available to remote client users only. It appears grayed out on the touch screen. • To indicate that you want to send the information to a printer, select Print. Quantum Scalar i6000 User’s Guide...
-
Page 100: Running Verification Tests To Determine Issue Resolution
You can access the tests in two ways: • On the main LMC display, click Tools > Verification Tests. The Verification Tests dialog box appears. From this dialog box, you can choose from a variety of verification tests, including the FRU tests. Quantum Scalar i6000 User’s Guide... -
Page 101: Closing Tickets
You should manually transition a ticket to the Closed state after performing the resolution steps and making sure the issue is resolved. Closing Individual Tickets To transition a ticket to the Closed state, perform the following steps: Quantum Scalar i6000 User’s Guide... -
Page 102: Generating The Tickets Report
You can choose to group tickets by subsystem, module, or FRU, and the results can be presented as a rollup summary or as a trend so you can see if the number of issues is increasing or decreasing over Quantum Scalar i6000 User’s Guide... - Page 103 2 On the menu bar, click Tools > Reports > Tickets. The Report Criteria dialog box appears. 3 Under Specify Report Criteria, click criteria options in the lists to customize the content and appearance of the Tickets Report. Table 7 summarizes the available report criteria options. Quantum Scalar i6000 User’s Guide...
- Page 104 • Total—tickets are not separated according to attribute Type Specifies the type of report. Choices include: • Rollup (default)—displays the values based on the selected grouping • Trend—shows the occurrence of tickets over time (grouping criteria is not used) Quantum Scalar i6000 User’s Guide...
- Page 105 • Stacked Bar (default) • Stacked Bar 3D • Pie • Pie 3D 4 Click View. The Report Viewer dialog box appears. The content and appearance of the report varies depending on the selected criteria. Quantum Scalar i6000 User’s Guide...
- Page 106 • To navigate through the pages of the report, click Back or Next. • To increase or decrease the magnification of the report, click Zoom In or Zoom Out. • To print the report, click Print. Specify print options, and then click OK. Quantum Scalar i6000 User’s Guide...
- Page 107 Loading the template recalls the saved report criteria and lets you quickly generate a report based on the saved criteria. 1 On the menu bar, click Tools > Reports > Tickets. The Report Criteria dialog box appears. Quantum Scalar i6000 User’s Guide...
-
Page 108: Suppressing Tickets And Ticket Notifications
By default, the library provides notifications whenever a problem occurs. Ticket Notifications Notifications include: • For Severity 1 issues, an e-mail is sent to Quantum Technical Support (techsup@quantum.com). This is set up by default in the Setup > Notifications > System Setup dialog box, Rules tab. See... - Page 109 Technical Support for this ticket. • E-mail — No e-mail notification will be sent to Technical Support or to the individuals configured in the Setup > Notifications > System Setup, Rules tab for this ticket. Quantum Scalar i6000 User’s Guide...
-
Page 110: Interpreting Leds
Each of the following library blades has a set of green, amber, and blue Status LEDs LEDs that indicate blade processor status, health status, and power control status: • Management control blade (MCB) • Control management blade (CMB) • Fibre Channel (FC) I/O blade Quantum Scalar i6000 User’s Guide... - Page 111 For example, if the MCB firmware becomes inoperable, the amber LED flashes at 1 Hz, but the library might not be able to display any related tickets. Quantum Scalar i6000 User’s Guide...
- Page 112 • Solid off — blade is not receiving power • Solid on — blade is powered down; ready to be replaced (swap mode) • Blinks one time every 10 seconds (flash) — blade is powered on; operating normally Quantum Scalar i6000 User’s Guide...
-
Page 113: Interpreting Drive Status Leds
2 Capture a system snapshot and send it to technical support for analysis. Interpreting Drive The library reports all drive issues that can affect customer operations. Status LEDs In addition to examining library reports, you should observe drive sled link LED and status LED activity. Quantum Scalar i6000 User’s Guide... - Page 114 - middle = amber - bottom = green fibre port FC link LED Figure 25 shows the locations of the status LEDs and the Fibre Channel link LED on the rear of a UDS-3 drive sled. Quantum Scalar i6000 User’s Guide...
- Page 115 For a description of how the blade status LEDs appear under normal conditions, see Table 11 on page 98. For information about interpreting the drive link LED, see Drive Sled Fibre Channel Link LED on page 99. Quantum Scalar i6000 User’s Guide...
- Page 116 The green LEDs for all drive sleds that are operating normally blink together. Amber Solid off — no errors are detected; drive sled’s controller is operating normally. Blue Blinks one time every 10 seconds (flash) — drive sled is powered on; operating normally. Quantum Scalar i6000 User’s Guide...
-
Page 117: Interpreting Fibre Port Link Leds
• Solid off — the drive brick is varied off or the drive cannot detect light through a fiber optic cable (equivalent to no fibre cable plugged in). If the drive brick is varied off, the blue status LED will be solid on. Quantum Scalar i6000 User’s Guide... - Page 118 The link LED for an FC I/O blade fibre port is located next to the port. On the I/O blade faceplate, black lines indicate how each link LED belongs to a port. Figure 26 shows the locations of the I/O blade Fibre port link LEDs. Quantum Scalar i6000 User’s Guide...
- Page 119 • Solid off — the FC I/O blade has not established a link OR the link is active and is currently transporting a large amount of data. Note: For the 7404 FC I/O blade, fibre port LEDs are off while the blade is booting up. Quantum Scalar i6000 User’s Guide...
-
Page 120: Interpreting Ethernet Expansion Blade Leds
Figure 27 Location of Ethernet Expansion Blade Status LEDs EEB status LEDs Ethernet Port status LEDs Table 15 Ethernet Expansion Blade LED States Blue Green Amber Description No power 1 Hz Powered Down - Ready for removal Quantum Scalar i6000 User’s Guide... -
Page 121: Interpreting Mcb Port Leds
The MCB has LEDs for the Ethernet, Fibre Channel, and SCSI ports. LEDs MCB Ethernet Port LEDs The LEDs on the MCB Ethernet port indicate status and activity. Figure 28 shows the locations and colors of the MCB Ethernet port LEDs. Quantum Scalar i6000 User’s Guide... - Page 122 • Solid off — the link is not up; data cannot be sent or received through the Ethernet port Amber • Flashes at irregular intervals — data activity is occurring through the Ethernet port • Solid off — no data activity is occurring through the Ethernet port Quantum Scalar i6000 User’s Guide...
-
Page 123: Interpreting Lbx Terminator Leds
106 describes how to interpret LED activity on the LBX terminator. The terminator must be located in the LBX of the last expansion module. The LED status should reflect the physical installed module count of the system. Quantum Scalar i6000 User’s Guide... - Page 124 The library has one control module and four expansion modules. The library has one control module and five expansion modules. The library has one control module and six expansion modules. The library has one control module and seven expansion modules. Quantum Scalar i6000 User’s Guide...
- Page 125 The library has one control module and one expansion module. The library has one control module and two expansion modules. The library has one control module and three expansion modules. The library has one control module and four expansion modules. Quantum Scalar i6000 User’s Guide...
- Page 126 The LBX terminator has six blue LEDs that indicate the presence of modules in the library. Figure 32 shows the locations of the LEDs. Table 20 on page 109 describes how to interpret LED activity on the LBX terminator. Quantum Scalar i6000 User’s Guide...
- Page 127 The library has one control module and four expansion modules. The library has one control module and five expansion modules. The library has one control module and six expansion modules. The library has one control module and seven expansion modules. Quantum Scalar i6000 User’s Guide...
-
Page 128: Interpreting Power Supply Leds
Modules can have up to two power supplies each. The top supply is #1 and the bottom supply is #2. Figure 33 shows the locations and colors of the AC power supply LEDs. Quantum Scalar i6000 User’s Guide... - Page 129 • Solid off — power supply’s AC input is below minimum requirements to operate Green DC OK • Solid on — power supply’s output voltage is within specifications (middle LED) • Solid off — power supply’s output voltage is outside of specifications Quantum Scalar i6000 User’s Guide...
-
Page 130: Interpreting Gen 2 Robot Status Leds
• The Sensors Engaged, Robot Power, and Robot Rail Engaged LEDs should all be ON • The Sensors Disengaged LED should be OFF If any of the LEDs are incorrectly illuminated, Quantum Support will need to troubleshoot, adjust, and possibly replace components to make sure all LEDs are correctly illuminated. - Page 131 Connection to power rail is OK Left Position Indicates this is a left-side robot. Sensors Disengaged The robot’s X-axis home/parking sensors are disengaged. The robot locking lever is fully unlocked. It is safe to remove the robot from the library. Quantum Scalar i6000 User’s Guide...
-
Page 132: Interpreting Hdem Tower Enable Button Blinking Pattern
Tower is not functioning properly or powered off completely GREEN, solid Tower is fully active, varied on and online BLINKING GREEN Tower is initializing/activating to an online (1 sec on, 1 sec off) or offline, varied on state Quantum Scalar i6000 User’s Guide... -
Page 133: Working With Command History Logs
LMC, controller LUNs, partitions, and drives. This information can help you isolate the source of an issue, such as a library device or host application. Quantum Scalar i6000 User’s Guide... -
Page 134: Viewing Command History Logs
These examples show expanded levels for “Controller LUNs”, “Partitions”, and “Tape Drives”. Initially, these areas are not expanded. Click the highest-level items to show next-level items. Quantum Scalar i6000 User’s Guide... - Page 135 4 To access the command history logs (for LMC, controller LUNs, partitions, or tape drives), select one or more device check boxes, and then click OK. A list of log files appears in the Command History Log dialog box. Quantum Scalar i6000 User’s Guide...
- Page 136 • Mail or save a log by clicking the Send button (see Mailing and Saving Logs on page 119) 5 Click a log file to highlight it, and then click Open. The contents of the log file appear. Quantum Scalar i6000 User’s Guide...
-
Page 137: Mailing And Saving Logs
• To indicate that you want to save the log, select Save, and then either type in the Save text box a path and a file name to which Quantum Scalar i6000 User’s Guide... - Page 138 Browse to specify a location and a file name. Note: The Save option is available to remote client users only. It appears grayed out on the touch screen. 3 To send, click OK. Quantum Scalar i6000 User’s Guide...
-
Page 139: Accessing Online Help
For further help, you can access the library’s Online Help system. • To access the entire Online Help system, click Help > Content. • To access context-sensitive help, click the Help button on any dialog box. Quantum Scalar i6000 User’s Guide... - Page 140 Chapter 2: Troubleshooting Your Library Accessing Online Help Quantum Scalar i6000 User’s Guide...
-
Page 141: Configuring Your Library
173 • Setting Up Policies for the Physical Library on page 180 • Specifying the Date and Time on page 185 • Configuring E-mail on page 187 • Setting Up E-mail Notifications on page 190 Quantum Scalar i6000 User’s Guide... -
Page 142: Running The Setup Wizard
Before you can manage your library from a remote LMC client, you must initially configure the library from its touch screen by either running the Setup Wizard command or using individual configuration commands Quantum Scalar i6000 User’s Guide... -
Page 143: Prerequisites
Setup > Setup Wizard. Enabling Licenses In addition to the standard features, the following licensable features are available: For more information about this License/Feature feature, see... Active Vault Chapter 4, Active Vault. Advanced Reporting Chapter 5, Advanced Reporting Quantum Scalar i6000 User’s Guide... - Page 144 Note: Authorized service personnel are involved in the first two situations. However, any administrator can activate additional storage slots. 1 Log on as an administrator. 2 If you are not already working from the physical library, select it from the View menu. Quantum Scalar i6000 User’s Guide...
- Page 145 • For features that are not licensed by quantity but instead apply to the entire library, such as the drive monitoring feature, the Quantity is always set to 1. 4 In the Enter License Key text box, type the appropriate license key. Quantum Scalar i6000 User’s Guide...
-
Page 146: Working With Partitions
There are two types of partitions in the Scalar i6000 library: • Standard partitions — Standard partitions are visible to hosts and are used for normal backup operations. You can create standard partitions via the setup wizard or manually using simple or expert mode. - Page 147 • Drive — the read/write device for removable media. Note: Partitions can be created that have zero (0) drives allocated. Note: Active Vault and Automated Media Pool (AMP) library managed partitions do not contain drives. Quantum Scalar i6000 User’s Guide...
- Page 148 Each application uses its partition as if it were a dedicated physical library. Note: For information about creating library-managed encryption on partitions, see Chapter 8, Encryption Key Management. Quantum Scalar i6000 User’s Guide...
-
Page 149: Understanding Partition Media Policy Settings
Media Checking Policy option to select from two modes of operation: Required or Not Required. With either mode, the library checks whether a cartridge has a valid media ID on the barcode label. Quantum Scalar i6000 User’s Guide... - Page 150 Media Domain Media Type Identifier Type Identifiers LTO-1 “L1” as the last characters in the barcode LTO-2 “L2” as the last characters in the barcode LTO-3 “L3” as the last two characters in the barcode Quantum Scalar i6000 User’s Guide...
- Page 151 Table 25 shows an example of how the return media identifier is reported to the host, depending on the setting you choose: Disabled, Quantum Scalar i6000 User’s Guide...
-
Page 152: Creating Partitions
Manually enables you to pick specific drives, storage magazines, and magazines within an I/E station to assign to a partition. Note: Make sure that you have adequately planned for the number of partitions that you want to configure. Quantum Scalar i6000 User’s Guide... - Page 153 Figure 36 Partitions dialog box 4 Click Create. The Partitions – Step 1: Choose Creation Mode dialog box appears. 5 Select Automatic, and then click Next. The Partitions – Step 2: Automatic Creation dialog box appears. Quantum Scalar i6000 User’s Guide...
- Page 154 Note: If you want to cancel the partition creation process, click Close. The Close button becomes unavailable after you click Create later in this procedure. 4 Click Create. The Partitions - Step 1: Choose Creation Mode dialog box appears. Quantum Scalar i6000 User’s Guide...
- Page 155 • From the Vendor ID list, select the vendor. The Vendor ID information is used in the SCSI Inquiry command. The choices are QUANTUM and ADIC. The default is QUANTUM. Some backup applications may only support or be configured for ADIC libraries, so if you configure a logical library using the vendor ID of QUANTUM, the backup application would not work with the library.
- Page 156 Scalar i500,Scalar i2000, or Scalar i6000. This feature can enable the library to be used with host applications that do not yet include the Scalar i6000 in a list of recognized devices. In addition, the various Microsoft Windows operating systems maintain a list of recognized devices.
- Page 157 Note: Drive cleaning should be enabled for partitions only if the host application does not support the coordination of drive cleaning. If drive cleaning functionality is enabled on the host application, do enable automatic drive cleaning for any partitions in the library. Quantum Scalar i6000 User’s Guide...
- Page 158 14 Verify that the parameters you set are correct. 15 To create the partition, click Create. The Partitions - Completed dialog box appears. Note: After you click Create, the Cancel button becomes unavailable. 16 Review the information to make sure it is correct. Quantum Scalar i6000 User’s Guide...
- Page 159 Create later in this procedure. 4 Click Create. The Partitions - Step 1: Choose Creation Mode dialog box appears. 5 Select Expert, and then click Next. The Partitions - Step 2: Choose Partition Properties dialog box appears. Quantum Scalar i6000 User’s Guide...
- Page 160 Scalar i6000 in a list of recognized devices. In addition, the various Microsoft Windows operating systems maintain a list of recognized devices. If the Scalar i6000 is not in an operating system’s list of recognized devices, the library will...
- Page 161 “unknown” device in device lists. You might prevent the library from being listed as “unknown” by setting Product ID to a library other than Scalar i6000. This setting does not cause any library operational changes other than the SCSI INQUIRY response.
- Page 162 Make sure that you select the appropriate module because the library can have drives in the control module and any of the eleven expansion modules. Note: With the release of version i12, you can create partitions that have zero (0) drives allocated. Quantum Scalar i6000 User’s Guide...
- Page 163 Create Magazine Extensions in Standard Partitions on page 276. 19 To continue, click Next. The Partitions - Step 6: Select I/E Slots dialog box appears. 20 Select the location of one or more I/E station magazines. Quantum Scalar i6000 User’s Guide...
- Page 164 240. This includes both physical slots and Extended IE virtual slots. 23 To continue, click Next. The Partitions - Summary Information dialog box appears. 24 In the Partitions - Summary Information dialog box, verify that the parameters you set are correct. Quantum Scalar i6000 User’s Guide...
-
Page 165: Modifying Partitions
For best results, follow these guidelines when adding or deleting partition elements: • Shut down the host application • Update the inventory in the library • Reconfigure the library in the application • Update the inventory in the application Quantum Scalar i6000 User’s Guide... - Page 166 7 On this dialog box, you can modify the following settings: • For Media Type Checking, select either Enable or Disable. This setting is enabled by default. • From the Media Checking Policy drop-down list, click either Required or Not Required. Quantum Scalar i6000 User’s Guide...
- Page 167 Note: If you are creating an Automated Media Pool (AMP) library managed partition or an Active Vault library managed partition, this screen is skipped because drives are not allowed in these partitions. Go to Step 9 Select the location of one or more drives. Quantum Scalar i6000 User’s Guide...
- Page 168 Type the number of magazines to add in the Magazine Extensions field. For more information, see Create Magazine Extensions in Standard Partitions on page 276. Quantum Scalar i6000 User’s Guide...
- Page 169 Note: The maximum number of I/E element addresses in any partition is 240. This includes both physical slots and Extended I/E virtual slots. 17 To continue, click Next. If Extended I/E is configured, the Extended I/E Slots dialog box appears. Quantum Scalar i6000 User’s Guide...
- Page 170 18 To enable autoleveling for the partition, perform the following steps: a From the Drive Type drop-down list, click the type of drives that you want to list in the table. Listed drive types use the following format: <vendor>_<product>_<interface> Quantum Scalar i6000 User’s Guide...
- Page 171 22 Review the information to make sure it is correct. 23 If you want to view the drive information after modifying the partition, click Next. 24 Click Finish. The Partitions dialog box appears again. 25 Click Close. Quantum Scalar i6000 User’s Guide...
- Page 172 Working With Partitions Downloading Drive Firmware for Autoleveling Note: Before you begin the following procedure, make sure that you have obtained the new drive firmware image from Quantum technical support and placed it in an accessible location on your laptop.
-
Page 173: Deleting Partitions
I/E station magazines, and a host at the same SCSI ID and LUN. To delete a partition, perform the following steps: 1 Log on as an administrator. Quantum Scalar i6000 User’s Guide... -
Page 174: Configuring Control Paths
Note: Only IBM and HP LTO-5 or later drives can be configured for control path bridging (using a drive as the control path for a partition), and in order to do so, they must be connected to an Ethernet Expansion blade. Quantum Scalar i6000 User’s Guide... - Page 175 Note: IO blades connected to drives configured with a control path may report certain library ready conditions differently than drives without a control path configured. Quantum Scalar i6000 User’s Guide...
- Page 176 Port Configuration Step 2 Blades on page 173 Connectivity Setup > FC Host LUN Step 3 Step 3 Blades > Mapping Access page 209 Channel Zoning page 208 Using the LUN Mapping Wizard on page 215 Quantum Scalar i6000 User’s Guide...
-
Page 177: Configuring An Ibm Or Hp Lto-5 Or Later Drive As The Control Path
SNW license to configure control path failover (see Configure Control Path on page 361). The instructions that follow only describe how to configure a drive as the control path for a partition. If you would like to configure both the Quantum Scalar i6000 User’s Guide... - Page 178 (HP LTO-5 or later drives connected to an Ethernet Expansion blade). 3 Click to highlight the row containing the partition whose control path settings you want to configure. 4 Click OK. The Control Path dialog box appears. Quantum Scalar i6000 User’s Guide...
- Page 179 SNW license with sufficient licensed drive counts to configure a CPF drive. For more information, see Configure Control Path on page 361. 7 Click OK. An Operation in Progress dialog box appears. 8 The control path drive is configured. Quantum Scalar i6000 User’s Guide...
-
Page 180: Setting Up The Network Configuration
Physical Library dialog, as described Setting Up Policies for the Physical Library on page 180. Note: For all site-to-site customer firewall network settings, see Appendix B, Network Port Settings. 1 Log on as an administrator. Quantum Scalar i6000 User’s Guide... -
Page 181: Setting Up Ipv4 Network Configuration
After completing the steps listed in Setting Up the Network Network Configuration on page 162, select Setup > Network Configuration Configuration > Interface (#) > IPv4 Configuration. The IPv4 Network Configuration - Interface # dialog box appears. Quantum Scalar i6000 User’s Guide... - Page 182 Chapter 3: Configuring Your Library Setting Up the Network Configuration Figure 37 Network Configuration - Interface 1 Quantum Scalar i6000 User’s Guide...
- Page 183 Chapter 3: Configuring Your Library Setting Up the Network Configuration Figure 38 Network Configuration - Interface 2 4 Use the following table to assist you in completing the elements on the IPv4 Network Configuration dialog box. Quantum Scalar i6000 User’s Guide...
- Page 184 The port speed (10, 100 or 1000 Mbps). Speed options are available only if Auto Negotiate is disabled. The current port settings are listed in the Current Port Settings section. For more information, see Viewing the Current Network Port Settings on page 171. Quantum Scalar i6000 User’s Guide...
-
Page 185: Setting Up Ipv6 Network Configuration
Setting Up the Network on page 162, select Setup > Network Network Configuration Configuration Configuration > Interface (#) > IPv6 Configuration. The IPv6 Network Configuration - Interface # dialog box appears. Figure 39 Network Configuration - Interface 1 Quantum Scalar i6000 User’s Guide... - Page 186 8 Click DHCP to display the DHCP tab. 9 As prompted, use the DHCP tab to enable or disable the Dynamic Host Configuration Protocol (DHCP) auto configuration function. 10 Click Hostname to display the Hostname tab. Quantum Scalar i6000 User’s Guide...
- Page 187 13 Use the Settings tab to view the current IPv6 configuration settings. 14 After you make the appropriate network configuration changes, click OK. A prompt appears informing you that network connectivity will be temporarily lost and asks whether you want to proceed. 15 Click Yes. Quantum Scalar i6000 User’s Guide...
-
Page 188: Configuring Dns
View menu. 3 Click Setup > Network Configuration > DNS Configuration. The DNS Configuration dialog box appears. 4 Enter a primary DNS server IP address. Optionally, enter secondary and tertiary addresses. 5 Click OK. Quantum Scalar i6000 User’s Guide... -
Page 189: Viewing The Current Network Port Settings
Configuration Protocol (DHCP) is enabled and DHCP assigns to the library an IP address that conflicts with the internal network, address conflicts could occur between internal library devices and external customer devices and the library will issue a ticket. Quantum Scalar i6000 User’s Guide... - Page 190 4 After the library processes the request successfully, a message appears that asks you whether you want to shut down the library. You must shut down and restart the library in order for the changes to take effect. Quantum Scalar i6000 User’s Guide...
-
Page 191: Managing Connectivity
2 Make sure that you are viewing the physical library. From the View menu, click the name of the physical library. 3 Click Setup > Blades > Connectivity > Port Configuration. The Connectivity dialog box appears. Quantum Scalar i6000 User’s Guide... - Page 192 4 Click the highest-level items to show next-level items. 5 Click a port to highlight it, and then click Configure. For an FC port on an I/O blade, the Fibre Channel Parameters dialog box appears. Quantum Scalar i6000 User’s Guide...
- Page 193 FC Frame Size is specified by each receiving node and need not match any other node. The frame size is typically set to 2048. (You can use another frame size if it is required by a particular software application.) Quantum Scalar i6000 User’s Guide...
- Page 194 Public FC-6 Soft Auto 2048 Initiator Loop preferred Public 6 After you finish selecting the port configuration settings, click OK. A message appears that asks whether you want to make the change. 7 Click Yes. Quantum Scalar i6000 User’s Guide...
-
Page 195: Fc Host Port Failover
4 Click Setup > Blades > Connectivity > FC Host Port Failover. The FC Host Port Failover dialog box appears, showing all the FC I/O blades found in the library. Each blade is identified by name and by location. Quantum Scalar i6000 User’s Guide... - Page 196 5 Click a blade to highlight it, and then click Configure. The FC Host Port Failover dialog box appears 6 In the Feature Enable area, select Enable FC Host Port Failover, and then click Set to make the Configuration tab available. Quantum Scalar i6000 User’s Guide...
- Page 197 Enable. If the port state is “disabled,” the port's connection is repaired and it is ready to be re-enabled. If the Configuration tab itself is disabled, the table on the Physical Ports tab will be empty. Quantum Scalar i6000 User’s Guide...
-
Page 198: Setting Up Policies For The Physical Library
Note: Enable is available only if the port is disabled. 13 To return to the main FC Host Port Failover dialog box, click Close. Setting Up Policies for the Physical Library The Physical Library dialog box enables you to configure various operating modes: Quantum Scalar i6000 User’s Guide... - Page 199 Disabled: Installed drives report their physical serial number to attached hosts. Drive replacement operations will cause the replacement drive to report its assigned physical serial number and host applications may have to re-configure drive support if the drive serial number changes. Quantum Scalar i6000 User’s Guide...
- Page 200 Send Usage Statistics Enabled (default): If e-mail notification settings are configured, library usage and performance data will be sent to Quantum for statistical review purposes. These emails contain configuration and status information only, and do not contain any customer data stored on the system.
- Page 201 Note: Automatic Inventory is disabled by default. 5 Select Enable in the Automatic Drive Unload area to cause the library to issue unload commands when host applications issue move media commands to the library. If you set this to Disable, Quantum Scalar i6000 User’s Guide...
- Page 202 The diagnostics test determines whether the EKM servers are connected and operating properly. The test runs in the background at regular intervals and generates a RAS ticket if key server connectivity issues are found. For more information about the tests Quantum Scalar i6000 User’s Guide...
-
Page 203: Specifying The Date And Time
2 Make sure that you are viewing the physical library. From the View menu, click the name of the physical library. 3 Click Setup > Date and Time. The Date and Time dialog box appears. Quantum Scalar i6000 User’s Guide... - Page 204 (Setup > Network Configuration > DNS Configuration), type the valid alpha/numeric IP Addresses that are accessible from the library. Go to step 7. • If NTP is enabled and you no longer want to use this setting, click Disable. Quantum Scalar i6000 User’s Guide...
-
Page 205: Configuring E-Mail
Send command to e-mail snapshots or logs and when the library automatically sends e-mail notifications of library problems. Use the procedures in the following subsections for: Quantum Scalar i6000 User’s Guide... -
Page 206: Setting Up Or Changing The E-Mail Configuration
7 In the Password text box, type the password for the account that you specified in the Account field. Note: The Password text box is not available if None is selected in the Authentication field. Quantum Scalar i6000 User’s Guide... -
Page 207: Testing The Current E-Mail Configuration
The subject of the test message should be Test email from Scalar i6000 and the message text should include the library name, version, and serial number, along with the date and time that the message was sent. Quantum Scalar i6000 User’s Guide... -
Page 208: Setting Up E-Mail Notifications
Examples of degraded situations include a redundant power supply that has failed or a connectivity problem that has caused host port failover to occur. Quantum Scalar i6000 User’s Guide... - Page 209 2 Make sure that you are viewing the physical library. From the View menu, click the name of the physical library. 3 Click Setup > Notifications > System Setup. The System Setup Notification dialog box appears with the Contact Information tab displayed. Quantum Scalar i6000 User’s Guide...
- Page 210 This dialog box shows all notification recipients that are set up currently in the LMC. By default, the only e-mail address to which the library sends e-mail notifications (severity level 1 [Failed] issues only) is techsup@quantum.com (Quantum technical support), as shown in this Notification dialog box example.
- Page 211 Note: Even though you can remove the Quantum technical support e-mail address so that Quantum does not receive severity level 1 notifications, Quantum recommends that you do not remove it. Also, do not include the Quantum technical support e-mail address for severity level 2 or 3 notifications.
- Page 212 Note: If you are using the remote client LMC, you can assign more than one severity level. While pressing the Ctrl key, click the severity levels you want to assign. The touch screen on the library enables you to select only one severity level. Quantum Scalar i6000 User’s Guide...
- Page 213 This tab allows users to assign an email address to notify someone of the status of the library at regular intervals. Users can designate the interval in minutes. 15 After you finish setting up all notifications, click OK. Quantum Scalar i6000 User’s Guide...
-
Page 214: Setting Up Media Security Notifications
• Unexpected Removal Detection During Library Operation — While library is powered up someone opens the door of the library and removes media. • Expected Removal Detection From I/E Slots During Library Operation — Media are exported to the I/E (via backup Quantum Scalar i6000 User’s Guide... - Page 215 I/E station. 4 Click OK to close the dialog. 5 From the main console, select Setup > System Settings > Physical Library. The Physical Library dialog box appears. Quantum Scalar i6000 User’s Guide...
-
Page 216: Viewing The Media Security Events Report
FC port on the MCB, or to a port on one of the FC I/O blades, you must map the appropriate partitions by using the FC Host command. If you have connected your hosts directly to the Quantum Scalar i6000 User’s Guide... -
Page 217: Configuring Drive Scsi Id
2 Make sure that you are viewing the partition that includes the drive you want to configure. From the View menu, click the name of the appropriate partition. 3 Click Setup > Drives > SCSI ID’s. The SCSI ID’s dialog box appears. Quantum Scalar i6000 User’s Guide... - Page 218 For example, in the figure above, the drive is in position 10. The following figure shows its location in the control module. For more information about location coordinates, see Understanding Location Coordinates on page 459. Quantum Scalar i6000 User’s Guide...
- Page 219 Drive 6 Drive 5 Drive 4 Drive 3 Drive 2 Drive 1 5 To specify a particular ID for a drive, click a new ID number from the New ID drop-down list. 6 Click Set. Quantum Scalar i6000 User’s Guide...
-
Page 220: Configuring Fibre Channel Drive Speed, Topology, And Loop Id
1 Click Setup > Drives > FC Settings. The Drive Settings dialog box appears. 2 From the Partition Filter drop-down list, select all partitions or a single partition whose drive settings you want to set. 3 Configure the settings as described below: Quantum Scalar i6000 User’s Guide... - Page 221 • You cannot use Point to Point if the tape drive is connected to an FC I/O blade. • You must use Point to Point if the tape drive is being used for control path failover (see Configure Control Path on page 361). Quantum Scalar i6000 User’s Guide...
-
Page 222: Configuring Fibre Channel I/O Blades
Device discovery occurs automatically when you reboot the library. Some host computers have plug and play capability, which discovers devices automatically. In general, host applications do not discover devices automatically. Quantum Scalar i6000 User’s Guide... - Page 223 Adding, Modifying, and Deleting FC Hosts You can add and configure FC hosts without powering down the system. Manually add an FC host if it was not already connected to the library when it was turned on. Quantum Scalar i6000 User’s Guide...
- Page 224 • In the WWN text box, type the host device World Wide Name (WWN). 7 Click OK. Modifying an FC Host 1 With the host selected in the FC Host dialog box, click Modify. The Host Configuration dialog box appears. Quantum Scalar i6000 User’s Guide...
- Page 225 Note: The Delete button is unavailable if the host is online. 4 Click Yes. A message appears that indicates a successful deletion. 5 Click OK. Quantum Scalar i6000 User’s Guide...
-
Page 226: Channel Zoning
The same I/O blade may appear multiple times in the list depending on the number of hosts assigned to the I/O blade. You only need to select one instance of the blade to zone the entire blade. Quantum Scalar i6000 User’s Guide... -
Page 227: Fc Host Lun Mapping
No. 9 After you complete your configuration changes, click Close. FC Host LUN Mapping Use the FC Host LUN Mapping dialog box to give a selected host access to partitions and drives. Quantum Scalar i6000 User’s Guide... - Page 228 Note: If you delete a partition that is currently displayed on the FC Host LUN Mapping dialog box, the internal LUN and any external LUN mappings for the partition will no longer appear on the dialog box. Quantum Scalar i6000 User’s Guide...
- Page 229 ID, vendor ID, and the serial number of the partition. For drives, the LMC displays the device LUN, connection type, port connection, vendor ID, serial number, and the associated partition. The following table describes the descriptors that appear in the Show Details view for partitions. Quantum Scalar i6000 User’s Guide...
- Page 230 SCSI INQUIRY response. The library can report that it is a Scalar i500, Scalar i2000, or Scalar i6000. This feature can enable the library to be used with host applications that do not yet include the Scalar i6000 in a list of recognized devices. In addition, the various Microsoft Windows operating systems maintain a list of recognized devices.
- Page 231 LUN/External LUN column. Always use LUN 0 for command and control. In the following figure, all devices have been mapped manually. The new map locations appear in heavy black type in the LUN/ External LUN column. The previous (default) device map position of Quantum Scalar i6000 User’s Guide...
- Page 232 LUN 2. Drag it back into the Internal LUN column to make it available for re-mapping. If you are working from the local touch screen, select an external device LUN, and then select the right arrow. Quantum Scalar i6000 User’s Guide...
- Page 233 LUN Mapping Wizard. 1 Click Setup > Blades > Access > LUN Mapping Wizard. The LUN Mapping Wizard – Overview dialog box appears. Quantum Scalar i6000 User’s Guide...
- Page 234 4 Select a partition to configure and then click Next to continue. All available blades on the selected partition are listed on this dialog box. The LUN Mapping Wizard – Select Blade dialog box appears. Quantum Scalar i6000 User’s Guide...
- Page 235 Mapping Wizard – Map/Unmap Devices dialog box appears. 6 Select the check box to map a device or clear the check box to unmap a device, then click Next to continue. The LUN Mapping Wizard – What Next? dialog box appears. Quantum Scalar i6000 User’s Guide...
- Page 236 8 If your configurations are complete, select Continue and preview all changes. The LUN Mapping Wizard – Preview All Changes dialog box appears. Quantum Scalar i6000 User’s Guide...
- Page 237 This dialog box displays what types of changes were made to all devices. The changes on the report include: • Added Mapping – (A) • Removed Mapping – (R) • LUN Modified – (M) Quantum Scalar i6000 User’s Guide...
- Page 238 Zoom In or Zoom Out. • To access the Online Help, click Help. 11 After you have reviewed the LUN Mapping Change Preview Report, click Close to return to the LUN Mapping Wizard – Preview All Changes dialog box. Quantum Scalar i6000 User’s Guide...
-
Page 239: Generating The Lun Mapping Report
Viewing the LUN Mapping Report To view the LUN Mapping report, first choose a grouping criteria, then view the report. 1 On the menu bar, click Tools > Reports > LUN Mapping. The Report Criteria dialog box appears. Quantum Scalar i6000 User’s Guide... - Page 240 • Group by Partition — The report lists the devices associated with each partition. 3 Click View. The Print Preview dialog box appears. Figure 41 page 223 shows an example of a LUN Mapping Report grouped by host. Quantum Scalar i6000 User’s Guide...
- Page 241 Chapter 3: Configuring Your Library Configuring Fibre Channel I/O Blades Figure 41 LUN Mapping Report grouped by host preview Quantum Scalar i6000 User’s Guide...
- Page 242 • To print the report, click Print. Specify print options, and then click OK. • To save the report as a PDF file, click PDF. Specify a file path and file name, and then click Confirm. Quantum Scalar i6000 User’s Guide...
-
Page 243: Generating The Library Configuration Report
5 To close the Report Criteria dialog box, click Cancel. Generating the Library Configuration Report The Library Configuration report lets you view the number of I/E stations, drives, and storage slots in the library that are currently Quantum Scalar i6000 User’s Guide... - Page 244 • To print the report, click Print. Specify print options, and then click OK. • To save the report as a PDF file, click PDF. Specify a file path and file name, and then click Confirm. Quantum Scalar i6000 User’s Guide...
-
Page 245: Configuring Drive Cleaning
For more information about enabling automatic drive cleaning for a partition, see Working With Partitions on page 128 on page 171. For more information about manually cleaning drives, see Cleaning a Drive on page 566. Quantum Scalar i6000 User’s Guide... -
Page 246: Assigning Cleaning Magazines
1 Make sure that you are viewing the physical library. From the View menu, select the name of the physical library. 2 On the menu bar, select Setup > Cleaning Slots. The Cleaning Slot Configuration window displays. Quantum Scalar i6000 User’s Guide... - Page 247 Chapter 3: Configuring Your Library Configuring Drive Cleaning Figure 43 Cleaning Slot Configuration window Quantum Scalar i6000 User’s Guide...
-
Page 248: Importing Cleaning Media
1 To import cleaning media, select Operations > Import Cleaning Media Media..The Import Cleaning Media window displays. 2 Click the check box in the Select column next to the cleaning tape you want to import. 3 Click OK. The Working... dialog box displays. Quantum Scalar i6000 User’s Guide... -
Page 249: Exporting Cleaning Media
• To export only the selected piece of media, click Menu, and then click Export cleaning media <barcode number>. • To export all media in the selected magazine, click Menu, and then click Export all cleaning media in magazine. Quantum Scalar i6000 User’s Guide... - Page 250 4 When complete, a dialog displays indicating if the export was successful. The cleaning media are removed to an available slot in the I/E station. 5 Click OK. On the Export Cleaning Media window, the exported cleaning tape will be highlighted green. Quantum Scalar i6000 User’s Guide...
-
Page 251: Unassigning A Cleaning Magazine
Registering SNMP Traps Because the library ignores all SNMP SET operations, external management applications cannot register themselves to receive SNMP traps from the library. The Trap Registration dialog box enables you to manually register external applications. Quantum Scalar i6000 User’s Guide... -
Page 252: Registering An Application
(UDP) port that you want to associate with the IP address or host name. 6 Click Create. The host application's IP address or name and UDP port number appear in the table to indicate that the application is registered to receive SNMP traps from the library. Quantum Scalar i6000 User’s Guide... -
Page 253: Removing An Application's Trap Registration
Ethernet port on the MCB. 1 Log on as an admin user. 2 Click Setup > Security. The Security Configuration dialog box appears with the Services tab displayed. Quantum Scalar i6000 User’s Guide... -
Page 254: Configuring Access For Network Services
• ICMP — To prevent external attempts to discover the library by pinging it (by means of Internet Control Message Protocol [ICMP] Echo packets), select Disable. Using this setting can prevent denial-of-service (DoS) attacks, which can flood the Quantum Scalar i6000 User’s Guide... -
Page 255: Configuring Access For Remote Lmc Clients
Enable. (The HTTP option is unavailable when accessing the LMC remotely.) • XML Interface — If Quantum Vision software is monitoring the library, you need to enable the XML interface so Vision can get the information it needs. In order to select XML Interface, the HTTP option must also be enabled. - Page 256 Note: Enabling SSL can impact the network performance of remote operations (for example, downloading new library software). • Callback Port Range — To configure firewall access for server callbacks to remote clients, type the first port number of a Quantum Scalar i6000 User’s Guide...
- Page 257 Note: The Service login timeout is set to 4 hrs and cannot be modified. 3 If you want to apply the changes, but you do not want to close the dialog box, click Apply. Otherwise, click OK to apply the changes and close the dialog box. Quantum Scalar i6000 User’s Guide...
-
Page 258: Configuring Access For Snmp And Smi-S
SNMP access, select Enable SNMP v1 and v2. If you decide you do not want to use SNMP v1 and v2, clear the Enable SNMP v1 and v2 check box. Quantum Scalar i6000 User’s Guide... -
Page 259: Using Ldap
User account information is centralized and shared by different applications, simplifying user account management tasks. For more information about local user accounts, see Creating Local User Accounts on page 478. Quantum Scalar i6000 User’s Guide... -
Page 260: Configuring Ldap
You can configure the Lightweight Directory Access Protocol (LDAP) settings any time after the initial library configuration. 1 From the LMC, select Setup > User Configuration > LDAP. The LDAP Configuration dialog box displays with the General tab displayed. Quantum Scalar i6000 User’s Guide... - Page 261 • Secure: Use this check box to enable the setup options to access a secure LDAP server, which can be done using any port except 389. The default secure port is 636. If you enable this option, you must retrieve the trusted root Quantum Scalar i6000 User’s Guide...
- Page 262 ) are secure only by default. • Search Information section: • Administrative user rights are not required, but the user must have the right to search for all needed user names in the LDAP directory. Quantum Scalar i6000 User’s Guide...
- Page 263 • Admin: The group associated with the library administrator, equivalent to the local administrative user privilege level. Any member of this group has administrative privileges. Quantum Scalar i6000 User’s Guide...
- Page 264 - cn or - uid or - sAMAccountName attributes match the actual username. To test the LDAP configuration, do the following: a Click the Test tab. b Fill in the Test User section: Quantum Scalar i6000 User’s Guide...
- Page 265 Click OK to return to the LDAP Configuration dialog box. • If the connection succeeded, click OK. 5 To accept and save the library configuration, in the LDAP Configuration dialog box, click OK. Quantum Scalar i6000 User’s Guide...
-
Page 266: Configuring Screen Saver Preferences
1 From the menu bar, click Setup > System Settings > Preferences. The Preferences dialog box appears with the Screen Saver tab displayed. 2 Do one of the following: • Select Default to use the default Quantum screen saver with standard settings. Quantum Scalar i6000 User’s Guide... - Page 267 Or click Apply to save the settings without closing the Preferences dialog box. 7 Because you made system configuration changes, you are prompted to save the configuration changes. For more information, see Saving and Restoring Library Configuration on page 601. Quantum Scalar i6000 User’s Guide...
-
Page 268: Working With Data Path Conditioning
Working With Data Path Conditioning Working With Data Path Conditioning The Scalar i6000 provides an automatic means of verifying, monitoring, and protecting data path integrity between hosts and library drives. This feature is referred to as data path conditioning. Using this feature, administrators can proactively detect and resolve data path problems before they affect backup, restore, and other data transfer operations. - Page 269 Performs tests to verify that Fibre Channel controllers on I/O blades are responsive to commands. Device Datapath Performs tests at the Interface Test level, and also performs a device inquiry on Test each target device. Quantum Scalar i6000 User’s Guide...
-
Page 270: About The Configuration Record
• SCSI tape drives — SCSI ID • Fibre Channel (FC) tape drives — World Wide Name (WWN) and loop ID, speed, and connection type Quantum Scalar i6000 User’s Guide... -
Page 271: Setting Aisle Lights
Note: For the time limited settings, if the lights were on before the operation, the timer starts over when the lights are automatically turned on. Quantum Scalar i6000 User’s Guide... -
Page 272: Configuring A Webcam For Your Library
1 From the main console, select Setup > System Settings > Camera Host/IP. The Camera Host/IP dialog box appears. 2 Specify the host name or IP address of the webcam that's connected to your intranet. 3 Click OK. Quantum Scalar i6000 User’s Guide... -
Page 273: Additional Information
These modules have larger storage capacities making them ideal for libraries where space is an issue. If your library has a tower installed, you can manage, monitor and maintain it. 1 From the Tools menu, select Towers. The Towers dialog box displays. Quantum Scalar i6000 User’s Guide... - Page 274 • Unknown - scanner is present but not working properly • Not Present - scanner is not installed • Removed - scanner has been taken out of the tower • Failed - scanner is not working properly Quantum Scalar i6000 User’s Guide...
- Page 275 Varied Off. • Cancel — Closes the Towers dialog box. • Refresh — Refreshes the Towers dialog so it displays the most current information. • Help — Displays the i6000 online help page referencing the tower. Quantum Scalar i6000 User’s Guide...
- Page 276 Chapter 3: Configuring Your Library Working with Towers Quantum Scalar i6000 User’s Guide...
-
Page 277: Active Vault
Create Active Vault Partitions on page 261 • Configure Access to External Applications on page 262 • Configure Active Vault Policies on Partitions on page 262 • View Active Vault Partition Policies on page 266 Quantum Scalar i6000 User’s Guide... -
Page 278: About Active Vault
• Library managed Active Vault partitions can be configured with EDLM policies (see Chapter 9, Extended Data Lifecycle Management). Configure Active Vault Active Vault policies are configured on standard partitions. The policies intercept host commands that export tape cartridges to library Quantum Scalar i6000 User’s Guide... -
Page 279: Create Active Vault Partitions
Vault partitions. Follow the instructions in Using Expert Mode page 141. When you get to the screen named Partitions - Step 2: Choose Partition Properties, select Library Managed (Vault) from the Partition Type drop-down menu. Quantum Scalar i6000 User’s Guide... -
Page 280: Configure Access To External Applications
This policy redirects SCSI host initiated tape cartridge export MOVE operations to an Active Vault. 1 Click Setup > Partitions > Policies > Active Vault Configuration. The Active Vault Configuration Wizard appears. Quantum Scalar i6000 User’s Guide... - Page 281 2 Select a partition from the table that has Active Vault policies disabled. 3 Proceed to Step Modify existing Active Vault 1 Select Modify. policy 2 Select a partition from the table that has Active Vault policies enabled. 3 Proceed to Step Quantum Scalar i6000 User’s Guide...
- Page 282 4 Click Yes to confirm. A “success” dialog box appears. 5 Click OK to close the dialog box. Process is complete. 4 Click Next. The Active Vault Policies screen appears. 5 Choose one of these redirect options: Quantum Scalar i6000 User’s Guide...
- Page 283 Note: Only host-initiated export operations will be redirected to the Active Vault. UI-initiated export operations will still move tape cartridges to an I/E element. 6 Click Finish. A confirmation dialog appears. 7 Click OK to close the dialog. Quantum Scalar i6000 User’s Guide...
-
Page 284: View Active Vault Partition Policies
View Active Vault To review the policies you configured, you can go back through the Partition Policies Wizard, or you can click Monitor > Partitions > Policies. See Monitoring Partition Policies on page 544 for more information. Quantum Scalar i6000 User’s Guide... -
Page 285: Advanced Reporting
In addition, Advanced Reporting feature allows you to schedule certain library reports to be automatically generated and e-mailed to designated recipients (Tools > Reports > Reporting Options). See Setting Up Advanced Reporting Options on page 616. Quantum Scalar i6000 User’s Guide... -
Page 286: Media Usage Report
1 Log on as an administrator. 2 From the main menu, select Tools > Reports > Media > Usage. The Media Usage Report dialog box is displayed. The report provides the following information: Quantum Scalar i6000 User’s Guide... - Page 287 Errors where all re-read attempts failed and the data could not be successfully read from the tape Encryption Cartridge Encryption Status (U=Unknown, E=Encrypted, N=Not Encrypted) 3 To send the report to your e-mail, click Send. Quantum Scalar i6000 User’s Guide...
-
Page 288: Viewing Cross-Partition Media Moves
3 If desired, filter the report output by selecting a single source partition and/or a single target partition from the Source Partition and Target Partition fields respectively. Click Filter to apply your selections and update the report. Quantum Scalar i6000 User’s Guide... - Page 289 • Click Save and navigate to the location where you want to save the report. Click OK. • Click Print to print the report. Click OK. • Click Cancel to return to the report screen 6 When you are finished with the report, click Close. Quantum Scalar i6000 User’s Guide...
- Page 290 Chapter 5: Advanced Reporting Viewing Cross-Partition Media Moves Quantum Scalar i6000 User’s Guide...
-
Page 291: Automated Media Pool
AMP. This allows you to adjust the amount of media within a partition as needed without performing import/export operations (for more information, see Moving Media Between Active Vault or AMP and Standard Partitions on page 704). Quantum Scalar i6000 User’s Guide... - Page 292 • Use an Automated Media Pool on page 278 • Assign Storage Magazines to/from the AMP on page 279 • Move Media to/from the AMP on page 281 • Auto Import Media on page 283 Quantum Scalar i6000 User’s Guide...
-
Page 293: Requirements For Automated Media Pool
1 Use Expert Mode to create one or more AMP library managed partitions. Follow the instructions in Using Expert Mode page 141. When you get to the screen named Partitions - Step 2: Choose Partition Properties, select AMP from the Partition Type drop- down menu. Quantum Scalar i6000 User’s Guide... -
Page 294: Create Magazine Extensions In Standard Partitions
If the standard partition you want to use with the AMP partition doesn’t have extensions defined, you must modify the standard partition (see Modifying Partitions on page 147). Note: You can only create magazine extensions in standard partitions (not library managed partitions). Quantum Scalar i6000 User’s Guide... -
Page 295: Configure Amp Import Policies
You can only configure export AMP policies on standard partitions (not Export Policies library managed partitions). However, this export function cannot be performed from the user interface. Instead, any SCSI MOVE commands performed on the standard partition to an assigned I/E elements will Quantum Scalar i6000 User’s Guide... -
Page 296: Use An Automated Media Pool
4 Click OK. Use an Automated Media Pool An AMP has two functions: • Assign Storage Magazines to/from the AMP on page 279 — Assigns storage elements from the AMP to a standard partition, or from a Quantum Scalar i6000 User’s Guide... -
Page 297: Assign Storage Magazines To/From The Amp
1 Make sure you are viewing the physical library (from the View menu, select the name of the physical library). 2 Make sure that the standard partition has sufficient “magazine extensions” configured (see Create Magazine Extensions in Standard Partitions on page 276. Quantum Scalar i6000 User’s Guide... - Page 298 5 Select the partition to which you wish to assign magazines from the Assign To list. Note: The Empty Slots column displays both storage and IE slots. 6 Click OK. The Select Segments screen appears. Quantum Scalar i6000 User’s Guide...
-
Page 299: Move Media To/From The Amp
1 Make sure you are viewing the physical library (from the View menu, select the name of the physical library). 2 Click Setup > Partitions > Automated Media Pool > Assign Media. The Assign Media: Select Partitions screen appears. Quantum Scalar i6000 User’s Guide... - Page 300 3 From the Remove From section, select a partition from which to move media. From the Assign To section, select a partition into which to move media. 4 Click OK. The Assign Media from Automated Media Pool screen appears. Quantum Scalar i6000 User’s Guide...
-
Page 301: Auto Import Media
6 From the Select Media list, select the tape(s) you want to move. 7 Click OK. Auto Import Media 1 From the View menu, select the AMP partition from which you want to import tapes. Quantum Scalar i6000 User’s Guide... - Page 302 When complete, the Results column will display the new location, in coordinates, of the media. 4 Click Refresh to refresh the Auto Import Media dialog box to ensure the media was imported. 5 Click Close. Quantum Scalar i6000 User’s Guide...
-
Page 303: Capacity On Demand
Capacity on Demand allows you to purchase capacity for your library as needed. As your storage needs change, you can add storage in blocks of 100. Scalar i6000 licensing begins at 100 cartridges and can be increased to as many as 7,146 LTO cartridges (for a single-robot library) or 7,224 LTO cartridges (for a dual-robot library). - Page 304 Chapter 7: Capacity on Demand • You can also use Unlicensed Expansion Modules to accommodate the Active Vault and Extended Data Lifecycle Management (EDLM) features, which do not require the use of licensed slots. Quantum Scalar i6000 User’s Guide...
-
Page 305: Encryption Key Management
• KMIP-compliant Encryption Key Management on page 289 • FIPS-Certified Encryption Solution on page 289 • Setting up EKM on the Scalar i6000 on page 293 • Using EKM Path Diagnostics on page 311 • Monitoring EKM Server Status on page 313 •... - Page 306 Note: The library does not support using more than one encryption key management system on a single library. Encryption on the Scalar i6000 tape library is enabled by partition only. The default setting for encryption-capable drives permits external application-managed encryption support on all encryption-capable tape drives and media within a partition.
-
Page 307: Kmip-Compliant Encryption Key Management
FIPS (Federal Information Processing Standard) 140-2 is a U.S. government standard relating to computer security and encryption. The Quantum Scalar i6000 now offers a FIPS 140-2 Level 1 certified encryption solution composed of the Scalar Key Manager and HP LTO-5 and laterFibre Channel tape drives in a Scalar i6000 library. - Page 308 • Library firmware must be at version 630Q or later. • HP LTO-5 and later tape drive firmware must be at the latest version Scalar i6000 Release qualified with the Scalar i6000 library (see the Notes for qualified firmware levels).
-
Page 309: Drives
4 Change the Encryption Method of a partition to Enable Library Managed. 5 Select the FIPS check box to enable FIPS mode for the partition. Clear the FIPS check box to disable FIPS mode for the partition. 6 Click OK. Figure 44 Enabling FIPS Mode Quantum Scalar i6000 User’s Guide... -
Page 310: Viewing Fips Status On The Library
FIPS. All tape drives in FIPS partitions are enabled. See Figure 44 page 291. • The Partitions Status report (Monitor > Partitions > Status) lists FIPS in the Encryption column if FIPS is configured on the partition. Quantum Scalar i6000 User’s Guide... -
Page 311: Setting Up Ekm On The Scalar I6000
Chapter 8: Encryption Key Management Setting up EKM on the Scalar i6000 Setting up EKM on the Scalar i6000 Step 1 — Installing the 1 Click Setup > Licenses. The Licenses dialog box appears. EKM License Key This dialog box lists the licensed features for your library, plus Status, Expiration, and Quantity. -
Page 312: Step 2 - Preparing Partitions For Library-Managed Encryption
Chapter 8: Encryption Key Management Setting up EKM on the Scalar i6000 Step 2 — Preparing 1 If not already installed, install tape drives that are supported by the Partitions for Library- encryption system you are using (see Supported Tape Drives page 288). - Page 313 Chapter 8: Encryption Key Management Setting up EKM on the Scalar i6000 Encryption System Action Scalar Key Manager TLS certificates may already be pre-loaded on (SKM) the library. 1 Check to see if certificates are loaded. See Checking for Current Certificates page 296.
- Page 314 Chapter 8: Encryption Key Management Setting up EKM on the Scalar i6000 Checking for Current Certificates Follow the steps below to see what certificates are already loaded on your library. 1 From the Tools menu, select EKM Management > Import Communication Certificates.
- Page 315 299. Installing SKM Library TLS Certificates from Quantum CD Note: The Quantum certificate bundle can be used only with SKM. Quantum TLS certificates for use with SKM may already be pre- loaded on your library. Check if these exist before adding new TLS certificates for SKM.
- Page 316 4 In the Select Certificates section, select SKM from the Key Server Type drop-down list. 5 Select the Use Quantum Certificate Bundle check box, and then click Browse to locate the Quantum Bundle File. Note: If you have installed certificates, they are listed in the Current Certificates section.
- Page 317 Chapter 8: Encryption Key Management Setting up EKM on the Scalar i6000 Installing User-Provided Certificates Follow these instructions to install your own TLS certificates, or when installing TLS certificates for KMIP. When providing your own certificates, it is assumed you understand the concepts of PKI and can access the tools or third-party resources needed to generate or obtain certificates.
- Page 318 Chapter 8: Encryption Key Management Setting up EKM on the Scalar i6000 Note: The .p12 format combines the public/private key pair files in .pem file format and password protects access to such .pem certificate files. • The Admin and Client certificates must be 1024 bits.
- Page 319 Chapter 8: Encryption Key Management Setting up EKM on the Scalar i6000 3 In the Select Certificates section, select the appropriate Key Server Type from the drop-down list. Depending on your selection, certain fields are enabled. 4 Take the following actions, depending on which Key Server Type you...
-
Page 320: Step 4 - Configuring The Ekm Server
Chapter 8: Encryption Key Management Setting up EKM on the Scalar i6000 • In the Admin Certificate Password field, type the password used when you generated the certificate files. • Click Browse to retrieve the Client Certificate File. • In the Client Certificate Password field, type the password used when you generated the certificate files. - Page 321 Chapter 8: Encryption Key Management Setting up EKM on the Scalar i6000 3 Fill in the rest of the fields as described in the sections below for each server type: Q-EKM on page 303, TKLM/SKLM on page 304, on page 304, or...
- Page 322 Chapter 8: Encryption Key Management Setting up EKM on the Scalar i6000 g EKM Path Diagnostics - Not supported for Q-EKM. The Test button is disabled. TKLM/SKLM a Enable SSL - Check the box if SSL communications should be enabled between the library and encryption server(s).
- Page 323 Chapter 8: Encryption Key Management Setting up EKM on the Scalar i6000 e Secondary port number - Field is disabled, and port number defaults to 6000 automatically. f Key Class - This field is not applicable for SKM. g EKM Path Diagnostics - To test the configuration, click Test.
-
Page 324: Step 5 - Configuring Partitions For Library-Managed Encryption
For SKM, ports 80, 6000, and 6001 must be open. Step 5 — Configuring Encryption on the Scalar i6000 library is enabled by partition only. You Partitions for Library- cannot select individual drives for encryption; you must select an entire partition for encryption. - Page 325 Chapter 8: Encryption Key Management Setting up EKM on the Scalar i6000 Encryption Methods, Details, and Restrictions The following encryption methods are available on the library: • Application Managed (default)— Allows your host application to provide encryption support on all encryption-capable tape drives and media within the partition.
- Page 326 Chapter 8: Encryption Key Management Setting up EKM on the Scalar i6000 managed encryption at the first write operation at the beginning of tape (BOT). If the media was previously written in a non-encrypted format, all data subsequently written to it will continue to be non-encrypted.
- Page 327 Chapter 8: Encryption Key Management Setting up EKM on the Scalar i6000 • KMIP-compliant key management (SafeNet) supports encryption for data cartridges using HP LTO-4 or later as well as IBM LTO-5 or later Fibre Channel drives. If you are using KMIP-...
- Page 328 Chapter 8: Encryption Key Management Setting up EKM on the Scalar i6000 Note: If you want to change a partition’s encryption method, make sure that the tape drives in that partition do not have cartridges loaded. If there are cartridges in the tape drives, you cannot change the encryption method.
-
Page 329: Step 6 - Saving The Library Configuration
Using EKM Path Diagnostics EKM Path Diagnostics is a series of short tests performed by the library to determine whether the EKM servers are connected and operating properly. Note: This feature is not available for Q-EKM. Quantum Scalar i6000 User’s Guide... -
Page 330: Troubleshooting Ekm Path Diagnostics Problems
Note: This feature is enabled by default. You can disable it for SKM but you cannot disable it for KMIP key managers. Unless directed by Quantum Support to disable this feature, the background EKM Path Diagnostics should always be enabled so the library can monitor SKM server status and report issues as soon as they arise. -
Page 331: Monitoring Ekm Server Status
1 From the View menu, select the name of the physical library or partition that communicates with the EKM servers you want to monitor. 2 On the menu bar, click Monitor > EKM Servers. The EKM Server Status dialog box appears. Quantum Scalar i6000 User’s Guide... - Page 332 No —encryption key generation not in progress. Version Applies to SKM only: Software version number Serial Number Applies to SKM only: Server serial number You can mail, save, or print status information by using the Send button. Quantum Scalar i6000 User’s Guide...
-
Page 333: Using Q-Ekm
Quantum Encryption Key Manager and Q-EKM best practices, see the User’s Guide (6-01847-xx). Q-EKM on the Scalar i6000 library supports encrypting LTO-4 or higher tape media using IBM LTO-4 or higher Fibre Channel drives only. All IBM Quantum Scalar i6000 User’s Guide... -
Page 334: Using Skm
Note: You must be running Q-EKM version 2.0 (or higher) to support IBM LTO-5 or LTO-6 tape drives. The encryption keys pass through the library, so that encryption is “transparent” to the applications. If you purchase Q-EKM, Quantum's Service department will schedule an appointment to install the application onto your server(s). - Page 335 Importing Encryption Certificates The encryption certificate contains a public key that is used to wrap (encrypt) encryption keys prior to transporting them to another SKM server. When sharing tape cartridges, or when performing a backup in Quantum Scalar i6000 User’s Guide...
- Page 336 Before you can receive encryption keys from another SKM server, you must first send your native encryption key certificate to that server. You can use the Export functionality to export the native certificate to a file Quantum Scalar i6000 User’s Guide...
- Page 337 SKM server. You may also use this function to import a backup of your own SKM server encryption keys in case of a catastrophic SKM server failure. Quantum Scalar i6000 User’s Guide...
- Page 338 SKM servers. Both SKM servers must be connected and operational in order to export encryption key certificates. 1 Before starting this process, read and follow the sequence of steps outlined in Sharing Encrypted Tape Cartridges on page 316. Quantum Scalar i6000 User’s Guide...
- Page 339 317). It should appear on the list for you to select. • Your SKM server — If you are sending your encryption key certificate to someone else to use to wrap encryption keys, Quantum Scalar i6000 User’s Guide...
- Page 340 To access the file, you will have to untar the file first. To retrieve these logs, you must have Library Managed Encryption licensed on the library and be running a SKM server or servers. Note: This function is available to users with administrator-level privileges only. Quantum Scalar i6000 User’s Guide...
- Page 341 Generating EKM Audit Reports The EKM Audit Report option allows you to view or print library information, encryption method activity and media encryption status. If desired, you can save, print or email the generated information. Quantum Scalar i6000 User’s Guide...
- Page 342 2 If desired, click the Start and End buttons in the Date Range section to specify starting and ending dates for the report. Click Filter to apply your entries. 3 Click Send to save, e-mail, or print the information. The Email, Save, or Print dialog box appears. Quantum Scalar i6000 User’s Guide...
- Page 343 • encryptionMethodChanges.csv • mediaEncryptionStatus.csv • libraryInfo.txt These three files contain the same information that is displayed on the EKM Audit Report screen. 5 Click Close when you are finished with the EKM Audit Report. Quantum Scalar i6000 User’s Guide...
- Page 344 Chapter 8: Encryption Key Management Using SKM Quantum Scalar i6000 User’s Guide...
-
Page 345: Extended Data Lifecycle Management
330 • Step 1: Creating the EDLM Library Managed Partition page 330 • Step 2: Configuring Access to StorNext on page 332 (optional) • Step 3: Configuring EDLM Policies on Partitions on page 332 Quantum Scalar i6000 User’s Guide... -
Page 346: About Edlm
330. • Automatic media scanning policies are configured by partition. Each partition can have its own unique set of media scanning and action policies. See Step 3: Configuring EDLM Policies on Partitions page 332. Quantum Scalar i6000 User’s Guide... - Page 347 Note: Manual movement between library managed partitions and standard partitions will require inventory reconciliation with the backup application managing the standard partition. • EDLM drives and blades must be separate from other blades in the library. Quantum Scalar i6000 User’s Guide...
-
Page 348: Configuring Edlm
• All tape drives in the EDLM library managed partition must be “EDLM-scanning drives” (not standard tape drives) which must be purchased from Quantum. Previously purchased “MeDIA drives” are the same thing and are now known as “EDLM-scanning drives.” These EDLM-scanning drives are HP LTO-4or higher Fibre Channel tape drives. - Page 349 6 Use Expert Mode to create the EDLM library managed partition. Follow the instructions in Using Expert Mode on page 141. When you get to the screen named Partitions - Step 2: Choose Partition Properties, select Library Managed (EDLM) from the Partition Type drop-down menu. Quantum Scalar i6000 User’s Guide...
-
Page 350: Step 2: Configuring Access To Stornext
EDLM library managed partition. Partitions (Some policies are not available on the EDLM and other library managed partitions; namely, those that require external access to a host application.) You can configure the following types of policies: Quantum Scalar i6000 User’s Guide... - Page 351 2 Click Next. The Select the EDLM Configuration Option screen appears. All of the library’s partitions are displayed in a table. The EDLM Policy column indicates whether EDLM policies are enabled or disabled on the partition. Quantum Scalar i6000 User’s Guide...
- Page 352 3 Proceed to Step 1 Select the Modify radio button. Modify existing EDLM policies on a partition 2 Select the check box of a partition in the table that has EDLM policies enabled. 3 Proceed to Step Quantum Scalar i6000 User’s Guide...
- Page 353 4 Click Next. The EDLM Media Scan Candidate Policies screen appears. Note: Depending on the type of partition you are setting policies for, some of the choices shown below may not appear. For example, library managed partitions cannot be configured for external application support. Quantum Scalar i6000 User’s Guide...
- Page 354 You can still perform manual scans on tapes residing in the partition, and media scan action results policies (Step 11 on page 341) will remain in effect. Quantum Scalar i6000 User’s Guide...
- Page 355 • 37h (55) – Loading Failure • 3Bh (59) – WORM Medium Integrity Check Failed This policy is disabled by default. The default number of Tape Alerts is 3. This policy is not available on the library managed partitions. Quantum Scalar i6000 User’s Guide...
- Page 356 Application support on page 337), and if the external application supports suspect counts. Perform scans Scans a tape cartridge as soon as it is imported into the partition. immediately when media is imported into the library. Quantum Scalar i6000 User’s Guide...
- Page 357 Note: When deciding on a scan type policy, consider how the tapes are being used. Depending on the number of EDLM drives and the scan type policy you choose, scans can take a very long time to complete, and may overlap the next scheduled scan. Quantum Scalar i6000 User’s Guide...
- Page 358 9 Select the maximum number of concurrent scans allowed from the Concurrent Scans drop-down list. The maximum allowed (default) is the number of scanning drives in the EDLM partition. 10 Click Next. The EDLM Media Scan Results Action Policies screen appears. Quantum Scalar i6000 User’s Guide...
- Page 359 Disable RAS ticket generation and Select this option if you do not wish to receive RAS notifications of bad or suspect media. tickets and e-mail notifications of bad or suspect media. RAS ticket generation is disabled by default. Quantum Scalar i6000 User’s Guide...
-
Page 360: Step 4: Viewing Edlm Partition Policies
You can manually scan tape cartridges in the library at any time. Manual EDLM scans can be run on any tape in the library, as long the following conditions are met: • An EDLM license must be installed on the library. Quantum Scalar i6000 User’s Guide... - Page 361 2 From the View menu, select the physical library or a partition on which EDLM policies are enabled. 3 From the main menu, select Tools > EDLM > Test Selection. The EDLM Test screen appears. Quantum Scalar i6000 User’s Guide...
- Page 362 The media barcode. Coordinate Where the cartridge is located within the library. Scan Scan type, described in Step 7 on page 346. Priority The order in which scans are performed, described in Step 9 page 347. Quantum Scalar i6000 User’s Guide...
- Page 363 Filter. If you choose not to filter the list, skip this step. 6 From the media table, select the check box for each tape you want to scan. To select all media listed, select the Select All Media check box. Quantum Scalar i6000 User’s Guide...
- Page 364 • For tapes in frequent use within the library, with scanning triggered by drive- reported media Tape Alert events. • For tapes in frequent use within the library, with scanning being performed at regular time intervals. Quantum Scalar i6000 User’s Guide...
- Page 365 High Placed in the queue behind existing queued tapes with “high” priority. Medium Placed in the queue behind existing queued tapes with “medium” priority. Placed in the queue behind existing queued tapes with “low” priority. Quantum Scalar i6000 User’s Guide...
-
Page 366: Viewing Edlm Test Sessions And Report Details
To view the status of EDLM test sessions (both automatic and manual), Test Sessions List do the following: 1 From the menu, select Tools > EDLM > Test Results. The EDLM Test Sessions List dialog box appears. Quantum Scalar i6000 User’s Guide... - Page 367 You can sort the list by clicking any of the column headers. An arrow appears in the column header indicating whether the column is sorted in ascending or descending order. Click the column header again to toggle between ascending and descending order. Quantum Scalar i6000 User’s Guide...
- Page 368 • Last Week — Test sessions that were run in the last seven days. • Last Month — Test sessions that were run in the last month. • Last 3 Months — Test sessions that were run in the last three months. Quantum Scalar i6000 User’s Guide...
-
Page 369: Viewing Edlm Session Report Details
1 From the EDLM Test Sessions List (Tools > EDLM > Test Results), click on a row to highlight it, and then click the Details button. The test results display in a new window called EDLM Session Report Quantum Scalar i6000 User’s Guide... - Page 370 You can sort the list by clicking any of the column headers. An arrow appears in the column header indicating whether the column is sorted in ascending or descending order. Click the column header again to toggle between ascending and descending order. Quantum Scalar i6000 User’s Guide...
- Page 371 State The current test status: Pending, In Progress, Completed, Stopped or Paused. Completed The date and time the test completed. Type The type of test that was run: Quick Scan, Normal Scan or Full Scan. Quantum Scalar i6000 User’s Guide...
- Page 372 Summary of the tape scan (either “good” or an Analysis explanation of the result). 3 To send a copy of the test session report via e-mail, click Send. To update the dialog with the current status, click Refresh. Quantum Scalar i6000 User’s Guide...
-
Page 373: Viewing The Edlm Queue
2 To refresh the list, click Refresh. 3 To delete a scan from the queue, select its check box and click Delete. Scans that are currently in progress cannot be deleted. 4 To close the screen, click Cancel. Quantum Scalar i6000 User’s Guide... -
Page 374: Diagnosing A Suspect Edlm Drive
If there is no ‘known good tape’ available and users are not confident that a tape is providing accurate data, they can contact Quantum Service and ask if an EDLM Diagnostic Tape is available to test their suspect EDLM drive. -
Page 375: Path Failover
License Drives for Path Failover on page 359 • Configure Control Path on page 361 • Configuring Data Path Failover on page 376 • Configuring Host Access to Storage Networking Drives and Partitions on page 383 Quantum Scalar i6000 User’s Guide... -
Page 376: Use The Storage Networking Wizard
The SNW wizard groups all the path failover features together in a single place. To access the SNW wizard: 1 Select Setup > SNW Wizard. The Storage Networking Configuration Wizard welcome screen appears. 2 Click Next. The Select Storage Networking Option screen appears. Quantum Scalar i6000 User’s Guide... -
Page 377: License Drives For Path Failover
SNW license. Your SNW license covers a specific number of drives. Any drive you use for an SNW feature consumes one license count. A drive consumes only one license count Quantum Scalar i6000 User’s Guide... - Page 378 5 Clear the check boxes of drives you no longer want to license. Any changes you make are indicated by colors filling the row. • Green — indicates you are adding the drive to the SNW count. Quantum Scalar i6000 User’s Guide...
-
Page 379: Configure Control Path
This configuration requires an Advanced Path Failover (APF) device driver installed on an attached host. This driver will determine and Quantum Scalar i6000 User’s Guide... -
Page 380: Multi Control Path
• The tape drive topology must be set to Point-to-Point (see Configuring Fibre Channel Drive Speed, Topology, and Loop ID page 202). Multi Control Path Configuration 1 Access the appropriate screen in one of two ways: Quantum Scalar i6000 User’s Guide... - Page 381 The Storage Networking Partitions dialog box appears, displaying all partitions that contain drives eligible to be a control path. 2 Select the partition whose control path settings you want to configure. 3 Click Next. The Control Path Configuration dialog box appears. Quantum Scalar i6000 User’s Guide...
-
Page 382: Basic Control Path Failover
6 Click Finish. An Operation in Progress dialog box appears. Basic Control Path Requirements Failover To configure drives for basic control path failover, you need the following: • A path failover license must be installed on the library (see Enabling Licenses on page 125). Quantum Scalar i6000 User’s Guide... - Page 383 SMC device also as LUN 0, not LUN 1. Virtual port WWPNs are based on the library’s WWNN and are identified by the WWPN’s last 12 bits. A partition’s control path configured via a Quantum Scalar i6000 User’s Guide...
- Page 384 WWPN (world wide port name) and LUN mappings. BCPF Configuration 1 Access the appropriate screen in one of two ways: • From the SNW Wizard: Select Setup > SNW Wizard. Click Next. From the Select Storage Networking Option screen, select Quantum Scalar i6000 User’s Guide...
- Page 385 The Control Path Configuration dialog box appears, displaying all partitions that contain drives eligible to be a control path. 2 Select the partition whose control path settings you want to configure. 3 Click OK. The Control Path Configuration dialog box appears. Quantum Scalar i6000 User’s Guide...
- Page 386 1 Access the appropriate screen as described above in Step 1 through above. The Control Path dialog box appears, with the Step 3 control path drive highlighted, and the control path failover drive checked. Quantum Scalar i6000 User’s Guide...
-
Page 387: Advanced Control Path Failover
Advanced Control Path Requirements Failover To configure drives for advanced control path failover, you need the following: • A Storage Networking (SNW) License must be installed on the library (see Enabling Licenses on page 125). Quantum Scalar i6000 User’s Guide... - Page 388 In this case, the current path is disabled and the new path is enabled, resulting in the existing LUN 1 for the current active path to disappear and a LUN 1 activating the selected redundant device. Quantum Scalar i6000 User’s Guide...
- Page 389 Wizard on page 358. • Select Setup > Partitions > Control Path from the main console. The Control Path Configuration dialog box appears, displaying all partitions that contain drives eligible to be a control path. Quantum Scalar i6000 User’s Guide...
- Page 390 Chapter 10: Path Failover Configure Control Path 2 Select the partition whose control path settings you want to configure. 3 Click OK. The Control Path dialog box appears. Quantum Scalar i6000 User’s Guide...
-
Page 391: Advanced Control Path
For example, consider such a drive configured to host the library control path. A switch could detect the tape drive as LUN 0 with WWPN 500308c0:9e2c3001 and detect the media changer as LUN 1 with WWPN 500308c0:9e2c3001 also via switch port 1: Quantum Scalar i6000 User’s Guide... - Page 392 • From the SNW Wizard: Select Setup > SNW Wizard. Click Next. From the Select Storage Networking Option screen, select Control Path and click Next. • Select Setup > Partitions > Control Path from the main console. Quantum Scalar i6000 User’s Guide...
- Page 393 The Storage Networking Partitions dialog box appears, displaying all partitions that contain drives eligible to be a control path. 2 Select the partition whose control path settings you want to configure. 3 Click Next. The Control Path Configuration dialog box appears. Quantum Scalar i6000 User’s Guide...
-
Page 394: Configuring Data Path Failover
If the tape drive loses its Fibre Channel link with the active port, it will automatically “fail over” and use the standby port to continue drive operations. Quantum Scalar i6000 User’s Guide... - Page 395 Advanced Data Path Failover (ADPF): Advanced Data Path Failover is a feature provided as part of the Storage Networking license and applies only to HP LTO-6 and later Fibre Channel tape drives. It provides an Quantum Scalar i6000 User’s Guide...
- Page 396 Port 2 until failover occurs again or the library is rebooted. Similarly, if a tape drive configured for advanced data path failover is the control path for a partition, the host uses Port 1 Quantum Scalar i6000 User’s Guide...
-
Page 397: Basic Data Path Failover
Path Failover. Or, via the SNW Wizard: Select Setup > SNW Wizard. Click Next. From the options screen, select Data Path Failover and click Next. The Data Path Failover (DPF) dialog box appears. Drives with BDPF configured have check marks in the BDPF column. Quantum Scalar i6000 User’s Guide... - Page 398 • Green - Added • Yellow - Removed • Teal - Changed • White - Unchanged 3 Click OK. An Operation in Progress dialog box appears. 4 When Basic Data Path Failover configuration is complete, click OK. Quantum Scalar i6000 User’s Guide...
-
Page 399: Advanced Data Path Failover (Adpf)
Wizard. 2 Click Next. 3 From the options screen, select Data Path Failover and click Next. The Data Path Failover (DPF) dialog box appears. Drives with ADPF configured have check marks in the ADPF column. Quantum Scalar i6000 User’s Guide... - Page 400 5 Click OK. An Operation in Progress dialog box appears. 6 When Advanced Data Path Failover configuration is complete, click Note: Unless a drive is configured for control path failover, drives can enable either BDPF or ADPF within the same partition. Quantum Scalar i6000 User’s Guide...
-
Page 401: Configuring Host Access To Storage Networking Drives And Partitions
Drives and partitions can be in multiple access groups, but each host can only be in one access group. • A partition can be assigned to a host access group if its control path is through an SNW-licensed tape drive. Quantum Scalar i6000 User’s Guide... -
Page 402: Requirements For Host Access
• Host access groups configured (see Viewing All Access Groups page 417). Configuring Hosts All hosts that are zoned or directly connected to the drives are available to be assigned to host access groups. You may wish to modify existing Quantum Scalar i6000 User’s Guide... -
Page 403: Create Host
SAN). Any time you delete a host you remove all host mappings configured for that host. Create Host To create a host: 1 Select Setup > SNW Wizard to display the SNW Wizard. 2 Click Next to display the Select Storage Networking Option screen. Quantum Scalar i6000 User’s Guide... - Page 404 Chapter 10: Path Failover Configuring Host Access to Storage Networking Drives and Partitions Quantum Scalar i6000 User’s Guide...
- Page 405 Chapter 10: Path Failover Configuring Host Access to Storage Networking Drives and Partitions 3 Select Host Access and click Next to display the Select Host Access Options screen. Quantum Scalar i6000 User’s Guide...
- Page 406 Chapter 10: Path Failover Configuring Host Access to Storage Networking Drives and Partitions 4 Select Host Configuration and click Next to display the Select Hosts Configuration Options screen. Quantum Scalar i6000 User’s Guide...
- Page 407 10 Click Finish to create the host. 11 Click OK in the The Host was created successfully dialog box. Modify Host To modify an existing host: 1 Select Setup > SNW Wizard to display the SNW Wizard. Quantum Scalar i6000 User’s Guide...
- Page 408 Chapter 10: Path Failover Configuring Host Access to Storage Networking Drives and Partitions 2 Click Next to display the Select Storage Networking Option screen. Quantum Scalar i6000 User’s Guide...
- Page 409 Chapter 10: Path Failover Configuring Host Access to Storage Networking Drives and Partitions 3 Select Host Access and click Next to display the Select Host Access Options screen. Quantum Scalar i6000 User’s Guide...
- Page 410 Configuring Host Access to Storage Networking Drives and Partitions 4 Select Host Configuration and click Next to display the Select Hosts Configuration Options screen. 5 Select Modify Host. 6 Click the appropriate box in the Select column to select the host to modify. Quantum Scalar i6000 User’s Guide...
- Page 411 10 Click OK in the The Host was modified successfully dialog box. Delete Host To delete an existing host: 1 Select Setup > SNW Wizard to display the SNW Wizard. 2 Click Next to display the Select Storage Networking Option screen. Quantum Scalar i6000 User’s Guide...
- Page 412 Chapter 10: Path Failover Configuring Host Access to Storage Networking Drives and Partitions Quantum Scalar i6000 User’s Guide...
- Page 413 Chapter 10: Path Failover Configuring Host Access to Storage Networking Drives and Partitions 3 Select Host Access and click Next to display the Select Host Access Options screen. Quantum Scalar i6000 User’s Guide...
-
Page 414: Creating, Modifying, And Deleting Host Access Groups
Creating, Modifying, If necessary, you can make the following modifications to host access and Deleting Host groups: Access Groups • Creating Host Access Groups on page 397 • Changing an Access Group Name on page 403 Quantum Scalar i6000 User’s Guide... - Page 415 A host can only be in one access group. Drives and partitions can be in multiple access groups. To create host access groups: 1 Select Setup > SNW Wizard to display the SNW Wizard. 2 Click Next to display the Select Storage Networking Option screen. Quantum Scalar i6000 User’s Guide...
- Page 416 Configuring Host Access to Storage Networking Drives and Partitions 3 Select Host Access and click Next to display the Select Host Access Options screen. 4 Select Access Group Configuration and click Next to display the Host Access Group Configuration Wizard. Quantum Scalar i6000 User’s Guide...
- Page 417 5 Click Next to display the Select Group Access Option screen. 6 Select the Create New Host Access Group radio button and click Next to display the Select Group Access Name dialog box. 7 Type a name into the Group Name field. Quantum Scalar i6000 User’s Guide...
- Page 418 9 Select one or more check boxes in the Select column to indicate which host or hosts to include in the access group, or select the Select All Hosts check box to include all of the hosts in the group. Quantum Scalar i6000 User’s Guide...
- Page 419 Exception: If the drive is configured for Data Path Failover, you should only select Port 1(if the data path fails over to Port 2, the host will still be able to access it because DPF is configured). Quantum Scalar i6000 User’s Guide...
- Page 420 The port you choose depends on which ports on the control path drive are physically cabled. 15 Click Finish to create the new access group. 16 Click OK in the The Host Access was updated successfully dialog box. Quantum Scalar i6000 User’s Guide...
- Page 421 2 Select the Change Access Group name radio button. 3 Click Next to display the Select Group Access dialog box. 4 Select the Expand Tree check box to list all items in the Access Group Hosts and Devices section of the dialog box. Quantum Scalar i6000 User’s Guide...
- Page 422 Chapter 10: Path Failover Configuring Host Access to Storage Networking Drives and Partitions 5 Select the box corresponding to the access group whose name you want to change.Click Next to display the Select Group Access Name dialog box. Quantum Scalar i6000 User’s Guide...
- Page 423 Hosts and Devices section of the dialog box. 5 Select the box corresponding to the access group to delete. 6 Click Finish to display the Warning dialog box. 7 Click Yes to delete the access group. Quantum Scalar i6000 User’s Guide...
- Page 424 1 Display the Host Access Group Configuration Wizard by performing Step 1 through Step 5 Viewing All Access Groups page 417. 2 Select the Add Host to Group radio button. 3 Click Next to display the Select Group Access dialog box. Quantum Scalar i6000 User’s Guide...
- Page 425 Configuring Host Access to Storage Networking Drives and Partitions 4 Select the Expand Tree box to list all items in the Access Group Hosts and Devices section of the dialog box. 5 Select the box corresponding to the access group to modify. Quantum Scalar i6000 User’s Guide...
- Page 426 To remove a host from a host access group: 1 Display the Host Access Group Configuration Wizard by performing Step 1 through Step 5 Viewing All Access Groups page 417. Quantum Scalar i6000 User’s Guide...
- Page 427 Chapter 10: Path Failover Configuring Host Access to Storage Networking Drives and Partitions 2 Select the Remove Host from Group radio button. 3 Click Next to display the Select Group Access dialog box. Quantum Scalar i6000 User’s Guide...
- Page 428 Hosts and Devices section of the dialog box. 5 Select the box corresponding to the access group from which to remove a host. 6 Click Next to display the Select Group Access Hosts to Remove dialog box. Quantum Scalar i6000 User’s Guide...
-
Page 429: Host Access Configuration - Modifying Drives/Partitions And Viewing Host Access Groups
The Host Access Configuration option allow you to do the following: Configuration – • Adding and Removing Drives and Partitions to/from Host Access Modifying Drives/ Groups on page 412 Partitions and Viewing • Viewing All Access Groups on page 417 Host Access Groups Quantum Scalar i6000 User’s Guide... - Page 430 Host Access Configuration option. To do so: 1 Select Setup > SNW Wizard to display the SNW Wizard. 2 Click Next to display the Select Storage Networking Option screen. Quantum Scalar i6000 User’s Guide...
- Page 431 Chapter 10: Path Failover Configuring Host Access to Storage Networking Drives and Partitions 3 Select Host Access and click Next to display the Select Host Access Options screen. 4 Select the Host Access Configuration radio button. Quantum Scalar i6000 User’s Guide...
- Page 432 Configuring Host Access to Storage Networking Drives and Partitions 5 Click Next to display the Select the Group to modify screen. 6 Select the Expand Tree box to list all items in the Access Group Hosts and Devices section of the dialog box. Quantum Scalar i6000 User’s Guide...
- Page 433 WWPNs, so the port you choose must be physically connected to a host or switch or the host will not see it. Exception: If the drive is configured for Data Path Failover, Quantum Scalar i6000 User’s Guide...
- Page 434 The port you choose depends on which ports on the control path drive are physically cabled. 14 Click Finish to update host access. Quantum Scalar i6000 User’s Guide...
- Page 435 5 Click Next to display the Select the Group to configure screen. 6 Select the Expand Tree box to list all items in the Access Group Hosts and Devices section of the dialog box. 7 Click Cancel to exit. 8 Click Yes. Quantum Scalar i6000 User’s Guide...
- Page 436 Chapter 10: Path Failover Configuring Host Access to Storage Networking Drives and Partitions Quantum Scalar i6000 User’s Guide...
-
Page 437: Configuring Access To Stornext
(API) client plug-in, and then configure the library to communicate with the external application. The API client plug-in is a Quantum-provided plug-in that allows the library to communicate with a supported external application (such as StorNext Storage Manager). The API client plug-in must be installed before you can configure library access to the external application. -
Page 438: Step 1: Confirming The External Application Is Supported
3 Extract the files from the .zip file. 4 Read the End User/Open Source License Agreement. Installation of the plug-in implies acceptance of the license agreement. 5 Select Tools > Update Software > Plug-in. The Install/Remove StorNext API Client Plug-in screen appears. Quantum Scalar i6000 User’s Guide... - Page 439 Chapter 11: Configuring Access to StorNext 6 Select Install a new StorNext API Client Plug-in. 7 Click Browse to retrieve the plug-in file. 8 Click Finish. The plug-in is installed or removed. A “success” dialog box appears. Quantum Scalar i6000 User’s Guide...
-
Page 440: Step 3: Configuring External Access
3 Click Finish. A confirmation dialog box appears. 4 Click Yes to confirm you want to remove the plug-in. Step 3: Configuring 1 Click Setup > Partitions > Policies > StorNext Access. The External Access StorNext Access Configuration Wizard appears. Quantum Scalar i6000 User’s Guide... - Page 441 Do this... Add a new external 1 Select Create. application 2 Click Next. Modify an existing external 1 Select Modify. application 2 Select the application you want to modify from the table. 3 Click Next. Quantum Scalar i6000 User’s Guide...
- Page 442 If you are creating or modifying, the Configure StorNext Settings screen appears. 4 If you are creating or modifying, configure the following the fields: Field Description Name Type a descriptive name you will use to identify the external application. Quantum Scalar i6000 User’s Guide...
- Page 443 Select the appropriate API client plug-in from the drop-down list. The list contains the API client plug-ins you installed in Step 2: Installing/Removing the Scalar i6000 API Client Plug-in on page 420. Application IP/Host Type the IP address or DNS host name (if...
- Page 444 Chapter 11: Configuring Access to StorNext Quantum Scalar i6000 User’s Guide...
-
Page 445: Partition Utilization Reporting
• The report contains the last 12 months of activity. Viewing the Partition To view the on-screen Partition Utilization report: Utilization Report 1 If you are not already viewing the physical library, click View and select the name of the physical library. Quantum Scalar i6000 User’s Guide... -
Page 446: Interpreting The Partition Utilization Report
This section lists each occurrence of partition activity that took place during the month. Each entry in this section includes the following information: • Date and time the activity occurred. • Partition name. Quantum Scalar i6000 User’s Guide... -
Page 447: Scheduling Partition Utilization Reports
Setup > Email Configuration and fill in the required fields. 1 Click Setup > Notifications > Partition Utilization. The Partition Utilization Notification Settings screen appears. Quantum Scalar i6000 User’s Guide... - Page 448 6 To delete a recipient, select the check box next to the recipient’s e- mail address and click Remove. 7 Select how often recipients will receive reports from the Interval drop-down list. If Quantum is doing the billing for this library, select Monthly. The interval choices are the following: •...
- Page 449 Chapter 12: Partition Utilization Reporting • Quarterly — The first day of January, April, July, and October. 8 Click OK. Reports will be sent on the scheduled days. Quantum Scalar i6000 User’s Guide...
- Page 450 Chapter 12: Partition Utilization Reporting Quantum Scalar i6000 User’s Guide...
-
Page 451: Running Your Library
485 • Powering Off the Library on page 487 • Powering On the Library on page 487 • Locking/Unlocking the I/E Station on page 488 • When Robotics Are Not Ready on page 490 Quantum Scalar i6000 User’s Guide... -
Page 452: Logging On And Off
Web browser. Logging On From the 1 If the Scalar i6000 Logon dialog box is not already displayed on the Touch Screen (Local library’s touch screen because the screen saver appears, tap the touch screen. - Page 453 Note: If you want to log on using the default administrator account (admin), and you do not remember the password, contact Quantum Support to reset the password. Note: If the date and time have reset to January 1, 1970 or if the year is set to a date earlier than 1970, a warning dialog will display on login.
-
Page 454: Logging Off From The Touch Screen (Local Client)
A message appears that asks you whether you are sure that you want to log off. Client) 2 Select Yes. The Scalar i6000 Logon dialog box appears. Logging On From a You can access all features of the LMC from a host computer using a Web Browser (Remote standard Web browser. - Page 455 Logging On and Off 2 If a security warning appears asking if you are sure you want to run the applet, click Run or Yes. The Scalar i6000 Logon dialog box appears. 3 In the Name text box, type the name of the user or administrator account with which you want to log on.
-
Page 456: Logging Off The Web Browser (Remote Client)
A message appears asking if you are sure you want to log off. Client) 2 Click Yes. The Scalar i6000 Logon dialog box appears. 3 To close the LMC applet, click Cancel. onnecting to Multiple Libraries This feature allows you log in to multiple libraries, and switch from one library console to another without logging off. -
Page 457: Operator Panel
To do this, select the library on the Connection menu, click Operations > Log Off, and then click Yes. When the Scalar i6000 Logon dialog box appears, click Cancel. You can then repeat this process to log off from additional libraries. -
Page 458: Indicator Panel
The Status indicator is not a button. These indicators do not report the status of communications with a host. Note: The enabled state does not mean that robotics are communicating with the host. It means that the robotics are communicating with the library controller. Quantum Scalar i6000 User’s Guide... - Page 459 Green Solid on — normal. No attention required. Amber Blinking or solid on — fault. Attention required. Monitor the system status buttons. To determine whether the library has created any tickets, click Tools > Tickets. Quantum Scalar i6000 User’s Guide...
-
Page 460: Library Management Console (Lmc)
The main LMC display consists of five areas: • The title bar on the touch screen view of the LMC displays the words “Scalar i6000 Library Management Console.” The title bar appears slightly differently on the remote client view of the LMC. Compare... -
Page 461: Menus
The following seven LMC menus organize commands into logical groupings: • The Operations menu consists of commands, such as changing the library’s mode of operation, importing and exporting cartridges, loading and unloading drives, moving media, performing inventory, and logging off. Quantum Scalar i6000 User’s Guide... - Page 462 For example, if system status buttons show a mix of green (Good), yellow (Warning or Degraded), and red (Failed) states, the color of the screen saver image will be red. Quantum Scalar i6000 User’s Guide...
- Page 463 9 Available only on libraries with I/O blades installed. 11 Guest can view the main LMC display, but cannot obtain more details or perform operations. Quantum Scalar i6000 User’s Guide...
- Page 464 9 Available only on libraries with I/O blades installed. 11 Guest can view the main LMC display, but cannot obtain more details or perform operations. Quantum Scalar i6000 User’s Guide...
- Page 465 9 Available only on libraries with I/O blades installed. 11 Guest can view the main LMC display, but cannot obtain more details or perform operations. Quantum Scalar i6000 User’s Guide...
- Page 466 9 Available only on libraries with I/O blades installed. 11 Guest can view the main LMC display, but cannot obtain more details or perform operations. Quantum Scalar i6000 User’s Guide...
- Page 467 9 Available only on libraries with I/O blades installed. 11 Guest can view the main LMC display, but cannot obtain more details or perform operations. Quantum Scalar i6000 User’s Guide...
- Page 468 9 Available only on libraries with I/O blades installed. 11 Guest can view the main LMC display, but cannot obtain more details or perform operations. Quantum Scalar i6000 User’s Guide...
- Page 469 9 Available only on libraries with I/O blades installed. 11 Guest can view the main LMC display, but cannot obtain more details or perform operations. Quantum Scalar i6000 User’s Guide...
- Page 470 9 Available only on libraries with I/O blades installed. 11 Guest can view the main LMC display, but cannot obtain more details or perform operations. Quantum Scalar i6000 User’s Guide...
-
Page 471: Toolbar
Operations > Export. For more information, see Exporting Cartridges From Partitions on page 699. The Tickets button displays tickets that the library created when it detected issues within its subsystems. You also can display tickets by Quantum Scalar i6000 User’s Guide... - Page 472 The Log Off button logs off the current user after confirming the log off request. You also can log off by clicking Operations > Log Off. For more information, see Logging On and Off on page 434. Quantum Scalar i6000 User’s Guide...
-
Page 473: Reading The Library Information Panel
Figure 47 Library Management Console Title bar Menu bar Tool bar Current library Current time current and date Activity Data transfer statistics Media slo usage Configuration Mount summary statistics System status buttons Quantum Scalar i6000 User’s Guide... - Page 474 The number of used media slots appears beneath the graph (occupied slots/total number of storage slots). Mounts The bar graph reports mount statistics compiled during the past 24 hours. The library updates this information every five minutes. Quantum Scalar i6000 User’s Guide...
-
Page 475: System Status Buttons
Each field replaceable unit (FRU) in the library belongs to one of the subsystems. Table 39 Subsystems and Their Components Subsystem Components Drives Drives, such as brick firmware, drive bricks, drive sleds Quantum Scalar i6000 User’s Guide... - Page 476 A component in this category has failed. For example, the buttons shown in Figure 48 on page 457 indicate that all subsystems are functioning normally (Good), while those shown in Figure 49 indicate that issues exist in the Media subsystem. Quantum Scalar i6000 User’s Guide...
-
Page 477: Understanding Location Coordinates
Library Explorer can display all library elements according to physical location in any configuration, from one module to eight modules, and one drive up to the maximum number of 96 drives. For more information on Library Explorer, see Using Library Explorer page 553. Quantum Scalar i6000 User’s Guide... -
Page 478: Cartridge Locations
10 first. You do not lose the magazine in columns 1 and 2 of section 5. Quantum Scalar i6000 User’s Guide... - Page 479 464 shows examples of location coordinates. Figure 50 Aisle, Module, and Rack Numbering Locations back of modules modules 1 through 4 (from left to right) aisle value racks 1 and 2 is always 1 front of modules Quantum Scalar i6000 User’s Guide...
- Page 480 Chapter 13: Running Your Library Understanding Location Coordinates Figure 51 Section, Column, and Row Numbering for Rack 1 - LTO Cartridges column 6 rows (individual slots) X-axis rail counts as section 6 Quantum Scalar i6000 User’s Guide...
- Page 481 - LTO Cartridges column I/E station cartridges in the I/E station are addressed by the library as part of column 3, sections 1 through 4 this column of magazines is not present in a control module Quantum Scalar i6000 User’s Guide...
- Page 482 1, and rack 1. That is why the first three numbers in the 1, Module 1, and Rack 1 coordinate value are 1,1,1. The last three numbers represent the address on the linear storage assembly. 1,1,1,3,2,1 column 1 is not available in a control module 1,1,1,7,3,2 Quantum Scalar i6000 User’s Guide...
-
Page 483: Tape Drive Location Coordinates
• Drives may be installed in any module except high-density expansion modules and the left parking module. • Because all drives in the library are full-height drives, each drive is in row 1 of the designated section. Quantum Scalar i6000 User’s Guide... - Page 484 1 – 16 1 – 12 Figure 56 on page 468 shows the physical location of drive 9, which is the last drive listed in the Move Media dialog box shown in Figure 55 on page 467. Quantum Scalar i6000 User’s Guide...
- Page 485 Chapter 13: Running Your Library Understanding Location Coordinates Figure 55 Example - Drive Location Coordinates Quantum Scalar i6000 User’s Guide...
-
Page 486: I/O Blade Locations
• Aisle, Module, and Rack — The definitions the same as for other library components (see Cartridge Locations on page 460). • Cluster — Refers to the I/O management unit and is always 1. Quantum Scalar i6000 User’s Guide... - Page 487 Figure 57 I/O Management Unit Bay Numbering cooling assembly Table 41 lists the range of possible FC I/O blade or EEB location coordinates. Table 41 FC I/O Blade/EEB 1-16 Location Coordinates Aisle Module Rack Cluster Quantum Scalar i6000 User’s Guide...
-
Page 488: I/E Station Locations
471). • HiCap I/E Station: Designated by the modules that contains it but since there are two I/E station doors, further designated by an A (left) and B (right) (see Figure 60 on page 472). Quantum Scalar i6000 User’s Guide... - Page 489 Chapter 13: Running Your Library Understanding Location Coordinates Figure 59 I/E Station Location Quantum Scalar i6000 User’s Guide...
-
Page 490: Tower Locations
The location coordinates of a tower is based on the number of towers in the library and it’s overall position in the library. The location coordinates are: tower # (module and rack), as indicated in the Towers dialog box (see Figure 61 on page 473). Quantum Scalar i6000 User’s Guide... -
Page 491: Viewing The Library (Physical Or Partition)
Note: Before you can begin many of the library operations that this guide describes, you must first set the library view to either the physical library or a partition. Quantum Scalar i6000 User’s Guide... -
Page 492: Displaying The Physical Library Or A Partition
To take the physical library or a partition online or offline, click the button in the right column that corresponds with the physical library or partition. The Change Library Mode dialog box appears. Quantum Scalar i6000 User’s Guide... -
Page 493: Changing The Library's State
From the View menu, click the name of the physical library or the appropriate partition. 2 Click Operations > Change Mode. The Change Library Mode dialog box appears with the current state of the physical library or partition shown. Quantum Scalar i6000 User’s Guide... - Page 494 Table 42 on page 477 summarizes the library functions that require the physical library or partitions to be either online or offline. Quantum Scalar i6000 User’s Guide...
-
Page 495: Working With Local User Accounts
Guests see only the main LMC display. Local Users can operate a partition, but cannot run diagnostic tools, which require access to the physical library. Administrators can access the entire physical library and all of its partitions. For a summary of user privileges Quantum Scalar i6000 User’s Guide... -
Page 496: Creating Local User Accounts
Disable Guest Login. You can toggle between Disable Guest Login and Enable Guest Login. Note: For a list of commands that are available to users logging on to the library as a guest, see Table 37 on page 445. Quantum Scalar i6000 User’s Guide... - Page 497 Passwords must be eight or more characters in length. The word password is not available for use. 8 In the Confirm Password text box, type the password again. 9 For Select Privilege, select a privilege level (Administrator or User). Quantum Scalar i6000 User’s Guide...
- Page 498 12 To register your user account selections, click Finish. Note: The Back button enables you to go back to a previous dialog box and make changes to your selections. Quantum Scalar i6000 User’s Guide...
-
Page 499: Modifying Local User Accounts
Table 37 on page 445. 4 Click the name of the account that you want to modify to highlight it, and then click Modify. The following dialog box appears. Quantum Scalar i6000 User’s Guide... - Page 500 (Administrator or User). Otherwise, proceed to the next step. Note: For a list of commands that are available to administrators and users, see Table 37 on page 445. 7 Perform one of the following tasks: Quantum Scalar i6000 User’s Guide...
-
Page 501: Deleting Local User Accounts
Deleting Local User 1 Log on as an administrator. Accounts 2 Make sure that you are viewing the physical library. From the View menu, click the name of the physical library. Quantum Scalar i6000 User’s Guide... -
Page 502: Viewing Local User Account Permissions
3 Click Setup > User Configuration > Local Users. The Local Users dialog box appears. 4 To view the permissions for all users, click Permissions. The Users Permissions dialog box appears. Quantum Scalar i6000 User’s Guide... -
Page 503: Shutting Down/Rebooting The Library
In addition, if automatic inventory is enabled, the library performs an inventory of cartridges, tape drives, and slots during a reboot. For more information on automatic inventory, see Setting Up Policies for the Physical Library on page 180. Quantum Scalar i6000 User’s Guide... - Page 504 Note: To recover from a library shutdown, you must cycle power on the library (power it off and then power it on). See Powering Off the Library on page 487 and Powering On the Library page 487. Quantum Scalar i6000 User’s Guide...
-
Page 505: Powering Off The Library
3 To turn on power to the library, press the Power button on the indicator panel. The library begins to boot up. Within five minutes, the LMC display appears on the library’s touch screen. A library with only a few Quantum Scalar i6000 User’s Guide... -
Page 506: Locking/Unlocking The I/E Station
When the library is fully up and ready to receive commands, the Robotics Enabled indicator turns solid green. Locking/Unlocking the I/E Station The Scalar i6000 I/E stations have multiple open and close sensors. When you are finished accessing the I/E station, make sure the station door is fully closed. - Page 507 • To lock an I/E station door, in the appropriate Action column, click Lock. • To unlock an I/E station door, in the appropriate Action column, click Unlock. 4 To return to the main console, click Close. Quantum Scalar i6000 User’s Guide...
-
Page 508: When Robotics Are Not Ready
Available Menu Commands When Robotics Become Disabled Discovery Discovery Operations > Change Mode (for shutdown only) Operations > Log Off Monitor > Drives Monitor > Connectivity > IO Blade Monitor > Connectivity > SCSI Channel Quantum Scalar i6000 User’s Guide... - Page 509 Setup > Network Configuration (from library’s touch screen only) Setup > Physical Library Setup > Users Setup > Notification Setup > Date and Time Setup > Licenses Setup > Email Configuration Setup > Trap Registration Setup > Security Tools > Tickets Quantum Scalar i6000 User’s Guide...
-
Page 510: Using The Library Access Feature
Since it may take 3 to 4 minutes for the library to come ready, plan your time inside the library to be as short as possible. Quantum Scalar i6000 User’s Guide... -
Page 511: Aisle Access
496 — For replacement or re-installation of a robot. Aisle Access 1 From the local operator panel, select Tools > Library > Access to access the wizard. 2 Click Next to open the Library Access Selection screen. Quantum Scalar i6000 User’s Guide... - Page 512 Chapter 13: Running Your Library Using the Library Access Feature 3 Select Aisle Access and click Next to go to the Library Aisle Access screen. Quantum Scalar i6000 User’s Guide...
- Page 513 7 When finished, close the module door and press the Robotics Enabled button. 8 Wait for the library to come ready (Library Status on the screen says “Ready” and the Robotics Enabled button comes on solid). Quantum Scalar i6000 User’s Guide...
-
Page 514: Robot Access
The timer stops counting down and a Close button becomes available. The library is now ready for use. 9 Click Close. Robot Access Robot removal and installation must be performed by a qualified Service technician only. Quantum Scalar i6000 User’s Guide... -
Page 515: Using The Command Line Interface
Path-specific Commands on page 502 • Issuing a Command from the Initial Prompt on page 503 • CLI Command List on page 503 Note: The CLI uses the term “mail slot” to mean I/E station slot. Quantum Scalar i6000 User’s Guide... -
Page 516: Logging On To The Cli
4 When prompted for the password, type the admin password configured on the library. The main CLI screen appears. Welcome to the XXX Library Command Line Interface. Type 'help' at the prompt for context-sensitive help. /> Quantum Scalar i6000 User’s Guide... -
Page 517: Command Line Interface (Cli) Commands
The user then typed drive The new path is now /set/drive Welcome to the XXX Library Command Line Interface. Type 'help' at the prompt for context-sensitive help. /> set /set> drive /set/drive> Quantum Scalar i6000 User’s Guide... -
Page 518: Global Commands
- list commands or get help for a specific command home - Go to the root level exit - log out - Go up one level Paths currently available: ----------------------------- Commands currently available: ----------------------------- Quantum Scalar i6000 User’s Guide... - Page 519 This command closes the shell. Global Command: up This command moves the customer backwards in the path. Welcome to the XXX Library Command Line Interface. Type 'help' at the prompt for context-sensitive help. /set/drive> up /set> /set> drive /set/drive> Quantum Scalar i6000 User’s Guide...
-
Page 520: Path-Specific Commands
- Go to the root level exit - log out - Go up one level Paths currently available: ----------------------------- Commands currently available: ----------------------------- media - Move between drive, slots, and mail slots within a partition Quantum Scalar i6000 User’s Guide... -
Page 521: Issuing A Command From The Initial Prompt
509 • set network ip on page 509 • show library configuration on page 510 • show partitions on page 511 • set partition online/offline on page 512 • reboot library on page 513 Quantum Scalar i6000 User’s Guide... - Page 522 -Shows media info for all storage slots, drive, and mail slots for the physical library media p2 drives -Shows media info for all drives in partition 2 media p4 slots 1 100 -Shows media info for storage slots 1 through 100 in partition 4 Quantum Scalar i6000 User’s Guide...
- Page 523 - Moves media from storage slot 10 to drive 1 media p2 D1 M1 - Moves media from drive 1 to mail slot 1 media p3 M1 S10 - Moves media from mail slot 1 to storage slot 10 Quantum Scalar i6000 User’s Guide...
- Page 524 Enter 'y' to continue or 'n' to skip [default='n']: y Partition 'Logical Library 01' is going to be taken offline. Moving '000038L3' from Mailbox slot 1 to Storage slot 1 ERROR: Robot is not ready. Partition 'Logical Library 01' set back online! Quantum Scalar i6000 User’s Guide...
- Page 525 Tape Drive firmware revisions: Phys. Drive # Part Drive Name Firmware Revision ----- ----- ----- ---------------- ----------------- Ultrium 5-SCSI I3FW Ultrium 5-SCSI I3FW Ultrium 5-SCSI I3FW Ultrium 5-SCSI I3FW Ultrium 5-SCSI I3FW Ultrium 5-SCSI I3FW Quantum Scalar i6000 User’s Guide...
- Page 526 Online; Drive Empty Drive# 3 (P1 D3) Green Online; Drive Empty Drive# 94 (P1 D94) Green Online; Drive Empty Drive# 95 (P1 D95) Green Online; Drive Empty Drive# 96 (P1 D96) Green Online; Drive Empty Quantum Scalar i6000 User’s Guide...
- Page 527 - IPv4 addr/mask/gtwy: 10.20.171.25 / 255.255.248.0 / 10.20.168.1/> set network ip set network ip description: Allows the user to set the basic IPv4 static address information. examples: set network ip />set net ip 10.0.0.3 255.255.255.0 10.0.0.1 /> Quantum Scalar i6000 User’s Guide...
- Page 528 Chapter 14: Using the Command Line Interface Command Line Interface (CLI) Commands show library configuration />sho lib con Tape library product ID: Scalar i6000 Tape library serial number: 273190052 Tape library firmware Revision: 630Q.GS20601 Number of frames: 12 Number of Drives (installed/assigned): 96/96...
- Page 529 Prints the partition number and name examples: show partitions />sho par State Partition Name ---- ------- -------------------------------- Online Online Online Online Online Online Online Online Online Online Online LL10 Online LL11 Online LL12 Online LL13 Online LL14 Online LL15 Quantum Scalar i6000 User’s Guide...
- Page 530 Partition 'HP LTO5' is going to be taken back online. Changing the partition mode to online will allow robotics actions against this partition to complete, and inform the backup applications of any changes. Enter 'y' to continue or 'n' to skip [default='n']: Quantum Scalar i6000 User’s Guide...
- Page 531 CLI or from the GUI. Reboot library description: Allows the user to reboot the library controller in a graceful manner examples: reboot library />reboot lib Are you sure you want to reboot the library (Y/N): Rebooting library controller…. /> Quantum Scalar i6000 User’s Guide...
- Page 532 Chapter 14: Using the Command Line Interface Command Line Interface (CLI) Commands Quantum Scalar i6000 User’s Guide...
-
Page 533: Maintaining Your Library
This chapter consists of the following sections: • Monitoring the Library on page 516 • Maintenance Actions on page 552 • Is the Access Door Closed? on page 552 • Is a Cartridge Old? on page 552 Quantum Scalar i6000 User’s Guide... -
Page 534: Monitoring The Library
World Wide Names (WWNs), IDs, and firmware versions. This section explains how to use Monitor menu commands to display status information for the following general areas: Quantum Scalar i6000 User’s Guide... -
Page 535: Monitoring System Status
1 Click Monitor > System or click the System Status button. The System Status dialog box appears, displaying four (4) tabs, Components Tab, Robots Tab, Drives Tab and, if installed, Towers Tab. These are explained in detail below. Quantum Scalar i6000 User’s Guide... - Page 536 Library/partition The library/partition The status of the library (Online or Current Firmware serial number Offline). Version MCB version The MCB serial The current status of the MCB Current Firmware number (Good, Degraded, or Failed). Version Quantum Scalar i6000 User’s Guide...
- Page 537 • Media Moves — Total number of media move operations performed by this robot. Drives Tab The Drives tab displays the following information about the library/ partition being viewed: • Serial Number — The serial number of the drive Quantum Scalar i6000 User’s Guide...
-
Page 538: Monitoring Drive Status
If you are viewing the physical library, status information for all drives appears. You can perform this procedure while viewing either the physical library or a partition. 1 Click Monitor > Drives. The Drive Status dialog box appears. Quantum Scalar i6000 User’s Guide... - Page 539 Chapter 15: Maintaining Your Library Monitoring the Library Figure 62 Left view of Drive Status dialog box Figure 63 Right view of Drive Status dialog box The following table describes the elements on the Drive Status dialog box. Quantum Scalar i6000 User’s Guide...
- Page 540 Indicates whether or not the drive is connected to an EEB (Ethernet Expansion blade). Only HP LTO-5 or later drives can be connected to an EEB. Note: A drive can be connected to either an I/O Blade or an EEB, not both. Quantum Scalar i6000 User’s Guide...
-
Page 541: Monitoring Connectivity Status
(CMB) in the library, the IO Blade selection does not appear on the menu. • The Fibre Channel Status dialog box displays information about the FC connections on the MCB and the I/O blades (if any exist). Quantum Scalar i6000 User’s Guide... - Page 542 3 From the IO Blade Status dialog box, you can perform the following tasks: • Change the sorting of I/O blades in the status list (for example, by type or location) by clicking the column heading by which Quantum Scalar i6000 User’s Guide...
- Page 543 Location The location of the port (for example, MCB). Port Mode The mode of the port (Target or Initiator). Status The status of the Fibre Channel (Operational, Lost Sync). WWPN The World Wide Port Name. Quantum Scalar i6000 User’s Guide...
- Page 544 1 Make sure that you are viewing the physical library. From the View menu, click the name of the physical library. 2 Click Monitor > Connectivity > Ethernet Blade. The Ethernet Blade Status dialog box appears. Quantum Scalar i6000 User’s Guide...
-
Page 545: Monitoring I/E Station Status
Monitoring I/E Station The I/E Station Status dialog box displays detailed information about Status the magazine slots in the I/E stations within the currently selected partition. If you are working in the physical library, status information Quantum Scalar i6000 User’s Guide... - Page 546 2A and 2B--the frame number (1-16), with A as the left I/E station and B the right. Magazine # The number of the I/E station magazine (numbered from top to bottom in the I/E station). Quantum Scalar i6000 User’s Guide...
-
Page 547: Monitoring Slot And Extended I/E Slot Status
You can perform this procedure while viewing either the physical library or a partition. 1 Click Monitor > Slots. The Slots Status dialog box appears. Note: For Extended I/E, click Monitor > Extended I/E Slots. Quantum Scalar i6000 User’s Guide... - Page 548 Location: Rack The location of slots by rack number. Location: The location of slots by section number. Section Location: The location of slots by column number. Column Location: Row The location of slots by row number. Quantum Scalar i6000 User’s Guide...
- Page 549 Section, Column, and Row. The defaults are set to All unless a drop-down list does not have more than one option. For example, the Aisle drop-down list is always set to 1 by default because only one aisle exists in the library. Therefore, the drop- Quantum Scalar i6000 User’s Guide...
-
Page 550: Monitoring Media Status
You can perform this procedure while viewing either the physical library or a partition. 1 Click Monitor > Media. The Media Status dialog box appears. Quantum Scalar i6000 User’s Guide... - Page 551 The type of cartridge (for example, LTO). In the status list area: Media ID The cartridge barcode. Media Type The type of cartridge (for example, LTO). Location The location of the cartridge (seeUnderstanding Location Coordinates page 459). Quantum Scalar i6000 User’s Guide...
- Page 552 You also can use the asterisk (*) as a wild card character to represent one or more characters in the media ID. This will list all media for IDs that match the designated pattern. For Quantum Scalar i6000 User’s Guide...
-
Page 553: Monitoring Sensor Status
Click Monitor > Sensors. The Sensor Status dialog box appears with the Cooling Fan tab displayed. Displaying Cooling Fan Information 1 To display detailed information about the library’s cooling fans, click the Cooling Fan tab on the Sensor Status dialog box. Quantum Scalar i6000 User’s Guide... - Page 554 Displaying Power Supply Information 1 To display detailed information about the library’s power supplies, click the Power Supply tab on the Sensor Status dialog box. Table 44 on page 537 describes the elements on the Power Supply tab. Quantum Scalar i6000 User’s Guide...
- Page 555 The location of the power supply within the library. 2 To view current information, click Refresh. Displaying Temperature Information 1 To display temperature status information for various library components, click the Temperature tab on the Sensor Status dialog box. Quantum Scalar i6000 User’s Guide...
- Page 556 Location Coordinates on page 459. 2 To view current information, click Refresh. Displaying Voltage Information 1 To display voltage status information for various library components, click the Voltage tab on the Sensor Status dialog box. Quantum Scalar i6000 User’s Guide...
- Page 557 The location of the voltage sensor within the library. Control management blade (CMB) locations are indicated by means of a coordinate system. For information about location coordinates, see Understanding Location Coordinates on page 459. 2 To view current information, click Refresh. Quantum Scalar i6000 User’s Guide...
-
Page 558: Monitoring Users Status
The Users Status dialog box displays detailed information about users Status who are currently logged on to the library. You can perform this procedure while viewing either the physical library or a partition. 1 Click Monitor > Users. The Users Status dialog box appears. Quantum Scalar i6000 User’s Guide... -
Page 559: Monitoring Partition Status
Unlike modifying a partition, viewing the status and details does not require you to take a partition offline. 1 Make sure that you are viewing the physical library. From the View menu, click the name of the physical library. Quantum Scalar i6000 User’s Guide... - Page 560 Partitions Status dialog box appears with a list of all logical partitions in the library and information about each partition. Figure 64 Partitions Status Dialog box Left side of dialog box Right side of dialog box Quantum Scalar i6000 User’s Guide...
- Page 561 SAN. Library Type Logical library/partition type - either Standard or Library Managed. If library managed, the type of library managed partition is listed in parentheses (for example, AMP, EDLM, or VAULT). Quantum Scalar i6000 User’s Guide...
-
Page 562: Monitoring Partition Policies
4 Click Close to close the Partition Details dialog box. 5 Click Close to return to the Partitions Status dialog box. Monitoring Partition To view EDLM or Active Vault policies configured on partitions, click Policies Monitor > Partitions > Policies from the LMC. Quantum Scalar i6000 User’s Guide... - Page 563 Policy Tree section if desired. You can also click the up/down arrows on the left side of the divider bar to hide or display the Policies sections. Quantum Scalar i6000 User’s Guide...
-
Page 564: Monitoring Ekm Server Status
Divider bar Monitoring EKM Server For each server configured, you can monitor the server using the EKM Status Server Status dialog box. 1 From the View menu, click the name of the physical library or partition. Quantum Scalar i6000 User’s Guide... - Page 565 The IP or host name of the server. Port The server port number: Q-EKM— Default 3801 for non-SSL and 443 for SSL SKM — default 6000 KMIP — 5696 State Whether the server is Primary or Secondary. Quantum Scalar i6000 User’s Guide...
-
Page 566: Mailing, Saving, And Printing Status Information
However, you cannot save or print the information from the library’s touch screen. The information that is sent will be the same as what the status dialog box appears at the time that you click Send. Quantum Scalar i6000 User’s Guide... - Page 567 It appears grayed out on the touch screen. • To indicate that you want to send the information to a printer, select Print. Note: The Print option is available to remote client users only. It appears grayed out on the touch screen. Quantum Scalar i6000 User’s Guide...
-
Page 568: Mailing Or Saving The Configuration Record
To e-mail the configuration record: 1 Log on as an administrator. 2 From the menu bar, click Monitor > Email Configuration Record. The Email Configuration Record dialog box appears. 3 Click Email and select the destination e-mail address. Quantum Scalar i6000 User’s Guide... - Page 569 3 Click Save and use the Browse function to specify the file name and location. 4 Click OK to save the configuration record to the specified location and close the Email Configuration Record dialog box. Quantum Scalar i6000 User’s Guide...
-
Page 570: Maintenance Actions
• If you have received a message about read/write failures, first copy the data from the failing cartridge, and then replace it with a new cartridge. Quantum Scalar i6000 User’s Guide... -
Page 571: Using Library Explorer
• Perform all drive related functions • View partition resources • View the location of cleaning tapes To use the Library Explorer: 1 From the Tools menu, click Library Explorer. The Library Explorer dialog box appears. Quantum Scalar i6000 User’s Guide... - Page 572 • Select the Device Type filter, and then from the Type drop- down list, click the appropriate device type: Storage, IE (I/E Station), or Drive. Click Show. The Control Module dialog box displays a graphical view of the library elements according to your Type filter choices. Quantum Scalar i6000 User’s Guide...
- Page 573 The upper portion of the screen displays a legend showing which colors represent each partition. You can use the right/left arrows at the bottom of the screen to scroll through all library modules. Quantum Scalar i6000 User’s Guide...
- Page 574 Chapter 15: Maintaining Your Library Maintenance Actions Quantum Scalar i6000 User’s Guide...
- Page 575 Understanding the Graphical Display You can access Library Explorer Control Module from both the physical and partition views. If you are in a partition view, you can view slots and drives pertaining to that particular partition. Quantum Scalar i6000 User’s Guide...
- Page 576 Menu or right click on the drive or slot. You can perform the following operations, depending on what library view you are using. From the View menu, click the name of the physical library or partition. • Drive Details Quantum Scalar i6000 User’s Guide...
-
Page 577: Drives
1 Log on as an administrator. 2 Make sure that you are viewing the physical library. From the View menu, click the name of the physical library. 3 Click Tools > Drives. The Drives dialog box appears. Quantum Scalar i6000 User’s Guide... - Page 578 Online indicates all SCSI and host commands are accessible. Offline indicates any move command is disabled. Location The location of the drive by means of a coordinate system. For information about location coordinates, see Understanding Location Coordinates page 459. Quantum Scalar i6000 User’s Guide...
- Page 579 I/O blade-attached Fibre drives that are properly connected and configured. If the button is not available for a Fibre drive, verify that it is properly connected to the I/O blade and that communication is established between them. Quantum Scalar i6000 User’s Guide...
- Page 580 Control area of the Drives dialog box. Viewing Drive Details 1 On the Drives dialog box in the Drive(s) area, click the appropriate drive row to highlight it. 2 Click Details. The Drive Details dialog box appears. Quantum Scalar i6000 User’s Guide...
- Page 581 Description Drive Model The brand name of the drive model. Vendor The drive vendor. Firmware Level The firmware version that is currently installed on the drive. Physical SN The serial number of the particular drive. Quantum Scalar i6000 User’s Guide...
- Page 582 The number of write errors that have occurred during the drive’s history. Megabytes Read The amount of data in megabytes that the drive has read during its history. Megabytes The amount of data in megabytes that the drive has written during its Written history. Quantum Scalar i6000 User’s Guide...
- Page 583 Email, and then either type an e-mail address in the Email text box or select an existing address from the drop-down list. You can type a comment in the Comment text box to send with the log. Quantum Scalar i6000 User’s Guide...
- Page 584 After adding cleaning media to the library, manually initiate a drive cleaning operation. 1 Select Tools > Drives to display the Drives dialog box. 2 Select a drive in the list, and then click Clean. The Clean Drive dialog box appears. Quantum Scalar i6000 User’s Guide...
- Page 585 The drive cleaning operation is initiated, and the Clean Drive dialog box closes. Once the cleaning operation completes, the cleaning media is returned to the I/E station or assigned cleaning magazine. Note: The system does not display a message when the cleaning operation is completed. Quantum Scalar i6000 User’s Guide...
- Page 586 2 Select a drive in the list, and then click Power Cycle. A warning dialog box displays stating power cycling the drive may cause a loss of data. Caution: Make sure that the drive is not being used by the host and/or performing any I/O to the drive. Quantum Scalar i6000 User’s Guide...
-
Page 587: Re-Enable Robot Remotely
1 Select Tools > Library > Robot State. The Robot State dialog displays. 2 Select the robot you want to enable and press Enable Robotics. A dialog will display ensuring you want to re-enable robotics. 3 Click Yes. Quantum Scalar i6000 User’s Guide... -
Page 588: Working With Connectivity
Click Yes. 4 To display the ports for a specific blade, click the name of the blade (EEB or I/O blade). For information about location coordinates, see Understanding Location Coordinates on page 459. Quantum Scalar i6000 User’s Guide... - Page 589 • To cause the LEDs on an EEB or I/O blade to blink rapidly so that you can find it in the library, select the blade, and then click Identify. After you locate the I/O blade, click Turn Off LED. When you click Identify, the following dialog box appears. Quantum Scalar i6000 User’s Guide...
-
Page 590: Capturing Snapshots
You should capture snapshots when technical support requests them. Details about capturing snapshots include: • Because the snapshot requires analysis by trained Quantum personnel, send captured snapshots to www.quantum.com/osr when Quantum requests them. - Page 591 3 Make sure that you are viewing the physical library. From the View menu, click the name of the physical library. 4 Click Tools > Capture Snapshot. The following message appears: 5 If you want to continue, click Yes. The Capture Snapshot dialog box appears. Quantum Scalar i6000 User’s Guide...
- Page 592 Email drop-down list. You can type a comment in the Comment text box to send with the snapshot. Note: Typically, you will send the snapshot to Quantum Support when requested to do so. Quantum Scalar i6000 User’s Guide...
-
Page 593: Capture A Network Trace
Email server. Start a Network Trace Manually Start a Network Trace on Library Startup Download a Network Trace Delete Network Trace Files You can use the Capture Network Trace screen to do the following: Quantum Scalar i6000 User’s Guide... - Page 594 • All — captures all traffic on all interfaces combined. 3 Enter a value in the Max File Size (MB) field from 0 to 1000MB. The trace will automatically stop when the value in the Max File Size field is reached. Quantum Scalar i6000 User’s Guide...
- Page 595 NOT stop when it reaches the max file size. You must stop it manually. 4 Select the Start on Boot check box. This starts the network trace automatically the next time the library is restarted. 5 Click Ok. Quantum Scalar i6000 User’s Guide...
- Page 596 Capture Network Trace screen displays. 2 From the Trace Control Area, click Delete. A warning dialog box displays asking if you are sure you want to delete all network trace files from the library. 3 Click Yes. Quantum Scalar i6000 User’s Guide...
-
Page 597: Updating Library Software
You can perform update operations from either the library’s touch screen or a remote client on a remote host computer, with one exception. You cannot download images from the local touch screen. Quantum Scalar i6000 User’s Guide... - Page 598 1 Log on as service. 2 You can access the Update Software Wizard while viewing either the physical library or a partition. From the View menu, click the name of the physical library or the appropriate partition. Quantum Scalar i6000 User’s Guide...
- Page 599 Note: Each firmware release has specific upgrade instructions included with the release. These specific upgrade instructions need to be followed to ensure that the firmware upgrade will be successful. Contact Quantum Support to obtain specific drive firmware upgrade instructions. This dialog box explains the operations you can perform by using the Update Software Wizard.
- Page 600 You can perform the library software update from either the library’s touch screen or a remote client, but you must perform the software download to the MCB from a remote client. Quantum Scalar i6000 User’s Guide...
- Page 601 Note: Before you begin the following procedure, make sure that you have obtained the new library software package from Quantum and placed it in an accessible location on your laptop. Caution: As a result of restore, rescue, or revert operations, the library shuts down.
- Page 602 The download process copies the software file from the remote file system to the library’s MCB. When the download process completes, the Library System Software Update dialog box appears again with the Install downloaded package option automatically selected. Quantum Scalar i6000 User’s Guide...
- Page 603 Note: If you downloaded a software package and then began this procedure without closing the Update Software Wizard - Library System Software Update dialog box, Install downloaded package is already selected. 2 Click Next. Quantum Scalar i6000 User’s Guide...
- Page 604 The Update Software Summary window appears asking if you want to continue. 5 Click Yes. The Software Update Progress screen appears displaying the progress of the installation. Quantum Scalar i6000 User’s Guide...
- Page 605 8 Log off close the browser. 9 Launch the browser and log in again after the library has completed it’s reboot process. 10 Click Help > About. Validate that the components reflect the correct firmware version. Quantum Scalar i6000 User’s Guide...
- Page 606 MCB. 1 On the Library System Software Update dialog box, select Reinstall current package. 2 Click Next. The Update Software Wizard dialog box appears. Click Install. The Software Update Progress dialog box appears. Quantum Scalar i6000 User’s Guide...
- Page 607 Note: Before the RCU is restarted, the main menu Activity panel displays the message WARNING: The Robotics is not Enabled. This message indicates that the RCU is not yet ready. When the RCU is ready, the message disappears. 4 Bring the physical library online. Quantum Scalar i6000 User’s Guide...
- Page 608 If the firmware upgrade process has failed, capture the snapshot and escalate the issue. 2 Click Next. The Update Software Wizard dialog box appears. 3 Click Finish. The Software Update Progress dialog box appears. Quantum Scalar i6000 User’s Guide...
- Page 609 5 Bring the physical library online. a From the LMC, click Operations > Change Mode. b Select Online, and then click OK. 6 Click Help > About. Validate that the components reflect the correct firmware version. Quantum Scalar i6000 User’s Guide...
-
Page 610: Updating Drive Firmware
Quantum technical support. If you want to update drive firmware by using I/O blades or Ethernet Expansion Blades (EEB), perform the procedure in this section. Drives that are not attached to I/O blades or Ethernet Expansion Blades must be updated by using update tapes. - Page 611 The table lists all drives in the library or, if you are currently viewing a partition, all drives in the partition. The Manage Images button enables you to download new drive firmware images to the library or delete drive firmware images Quantum Scalar i6000 User’s Guide...
- Page 612 The In Use check box indicates that the firmware image is set to auto-level all the drives to that firmware image in a specific partition. 5 To download a new drive firmware image, click Download. The Select firmware image file to download dialog box appears. Quantum Scalar i6000 User’s Guide...
- Page 613 595. To update drive firmware by using update tapes, proceed to Updating Drive Firmware Using Update Tapes on page 597. Updating Drive Firmware Using Firmware Images Caution: If you are viewing a partition, drive firmware update operations affect drives that are within the partition only. Quantum Scalar i6000 User’s Guide...
- Page 614 If you load a firmware image onto a drive that is the same version that is currently running on the drive, the upgrade will fail. If host reservations exist on drives, it will fail the upgrade. 1 On the Update Drive Firmware dialog box, select Firmware Image. Quantum Scalar i6000 User’s Guide...
- Page 615 To determine the appropriate drive Release Notes firmware, see the library’s or contact Quantum technical support. If you need to update drive firmware by using update tapes, perform the following procedure. Quantum Scalar i6000 User’s Guide...
- Page 616 OK. Note: You can perform a firmware update only for drives of the same product (such as HP or IBM), and type (such as LTO-4 or LTO-5). Quantum Scalar i6000 User’s Guide...
-
Page 617: Teaching The Library (Configuration And Calibration)
(for example, when you add or remove storage or remove storage to add another component. The library will automatically perform a configuration teach, calibration teach, and inventory when an expansion module is added. Quantum Scalar i6000 User’s Guide... - Page 618 I/E station targets are small square holes that are located at the top and bottom of the I/E station. Whenever you perform work on the library that could affect the position of rack, drive, or I/E station Quantum Scalar i6000 User’s Guide...
-
Page 619: Saving And Restoring Library Configuration
The library’s save and restore capabilities enable you to save a remote or Library Configuration local copy of configuration settings for the library’s drives, I/O blades, and partitions, including the allocation of drives, storage magazines, Quantum Scalar i6000 User’s Guide... - Page 620 Save Rescue command. You might rescue the library’s configuration, for example, if the library becomes unstable due to a configuration change and you want to roll back the library’s configuration settings to a previous state. The Quantum Scalar i6000 User’s Guide...
- Page 621 Note: If you have never saved the configuration, then the icon will always show green/good, even if you change the configuration. You can click the CONFIG button on the LMC toolbar to access the Save and Restore Library Configuration dialog box. Quantum Scalar i6000 User’s Guide...
- Page 622 Click the CONFIG button on the LMC toolbar. The Save and Restore Library Configuration dialog box appears. Alternatively, make sure that you are viewing the physical library (from the View menu, click the name of the physical library), then click Tools > Save/Restore. 2 Click Save. Quantum Scalar i6000 User’s Guide...
- Page 623 The rescue image timestamp displayed on the Save and Restore Library Configuration dialog box will be updated to indicate that the file has changed. If the save rescue operation does not succeed, a message appears that describes the error that occurred. Quantum Scalar i6000 User’s Guide...
- Page 624 (from the View menu, click the name of the physical library), then click Tools > Save/Restore. 2 Click Restore. Note: If the library is not offline, you receive a message that asks you whether you want to take it offline. Click Yes. Quantum Scalar i6000 User’s Guide...
- Page 625 5 After the restore operation has completed on the library, close and restart the remote client. 6 If you have not done so already, make sure that the robotics are enabled and bring the library back online so that data input and output can continue. Quantum Scalar i6000 User’s Guide...
- Page 626 (from the View menu, click the name of the physical library), then click Tools > Save/Restore. 2 Click Rescue. Note: If the library is not offline, you receive a message that asks you whether you want to take it offline. Click Yes. Quantum Scalar i6000 User’s Guide...
- Page 627 1 Log on as an administrator from the remote client or from the library’s touch screen. Click the CONFIG button on the LMC toolbar. The Save and Restore Library Configuration dialog box appears. Quantum Scalar i6000 User’s Guide...
-
Page 628: Viewing The Drive Resource Utilization Reports
DRUR can help you determine the proper work load distribution Reports between the drives in your library. DRUR provides you with up to twelve months of historical data for each SN drive installed, and includes MB read and written, mounts, and media motion time. Quantum Scalar i6000 User’s Guide... - Page 629 2 Make sure that you are viewing the physical library. From the View menu, click the name of the physical library. 3 From the Tools menu, click Reports > Drive Utilization. The Drive Utilization Report dialog box appears. Quantum Scalar i6000 User’s Guide...
- Page 630 4 In the Specify Report Criteria section, you can use the following criteria filters to view and export specific data: • Range • Current Month • Last Month • Last 3 Months • Last 6 Months • Last 12 months • Grouping Quantum Scalar i6000 User’s Guide...
- Page 631 • Trend: A time scale x-axis for the display of the trend of the particular attribute. • Chart: Choose from the following charts to visually display your data: • Bar • Bar 3D • Line • Stacked Area • Stacked Bar Quantum Scalar i6000 User’s Guide...
- Page 632 7 To view a report according to the criteria selected, click View, and then click Preview. The report appears graphically according to the type of chart you selected. 8 To view the next page of the report, click the Next icon on the toolbar. Quantum Scalar i6000 User’s Guide...
- Page 633 5 To load the saved report criteria at a later time, click the template in the list, and then click View to generate the report. 6 To close the Drive Utilization Report dialog box, click Cancel. Quantum Scalar i6000 User’s Guide...
-
Page 634: Setting Up Advanced Reporting Options
Saving Report Criteria Templates To schedule a job for a report, that report must have at least one template. A template is a saved set of report criteria that customize the content and appearance of a report. Quantum Scalar i6000 User’s Guide... - Page 635 To set up a report to be automatically generated, first schedule a new job, and then set job options. 1 On the menu bar, click Tools > Reports > Reporting Options. The Reporting Options dialog box appears. Quantum Scalar i6000 User’s Guide...
- Page 636 For example, 0 is midnight, 10 is 10:00 a.m., and 20 is 8:00 p.m. • (Optional) Select the Recurring Job check box, and then under Frequency click how often you want the report to be generated. Quantum Scalar i6000 User’s Guide...
- Page 637 • If there are no templates available for the report you choose, you need to save a template for the report before you can schedule a job. For more information on saving a template, see Saving Report Criteria Templates on page 616. Quantum Scalar i6000 User’s Guide...
- Page 638 Remove. 6 Click OK. The new job appears in the list of scheduled jobs. The LMC will generate the report at the specified time and send it to the designated e-mail recipients. Quantum Scalar i6000 User’s Guide...
- Page 639 2 Under Scheduled Jobs, click the job you want to delete, and then click Delete. A dialog box appears asking if you are sure you want to delete the selected job. 3 Click Yes. The job is deleted from the list of scheduled jobs. Quantum Scalar i6000 User’s Guide...
-
Page 640: Working With Verification Tests
To perform these tests, the accessor assembly must be ready and functional, and the library must be powered on. In addition, the library must be in an offline state, and at least one scratch tape must be inserted in the I/E station. Quantum Scalar i6000 User’s Guide... - Page 641 FRU Test The FRU test enables you to verify the replacement of a FRU. When the FRU test is selected, you can select any of the following sub-tests: Quantum Scalar i6000 User’s Guide...
- Page 642 Use the Verification Tests dialog box to select the test and sub-test, to start the test, and view results. Figure 67 shows the parts of the Verification Tests dialog box. To display the dialog box, click Tools > Verification Tests. Quantum Scalar i6000 User’s Guide...
- Page 643 • Performs accessor X-axis and Y-axis travel test (also calls the FRU accessor assembly test) • Calibrates library and checks calibration offsets by comparing them to the default values for the drives and I/E stations Quantum Scalar i6000 User’s Guide...
- Page 644 • Performs reach and retract five times • If the LMC gets its side done, performs a Get/Put of the selected cell • Scans the control module serial number to make sure the scanner is reading properly Quantum Scalar i6000 User’s Guide...
- Page 645 Understanding the Verification Test Inventory The verification tests generate inventory lists that provide specific information about the library's configurations. Inventory lists for the library, drives, and blades are available. On the Verification Test dialog Quantum Scalar i6000 User’s Guide...
- Page 646 This inventory list provides the following information about each drive: • Drive type • Type of interface • Physical serial number • Logical serial number • Firmware version • Sled serial number • Sled application firmware version • Sled boot firmware version Quantum Scalar i6000 User’s Guide...
- Page 647 The test was interrupted. The log will show the result to provide a record of test interruption. Note: A single problem in the library can cause failed results in multiple tests. After taking action to correct a failed result, run tests that yielded failed results again. Quantum Scalar i6000 User’s Guide...
- Page 648 To view the graphical reports for a test, click Reports on the Verification Tests dialog box. Figure 68 on page 631 shows the parts of the report window. Quantum Scalar i6000 User’s Guide...
- Page 649 (results for the last five tests are retained) click to close the report window click to view the text log graphic showing P (passed), and F (failed) results Quantum Scalar i6000 User’s Guide...
- Page 650 Then realign the middle X-axis rail and check the alignment of the top and bottom X-axis rails at the location of the failure. Figure 69 on page 633. Quantum Scalar i6000 User’s Guide...
- Page 651 • If the graphical report shows a failed result for the drive-side or door-side, make sure that all tape magazines are installed properly on that side and that the calibration targets are correctly snapped on to the magazines. Quantum Scalar i6000 User’s Guide...
- Page 652 • If running the test again still generates failed results, realign the middle X-axis rail and check the alignment of the top and bottom X- axis rails at the location of the failure. Figure 70 on page 634. Figure 70 Vertical Alignments Graphical Report Quantum Scalar i6000 User’s Guide...
- Page 653 • If running the test again still generates failed results, realign the middle X-axis rail and check the alignment of the top and bottom X- axis rails at the location of the failure. Figure 71 on page 636. Quantum Scalar i6000 User’s Guide...
- Page 654 Reports are generated for drive-side and door- side for all frames. • If the graphical report shows a failed result for one or more tape magazines, make sure the magazines at the location of the failure Quantum Scalar i6000 User’s Guide...
- Page 655 • If running the test again still generates failed results, realign the middle X-axis rail and check the alignment of the top and bottom X- axis rails at the location of the failure. Figure 72 on page 637. Figure 72 Calibration Offsets Graphical Report Quantum Scalar i6000 User’s Guide...
- Page 656 • If running the test again still generates failed results, realign the middle X-axis rail and check the alignment of the top and bottom X- axis rails at the location of the failure. Figure 73 on page 639. Quantum Scalar i6000 User’s Guide...
- Page 657 • If the graphical report shows a failed result for one or more tape magazines, make sure the magazines at the location of the failure are installed properly. Quantum Scalar i6000 User’s Guide...
- Page 658 • If there are a large number of issues, use rubbing alcohol to clean the picker fingers and the detents in the side of the tapes. • If the problems persist, you may need to replace the picker assembly. Figure 74 on page 641. Quantum Scalar i6000 User’s Guide...
- Page 659 Y position (shift), and the number of hits the scanner receives while traveling up and down. (Only known magazines are tested.) • If the graphical report shows a failed result for one or more tape magazines, replace the affected magazines. Quantum Scalar i6000 User’s Guide...
- Page 660 • If the library is level and there are multiple failed results, the scanner should be inspected and replaced if necessary. Figure 75 on page 642. Figure 75 Scan Fiducials Graphical Report Quantum Scalar i6000 User’s Guide...
- Page 661 Also make sure that the storage is correctly seated in the I/ E station and that the I/E station and front door are completely shut. • If the problems persist, you may need to replace the picker assembly. Figure 76 on page 644. Quantum Scalar i6000 User’s Guide...
- Page 662 To view a test log, click Reports on the Verification Tests dialog box to display the report window, and then click the Text tab. Quantum Scalar i6000 User’s Guide...
- Page 663 • At the end of every test, summary results of every subtest are given. The overall test result appears between asterisk lines, and a summary of subtest results follows. See Figure 77 on page 646. Quantum Scalar i6000 User’s Guide...
- Page 664 Chapter 15: Maintaining Your Library Maintenance Actions Figure 77 Example Test Log Output Quantum Scalar i6000 User’s Guide...
- Page 665 1 Log on as an administrator. 2 Make sure that you are viewing the physical library. From the View menu, click the name of the physical library. 3 Click Tools > Verification Tests. The Verification Tests dialog box appears. Quantum Scalar i6000 User’s Guide...
- Page 666 Chapter 15: Maintaining Your Library Maintenance Actions 4 From the Select Test drop-down list, click Install. 5 Click Start. 6 If prompted to take the library offline, click Yes. The IVT Pre-Test Questionnaire appears. Quantum Scalar i6000 User’s Guide...
- Page 667 Gen 2 Pre-test Questionnaire 7 Complete the pre-test questionnaire by clicking inside the box next to the questions. You cannot continue with the installation verification test until you have completed and verified the question requests on this questionnaire. Quantum Scalar i6000 User’s Guide...
- Page 668 The tests must be re-run if they fail. 8 After you complete the questionnaire, click Next. The following dialog box appears. 9 Insert a “scratch” cartridge into the I/E station, and then click Next. Quantum Scalar i6000 User’s Guide...
- Page 669 10 Select a scratch cartridge of each media type listed on the following dialog box. Note: You can select one scratch cartridge per media type. Each test that requires a scratch cartridge will call the media types as needed. Quantum Scalar i6000 User’s Guide...
- Page 670 As the tests run, the library will generate RAS tickets if problems are discovered. You must close the Verification Tests dialog box to view those tickets. Return to the Verification Tests dialog box to view test results. Quantum Scalar i6000 User’s Guide...
- Page 671 • Use the toolbar to navigate between graphical reports or to save the results in PDF format. For more information about how to work with graphical reports, see Verification Test Graphical Reports on page 630. Quantum Scalar i6000 User’s Guide...
- Page 672 15 To e-mail the test log, print it, or save it as a text file, click Send and then specify the output location. For more information, see Mailing, Saving, and Printing Status Information on page 548. Quantum Scalar i6000 User’s Guide...
- Page 673 The LMC saves the most recent five test results. 17 When you are done working with the test results, click Close to close the result window. 18 If you are done performing verification tests, click Close to close the Verification Tests dialog box. Quantum Scalar i6000 User’s Guide...
- Page 674 Email, and then either type an e-mail address in the Email text box or select an existing address from the drop-down list. You can type a comment in the Comment text box to send with the log. Quantum Scalar i6000 User’s Guide...
- Page 675 1 Log on as an administrator. 2 Make sure that you are viewing the physical library. From the View menu, click the name of the physical library. 3 Click Tools > Verification Tests. The Verification Tests dialog box appears. Quantum Scalar i6000 User’s Guide...
- Page 676 5 From the Select Subtest drop-down list, click either Frame or Configuration or both. A check mark indicates the test is selected. 6 Click Start. 7 If prompted to take the library offline, click Yes. The following dialog box appears. Quantum Scalar i6000 User’s Guide...
- Page 677 8 Select either Continue With Scratch Tapes or Continue Without Scratch Tapes, and then click Next. 9 If you selected Continue With Scratch Tapes, insert a “scratch” cartridge into the I/E station, and then click Next. Quantum Scalar i6000 User’s Guide...
- Page 678 10 Select a scratch cartridge of each media type listed on the following dialog box, and then click Next. Note: You can select one scratch cartridge per media type. Each test that requires a scratch cartridge will call the media types as needed. Quantum Scalar i6000 User’s Guide...
- Page 679 Chapter 15: Maintaining Your Library Maintenance Actions 11 Select the number of the frame and racks where the tests are to be performed. The following example shows both the frame and configuration tests because both were selected. Quantum Scalar i6000 User’s Guide...
- Page 680 Chapter 15: Maintaining Your Library Maintenance Actions Test progress is shown in the Verification Tests dialog box. Quantum Scalar i6000 User’s Guide...
- Page 681 For information about how to interpret test logs, see Verification Test Logs on page 644. For information how to e-mail, print, or save text logs, see Mailing, Saving, and Printing Test Logs on page 656. Quantum Scalar i6000 User’s Guide...
- Page 682 The screens displayed by the FRU operational tests vary, depending on which subtest was selected. For example, if you click Picker Assembly, IE Assembly, or Drive Sled Assembly, the following dialog box appears for selecting a scratch tape. Quantum Scalar i6000 User’s Guide...
- Page 683 3 Click Tools > Verification Tests. The Verification Tests dialog box appears. FRU tests are available for the Accessor Assembly, Picker Assembly, Drive Sled Assembly, IE Assembly, and Scan Barcode. You can only test one FRU at a time. The following steps provide Quantum Scalar i6000 User’s Guide...
- Page 684 4 From the Select Test drop-down list, click FRU. 5 From the Select Subtest drop-down list, click Scan Barcode. 6 Click Start. 7 If prompted to take the library offline, click Yes. The following dialog box appears. Quantum Scalar i6000 User’s Guide...
- Page 685 8 Click Finish. Test progress is shown in the Verification Tests dialog box. 9 After the test is complete, click Reports to view the test results. For more information about how to work with graphical reports, see Verification Test Graphical Reports on page 630. Quantum Scalar i6000 User’s Guide...
- Page 686 3 Click Tools > Tickets. The Ticket dialog box appears. 4 From the Tickets dialog box, click the categories of the tickets you want to view and click OK. The Ticket List dialog box appears. Quantum Scalar i6000 User’s Guide...
- Page 687 Chapter 15: Maintaining Your Library Maintenance Actions 5 Click a ticket to highlight it, and then click Details. The Ticket Details dialog box is displayed. Quantum Scalar i6000 User’s Guide...
- Page 688 The Custom test enables you to run the Library Alignment sub-test. 1 Make sure that you are viewing the physical library. From the View menu, click the name of the physical library. 2 Click Tools > Verification Tests. The Verification Tests dialog box appears. Quantum Scalar i6000 User’s Guide...
- Page 689 3 From the Select Test drop-down list, click Custom. The Select Subtest field defaults to the Library Alignment subtest and cannot be changed. 4 Click Start. 5 If prompted to take the library offline, click Yes. 6 Click Start. The following dialog box appears. Quantum Scalar i6000 User’s Guide...
- Page 690 7 Select the starting Module (frame) and Rack as well as the ending Module (frame) and Rack where you want to perform the tests. 8 Click Finish. The test is initiated. Test progress is shown in the Verification Tests dialog box. Quantum Scalar i6000 User’s Guide...
- Page 691 Maintenance Actions 9 After the test is complete, click Reports to view the current or historical reports. For more information about how to work with graphical reports, see Verification Test Graphical Reports on page 630. Quantum Scalar i6000 User’s Guide...
-
Page 692: Using The Partitions Defragmentation Tool
2 Make sure that you are viewing the physical library. From the View menu, click the name of the physical library. 3 Click Tools > Partitions Defragmentation. The Partitions Defragmentation dialog box appears. This dialog box shows a graphical representation of the tape magazines in the library. Quantum Scalar i6000 User’s Guide... - Page 693 4 To begin defragmenting partitions, click Start. A dialog box appears notifying you that partitions that do not have a free I/E station slot cannot be defragmented and will be skipped. Quantum Scalar i6000 User’s Guide...
- Page 694 In this case, simply import the media into the library. The media will automatically be moved to a magazine in the correct partition. For more information about importing media, see Importing Cartridges Into Partitions on page 697. Quantum Scalar i6000 User’s Guide...
-
Page 695: Removing Lodged Cartridges
3 On the drive, press the Eject button, and then remove the cartridge. 4 Close the access door. The power is on. 5 On the operator panel, press the Robotics Enabled button to enable the picker. Quantum Scalar i6000 User’s Guide... -
Page 696: Using Sift Sort
(if a barcode nomenclature is implemented) Exporting Media via 1 Log on as an administrator. Sift/Sort 2 From the Tools menu, select Sift Sort > Export. The Sift Sort Export dialog box appears. Quantum Scalar i6000 User’s Guide... - Page 697 Select a Partition from the drop down list. b If EDLM is licensed on the library, you can filter media in the EDLM library managed partition and partitions with EDLM policies configured according to their media scan test result. Quantum Scalar i6000 User’s Guide...
- Page 698 When Relocate Full is not checked, tapes that exist in the destination area will not be moved (skipped). 7 Click OK. The Control Module screen appears. Quantum Scalar i6000 User’s Guide...
- Page 699 8 Click the desired storage location slot for the export function. The coordinates and details for that location appear in the Information area of the screen. 9 Click Select. The Sift Sort Export screen appears. Quantum Scalar i6000 User’s Guide...
-
Page 700: Capturing Sift Sort Screen Shot
After retrieving the MIB files, you can extract the contents and then use a third-party SNMP tool such as Landesk or HP Operations Manager. Emailing or Saving an 1 Log on as an administrator. MIB File Quantum Scalar i6000 User’s Guide... -
Page 701: Maintaining Air Filters
MIB file on your computer. Maintaining Air Filters The access door of each control and expansion module has two air filters: one located at the top, and the other located at the bottom, as shown in Figure Quantum Scalar i6000 User’s Guide... - Page 702 The materials in the filters should last for the life of the product. However, if abnormal contamination occurs, you should replace them. To order filters, contact your service representative. Quantum Scalar i6000 User’s Guide...
-
Page 703: Removing An Air Filter
The screws remain attached to the retaining bar. thumbscrew retaining bar thumbscrew 5 Remove the air filter. 6 Use water and a mild soap to clean the air filter. 7 Allow them to dry. Quantum Scalar i6000 User’s Guide... -
Page 704: Replacing An Air Filter
4 Place the filter in the opening. 5 Place the retaining bar over the filter to hold it in place. Use the Phillips screwdriver to tighten the two retaining thumbscrews. thumbscrew retaining bar thumbscrew 6 Close the access door. Quantum Scalar i6000 User’s Guide... -
Page 705: Robot, Tower And Power Rail Health Checks
The interval can be set in increments of days, from once per day to once per year. You can also set it to never run. Quantum recommends a once-per-day health check for the robots, towers and power rails. - Page 706 Chapter 15: Maintaining Your Library Robot, Tower and Power Rail Health Checks Quantum Scalar i6000 User’s Guide...
-
Page 707: Working With Cartridges And Barcodes
• Fibre LTO-3 • Fibre LTO-4 • Fibre LTO-5 • Fibre LTO-6 • Fibre LTO-7 (IBM only) Every partition in the library must contain at least one cleaning cartridge. This chapter consists of the following sections: Quantum Scalar i6000 User’s Guide... -
Page 708: Handling Cartridges Properly
24 hours, whichever is less. • Do not place cartridges near sources of electromagnetic energy or strong magnetic fields, such as computer monitors, electric motors, Quantum Scalar i6000 User’s Guide... -
Page 709: Write-Protecting Cartridges
The switch is located on the left side of the cartridge front. See Figure 79 on page 692 for the location of the switch on an LTO cartridge. Quantum Scalar i6000 User’s Guide... -
Page 710: Supported Barcode Formats
Figure 79 Write-protect Switch on an LTO-1 Cartridge Supported Barcode Formats Quantum supplies industry standard LTO barcode labels with a length of 6 barcode characters + 2 media identifier characters. For advanced uses, your Quantum library supports tape cartridge barcode label lengths of up to 15 characters. -
Page 711: Barcode Label Requirements
Barcode Label Requirements Barcode Label Requirements Cartridges must have an external barcode label that is machine readable. Quantum-supplied barcode labels provide the best results. Barcode labels from other sources can be used, but they must meet the following requirements: • ANSI MH10.8M-1983 Standard •... - Page 712 Caution: Do not place any extra labels on the tapes other than on the front. Extra labels will cause tape handling issues, tapes getting stuck in drives and inventory operations to fail. Quantum Scalar i6000 User’s Guide...
- Page 713 Chapter 16: Working With Cartridges and Barcodes Installing Barcode Labels Figure 80 Applying Barcode Labels to Cartridges top of cartridge barcode label write protect lock Quantum Scalar i6000 User’s Guide...
-
Page 714: Using Cleaning Cartridges
In general, cleaning cartridges must be treated in the same manner as data cartridges. Any physical cartridge (cleaning or data) can exist in only one partition. There can be no sharing of cleaning cartridges between partitions. Quantum Scalar i6000 User’s Guide... -
Page 715: Managing And Moving Media
The cartridges will not go back all the way if they are inserted incorrectly. After your library begins operation, use the Import Media dialog box to add cartridges without interrupting library operations. Place cartridges in the I/E station. The scanner automatically reads the barcodes on new cartridges. Quantum Scalar i6000 User’s Guide... - Page 716 5 Click Yes. The Import Media dialog box appears with a list of cartridges in the I/E station displayed. The following table describes the elements on the Import Media dialog box. Element Description Media ID The volume serial number of the cartridge. Quantum Scalar i6000 User’s Guide...
-
Page 717: Exporting Cartridges From Partitions
Export Media dialog box appears with a list of cartridges in the partition displayed. Note: The physical library must be online. If the partition is not offline, you receive a message that asks you whether you want to take it offline. Click Yes. Quantum Scalar i6000 User’s Guide... -
Page 718: Loading Drives
The Load Drives dialog box enables you to load drives with cartridges from the current partition. 1 Make sure that you are viewing the partition from which you want to load drives. From the View menu, click the name of the appropriate partition. Quantum Scalar i6000 User’s Guide... - Page 719 Location is defined as a series of coordinates representing the aisle, module, rack, section, column, and row where a cartridge is located. See Understanding Location Coordinates on page 459. The Select Media area shows the full slots. Quantum Scalar i6000 User’s Guide...
-
Page 720: Unloading Drives
SeeUnderstanding Location Coordinates on page 459. 5 Click OK. The library rewinds the data cartridge, unloads it from the drive, and returns it to storage. Quantum Scalar i6000 User’s Guide... -
Page 721: Moving Media Within A Partition
2 Click Operations > Move Media. The Move Media dialog box appears. The table in the Select Source area lists slot locations with cartridges, and the table in the Select Target area lists slot locations without cartridges. Quantum Scalar i6000 User’s Guide... - Page 722 Active Vault, Automated Media Pool (AMP), and Extended Data Lifecycle Management (EDLM) partitions. Note: Manual movement between library managed partitions and standard partitions will require inventory reconciliation with the backup application managing the standard partition. Quantum Scalar i6000 User’s Guide...
- Page 723 4 Select a source partition from the Select Source Partition section and select a destination partition from the Select Destination Partition. You cannot move media between library managed partitions or between standard partitions. 5 Click Next. The Select Media to Move screen appears. Quantum Scalar i6000 User’s Guide...
-
Page 724: Taking Inventory
Operations® Inventory. To enable automatic inventories, see Setting Up Policies for the Physical Library page 180. 1 Log on as an administrator. Quantum Scalar i6000 User’s Guide... - Page 725 3 To perform an inventory, click OK. The inventory process take a few minutes to complete. 4 When the “Inventory completed successfully” message appears, click OK. Quantum Scalar i6000 User’s Guide...
- Page 726 Chapter 16: Working With Cartridges and Barcodes Managing and Moving Media Quantum Scalar i6000 User’s Guide...
-
Page 727: Frequently Asked Questions
This appendix answers some questions that are most often asked about the library. Where do I find installation instructions? The library requires that a trained Quantum Support Engineer perform the installation. Where are error messages described? When the library detects issues, it sends you e-mail notifications and creates tickets that provide you with detailed information about the issues and corrective actions you can perform. - Page 728 What do I do if I lose power during a backup? If your library contains a redundant power supply, it is unlikely that power will ever be completely unavailable to the library. Quantum Scalar i6000 User’s Guide...
- Page 729 Shutting Down/Rebooting the Library on page 485, Powering Off the Library on page 487, and Powering On the Library page 487. The blue LED on the power supply will be on and not blinking. Quantum Scalar i6000 User’s Guide...
- Page 730 Appendix A: Frequently Asked Questions Quantum Scalar i6000 User’s Guide...
- Page 731 DHCP Client Outbound HTTP Library is a webserver for Inbound administration purposes HTTP Library is a client for SKMv1 Outbound NTP Client Inbound/ Outbound SNMP SNMP queries and management Inbound/ Outbound SNMP Trap output Outbound Quantum Scalar i6000 User’s Guide...
- Page 732 KMIP Communication port on the Outbound server. Library uses non priviledged ports 5988 SMIA SMIS/OpenWBEM Inbound 5989 SSMIS Secure SMIS/OpenWBEM Inbound 6000, SKM tape encryption protocol Outbound 6001 * user configurable. The default value is shown Quantum Scalar i6000 User’s Guide...
- Page 733 Capacity on demand (COD) An Quantum library feature that enables users to have a large physical library, but users pay only for what capacity they are currently using. License upgrades enable more capacity to be added without a system interruption.
- Page 734 Glossary Control Path Failover (CPF) The Scalar i6000 provides support for configuring the HP LTO-5 and later drive for control path failover. To configure a control path failover drive, you must have a Storage Networking License (SNW). When control path failover is used, one drive is assigned as the primary control path and another drive as the control path failover (secondary) drive.
- Page 735 A management and connectivity interface for the library. The control module and first seven expansion modules can have I/O management units installed. The I/O management unit may contain a CMB, FC I/O blades and Ethernet Expansion blades. Quantum Scalar i6000 User’s Guide...
- Page 736 The library controller board, which resides in the LMM. The MCB I/O ports for Fibre Channel, Ethernet, serial, and SCSI. Partition A partition is a logical portion of the physical library that is viewed by the host as if it is a complete library. Partitions Quantum Scalar i6000 User’s Guide...
- Page 737 The robotic hand portion of the accessor assembly that handles cartridges. Quantum Encryption Key Manager (Q-EKM) Quantum's encryption key management solution that supports IBM LTO-4, LTO-5, and LTO-6 FC and SAS tape drives. Relative Distinguished Name. Scalar Key Manager (SKM) Quantum's encryption key management solutions that supports HP LTO-4, LTO-5, and LTO-6 FC and SAS tape drives.
- Page 738 A sheet metal case that houses LTO or SCSI drives in the drive clusters. WORM The Scalar i6000 library supports write once, read many technology in LTO-3 and greater tape drives. WORM allows non- erasable date to be written once and provides extra data security by prohibiting accidental data erasure.
Need help?
Do you have a question about the Scalar i6000 and is the answer not in the manual?
Questions and answers