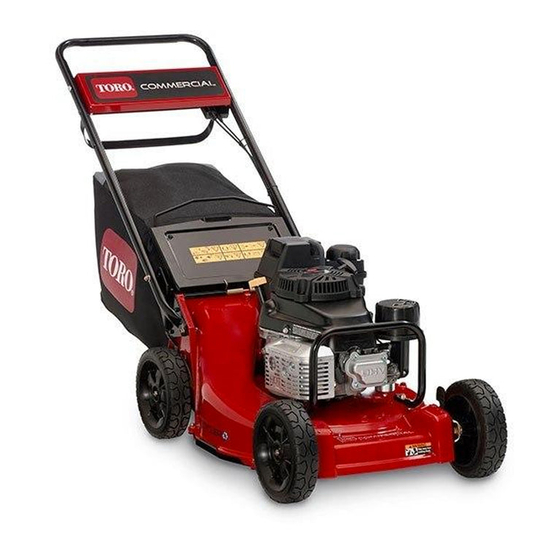
Toro 22298 Operator's Manual
21in heavy-duty recycler / rear bagger lawn mower
Hide thumbs
Also See for 22298:
- Operator's manual (32 pages) ,
- Installation instructions manual (13 pages) ,
- Service bulletin (3 pages)

Related Manuals for Toro 22298


Summary of Contents for Toro 22298
- Page 1 Form No. 3418-846 Rev A 21in Heavy-Duty Recycler ® /Rear Bagger Lawn Mower Model No. 22298—Serial No. 402100000 and Up *3418-846* A Register at www.Toro.com. Original Instructions (EN)
-
Page 2: Table Of Contents
Section 4442, maintained in additional information, contact an Authorized Service effective working order or the engine is constructed, Dealer or Toro Customer Service and have the model equipped, and maintained for the prevention of fire. and serial numbers of your product ready.Figure 1... -
Page 3: Safety
Safety Starting the Engine ........... 15 Shutting Off the Engine........16 Operating the Self-Propel Drive and This machine has been designed in accordance with Engaging the Blades ........16 ANSI B71.1-2012. Checking the Blade-Brake Clutch ..... 17 Recycling the Clippings ........18 Bagging the Clippings........ -
Page 4: Safety And Instructional Decals
Safety and Instructional Decals Safety decals and instructions are easily visible to the operator and are located near any area of potential danger. Replace any decal that is damaged or missing. decaloemmarkt Manufacturer's Mark 1. This mark indicates that the blade is identified as a part from the original machine manufacturer. - Page 5 decal130-9656 130-9656 1. Choke 3. Slow 2. Fast 4. Engine—stop (shut off) decal130-9670 130-9670 1. Severing hazard of hand or foot; mower blade—keep away from moving parts.
-
Page 6: Setup
Setup Important: Remove and discard the protective plastic sheet that covers the engine and any other plastic or wrapping on the machine. Removing the Cable Guard No Parts Required Procedure g234471 Figure 3... -
Page 7: Installing The Handle
Installing the Handle No Parts Required Procedure g235723 Figure 4... -
Page 8: Installing The Cable Guard
Installing the Cable Guard No Parts Required Procedure g234486 Figure 5 Installing the Recoil-Starter Rope in the Rope Guide No Parts Required Procedure g230180 Figure 6... -
Page 9: Filling The Engine With Oil
Filling the Engine with Oil No Parts Required Procedure Important: Your machine does not come with oil in the engine. Before starting the engine, fill the engine with oil. g235721 Figure 7... -
Page 10: Assembling The Grass Bag
Assembling the Grass Bag No Parts Required Procedure g238450 Figure 8 Adjusting the Self-Propel Drive No Parts Required Procedure Important: You must adjust the self-propel-drive cable before you operate the machine for the first time. Refer to Adjusting the Self-Propel Drive (page 25). -
Page 11: Product Overview
Product Overview g231779 Figure 11 1. Blade-control lock-lever 3. Handle 2. Blade-control bar 4. Drive bail g239096 Figure 9 1. Handle 6. Throttle-control lever 2. Self-propel-drive bar 7. Air cleaner 3. Blade-control bar 8. Spark plug 4. Rear deflector (not shown) 9. Cutting-height lever (4) 5. -
Page 12: Before Operation
Operation – Store fuel in an approved container and keep it out of the reach of children. • Fuel is harmful or fatal if swallowed. Long-term Note: Determine the left and right sides of the exposure to vapors can cause serious injury and machine from the normal operating position. -
Page 13: Checking The Engine-Oil Level
Important: Note: To reduce starting problems, add fuel The capacity of the fuel tank is 3.8 L (1.0 US stabilizer to the fuel all gasoline. Mix the stabilizer gallon). with gasoline less than 30 days old. Checking the Engine-Oil Level Service Interval: Before each use or daily Important: If the oil level in the engine is too low or too high and you run the engine, you may damage... -
Page 14: Adjusting The Cutting Height
Adjusting the Cutting Height DANGER Adjusting the cutting-height levers could bring your hands into contact with a moving blade and result in serious injury. • Shut off the engine and wait for all movement to stop before adjusting the cutting height. •... -
Page 15: Starting The Engine
Uneven terrain could cause the • Use accessories and attachments approved by machine to overturn or cause you to lose your The Toro® Company only. balance or footing. • If the machine strikes an object or starts to vibrate,... -
Page 16: Shutting Off The Engine
g234784 Figure 15 Shutting Off the Engine Start the engine. Release the blade-control bar and move the To operate the self-propel drive, squeeze the throttle-control lever to the S position. drive bail (Figure 17). Note: Close the fuel valve by moving the fuel-valve lever (Figure 14) to the left if you will not be starting... -
Page 17: Checking The Blade-Brake Clutch
To engage the blades, do the following: Push and hold the blade-control lock lever Release the blade-control bail to disengage the forward to release the blade-control bail (A of blade (B of Figure 18). The blade-control-lock Figure 18). lever resets to lock the blade-control bail. Pull the blade-control bail to the handle and release the blade-control-lock lever;... -
Page 18: Recycling The Clippings
A worn grass bag could allow small stones and other similar debris to be thrown toward you or bystanders, resulting in serious personal injury or death. Check the grass bag frequently. If it is damaged, install a new Toro replacement bag. WARNING The blades are sharp;... - Page 19 g236745 Figure 20 Removing the Grass Bag DANGER The machine can throw grass clippings and other objects through an opening in the machine housing. Objects thrown with enough force could cause serious personal injury or death to you or to bystanders. •...
-
Page 20: Operating Tips
Periodically file down nicks on the blade. • • Walk at a slower pace while mowing. Replace the blade when necessary with an original Toro replacement blade. • Raise the cutting height on your machine. • Avoid mowing wet grass and leaves. They tend to •... -
Page 21: Cleaning Under The Machine
Cleaning under the Machine no longer see clippings being washed out from under the machine. To ensure the best performance, keep the underside Shut off the engine and wait for all moving parts of the machine clean. Be especially careful to keep to stop. -
Page 22: Maintenance
• The blade is sharp; contacting the blade can result genuine Toro replacement parts and accessories. in serious personal injury. Wear gloves when Replacement parts and accessories made by servicing the blade. Do not repair or alter the other manufacturers could be dangerous, and blade(s). -
Page 23: Servicing The Air Cleaner
Servicing the Air Cleaner Changing the Engine Oil Service Interval: Every 25 hours—Clean the foam Service Interval: After the first 8 hours pre-cleaner (more frequently in Every 50 hours dusty conditions). Run the engine a few minutes before changing the oil Every 300 hours—Replace the paper air filter to warm it. -
Page 24: Servicing The Spark Plug
Shut off the engine and wait for all moving parts Stop the engine, wait for all moving parts to stop, to stop. and check for oil leakage around the filter. Disconnect the wire from the spark plug. Add oil to compensate for the oil in the oil filter. Refer to 5 Filling the Engine with Oil (page Drain the gasoline from the fuel tank. -
Page 25: Adjusting The Self-Propel Drive
Adjusting the Self-Propel Maintaining the Blade Drive Always mow with a sharp blade. A sharp blade cuts cleanly and without tearing or shredding the grass If the machine is new, does not self-propel, or it tends blades. to creep forward, adjust the drive cable. Shut off the engine and wait for all moving parts Move the machine outside and onto a paved to stop. -
Page 26: Removing The Blade
WARNING A worn or damaged accelerator can break, and a piece of the accelerator could be thrown toward you or bystanders, resulting in serious personal injury or death. • Inspect the accelerator periodically for wear or damage. • Replace a worn or damaged accelerator. g002278 Figure 29 Removing the Blade... -
Page 27: Adjusting The Blade-Brake Cable
Installing the Blade Install a sharp, balanced Toro blade, the accelerator, and the blade nuts. The sail of the blade must point toward the top of the mower housing for proper installation. -
Page 28: Cleaning Under The Belt Cover
Connect the wire to the spark plug. Cleaning the Blade-Brake-Clutch Shield Service Interval: Every 50 hours Clean the blade-brake-clutch shield to ensure the best performance and to prevent parts from degrading. Clean the blade-brake-clutch shield when you sharpen the blade, because you need to remove the blade in g240206 Figure 36 order to remove the blade-brake-clutch shield. -
Page 29: Cleaning The Wheels
Cleaning the Wheels Remove the screws that secure the blade-brake-clutch shield to the mower housing (Figure 38). Service Interval: Every 40 hours Remove the blade-brake-clutch shield and brush Remove the rear wheels and clean any debris or blow all the debris from under the shield and from the wheel-gear area. -
Page 30: Storage
Storage Touch up all rusted or chipped paint surfaces with paint available from an Authorized Service Dealer. To prepare the machine for off-season storage, perform the recommended maintenance procedures; Removing the Machine refer to Maintenance (page 22). Store the machine in a cool, clean, dry place. Cover from Storage the machine to keep it clean and protected. -
Page 31: Troubleshooting
Troubleshooting Problem Possible Cause Corrective Action The engine does not start. 1. The fuel tank is empty or the fuel 1. Drain and/or fill the fuel tank with fresh system contains stale fuel. fuel. If the problem persists, contact an Authorized Service Dealer.