
Related Manuals for DigiTrak Falcon F2

Summary of Contents for DigiTrak Falcon F2
- Page 1 Directional Drilling Locating System Operator’s Manual IGITAL ONTROL dci@digital-control.com NCORPORATED www.DigiTrak.com...
- Page 2 CE Requirements DigiTrak receivers are classified as Class 2 radio equipment per the R&TTE Directive and may not be legal to operate or require a user license to operate in some countries. The list of restrictions and the required declarations of conformity are available on DCI’s website at www.DigiTrak.com.
- Page 3 India DTJ 1023, 10th Floor DLF Tower A, DA District Center Jasola, New Delhi 110044 +91.11.4507.0444 +91.11.4507.0440 fax dci.india@digital-control.com Russia Molodogvardeyskaya Street, 4 Building 1, Office 5 Moscow, Russia 121467 +7.499.281.8177 +7.499.281.8166 fax dci.russia@digital-control.com Operator’s Manual DigiTrak Falcon...
- Page 4 NCORPORATED Dear Customer, Thank you for choosing a DigiTrak locating system. We are proud of the equipment we have been designing and building in Washington State since 1990. We believe in providing a unique, high-quality product and standing behind it with world-class customer service and training.
-
Page 5: Table Of Contents
50 Foot Calibration (Optional) ..............23 Settings ......................24 Depth Units Menu ..................24 Pitch Units Menu ..................24 Roll Offset Menu ..................25 Transmitter Options Menu ................ 26 Telemetry Channel Menu ................27 Target Steering ....................27 Operator’s Manual DigiTrak Falcon... - Page 6 Temperature Status and Overheat Indicator ..........60 Transmitter Temperature Warning Tones ........... 60 Transmitter Overheat Indicator (Temp Dot) ..........61 Changing Frequency Bands ................61 Above Ground (Pre-Bore) Tilt Method ............61 Below Ground (Mid-Bore) Roll Methods ............62 Operator’s Manual DigiTrak Falcon...
- Page 7 Appendix D: Calculating Depth Based on Distance Between FLP and Appendix E: Reference Tables Depth Increase in Inches (cm) per 10-ft. (3-m) Rod ........72 Depth Increase in Inches (cm) per 15-ft. (4.6-m) Rod ........73 LIMITED WARRANTY Operator’s Manual DigiTrak Falcon...
- Page 8 IGITAL ONTROL NCORPORATED Operator’s Manual viii DigiTrak Falcon...
-
Page 9: Important Safety Instructions
General The following warnings relate generally to the operation of DigiTrak locating systems. This is not an exhaustive list. Always operate your DigiTrak locating system in accordance with the manual and be aware of interference that may affect efforts to retrieve accurate data with this locating system. -
Page 10: Pre-Drilling Testing
ONTROL NCORPORATED Pre-Drilling Testing Before each drilling run, test your DigiTrak locating system with the transmitter inside the drill head to confirm it is operating properly and providing accurate drill head location and heading information. During drilling, the depth will not be accurate unless: ... -
Page 11: Battery Pack Storage
Do not store or ship this equipment with batteries inside. Always remove the batteries from the equipment before shipping or periods of non-use. The battery charger provided with your DigiTrak locating system is designed with adequate safeguards to protect you from shock and other hazards when used as specified within this document. -
Page 12: General Transmitter Care Instructions
Ensure that this hole remains clear of debris. Send in the Product Registration Card or register online at access.DigiTrak.com for the 90-day Limited Warranty. Operator’s Manual DigiTrak Falcon... -
Page 13: Getting Started
Falcon F2 locating system is ready to drill. Assign a second optimized band as an alternate. At your next bore, re-scan and choose the best bands for the new job site. -
Page 14: Using This Manual
This manual is an important tool for you as the operator of a Falcon locating system. You can find it on the flash drive that accompanied your system or at www.DigiTrak.com. We encourage you to load it onto your mobile device and keep it handy so the information you need is always close at hand. -
Page 15: Powering On
2. Do not power on the transmitter until after running the Frequency Optimizer (see next section). Batteries and Power On/Off 3. If you will be using the Frequency Optimizer, transmitter Page 57 orientation while powering on does not matter. Operator’s Manual DigiTrak Falcon... -
Page 16: Jobsite Setup
5. Select Pair 6. Align the receiver and transmitter IR windows within two inches of each other and select the check mark to pair. A successful pairing is indicated by a beep and a check mark. Operator’s Manual DigiTrak Falcon... -
Page 17: Calibrate
A 15 m calibration is not necessary for drilling. Interference Check Interference Check for active interference on both frequency bands to verify it does Page 34 not interfere with the transmitter's signal. Operator’s Manual DigiTrak Falcon... -
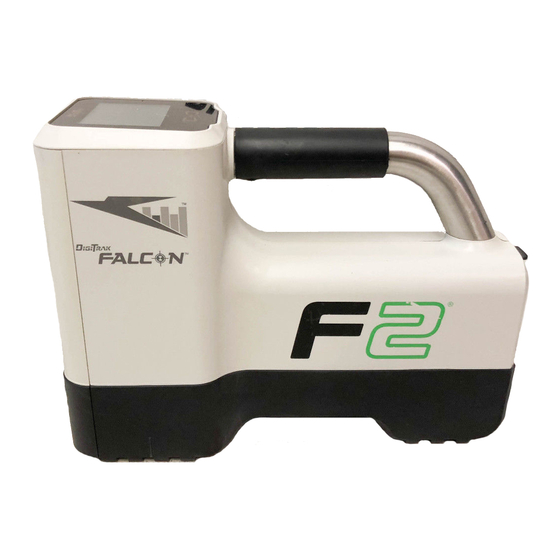
Page 18: Receiver
F2 receiver (locator) is a handheld unit used for locating and tracking a DigiTrak Falcon F2 dual wideband transmitter. It converts signals from the transmitter to display depth, pitch, roll, temperature, and battery level, plus sends this information to the remote display on the drill rig. -
Page 19: Audible Tones
Customer service phone numbers Receiver Startup Screen Locate Screen Click to exit the startup screen. The Falcon F2 receiver proceeds to the Page 29 Locate screen. Note If an item of the self-test fails, a "Fail" warning displays on the startup screen instead of "Pass". -
Page 20: Using A Remote Display
F Series Display - FSD Aurora - AP8, AF10 If you already own one of the above displays, select "F2" to communicate with your Falcon F2 receiver. The operator's manual for your remote display is located on the flash drive that accompanied your Falcon F2 locating system and also at www.DigiTrak.com. -
Page 21: Receiver Menus
IGITAL ONTROL NCORPORATED Receiver Menus I am already familiar with DigiTrak receiver menus; can I skip this? Page 28 If you have used a DigiTrak SE or F2 receiver, you are well on your way to mastering a Falcon. -
Page 22: Frequency Optimizer
Some of my bands are missing on the optimizer. Is my Falcon F2 broken? No. A maximum of nine bands are available, but some country regulations limit the number of frequencies and bands available. - Page 23 9.0–13.5 13.5–18 18–22.5 22.5–27 27–31.5 31.5–36 36–40.5 40.5–45 5. Select whether to assign this as the Up or Down band (the band the Tx powers on with when facing Up or Down). Down Cancel Operator’s Manual DigiTrak Falcon...
- Page 24 Yes. Select Return to go back to the frequency optimization results, erase the maximum readings, and continue observing the noise readings of the last optimized frequency bands. Select to return to the Locate screen. Operator’s Manual DigiTrak Falcon...
-
Page 25: Power Off
Main menu to turn the receiver off. The receiver automatically shuts down after 15 minutes of inactivity or after 30 minutes when in Target Steering mode. Is it okay to power off by just pulling the battery out? Yes, Falcon F2 can handle it. ... -
Page 26: Height-Above-Ground (Hag)
Calibration Depth Units To prevent incorrect readings, Falcon F2 always powers up with the Page 20 Page 24 HAG function off (disabled). HAG also automatically shuts off during... - Page 27 HAG value. The receiver beeps and confirms with a Set HAG Value checkmark, then enables HAG and returns to the Locate screen. Depth readings (holding the trigger) must now be taken with the receiver held at this height. Operator’s Manual DigiTrak Falcon...
-
Page 28: Calibration And Agr
3 m calibration distance so it can be compared to future signal strength values. A change in signal strength can indicate you are currently in an interference environment or there is a problem with your equipment. Operator’s Manual DigiTrak Falcon... - Page 29 If you wait longer than about 15 seconds to click the trigger, the calibration terminates and the Above Ground Range (AGR) screen displays (see next section). 5. The display counts down to zero while the receiver records the calibration point. Do not move the receiver. Operator’s Manual DigiTrak Falcon...
-
Page 30: Above Ground Range (Agr)
Above Ground Range (AGR) Locate Screen Note that because AGR intentionally does not consider pitch when calculating Page 29 range, it displays a symbol indicating "Warning, pitch is unknown, assume zero". It also ignores any HAG setting. Operator’s Manual DigiTrak Falcon... -
Page 31: After Calibration
No. A 15M calibration only helps with above-ground measurements. Use it if the AGR test reveals shorter than actual distance readings beyond 12.2 m. After the 15M calibration, use the subsequent AGR test to verify the adjusted distance readings. Operator’s Manual DigiTrak Falcon... -
Page 32: Settings
HAG back on and reset the height value. Pitch Units Menu Use the Pitch Units menu to choose between degrees (0.0°) and percent (0.0%). Typical HDD bores use percent pitch instead of degrees. Operator’s Manual DigiTrak Falcon... -
Page 33: Roll Offset Menu
When the receiver returns to the Locate screen, roll offset is indicated by a hollow dot in place of the solid dot on the roll indicator and the letters “RO” at the bottom right of the roll indicator on both the receiver and remote display. Operator’s Manual DigiTrak Falcon... -
Page 34: Transmitter Options Menu
5 cm or less, select this option to view transmitter serial number, region, bands, amperage, voltage, temperature, maximum temperature, and software version. Viewing this data also confirms that the IR pairing capability is functional. Operator’s Manual DigiTrak Falcon... -
Page 35: Telemetry Channel Menu
, then returns to the Locate screen. The current telemetry channel displays next to the Telemetry Channel icon on the Main menu. Target Steering Target Steering The last item on the Main menu is for using the DigiTrak Target Page 51 Steering locating method, which is discussed later in the Advanced Locating section of this manual. -
Page 36: Locating Basics
If you're new to locating and first want to know everything about the locating screens, you've come to the right place. If you already know locators and want to jump right in and start locating with your Falcon F2 system, skip down to Interference. Locating in a High-Interference Area This section covers locating basics: ... -
Page 37: Locating Screens
If the transmitter is on and there is no roll or pitch data, hold the trigger for 10 seconds to engage Max mode and the data should appear. If not, the transmitter and receiver may not be paired to the same frequency band. Operator’s Manual DigiTrak Falcon... - Page 38 Less Common Icons Calibration required or self-test error warning Attenuated Signal (shallow depth) Roll Offset enabled Transmitter yaw Transmitter (Tx) current draw warning Tx battery strength Target Steering Locate Screen with Less Common Icons Operator’s Manual DigiTrak Falcon...
-
Page 39: Depth Screen
The purpose of Max mode noise filtering is to stabilize erratic roll/pitch data, depths, and locates when drilling at the very limit of the ability of the transmitter due to extreme depth or interference, which will vary by jobsite. Operator’s Manual DigiTrak Falcon... - Page 40 Max mode can only provide accurate data when the drill head is not moving. Always take three Max readings; all three readings must be identical and stabilize before the Max mode timer is full. Operator’s Manual DigiTrak Falcon...
-
Page 41: Predicted Depth Screen
Hold the trigger for longer than five seconds to enter Max mode, as described in the previous section. In this example, if the drill head travels an additional 1.82 m at -0.2% pitch, it will be directly below the locator at 2.62 m. Operator’s Manual DigiTrak Falcon... -
Page 42: Depth Screen, Invalid Location
Interference at the remote display may also occur from other sources operating nearby on the same frequency. The following section describes how to use the receiver to test for the presence of background noise. Operator’s Manual DigiTrak Falcon... -
Page 43: Checking For Interference
Verify that the roll/pitch data is consistent and correct in the flagged area. The transmitter’s signal strength should generally be a minimum of 150 points greater than the Operator’s Manual DigiTrak Falcon... -
Page 44: Roll/Pitch Check
If roll/pitch data or signal strength become unstable, Page 31 hold the trigger to see if Max Mode can stabilize the data. Red flag area Intended bore path Intended depth Two-Person Roll/Pitch Test with Transmitter Operator’s Manual DigiTrak Falcon... -
Page 45: Suggestions For Dealing With Interference
Locate Points (FLP & RLP) and Locate Line (LL) The Falcon F2 receiver locates the transmitter by detecting three specific places in the transmitter’s magnetic field: the front locate point (FLP) ahead of the transmitter, the rear locate point (RLP) behind the transmitter, and the locate line above the transmitter itself. - Page 46 This slight fore/aft offset will increase with depth (see Appendix C). In these cases, the depth displayed on the receiver is referred to as the projected depth. Operator’s Manual DigiTrak Falcon...
-
Page 47: Effects Of Depth, Pitch, And Topography On Distance Between Flp And Rlp
To calculate depth (for comparison to the receiver’s depth reading) using the distance between the locate points and the pitch of the transmitter, see Appendix D: Calculating Depth Based on Distance Between FLP and RLP on page 71. Operator’s Manual DigiTrak Falcon... -
Page 48: Marking Locate Points
Plumb Line for Marking Locate Points Locating the Transmitter Falcon F2 can locate the transmitter and its heading while it moves, whether in front of the transmitter, behind it, or beside it. It can locate the transmitter while facing toward or away from the drill rig. -
Page 49: Finding The Front Locate Point (Flp)
FLP will be found farther in front of the transmitter. Locating Drill “target” ball “Box” Bore path Receiver Locate Screen Actual Position of Receiver and Transmitter 4. Move the receiver to guide the ball into the box. Operator’s Manual DigiTrak Falcon... - Page 50 If it does not, do not continue to use the receiver and contact DCI Customer Service. 6. With the ball centered in the box, mark the ground directly below the receiver’s display screen as the FLP. Operator’s Manual DigiTrak Falcon...
-
Page 51: Finding The Locate Line (Ll)
Do not rely on the alignment of the ball with the vertical crosshair to identify the left/right position of the transmitter. Accurately locating the front and rear locate points is required to determine the transmitter’s lateral position (heading) and take accurate depth readings. Operator’s Manual DigiTrak Falcon... - Page 52 No. If a new FLP is directly in line with the previously marked FLPs (a straight bore line), it is unnecessary to find a new RLP since it will be directly in line with the previous marks. After the drill head moves forward another rod, find the new FLP and then LL. Operator’s Manual DigiTrak Falcon...
-
Page 53: Finding The Rlp To Confirm Transmitter Heading And Position
Receiver Locate Screen at RLP Actual Position of Receiver and Transmitter 13. Mark the ground directly below the receiver’s display screen as the RLP. A line between the RLP and FLP represents the transmitter’s heading. Operator’s Manual DigiTrak Falcon... - Page 54 1 m. The depth reading should increase this same distance. In the example above, the depth would be 3.62 m. Appendix C on page 67 and Appendix D on page 71 for more information on depth. Operator’s Manual DigiTrak Falcon...
-
Page 55: Advanced Locating
FLP, in line with the path created by the FLP and RLP. Turn HAG off. One rod length One rod length Drill Drill Tracking "On-the-Fly" Tracking "On-the-Fly" with a Straight Path with a Curved Path Operator’s Manual DigiTrak Falcon... - Page 56 Once the FLP is in the box, hold the trigger and confirm that the predicted depth reading is as expected. Drill Bore path Receiver Screen Tracking "On-the-Fly" Actual Position of Receiver and Transmitter Operator’s Manual DigiTrak Falcon...
-
Page 57: Off-Track Locating
(P1). Move the receiver forward and backward until the ball jumps between the top and bottom of the screen, then mark this location. Bore path Obstruction Path around obstruction Predetermined distances Drill Operator’s Manual DigiTrak Falcon... - Page 58 Differences in pitch and topology elevations will also affect the signal strength and LL position as the drill head progresses. Bore path Obstruction Predetermined distances Path around obstruction Drill Off-Track Locating Operator’s Manual DigiTrak Falcon...
-
Page 59: Target Steering
Target Steering The Target Steering locating method allows the Falcon F2 receiver to be placed ahead of the drill head and used as a steering target. Locate Points (FLP & In general, Target Steering should be used to maintain a bore path, not RLP) and Locate Line (LL) to bring a significantly off-course bore back on track. -
Page 60: Turning Target Steering On
With Target Steering enabled, the Locate screen will now show the horizontal distance from transmitter to receiver (see the first screen in the section Positioning the Receiver as the Target on page 54). Any HAG setting in effect is ignored during Target Steering. Operator’s Manual DigiTrak Falcon... -
Page 61: Turning Target Steering Off
1. Hold the trigger briefly to set the target depth value. Select to set target depth Operator’s Manual DigiTrak Falcon... -
Page 62: Positioning The Receiver As The Target
The remote display on the drill automatically changes to Target Steering or Remote Steering mode. Horizontal distance from transmitter to receiver Target Steering Data on the Receiver Operator’s Manual DigiTrak Falcon... -
Page 63: Steering To The Target With The Remote Display
Refer to the operator's manual for your remote display for details on its Target Steering or Remote Steering screen. Manuals are located on the flash drive or CD that accompanied the equipment or online at www.DigiTrak.com. Target Steering in Interference Areas Warning Interference can cause inaccuracies in the measurement of depth and placement of the locating ball, and loss of the transmitter’s pitch, roll,... -
Page 64: Transmitter
) near the serial number. The transmitter must be paired to the receiver prior to use. The Falcon F2 wideband transmitter provides pitch readings in as low as 0.1% or 0.1° increments at level and displays roll in 12 clock positions (CP). The transmitter has a depth range of up to 30.5 m, data range of up to 38.1 m, and broadcasts in nine bands... -
Page 65: Batteries And Power On/Off
IGITAL ONTROL NCORPORATED Batteries and Power On/Off DigiTrak Falcon F2 dual wideband transmitters require two C-cell alkaline batteries or one ™ DCI SuperCell lithium battery providing a maximum of 3.6 VDC. Alkaline batteries will last up to 20 hours, whereas a SuperCell battery will last up to 70 hours. -
Page 66: Transmitter Battery Strength
Selecting the Startup Frequency of the Transmitter To power on the transmitter in the last band used, install the batteries with the transmitter horizontal. The Falcon F2 receiver remembers the last frequency band used, even after a power cycle. 4. Replace the battery cap and maintain orientation for at least 10 seconds. -
Page 67: Sleep Mode
ONTROL NCORPORATED The Falcon F2 transmitter only performs this current draw test for five minutes after powering on. The transmitter must be installed in the drill head for this test to be valid. Different drill heads and slot arrangements will affect current draw and battery life. -
Page 68: Temperature Status And Overheat Indicator
IGITAL ONTROL NCORPORATED Use only the battery cap that accompanied the Falcon F2 transmitter; other battery caps may look similar but crush the batteries or make the transmitter too long to fit in a standard housing. Temperature Status and Overheat Indicator All DigiTrak transmitters are equipped with an internal digital thermometer. -
Page 69: Transmitter Overheat Indicator (Temp Dot)
The new band displays at the top of the Main menu. It may take up Page 26 to 30 seconds for the transmitter to begin sending data on the new frequency; return to the Locate screen and verify that transmitter data appears on the display. Operator’s Manual DigiTrak Falcon... -
Page 70: Below Ground (Mid-Bore) Roll Methods
NCORPORATED Below Ground (Mid-Bore) Roll Methods Switching between bands on the Falcon F2 transmitter may provide better data results while drilling in a section of the bore with a high level of interference. Use these methods to change the frequency band of a transmitter mid-bore. -
Page 71: Appendix A: System Specifications
IGITAL ONTROL NCORPORATED Appendix A: System Specifications Power Requirements Device (Model Number) Operational Voltage Operational Current DigiTrak Falcon F2 Receiver 14.4 V 300 mA max (FAR2) DigiTrak SE NiMH Battery Input 100–240 VAC 350 mA max Charger (SBC) Output 25 V... -
Page 72: Storage And Shipping Requirements
0 – 3% 0 – 1.7° 0.1% 3 – 9% 1.7 – 5.1° 0.2% 9 – 30% 5.1 – 16.7° 0.5% 30 – 50% 16.7 – 26.6° 2.0% 50 – 90% 26.6 – 42.0° 5.0% Operator’s Manual DigiTrak Falcon... -
Page 73: Appendix B: Receiver Screen Symbols
Roll/Pitch Update Meter transmitter (specifically, data rate). Five bars is the best signal. Fewer bars indicates the receiver is in an area of interference or you are reaching the range Page 29 limit of the transmitter. Operator’s Manual DigiTrak Falcon... - Page 74 Allowing this screen to time out opens the AGR screen. Page 21 – Indicates a failure in the self-test or a need to calibrate the receiver Warning Page 30 to the transmitter. Operator’s Manual DigiTrak Falcon...
-
Page 75: Appendix C: Projected Depth Versus Actual Depth And The Fore/Aft Offset
The projected depth and fore/aft offset must be accounted for when the transmitter is steep and/or deep. See Table C1 Table C2 to determine the actual depth and fore/aft offset when you know the displayed (projected) depth and pitch of the transmitter. Operator’s Manual DigiTrak Falcon... - Page 76 – Table C4 These "steep and deep" calculations for projected depth are important when using a bore plan that has specified target depths on steeper and deeper bores. Operator’s Manual DigiTrak Falcon...
- Page 77 4.65 m 5.38 m 6.38 m 7.21 m 7.62 m Use the projected/displayed depth values in the first column and transmitter pitches in the first row to find fore/aft Max mode timer offset values. Operator’s Manual DigiTrak Falcon...
- Page 78 For example, if your pitch is 30% and your projected depth reading is 7.32 m, multiply depth 24 by conversion factor 0.943. The result, 6.90 m, is the actual depth of the transmitter. Operator’s Manual DigiTrak Falcon...
-
Page 79: Appendix D: Calculating Depth Based On Distance Between Flp And Rlp
28 / 15.6 1.48 62 / 31.8 1.69 96 / 43.8 2.02 30 / 16.7 1.48 64 / 32.6 1.71 98 / 44.4 2.04 32 / 17.7 1.49 66 / 33.4 1.73 100 / 45.0 2.06 Operator’s Manual DigiTrak Falcon... -
Page 80: Appendix E: Reference Tables
127 cm 61 cm 130 cm 64 cm 137 cm 66 cm 147 cm 69 cm 157 cm 71 cm 175 cm 74 cm 191 cm 76 cm 203 cm 79 cm 216 cm Operator’s Manual DigiTrak Falcon... -
Page 81: Depth Increase In Inches (Cm) Per 15-Ft. (4.6-M) Rod
191 cm 89 cm 196 cm 94 cm 203 cm 99 cm 221 cm 102 cm 236 cm 107 cm 262 cm 112 cm 284 cm 114 cm 305 cm 119 cm 323 cm Operator’s Manual DigiTrak Falcon... - Page 82 IGITAL ONTROL NCORPORATED Operator’s Manual DigiTrak Falcon...
-
Page 83: Limited Warranty
IGITAL Kent Washington 98032, USA ONTROL 425.251.0559 / 800.288.3610 dci@digital-control.com, www.DigiTrak.com NCORPORATED LIMITED WARRANTY Digital Control Incorporated ("DCI") warrants that, when shipped from DCI, each DCI product (other than software products) will conform to DCI’s current published specifications in existence at the time of shipment and will be free, for the warranty period (“Warranty Period”) specified below, from material defects in materials and workmanship. - Page 84 DCI does not assume any duty to train User or any other person, and does not assume responsibility or liability for the locating or other work performed at a jobsite at which DCI personnel or equipment are or have been present. Operator’s Manual - Warranty DigiTrak Falcon...
Need help?
Do you have a question about the Falcon F2 and is the answer not in the manual?
Questions and answers