Table of Contents
Advertisement
10F., No.3-1, Yuancyu St., Nangang District,
Taipei City 115, Taiwan
Tel :+886-2-6615-9111
Fax :+886-2-6615-0933
http://www.teco.com.tw
This manual may be modified when necessary because of improvement of the product, modification,
or changes in specifications, This manual is subject to change without notice.
EV Series 110V
Distributor
Ver:03 2006.05
0.2∼0.75KW
(0.2∼1HP)
220V
0.2∼2.2KW
(0.2∼3HP)
440V
0.75∼2.2KW
(1∼3HP)
Microprocessor Controlled
IGBT Drive
Inverter Motor Speed Regulator
Operating Manual
Advertisement
Table of Contents
Troubleshooting

Related Manuals for TECO JNEV-202~203-H1


Summary of Contents for TECO JNEV-202~203-H1
- Page 1 10F., No.3-1, Yuancyu St., Nangang District, Taipei City 115, Taiwan Tel :+886-2-6615-9111 Fax :+886-2-6615-0933 http://www.teco.com.tw Ver:03 2006.05 This manual may be modified when necessary because of improvement of the product, modification, or changes in specifications, This manual is subject to change without notice.
- Page 2 Quick Start Guide This guide is to assist in installing and running the inverter to verify that the drive and motor are working properly. Starting, stopping and speed control will be from the keypad. If your application requires external control or special system programming, consult the 7300EV Instruction Manual supplied with your inverter.
- Page 3 Step3 Check motor rotation without load. Press RUN Key. 7-segment Display will indicates 00.0to 05.0. Such value is the frequency output value. Check the operation direction of the motor. IF the direction of the motor is incorrect: Press STOP Key, turn off the AC power supply. After Power indicator LED is off, change over theT1 and T2.
-
Page 4: Table Of Contents
7300EV user manual Table of Contents Tutorial ........................i Content ........................Preface ........................0-1 Preface........................0-1 Product inspection ....................0-1 Chapter 1 Safety precautions ................1-1 1.1 Operation precautions ..................1-1 1.1.1 Before power up ..................1-1 1.1.2 During power up ..................1-2 1.1.3 Before operation .................. - Page 5 Chapter 4 Programming instructions & parameter list ........4-1 4.1 Keypad description.................... 4-1 4.1.1 Keypad description..................4-1 4.1.2 Operation instruction of the keypad ............4-1 4.2 Parameter functions list ..................4-3 4-10 4.3 Parameter functions description............... Chapter 5 Trouble shooting and maintenance ..........
- Page 6 Figure index Figure 3-1 Panel and enclosure arrangement for drives ..........3-1 Figure 3-2 Mounting and clearance requirements............3-1 Figure 3-3 Din rail mounting of the JNEV Drive ............3-2 Figure 3-4 Side-by-side mounting of the JNEV Drive........... 3-2 Figure 3-5 NEMA 4 mounting instructions..............3-4 Figure 3-6 NEMA 4 wiring diagram................
- Page 7 Figure 4-9 Output current detection................4-19 Figure 4-10 DC injection braking................4-21 Figure 4-11 Output torque capacity ................4-23 Figure 4-12 Slip compensation ...................4-23 Figure 4-13 Low frequency voltage compensation............4-24 Figure 4-14 V/F patterns a. User configured V/F pattern ...............4-26 b. Pre configured V/F pattern..............4-27 Figure 4-15 V/Hz curves with varying base voltages ...........4-28 Figure 4-16 PID flow control diagram ................4-30 Figure 4-17 Sleep/wake mode ..................4-31...
-
Page 8: Preface
Should there be any problem in using the product that can not be solved with the information provided in the manual, contact your nearest TECO distributor or sales representative who will be willing to help you. ※Precautions The inverter is an electrical product. -
Page 9: Chapter 1 Safety Precautions
Chapter 1 Safety Precautions Chapter 1 Safety Precautions 1.1 Operation Precautions 1.1.1 Before Power Up Caution The line voltage applied must comply with the inverter’s specified input voltage.(See the nameplate) Danger Make sure the main circuit connections are correct. L1(L), L2, and L3(N) are power-input terminals and must not be confused with T1, T2 and T3. -
Page 10: During Power Up
Chapter 1 Safety Precautions 1.1.2 During Power up Danger The inverter still has control power immediately after power loss. When the power is re- supplied, the inverter operation is controlled by F41. The inverter operation is controlled by F04 and C09 and the status of (FWD/REV RUN switch) when power is re-supplied. -
Page 11: During Operation
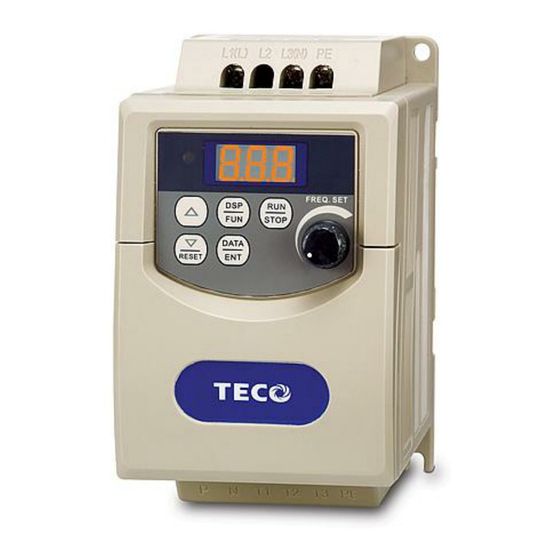
Chapter 1 Safety Precautions 1.1.5 During operation Danger Do not connect or disconnect the motor while inverter is operating the motor. The inverter and the disconnect device can sustain damage from high levels of switch-off current transients. Danger To avoid electric shock, do not take the front cover off while power The motor will restart automatically after stop when auto-restart function is enabled. - Page 12 Chapter 2 Model description Chapter 2 Model description Model:JNEV-201-H1 Inverter model I/P: AC 1 PH Input power 200-240V 50/60Hz O/P: AC3PH 0~264V 1.6KVA 4.2A Output power TECO ELECTRIC&MACHINERY CO.,LTD JNEV Input Max suitable motor Series: SPEC Power supply Noise filter Enclosure voltage :...
-
Page 13: Environment
Chapter 3 Environment description and installation Chapter 3 Mounting and installation of the JNEV drive 3.1Environment The environment will directly affect the proper operation and the life of the inverter, so install the inverter in an environment that complies with the following conditions: Ambient temperature: 14~122 deg F (-10 to 50 deg C) Avoid exposure to rain or moisture. -
Page 14: Figure 3-3 Din Rail Mounting Of The Jnev Drive
Chapter 3 Environment description and installation All JNEV drives in IP-20 Enclosures can be DIN-RAIL mounted as shown below. Figure 3-3 Din Rail Mounting of the JNEV Drive All JNEV Drives in IP-20 enclosures can be mounted side-by-side as shown below. (ambient temperature below 122˚F)(50 Figure 3-4 Side-by-side Mounting of the JNEV Drive... - Page 15 Chapter 3 Environment description and installation 3.2 Mounting and installation Do not use the inverter in an environment with the following conditions: Direct sunlight Corrosive gas and liquid Wind, rain, and water Salt Iron filings, dust drops may get into Excessive high Excessive vibration Extreme low temperature...
-
Page 16: Figure 3-5 Nema 4 Mounting Instructions
Chapter 3 Environment description and installation EV-1P2/1P5/101/2P2/2P5/201- -N4X(IP65 TYPE INSTALLATION : (PE) NOTE : 1. POWER SWITCH , REV-0-FWD SWITCH AND (PE) Potentiometer are only for EV-1P2~201- N4S TYPE 2. Power supply cable : #14 (2.0m ) 3. Motor cable : #16 (1.25m ) Tightening Torque (1). - Page 17 Chapter 3 Environment description and installation Figure 3-7 M/N XX-YYY-N4S (115V, 230V models) connection diagram...
- Page 18 Chapter 3 Environment description and installation Figure 3-8 M/N XX-YYY-N4 (115V, 230 MODELS) connection diagram...
-
Page 19: Wiring Rules
Chapter 3 Environment description and installation 3.3 Wiring Rules 3.3.1 Notice for wiring Tightening torque: Connect cables with a screwdriver or other suitable tools per the tightening torques listed below. Securing torque Horsepower Power source Tightening torque for TM1 terminal 0.25/0.5/1 100-120V 0.74/0.1... - Page 20 Chapter 3 Environment description and installation Fuse types Drive input fuses are provided to disconnect the drive from power in the event that a component fails in the drive’s power circuitry. The drive’s electronic protection circuitry is designed to clear drive output short circuits and ground faults without blowing the drive input fuses.
- Page 21 Chapter 3 Environment description and installation 3.3.2 Options and wiring specifications MCCB/ MC/ Fuse Warranty and replacement service does not apply to damage caused by the following conditions. (1)MCCB or fuse is not installed, improperly installed, or improperly sized, and has resulted in inverter damage.
-
Page 22: Precautions For Peripheral Applications
Chapter 3 Environment description and installation 3.3.3Precautions for peripheral applications: Power supply: Make sure the correct voltage applied to avoid damaging the inverter. A molded-case circuit breaker or fused disconnect must be installed between the AC source and the inverter. Molded-case circuit breaker: Use a molded-case circuit breaker that conforms to the rated voltage and current of the inverter to control the power and... -
Page 23: Figure 3-10A Installation Examples
Chapter 3 Environment description and installation Make external connections as shown in figure 3-10. Check after wiring to make sure all connections are correct. (Do not use the control circuit buzzer to check connections) (A) Main circuit must be separated from other high voltage or high current power line to avoid noise interference. -
Page 24: Figure 3-11 Grounding Filtered Units
Chapter 3 Environment description and installation power supply and output PE terminals must both connected to ground to increase noise immunity of the built-in Filter. Ground Figure 3-11 Grounding filtered units (A)The control circuit wiring and main circuit wire/ other high voltage/current power wiring should be separated to avoid noise interruption. - Page 25 Chapter 3 Environment description and installation When the connection between the inverter and the motor is too long, consider the voltage drop of the circuit. Phase-to-phase voltage drop (V) = 3 ×resistance of wire (Ω/km)×length of line (m)×current×10 . And the carrier frequency must be adjusted based on the length of the line.
-
Page 26: Inverter Specification
Chapter 3 Environment description and installation Inverter Specification 3.4.1 Basic specification 120V model 230V model Single phase Three phase Model □□□ □□□ -H1(F) □□□ 201 202 203 2P2 2P5 202 203 Horsepower (HP) 0.25 0.25 0.25 Max.Applicable Motor 0.25 0.25 output.HP*1 (KW) (0.2) (0.4) -
Page 27: General Specifications
Chapter 3 Environment description and installation 3.4.2 General Specifications Range 0~200Hz Initial Drive 100%/3Hz (Vector mode) Speed Control Range (Vector mode) 20:1 Speed Control ±0.5%(Vector mode) Precision Setting resolution※1 Digital: 0.1Hz(0~99.9Hz)/1Hz(100~200Hz); analog: 0.06Hz/ 60Hz Keypad setting Set directly with▲▼ keys or the VR on the keypad Display 7 segment*3 Displays;... - Page 28 Chapter 3 Environment description and installation Over load protection Inverter rated current 150%/1min International UL/CE conformity Over voltage 230V Class: DC voltage >400V 460V Class: DC voltage >800V Under voltage 230V Class: DC voltage <190V 460V Class: DC voltage <380V Instantaneous power Set to enable or disable loss restart...
-
Page 29: Ev Wiring Diagram
Chapter 3 Environment description and installation 3.5 EV Wiring diagram Braking Unit Power terminal Single phase 100~120V • L1(L) 1/3 phase 200~240V • 3 phase 380~480V • L3(N) (3)24V RA(1) PNP common point Multi-function digital output (4)S1 RB(2) Multi function digital (5)S2 input (6)S3... -
Page 30: Description Of Inverter Terminal
Chapter 3 Environment description and installation 3.6 Description of Inverter Terminal Descriptions of power terminals Figure 3-15 Power terminals locations Symbol Description L1 ( L ) Main power input Single-phase: L/N* Three-phase: L1/L2/L3 L3 ( N ) ⊕ DC power and braking unit connection terminals. -
Page 31: Figure 3-16 Signal Terminal Locations
Chapter 3 Environment description and installation Control signal terminals block description 1 2 3 7 8 9 10 11 12 Figure 3-16 Signal terminal locations Symbol Description Rated contact capacity: Multi-functional output terminal (250VAC/10A) Normally open contact Contact description: (refer to parameter F21) Supply for external potentiometer for speed reference. - Page 32 Chapter 3 Environment description and installation SW function description Type of external signal Remarks NPN input (SINK) PNP input (SOURCE) Factory default Type of external signal Remarks 0~10V DC analog signal Effective when parameter F05=2 (analog input signal from TM2) 4~20mA analog signal 3-20...
-
Page 33: Dimension
Chapter 3 Environment description and installation 3.7 Dimension (1) IP20 Frame1: Single phase: JNEV-1P2~201-H1/H1F Three phase: JNEV-2P2~201-H3 Figure 3-17 EV drive frame1 dimensions 3-21... -
Page 34: Figure 3-18 Ev Drive Frame 2 Dimensions
Chapter 3 Environment description and installation (2) IP20 Frame2: Single phaseJNEV-202~203-H1/H1F Three phase JNEV-202~203-H3 Three phase JNEV-401~403-H3/H3F Figure 3-18 EV drive frame2 dimensions Unit: inch/mm LENGTH MODEL Frame 1 5.2/132 4.86/123.5 2.64/67 3.03/77 Frame 2 5.2/132 4.86/123.5 4.25/108 4.65/118 LENGTH MODEL Frame 1 5.13/130.5 5.06/128.45... -
Page 35: Figure 3-19 Ev Drive Ip65 (Switch) Frame 1 Dimensions
Chapter 3 Environment description and installation (3) IP65 Frame1(switch) EV-1P2/1P5/101/2P2/2P5/201-N4S(IP65 type): Figure 3-19 EV drive IP65 (switch) frame 1 dimensions IP65 Frame1(no switch) EV-1P2/1P5/101/2P2/2P5/201-N4(IP65 type): Figure 3-20 EV drive IP65 (no switch) Frame 1 dimensions 3-23... -
Page 36: Installation And Design Considerations
Chapter 3 Environment description and installation 3.8 Installation and design consideration must power on the same time Common bussing of drives allow ⊕ ‘ ’ for load-sharing and therefore connection can save energy. Adding a braking unit to improve brake ⊖... -
Page 37: Chapter 4 Programming Instructions & Parameter List
Chapter 4 Software index Chapter 4 Programming instructions & Parameter list 4.1 Keypad description 4.1.1 Keypad display Power LED (Red) Figure 4-1 Keypad layout 4.1.2 Operation Instruction of the keypad F10=001, inverter displays status F×× Power ON Frequency display DATA in stop mode F××... - Page 38 Chapter 4 Software index Remote/Local change function • Local mode Run command RUN/STOP on the keypad ● Frequency command ● When C41=000: only UP/DOWN key on the keypad can control and F05 setting no effect. When C41=001: only VR on the keypad can control and F05 setting no effect.
-
Page 39: Parameter Functions List
Chapter 4 Software index 4.2 Parameter function list Basic parameter function list Factory Function Description Range/ Code Remarks Default Inverter horse power capacity 01 Acceleration time 1 00.1~999s 05.0 *1 *2 02 Deceleration time 1 00.1~999s 05.0 *1 *2 000: Forward 03 Motor rotation direction... - Page 40 Chapter 4 Software index 18 AIN Bias (%) 000~100 000: Positive 19 AIN Bias 001: Negative 000: Positive 20 AIN Slope Direction 001: Negative 000: Run 001: Frequency reached (Set frequency ± F23) 002: Frequency is within the range set by (F22±F23) 003: Frequency Detection (>F22) 004: Frequency Detection (<F22) 005: Fault terminal...
- Page 41 Chapter 4 Software index 39 DC braking level 000~020% 40 Carrier frequency 004~016 4~16K 000: Enable Auto Restart for power-loss 001: Disable 42 Auto-restart times 000~005 43 Motor rated current 44 Motor rated voltage 45 Motor rated frequency 46 Motor rated power 47 Motor rated speed 48 Torque Boost Gain (Vector) 001~450 Slip Compensation Gain...
- Page 42 Chapter 4 Software index *1 *2 11 Acceleration time 2 00.1~999 Sec 05.0 *1 *2 12 Deceleration time 2 00.1~999 Sec 05.0 This function only available 000: Auto-run at set temperature for IP20 type, 001: Run when inverter runs For IP65 13 Fan control 002: Always run type , fan will...
- Page 43 Chapter 4 Software index 33 I: Integral time (s) 00.0 – 100 10.0 34 D: Differential time (s) 0.00 – 10.0 0.00 000: Positive direction 35 PID OFFSET 001: Negative direction 36 PID OFFSET adjust (%) 000 – 109 37 PID Update time (s) 00.0 - 02.5...
- Page 44 Chapter 4 Software index 000: 001: Frequency reached (Set frequency ± F23) 002: Frequency is within the range set by (F22±F23) 003: Frequency detection (>F22) 004: Frequency detection (<F22) 005: Fault terminal Multi-function output 006: Auto-restart (option) 007: Momentary power loss T+,T- 008: Emergency Stop(E.S.) 009: Base Block(b.b.)
- Page 45 Chapter 4 Software index Note: *1: Can be modified in Run mode. *2: Frequency resolution is 1Hz for settings above 100 Hz. *3: Cannot be modified during communication. *4: Do not change while making factory setting. F52 factory setting is 020(60HZ) and motor parameter value is 170. F52 factory setting is 010(50HZ) and motor parameter value is 140.
-
Page 46: Parameter Functions Description
Chapter 4 Software index 4.3 Parameter function description Basic function parameter list F00 Inverter horse power capacity Inverter model Inverter model JNEV JNEV F01 Acceleration time 1 (s): 00.1 – 999 F02 Deceleration time 1 (s): 00.1 – 999 Formula for acceleration/deceleration time: Denominator is based on the setting of Cn14 a) Motor rating frequency (Sensor less vector control C14=000) b) Max output frequency (V/f mode C14=001) -
Page 47: B. Run/Stop-Forward/Reverse Wiring Detail
Chapter 4 Software index 3.) Up/Down terminal: please refer to description of parameter group F11~ F15 (multi-function input terminal). 4.) Priority of reading frequency command: Jog> preset frequency > (Keypad▲▼ or TM2 UP/ Down or communication) F06 : External control operation mode 000: Forward/ Stop-Reverse/Stop 001: Run/ Stop-Forward/Reverse 002: 3-wire—Run/ Stop... -
Page 48: Figure 4-4 Control Method Sequences
Chapter 4 Software index Terminal Terminal Terminal Figure 4-4 Control Method Sequences Note: C00=001, reverse command is disabled. F07 Frequency upper limit (Hz): 01.0 - 200 F08 Frequency lower limit (Hz): 00.0 - 200 F07 (Frequency upper limit) (Note) F08 (Frequency lower limit) Frequency Comman Figure 4-5 Frequency Limits... - Page 49 Chapter 4 Software index F11~15 Selectable Functions for input terminals ( S1-S4& AIN ) 000: Forward run 001: Reverse run 002: Preset speed command 1 003: Preset speed command 2 004: Preset speed command 3 005: Jog frequency command 006: External Emergency stop(E.S.) 007: Base block (b.b.)
- Page 50 Chapter 4 Software index F11~F15=006: Emergency Stop (E.S) The inverter will decelerate to stop on receiving the external emergency stop signal. The display will be blinking with “E.S”. The inverter will only start again when the Emergency Stop signal is removed and the start signal is turned off and then on again (remote start mode) or the Run key is pressed (keypad mode).
-
Page 51: Figure 4-6 Acceleration/Deceleration Prohibit
Chapter 4 Software index Run signal Acceleration Acceleration/deceleration prohibit is ※Note: /deceleration unavailable Run signal is OFF. (RAMP to stop) prohibit Output frequency Figure 4-6 Acceleration/Deceleration Prohibit F11~F15=015 Master/Auxiliary speed switch 1) F05=001, when one of the parameters F11~ F15 is set to 015, and multi-function input terminal is OFF, the frequency is set by the potentiometer on the Keypad(Master speed),... - Page 52 Chapter 4 Software index F17 AIN Gain (%) 000 - 200 F18 AIN Bias (%) 000 - 100 1.) F19= 000: 0V (4mA) corresponding to lower frequency limit, 10V (20mA) corresponding to upper frequency limit. 2.) F19= 001: 10V (20mA) corresponding to lower frequency limit, 0V (4mA) corresponding to upper frequency limit.
- Page 53 Chapter 4 Software index F19 AIN Bias: 000: Positive 001: Negative F20 AIN signal slope direction. 000: Positive 001: Negative C45 AIN signal scan time confirmation. (mSec × 8): 001 – 100 Refer to F17/F18 description The inverter reads A/D average value every C45 x 8mS. The user can set scan interval time according to noise levels in the operation environment.
-
Page 54: B. Frequency Reached (F21/C46=2)
Chapter 4 Software index F21/C46=002 Preset output Frequency F22 ± F23 reached. Figure 4-8b Frequency Reached (F21/C46=2) F21/C46=003 Frequency detection Fout>F22 Figure 4-8c Frequency Detection (F21/C46=3) 4-18... -
Page 55: Figure 4-9 Output Current Detection
Chapter 4 Software index F21/C46=004 Frequency detection Fout﹤F22 Figure 4-8d Frequency Detection (F21/C46=4) F24 Output current reached setting value F25 Output current detection time F21: Output current detection value >F24 When setting value is 015 C46: Output current detection value >F24 F24: Setting value (000~100%) by motor rated current (F43) F25: Setting value (00.0~25.5) unit : sec load... - Page 56 Chapter 4 Software index Multi-function analog output: F26 Multi-function output analog type selection 001: Set frequency 002: Output frequency 003: DC voltage 004: Output current 005: PID feedback signal F27 Multi-function analog output gain = 000 ~ 200% 0-10 Vdc output from FM+ multi-function analog output terminal.
-
Page 57: Figure 4-10 Dc Injection Braking
Chapter 4 Software index Set frequency priority: Jog→ Preset frequency →External analog frequency signal Preset Preset Preset Jog frequency Frequency Frequency Frequency Output Command Command 3 Command 2 Command 1 frequency Set value =005 Set value =004 Set value =003 Set value =002 F37 DC braking time (s) : 00.0~25.5 F38 DC braking start frequency (Hz) : 01.0~10.0... - Page 58 Chapter 4 Software index Corresponding list of current and carrier frequency Model EV-1P2/2P2 EV-1P5/2P5 EV-101/201 EV-202 EV-203 EV-401 EV-402 EV-403 Carrier H1/H1F/H3 H1/H1F/H3 H1/H1F/H3 H1/H1F/H3 H1/H1F/H3 H3/H3F H3/H3F H3/H3F frequency 4~10K 10.5 10.5 10.0 F41 Auto restart on momentary power loss. 000: Enable 001: Disable F41=000: Auto restart after a momentary power loss is enabled on resumption of power and applying the...
-
Page 59: Figure 4-11 Output Torque Capacity
Chapter 4 Software index • Torque/Speed curve pattern: Torque ΔTe:Increase output torque capacity Figure 4-11 Output Torque Capacity • Operating frequency range: 0~Motor rate frequency • When the motor output torque is not enough and increase F48 setting value. • When the motor is erratic or vibrates decrease F48 setting value. -
Page 60: Figure 4-13 Low Frequency Voltage Compensation
Chapter 4 Software index F50 Low frequency voltage compensation, C14=000 Performance: During low frequency Increase F50 setting value increase output voltage and low frequency torque. Decrease F50 setting value decrease output voltage and low frequency torque. • Output voltage/frequency curve pattern: Figure 4-13 Low Frequency Voltage Compensation 0~12HZ / 60HZ •... - Page 61 Chapter 4 Software index C01 Acceleration stall-prevention: =000: Enable Stall prevention during Acceleration. =001: Disable Stall prevention during Acceleration. C02 Acceleration stall-prevention level: 050% ~ 200% C03 Deceleration stall-prevention: = 000: Enable Stall prevention during deceleration. = 001: Disable Stall prevention during deceleration. C04 Deceleration stall-prevention level: 050% ~ 200% C05 Run stall-prevention: = 000: Enable Stall prevention in Run mode.
- Page 62 Chapter 4 Software index 000: Reset is enable when RUN switch is OFF. C10 Reset mode 001: Reset is enable with RUN switch OFF or ON. C10=000. Fault can not be reset, therefore inverter can not start when the RUN switch is in ON position.
-
Page 63: B. Pre Configured V/F Pattern
Chapter 4 Software index C15 = 001– 006 fixed V/F patterns (see below). C15 V/F Pattern C15 V/F Pattern Spec Spec Figure 4-14b Pre-configured V/F patterns 4-27... -
Page 64: Figure 4-15 V/Hz Curves With Varying Base Voltages
Chapter 4 Software index C16 VF base output voltage set C17=60HZ C18=100% 200~240V, patterns based an output voltage are shown below. (Corresponding settings for 400- 480 volts input: multiply by 2) C16=240 C16=220 C16=200 60.0Hz (C17) Figure 4-15 V/HZ curves with varying base voltages When the output voltage is higher than the input voltage, the max output voltage is limited... - Page 65 Chapter 4 Software index C30 PID operation mode 000: PID Function disabled. 001: PID Control, Deviation is derivative controlled 002: PID Control, Feedback derivative controlled. 003: Same as 001 but (reverse characteristics control). 004: Same as 002 but (reverse characteristics control). D is the deviation of PID error in the unit time (C34).
-
Page 66: Figure 4-16 Pid Flow Control Diagram
Chapter 4 Software index C37 PID update time (s): 00.0 - 02.5 C37: the refresh time of PID output command. Note: PID function is used in flow control, external fan wind volume control, and temperature control. See flow control diagram below. Figure 4-16 PID flow control diagram 1. -
Page 67: Figure 4-17 Sleep/Wake Mode
Chapter 4 Software index Timing diagram is as following: Figure 4-17 Sleep/ Wake Mode C40 Frequency Up/Down control using MFIT : 000: When using Up/Down command, the set frequency by this function will be stored after the inverter stops. UP/DOWN function is not available in stop mode. 001: When using Up/Down command, the set frequency will be reset to 0Hz after the inverter stops. - Page 68 Chapter 4 Software index Local /Remote control select description • Local mode Run command Run/Stop pad on the keypad controls inverter F04 setting has no effect on control. Frequency command When C41=000: UP/DOWN pad on the keypad controls the drive and the F05 setting effect.
- Page 69 Chapter 4 Software index C46 (Option card) Multi-function output T+, T- 000: 001: Frequency reached [Preset target frequency ± F23] 002: Frequency reached [ Preset output frequency level (F22) ±F23] 003: Frequency detection (>F22) 004: Frequency detection (<F22) 005: Fault. 006: Auto-restart 007: Momentary power loss 008: Emergency Stop (E.S.)
- Page 70 Chapter 4 Software index 000: 1 Stop bit C51 Stop bit 001: 2 Stop bit 000: No parity C52 Parity bit 001: Even parity 002: Odd parity 000: 8 bits data C53 Data bits 001: 7 bits data 1. RS-485 communication: (requires RS485 port device) 1 to 1 control: PC or PLC or controller controls one inverter (C49 is set to 001~254).
-
Page 71: Figure 4-18 Communication Error Timing Pattern
Chapter 4 Software index C54/C55 Communication error parameter timing pattern Master T3 > C54 Slave (EV)Tx F21=014 C46=014 0,1,2 (≠3) Frequency Dec from F02 C55=000 or 002 If F02<C12 Dec from C12 Frequency free Run C55=001 Frequency keep Run Display always show “COT”... -
Page 72: Chapter 5 Troubleshooting And Maintenance
Chapter 5 Trouble shooting and maintenance Chapter 5 Troubleshooting and maintenance 5.1Trouble indication and corrective action 5.1.1 Fault/ Error display and Diagnostics 1. Un- reset able / un recoverable Errors Display Error Cause Corrective Action EEPROM EEPROM problem Change EEPROM problem Over voltage during Voltage... - Page 73 Chapter 5 Trouble shooting and maintenance 2. Errors which can be recovered both manually and automatically Display Error Cause Corrective Action 1.Motor winding and Over current at 1. Check the motor frame short circuit start 2. Check the wiring 2.Motor and ground short circuit 3.
- Page 74 Chapter 5 Trouble shooting and maintenance 3. Errors which can only be recovered manually (no auto-restart) Display Error Cause Corrective Action Detection circuit Over-current malfunction Send the inverter back for during stop 2. Bad connection for CT repair signal cable 1.
- Page 75 Chapter 5 Trouble shooting and maintenance 5.1.2 Set up Configuration, Interface Errors. Display Error Description Zero speed stop Set frequency <0.1Hz Increase set frequency 1. If the inverter is set to external control mode (F04=001), and direct start is disabled (C09=001), the inverter cannot be Fail to start started and will flash STP1 when Run switch is ON when...
-
Page 76: Keypad Operation Error Description
Chapter 5 Trouble shooting and maintenance 5.1.3 Keypad operation error description Display Error Cause Corrective Action Attempt to Press▲ or ▼ keys when F05> 0 or in 1. ▲ or ▼ keys can be used speed operation. to modify frequencies only Key operation when F05=0. -
Page 77: General Functional Troubleshooting
Chapter 5 Trouble shooting and maintenance 5.2 General functional troubleshooting Status Checking point Corrective Action • Is the power applied? • Turn the power OFF and then ON again. Is power applied to L1, L2, and L3(N) • Make sure the input line voltage is terminals (is the charging indicator lit)? -
Page 78: Troubleshooting Flowcharts 7300Ev Series
Chapter 5 Trouble shooting and maintenance 5.3 Troubleshooting Flowcharts 7300EV Series EV Inverter faults Is failure fully understood? signs Symptoms other than burn out, Check and replace burnt burnout and and damaged parts damage, or fuse meltdown in damage? the inverter? Fault Is the main circuit Replace... - Page 79 Chapter 5 Trouble shooting and maintenance * from previous page Check parameters of the inverter Perform parameter initializations Specify operation control method Set up frequency commands Is the frequency value displayed in Replace the control board the operating unit Are there voltage outputs in output Replace the control terminals T1,T2...
-
Page 80: Figure 5-2 Oc, Ol Fault Troubleshooting
Chapter 5 Trouble shooting and maintenance Troubleshooting for OC, OL error displays The inverter displays OC, OL errors Is the main circuit I.G.B.T. working Replace I.G.B.T properly? abnormalities in Replace faulty circuit boards appearances? Apply power Any faults? Is the current detector OK? Replace the current sensing... - Page 81 Chapter 5 Trouble shooting and maintenance Troubleshooting for OV, LV error display The inverter displays OV. LV Is the main circuit fuse Replace the main circuit board intact? Apply power Fault message Replace the control board Input operation commands Input frequency commands Is the output frequency of the operating unit Replace the control board...
-
Page 82: Figure 5-4 Drive Running Troubleshooting Diagnostics
Chapter 5 Trouble shooting and maintenance The motor doesn’t Is MCCB closed? Can MCCB be Check for short-circuited wiring closed? YES (normal value within the voltage between ˙Bad power quality ˙or wiring incorrect Leads correct? ‘LED indicator EV fault lit? Is the operation Set switch to “RUN”... -
Page 83: Figure 5-5 Motor Overload / Overheating Diagnostics
Chapter 5 Trouble shooting and maintenance Motor is overheated Is the measured load or Reduce the load the current exceeding Increase ratings of EV and the configured value? motor running in low speed Select a different motor for a long time Are voltages between EV fault phase... -
Page 84: Routine And Periodic Checks
Chapter 5 Trouble shooting and maintenance 5.4 Routine and periodic checks To ensure stable and safe operations, check and maintain the inverter regularly and periodically. The table below lists the items to be check to ensure stable and safe operations. Check these items 5 minutes after the “Charge”... -
Page 85: Chapter 6 Peripherals Components
Chapter 6 Peripherals Chapter 6 Peripherals Components 6.1 Input side AC reactor Model Line input side AC inductance Current (A) inductance (mH) 2P2/2P5-H1(F)/H3 201-H1(F)/H3 202-H1(F)/H3 19.0 JNEV-XXX- 203-H1(F)/H3 25.0 0.71 401- H3(F) 402- H3(F) 403- H3(F) 6.2 EMC filter The inverter adapts rapid switching components to improve the efficiency of the motor and to reduce the motor noise. - Page 86 Chapter 6 Peripherals Filter selection: Build in Filter model Optional Filter model (First Environment (First Environment Inverter model Rated (INPUT) Unrestricted Distribution./ Unrestricted Distribution./ Restricted Distribution.) Restricted Distribution.) JNFS21017-20.8-07 1 φ 85 ~132V 1P2-H1 --------------- (Restricted Distribution.) JNFS21017-20.8-07 1 φ 85 ~132V 1P5-H1 --------------- (Restricted Distribution.)
- Page 87 Chapter 6 Peripherals EV EXTERNAL FILTER SIZE JNFS21017-20.8-07 FOR EV-1P2~201-H1 Figure 6-1a External Filter Dimensions JNFS21017-20.8-07 JNFS21019-8.9-07 FOR EV-2P2~201-H3 Figure 6-1b External Filter Dimensions JNFS21019-8.9-07...
- Page 88 Chapter 6 Peripherals JNFS21015-22-07 FOR EV-202~203-H1 Figure 6-1c External Filter Dimensions JNFS21015-22-07 JNFS21016-15-07 FOR EV-202~203-H3 Figure 6-1d External Filter Dimensions JNFS21016-15-07...
- Page 89 Chapter 6 Peripherals JNFS20858-7-07 FOR EV-401~403-H3 Figure 6-1e External Filter Dimensions JNFS20858-7-07...
-
Page 90: Option Card
Chapter 6 Peripherals 6.3 Option card 6.3.1 RS-485 option card (Model: JNSIF-485) Red cable to 24V Black cable to COM Figure 6-2 JNSIF-485 MODULE JNSIF-485 wiring diagram: Figure 6-3 JNSIF-485 wiring diagram ※ Note : In order to avoid external static electricity interference with option cards... -
Page 91: Rs-232 Option Card
Chapter 6 Peripherals 6.3.2 RS-232 option card (model: JNSIF-232) Figure 6-4a JNSIF-232 CABLE JNSIF-232 wiring diagram L1 (L) SINGLE/THREE-PHASE POWER SUPPLY L3 (N) 7300EV SERIES RS-232 INVERTER CON302 (12P) JNSIF-232 1.8 m Figure 6-4b JNSIF-232 WIRING DIAGRAM... -
Page 92: Program Copy Option Card
Chapter 6 Peripherals 6.3.3program copy option card (Copy Unit) (model: JNSIF-MP) Figure 6-5a JNSIF-MP MODULE JNSIF-MP Wiring diagram SINGLE/THREE-PHASE L1 (L) POWER SUPPLY L3 (N) 7300EV SERIES INVERTER Copy Unit CON302 (12P) JNSIF-MP Figure 6-5b JNSIF-MP wiring diagram... -
Page 93: Remote Keypad
Chapter 6 Peripherals 6.3.4 Remote keypad (Remote keypad)( Model: JNSDOP-LED-2M ) Red cable to 24V Black cable to COM Figure 6-6a Remote keypad JNSDOP-LED-2M wiring diagram Figure 6-6b Remote keypad Wiring Diagram * When the inverter is powered on or off the user can set up or remove the remote keypad. -
Page 94: B. Jnsif-Io Wiring Diagram
Chapter 6 Peripherals 6.3.5 Input/ Output expansion card(model: JNSIF-IO) Red cable to 24V Black cable to COM Figure 6-7a JNSIF-IO CARD JNSIF-IO wiring diagram CON302(12P) Figure 6-7b JNSIF-IO Wiring Diagram 6-10... -
Page 95: Pda Link
Chapter 6 Peripherals 6.3.6 PDA Link (1) HP iPAQ Pocket PC h2210. (PDA) / PC hx2190 (2) PDA wire (JNSWPDA). (3) RS-232 Interface Card (JNSIF-232). (4) Inverter 6-11... - Page 96 Appendix Appendix EVinverter parameter setting list Customer Name Model of the inverter: Location of use: Customer’s telephone number: Customer’s address: Parameter Parameter Parameter code Setting Setting Setting code code Appendix Ι...
Need help?
Do you have a question about the JNEV-202~203-H1 and is the answer not in the manual?
Questions and answers