Table of Contents
Advertisement
Welcome, and thank you for purchasing your new Tunnel Master Jr. Car Wash Controller
from Innovative Control Systems, Inc.
As an ICS customer you benefit from a thoroughly researched car wash controller system.
This manual, "ICS Car Wash Controller System" has many features, which will enable you,
the operator, to have an active part in the control and operation of your car wash facility.
Controller Features:
•
24 programmable, fused outputs, upgradeable to 48, each with two independent circuits
for 24vac and 110vac
•
Programmable relay flashing feature
•
Exclusive, patented anti theft feature to prevent unauthorized processing of car washes
•
Input for Pulse, Gate, Tire, Roller Locator, Entrance Management and Panic circuits
•
Auto pulse feature allows pulse simulation in the event of pulse switch failure
•
Auto Gate feature allows gate switch simulation in the event of gate switch failure
•
Exterior indicators for easy troubleshooting
•
16 programmable service buttons on the entry keypad, upgradeable to 32
•
Automated wet down feature for easy startup
•
Optional report and/or receipt printers
ICS developed this manual in order to:
•
Provide a comprehensive, easy-to-use system reference guide.
•
Enable operators and their employees to obtain the maximum value from the system.
•
Furnish operators with a tool for training their employees on the OEM Car Wash
Controller.
By reading the information and performing the procedures in this manual you should
be able to:
•
Install your Tunnel Master Jr. Controller
•
Configure your wash settings and features
•
Process vehicles through your wash
•
View car counts
•
View historical information
•
Track sales
•
Print reports
•
Troubleshoot problems if they occur
Many of the features you will find in the ICS Controller system were integrated at the
request of current car wash operators. We welcome your feedback and want to assure you
that ICS will always remain the best in the industry in car wash controller and management
systems.
Information in this manual is subject to change without notice. Companies, names and data used in examples within the manual are
fictitious unless otherwise noted. No part of this manual may be reproduced or transmitted in any form or by any means, electronic or
mechanical, for any purpose without the express written permission of Innovative Control Systems, Inc.
Welcome
TUNNEL MASTER JR MANUAL
Welcome
1
Advertisement
Table of Contents

Related Manuals for ICS Tunnel Master Jr


Summary of Contents for ICS Tunnel Master Jr
- Page 1 • Troubleshoot problems if they occur Many of the features you will find in the ICS Controller system were integrated at the request of current car wash operators. We welcome your feedback and want to assure you that ICS will always remain the best in the industry in car wash controller and management systems.
- Page 2 TUNNEL MASTER JR MANUAL Table of Contents Chapter Title Page System Hardware and Installation Relay Box Mounting and Installation Pulse / Proximity Switch Wiring Gate (Electric Eye) Switch Wiring Tire Switch Wiring Entrance Management System Wiring Roller Locator Wiring Panic Stop Circuit Wiring...
-
Page 3: Table Of Contents
TUNNEL MASTER JR MANUAL Printing Reports Troubleshooting Appendix Equipment Layout & Addressing Drawings 1 Relay Box, 1 Entry Keypad, Report & Receipt Printer 2 Relay Boxes, 1 Entry Keypad, Report / Receipt Printer 2 Relay Boxes, 2 Entry Keypads, Receipt &... -
Page 4: System Hardware And Installation
Introduction This chapter provides a brief description of the hardware components and their function. The Tunnel Master Jr. hardware is designed to withstand the harsh environments and hard use of a busy car wash. Both the Relay Box and the Input Station Keypad come with a 3-year, conditional warranty, against defects in material, workmanship and operating failure from normal use. -
Page 5: Relay Box
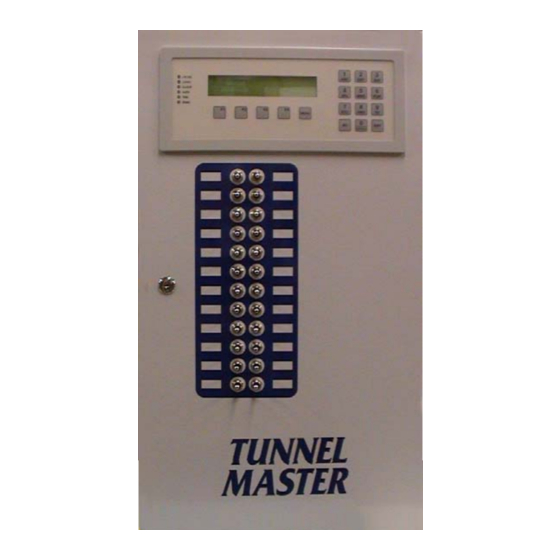
The Relay Box is the control center for “firing” the various outputs or services in the wash tunnel, i.e., Soap foamer, Reclaim motor, etc. The Tunnel Master Jr. Controller relay box provides for automatic, computer controlled or manual firing of the outputs. The relay box can control up to 24 outputs. - Page 6 TUNNEL MASTER JR MANUAL The Relay Box Interior picture Each relay has circuits to control both 24VAC and/or 110VAC simultaneously so that a service sign as well as the service solenoid can be operated from the same relay. • Plug in relays for ease of serviceability •...
-
Page 7: Mounting And Installation
TUNNEL MASTER JR MANUAL The Relay Box Installation Mounting and The following instructions will provide detail information on proper Installation mounting and installation of the Entrance Keypad (See Appendix A for equipment layout. options.) Relay Box Mounting • All site wiring must be performed be a licensed electrician that must comply with all local and national codes. - Page 8 TUNNEL MASTER JR MANUAL The Relay Box Installation Relay Box Wiring • A 6.3 amp 250v fuse protects each relay. Four spare fuses along with LED fuse test indicators are located at the bottom of the relay board. (Fuses should not be replaced with any other device.)
-
Page 9: Pulse / Proximity Switch Wiring
TUNNEL MASTER JR MANUAL Pulse/Proximity Switch Wiring The following diagram shows how to wire the pulse / proximity switch Pulse Switch Wire Diagram into the Relay Box. Important! The pulse switch is a critical input for the OEM Controller. It signals... -
Page 10: Gate (Electric Eye) Switch Wiring
TUNNEL MASTER JR MANUAL Gate (Electric Eye) Switch Wiring The following diagram shows how to wire the Gate (electric eye) Gate Switch Wire Diagram switch into the Relay Box. Important! The "Gate" switch is the second critical input device to the OEM Relay Box. -
Page 11: Tire Switch Wiring
TUNNEL MASTER JR MANUAL Tire Switch Wiring The following diagram shows how to wire the Tire switch into the Tire Switch Wire Diagram Relay Box. Important! This circuit is used if the customer has purchased a tire position switch from the equipment vendor. The switch enables the Controller software to turn equipment on and off as each of the vehicle's tires pass that piece of equipment. -
Page 12: Entrance Management System Wiring
TUNNEL MASTER JR MANUAL Entrance Management System Wiring The following diagram shows how to wire the treadle switch for the EMS Treadle Wiring Diagram EMS into the Relay Box. Important Note: This circuit is used if the customer has purchased a treadle switch from the equipment vendor. -
Page 13: Roller Locator Wiring
TUNNEL MASTER JR MANUAL Roller Locator Wiring The following diagram shows how to wire the Roller Locator into the Roller Locator Wire Diagram Relay Box. Important Note: You can add a roller locator to the TMJ to keep your rollers from jamming your conveyor. -
Page 14: Panic Stop Circuit Wiring
TUNNEL MASTER JR MANUAL Panic Stop Circuit Wiring The following diagram shows how to wire the Panic Stop circuit into Panic Stop Circuit Diagram the Controller. Important! This drawing shows the basic wiring of the panic circuit. The Panic circuit allows for certain software programming that could not be programmed without this circuit in place. - Page 15 TUNNEL MASTER JR MANUAL System Hardware...
-
Page 16: Anti Collision Wiring
Tunnel Master Jr. Important! The anti-collision on the Tunnel Master Jr. is a function to help prevent cars from running into each other at the exit end of the tunnel. In order for this to work you need an anti- collision device mounted in the tunnel at the spot where you could have a potential collision. -
Page 17: Input Wiring Summary
TUNNEL MASTER JR MANUAL Tunnel Master Junior Input Wiring Summary The following diagram shows where all of the TMJ inputs get wired Input Wiring Summary into. System Hardware... -
Page 18: Relay Box Jumper Settings
TUNNEL MASTER JR MANUAL The Relay Box Jumper Settings Jumper Settings The following picture and table will explain the location and purpose of the various jumpers on the Relay Box circuit board. Relay Box Circuit The following picture shows the Relay Box door circuit board and Board location of the various jumpers, switches and controls. - Page 19 TUNNEL MASTER JR MANUAL 3 position jumper should be on 2 pins to select 485 Communication (Left) Receive terminating resister. Network Interface Chassis Ground Jumper Network Interface Signal Ground Jumper BIAS Low (-) set ON for the Main Relay box only.
-
Page 20: Relay Box Dip Switch Settings
TUNNEL MASTER JR MANUAL The Relay Box Dip Switch Settings Dip Switch Settings The following picture and table will show the Relay Box Dip switch and the various settings that may be used. Helpful Tips ☺ For location of the Dipswitch refer to the previous Relay Box picture on page 14. -
Page 21: Troubleshooting
TUNNEL MASTER JR MANUAL The Entrance Keypad Introduction The Entrance Keypad is the service / output station at the front of the car wash. • Services sold to the customer are entered into the Entrance Keypad • Vehicles are processed at the front of the wash with Entrance Keypad. - Page 22 TUNNEL MASTER JR MANUAL The Entrance Keypad Button These are the button functions for the Entrance Keypad. Function Button Function When pressed prints a receipt when optional receipt printer is attached. ⇑ When pressed the current shift will close and a new shift started.
- Page 23 TUNNEL MASTER JR MANUAL The Entrance Keypad Installation Mounting and The following instructions will provide detail information on Installation proper mounting and installation of the Entrance Keypad Entrance Keypad Mounting • The Entrance Keypad should be mounted securely to the wall of the car wash, in the entrance to the tunnel, at approximately chest height.
-
Page 24: Entrance Keypad
OEM Relay Box • Electrician must run a single-twisted pair, 24AWG shielded com cable (can be purchased from ICS) through the above 3/4” conduit from the Relay Box to the Entrance Keypad. • There is a terminal block (NETWORK 485), located on the keypad circuit board labeled with DT+, DT-, and GND, for Data+, Data- and Ground, respectfully. -
Page 25: Mounting And Installation
• 24vac terminations must be made as follows: First Entrance Keypad Second Entrance Keypad • Electrician must run a single-twisted pair, 24AWG shielded COM cable (can be purchased from ICS) through the above 3/4” conduit from the first Entrance Keypad to the second Entrance Keypad. System Hardware... - Page 26 TUNNEL MASTER JR MANUAL The Entrance Keypad Installation Second Entrance Keypad Wiring • There is a terminal block (NETWORK 485), located on each of the keypad circuit boards labeled with DT+, DT-, and GND, for Data+, Data- and Ground, respectfully.
-
Page 27: Entrance Keypad Jumper Settings
These are the jumper functions and their normal settings. By default, Function the keypad comes address as 5. There is no reason to change this unless advised by ICS. If you have two keypads, you should address the second as address 6. Jumper Setting Function Reserved Jumper;... - Page 28 TUNNEL MASTER JR MANUAL The Entrance Keypad Dip Switch Settings Dip Switch Settings The following picture and table will show the Entrance Keypad Dip switch and the various settings that may be used. Helpful Tips ☺ For location of the Dipswitch refer to the previous Entrance Keypad picture on page 23.
- Page 29 The Optional Report/Receipt Printer Introduction The Epson TM-T811 thermal printer is utilized by the Tunnel Master Jr. system for both the report and receipt printer. These printers can be purchased as an option to the base system or purchased and added to the system after initial installation.
- Page 30 ¼” cable. The connector should be tightened to the torque specs of the manufacturer. Overtorquing may cause enclosure breakage. • Insert the cable with the 25-pin RS-232 connector attached (supplied by ICS) into the OEM Relay Box. Allow excess cable outside the Relay Box for easy access to the backside of the report printer so that the RS-232 25-pin connector can be easily attached and removed.
- Page 31 ¼” cable. The connector should be tightened to the torque specs of the manufacturer. Overtorquing may cause enclosure breakage. • Insert the cable with the 25-pin RS-232 connector attached (supplied by ICS) into the Entrance Keypad. Allow excess cable outside the Keypad for easy access to the backside of the receipt printer so that the RS-232 25-pin connector can be easily attached and removed.
-
Page 32: The Relay Box Keypad
This chapter will provide information on how to setup and configure facility specific information and how to use some of the features of your new Tunnel Master Jr. Car Wash Controller. The Tunnel Master Jr. controller contains unique features usually found only in the high- end full service wash controller systems. - Page 33 Note In order to utilize the full functionality of the Tunnel Master Jr. Controller, it is very important that the electrician adhere to the wiring instructions provided with the Relay Box. Wash Configuration...
- Page 34 TUNNEL MASTER JR MANUAL The Relay Box Entry Keypad Button These are the button functions for the Relay Box Entry Keypad. Function Button Function Function buttons are used during the setup and F1 – F4 programming of the wash facility. During setup options will be displayed at the bottom of the display indicating which button to press for the option desired.
-
Page 35: Accessing A Password Protected Menu
Procedures Follow these procedures to enter the system password. Step Action Screen Displays ICS OEM Tunnel Controller 10:25:35 PM Press the Menu key from the VER 1 REV 5.11 04/15/2002 main screen display Password _ _ _ _ _ _... -
Page 36: Set Password
This is where the user will set many of the unique feature of the Tunnel Master Jr. Tunnel Controller Set Date Time This option allows the user to set the date and time the system will recognize. -
Page 37: Wash Settings
TUNNEL MASTER JR MANUAL Set Date Time Introduction The first item to program is the correct date and time for the system to recognize. This is menu option #3 in the Configure Wash menu. The time will be important in that other programming options such as when to automatically bump a shift will need the correct time set to accomplish the process at the correct time of day. - Page 38 TUNNEL MASTER JR MANUAL Set Password Introduction The feature allows you to restrict access to the menus in Tunnel Master Jr. System. Procedures Follow these procedures to set or change the system password. Step Action Screen Displays [1] Shift Break [4] View Counts Press the numeric key “3”...
- Page 39 TUNNEL MASTER JR MANUAL Wash Settings Introduction The Wash Settings menu option is where important information about the user’s specific car wash equipment is programmed. Important features such as the anti-theft program and Wet Down option are set in this menu.
- Page 40 TUNNEL MASTER JR MANUAL Wash Settings (Continued) Auto Pulse This is the rate in which you want the conveyor Period to run when in Auto Pulse. You should set this value to 0 when the conveyor is running. Doing this will automatically calibrate this setting based on your conveyor speed.
-
Page 41: Outputs
If you do not have a push button station, this option is disregarded. Console Debug This is a debug utility that ICS may use to track system activity. This should be set to N if you are using the TMJ Interface. - Page 42 TUNNEL MASTER JR MANUAL Header 1 Enter information desired to display on the first line on the top of reports and receipts. This is usually company information. Header 2 Enter information desired to display on the second line on the top of reports and receipts. This is usually company information.
- Page 43 TUNNEL MASTER JR MANUAL Key Pad 1 This is the address of the first Key Pad. If you are Address using a push button station, set this to “0”. By default the keypad is set to “5”. If you are using multiple keypads consult the dipswitch settings on the keypad for the proper address.
- Page 44 TUNNEL MASTER JR MANUAL Wash Settings Menu Item Menu items and an explanation of their function. Function Step Action Screen Displays [1] Shift Break [4] View Counts Press the [MENU] button [2] Wet Down Wash [5] Print Reports from the main screen display...
- Page 45 The Outputs menu option is where the user will initially setup and later as needed edit the wash relays that will be activate for the various was equipment. The basic Tunnel Master Jr. Relay Box allows for up to 24 Outputs. There is an option to add an additional Relay Box that will provide for an additional 24 Outputs for a total maximum of 48.
-
Page 46: Services
TUNNEL MASTER JR MANUAL Type Use the “0” button to advance to select the option desired. M = Mandatory, relay will activate for any service sold that is set as a Base. S = Selective, relay will activate only when a service set as an Extra Service is sold along with a Base service. - Page 47 TUNNEL MASTER JR MANUAL Outputs Menu Items Continuation of a list of menu items within the Outputs menu and a brief Function explanation of their function. Menu Item Function Part Use the “0” button to advance to the desired choice for what part of the car this piece of equipment is to turn on for.
- Page 48 TUNNEL MASTER JR MANUAL Enter Y for yes, or N for no if the relay should activate during the Wet Down process in the morning. The Wet Down process provides a quick and easy way to prepare the wash tunnel for opening. Select Wet Down, option [2]...
- Page 49 TUNNEL MASTER JR MANUAL Outputs Menu Items Continuation of a list of menu items within the Outputs menu and a brief Function explanation of their function. Menu Item Function Panic Two setting here if there is a Panic circuit is wired to the system.
-
Page 50: Output Lists
TUNNEL MASTER JR MANUAL Outputs Procedures Follow these procedures to set or change the settings for the Outputs in the Tunnel Master Jr. Controller program. Step Action Screen Displays [1] Shift Break [4] View Counts Press the [MENU] button [2] Wet Down Wash... - Page 51 TUNNEL MASTER JR MANUAL Outputs Procedures Follow these procedures to set or change the settings for the Outputs in the OEM Controller program. Step Action Screen Displays Output 01 Name Roller Repeat steps 8 & 9 until the Start 0084 Type R Part AC Flash N...
- Page 52 TUNNEL MASTER JR MANUAL Services Introduction The Services menu option is where the user will initially setup and edit the wash services that will be available on the system. The basic controller configuration allows for up to 16 services and the roller control as the 17 There is an option to add an additional entrance Keypad that will provide for an additional 16 services for a total maximum of 32 services.
- Page 53 TUNNEL MASTER JR MANUAL Rate Use the numeric buttons or the “0” button to advance through the available options. Setting the desired tax rate will determine how much and which taxes will be applied to the service when it is sold.
- Page 54 TUNNEL MASTER JR MANUAL Services Procedures Follow these procedures to set or change the Services in the Tunnel Master Jr. Controller program. Step Action Screen Displays [1] Shift Break [4] View Counts Press the [MENU] button [2] Wet Down Wash...
- Page 55 TUNNEL MASTER JR MANUAL Services Procedures Follow these procedures to set or change the Services in the Tunnel Master Jr. Controller program. Step Action Screen Displays Service 01 Name GOLD WASH Using the numeric button Price 9.99 Type B “0” scroll to the desired Rate “Type”...
- Page 56 TUNNEL MASTER JR MANUAL Output Lists Introduction The Output Lists menu option is where the user will initially setup, and later as needed, edit what outputs will activate for each of the services they offer. This feature is simply telling the system what outputs will fire for each service.
- Page 57 TUNNEL MASTER JR MANUAL Output Lists Procedures Follow these procedures to set or change the Outputs that will be activated for the various service options. Step Action Screen Displays [1] Shift Break [4] View Counts Press the [MENU] button [2] Wet Down Wash...
- Page 58 TUNNEL MASTER JR MANUAL Output Lists Procedures Procedures to assign outputs to services continued. Step Action Screen Displays Service _ _ Press the “F4” button to Outputs , save the Output List assigned to this service Note: The input will be saved and the display will be ready to start new input.
-
Page 59: Operating Procedures
TUNNEL MASTER JR MANUAL Chapter 3 Operating Procedures Overview Introduction The Operating Procedures chapter will provide the user with an explanation of how to operate their Tunnel Controller, process customer vehicles and review operations through the reports available. As in the previous chapters the instructions will follow a logical trail through a days operations beginning with the opening process. -
Page 60: Main Wash Menu
TUNNEL MASTER JR MANUAL Main Wash Menu Introduction After setting up the various wash settings and services the user is now ready to wash cars. The main wash menu is where many of the day to day activities will be performed. It is important to train personnel in the proper selection of these menu options to assure accurate shift reporting and to review operations. -
Page 61: Wet Down Wash
Note: If a password has been set it will be necessary to enter the password before the main menu can be accessed. ICS OEM Tunnel Controller 10:25:35 PM Press the numeric key “2” to VER 1 REV 5.11 04/15/2002 select Wet Down Wash. -
Page 62: Processing Vehicles
TUNNEL MASTER JR MANUAL Processing Vehicles Introduction After the Wet Down has been completed the operator is now ready to process vehicles. As the vehicles are guided onto the conveyor the attendant can “load” the vehicle into the Entrance Keypad at the front of the wash. - Page 63 TUNNEL MASTER JR MANUAL Processing Vehicles (Non-Stacking) Procedures These are the procedures for a non-stacking system. Step Non Stacking Action Keypad Response The red indicator light will light up Press the numeric button indicating the input has been associated with the service accepted the customer has purchased.
- Page 64 TUNNEL MASTER JR MANUAL Processing Vehicles (Stacking) Procedures These are the procedures for a stacking system. Status Step Stacking Action Keypad Response Ready Press the numeric button The red indicator light will light associated with the service the up indicating the input has been customer has purchased.
- Page 65 TUNNEL MASTER JR MANUAL Viewing Service Counts Introduction There will be times during the course of daily operations that management personnel will want to review sales counts. This can be down quickly from the View Counts menu option. This option allows the user to quickly determine how many of each service option have been processed during the current shift.
- Page 66 TUNNEL MASTER JR MANUAL Viewing Service Counts Procedures Continue following these procedures to view the service counts for the current shift. Step Action Screen Displays 01-EXTERIOR W 0052 05- POLISH WAX 0023 Press the {ENT] button on 02-SILVER WAS 0023 06-CLEAR COAT 0015...
- Page 67 TUNNEL MASTER JR MANUAL Shift Break Introduction There are two ways to break (close) a shift. The first is to go into Wash Settings and select Yes for the Auto Shift menu option. This option will automatically close the shift at midnight each night. The second option is to go to the main display menu and select Shift Break.
- Page 68 TUNNEL MASTER JR MANUAL Printing Reports Introduction Anytime during the day or after shutdown it is possible to print out reports. These reports include the following options: 1. Shift History 2. Monthly Summary 3. Yearly Summary 4. Wash Settings Menu...
- Page 69 TUNNEL MASTER JR MANUAL Printing Reports Picture This is a picture of a shift report and an explanation of the entries. The summary reports provide the same basic information. Date / Time and station ID information. ID information is setup in the Headers menu option in Wash Settings.
- Page 70 TUNNEL MASTER JR MANUAL Printing Reports Procedures Follow these procedures to print a shift report. Step Action Screen Displays [1] Shift Break [4] View Counts Access the Main Menu by [2] Wet Down Wash [5] Print Reports pressing the “Menu” button [3] Configure Wash on the display pad.
- Page 71 TUNNEL MASTER JR MANUAL Printing Reports Procedures Follow these procedures to print either a Month or Yearly summary report. Step Action Screen Displays [1] Shift Break [4] View Counts Access the Main Menu by [2] Wet Down Wash [5] Print Reports pressing the “Menu”...
- Page 72 Trouble Shooting Tunnel Master Jr. Controller System Diagnosis The following diagnostic procedures are provided for use only when the ICS Tunnel Controller System has stopped responding or is not functioning. If you determine after reviewing the diagnostic procedures the system is malfunctioning, write down the specific conditions and contact your OEM vendor.
- Page 73 TUNNEL MASTER JR MANUAL Wash Controller Input Check There are four possible inputs into the Controller that if not functioning could cause the system to not respond properly. There are indicators in the upper left corner of the relay box display panel. Check to see that the inputs and indicator lights are functioning normally.
- Page 74 TUNNEL MASTER JR MANUAL Entrance Keypad Diagnostics To test the keypad, there is a diagnostic mode you can put it in to verify its functionality. Remove the 4 screws and remove the top of the keypad. Flip it over, you will see the dip switch settings. Turn dip switch 4 on and press the reset button to the immediate left of the dipswitches.
- Page 75 TUNNEL MASTER JR MANUAL ICS System Trouble Shooting Tunnel Master Junior Relay Box Symptom Cause Remedy Manual Override not Jumper JP 11 is off Put Jumper on JP 11 working Ribbon cable(s) not plugged in Re-attach Ribbon cable Ribbon cable(s) plugged in...
- Page 76 TUNNEL MASTER JR MANUAL Entrance Keypad Symptom Cause Remedy Key pad not responding Keypad address not correct. In most circumstances, the keypad address in the wash settings should be 5. See page 24 for keypad addressing. Loss of power to Entrance Keypad Check Power LED, if voltage...
- Page 77 TUNNEL MASTER JR MANUAL My Epson Dot Matrix printer Printer dipswitch settings are Turn printer upside down. is printing garbage incorrect. Loosen the screw to get to the dipswitches. DSW1 # 3 should be on and everything else should be off.
- Page 78 TUNNEL MASTER JR MANUAL Appendix A Appendix...
- Page 79 TUNNEL MASTER JR MANUAL Appendix...
- Page 80 TUNNEL MASTER JR MANUAL Appendix...
- Page 81 TUNNEL MASTER JR MANUAL Index display light · 31 Extend output menu item · 43 AntiBounce · 36 Assigning Outputs · 51 AutoGate · 37 AutoGateDelay · 37 Flash AutoPulse · 37 output menu item · 43 AutoPulsePeriod · 37 FlashOff ·...
- Page 82 MinCarLength · 36 Proximity Switch Monthly Summary wiring · 9 menu item / function · 63 Pulse Switch Mounting wiring · 9 entrance keypad · 20 PulseLength · 36 printer · 27 PushButtonCols · 38 relay box · 7 PushButtonRows · 38 Name output menu item ·...
- Page 83 TUNNEL MASTER JR MANUAL TaxRate1 · 38 Wash Configuration TaxRate2 · 38 introduction · 29 Time Wash Settings setting time · 34 Configure Wash Menu · 33 Tire Switch menu options & functions · 36-40 wiring · 11 procedures for programming · 41 Trouble Shooting ·...
Need help?
Do you have a question about the Tunnel Master Jr and is the answer not in the manual?
Questions and answers