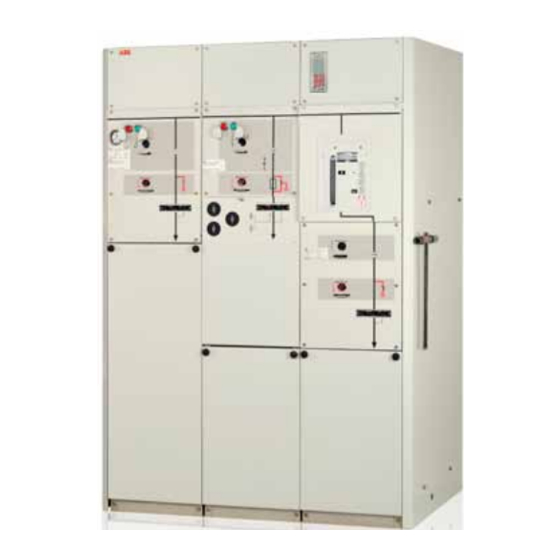
ABB SafeRing Installation Instructions Manual
Retrofit of opening coil y1 and auxiliary switch s7 f, c and si modules with latched mechanism
Hide thumbs
Also See for SafeRing:
- Product manual (44 pages) ,
- Installation, service and maintenance instructions (36 pages) ,
- Installation and operating instructions manual (24 pages)
Advertisement
Quick Links
We reserve all rights in this document and in the information contained therein: Reproduction, use or disclosure to third
parties without express authority is strictly forbidden. © ABB Technology Ltd.
SafeRing / SafePlus
Retrofit of opening coil Y1 and auxiliary switch S7
F, C and SI Modules with latched mechanism
Installation instructions
Edition
Document status
1.0
RELEASED
Location
Prepared
NODIS
Checked
NODIS
Approved
NODIS
ABB
ABB Technology Ltd.
www.abb.com
Responsible
NODIS
Date
Name
2008-12-11
BJGU/GUSO
2008-12-16
MARE
2008-12-16
OLGR
Title
SAFERING / SAFEPLUS
RETROFIT OF
OPENING COIL Y1 AND
AUXILIARY SWITCH S7
F, C AND SL MODULES
Document No.
1VDD200027
Language
EN/NO
Sheet No.
1/15
Advertisement

Summary of Contents for ABB SafeRing
- Page 1 We reserve all rights in this document and in the information contained therein: Reproduction, use or disclosure to third parties without express authority is strictly forbidden. © ABB Technology Ltd. SafeRing / SafePlus Retrofit of opening coil Y1 and auxiliary switch S7...
- Page 2 We reserve all rights in this document and in the information contained therein: Reproduction, use or disclosure to third parties without express authority is strictly forbidden. © ABB Technology Ltd. General Safety Instructions! Check that the installation, putting into service and maintenance of this apparatus is carried out by qualified personnel with knowledge of the apparatus to be installed.
- Page 3 We reserve all rights in this document and in the information contained therein: Reproduction, use or disclosure to third parties without express authority is strictly forbidden. © ABB Technology Ltd. Sikkerhetsinstruks! Sørg for at installasjon, idriftsettelse og vedlikehold er utført av kvalifisert personell som har kjennskap til utstyret som blir installert.
-
Page 4: Installation Procedure
We reserve all rights in this document and in the information contained therein: Reproduction, use or disclosure to third parties without express authority is strictly forbidden. © ABB Technology Ltd. Installation procedure The pictures and drawings are for an F module, but this document is also valid for C and Sl modules with latched mechanism Bilder og tegninger er av et F-felt, men dette dokumentet er også... - Page 5 We reserve all rights in this document and in the information contained therein: Reproduction, use or disclosure to third parties without express authority is strictly forbidden. © ABB Technology Ltd. 6. Unscrew and remove the bracket for capacitive voltage indication...
- Page 6 We reserve all rights in this document and in the information contained therein: Reproduction, use or disclosure to third parties without express authority is strictly forbidden. © ABB Technology Ltd. 8. Unscrew and remove the bracket for the push buttons Skru av braketten for trykknapper 9.
- Page 7 We reserve all rights in this document and in the information contained therein: Reproduction, use or disclosure to third parties without express authority is strictly forbidden. © ABB Technology Ltd. 10. Pull the position indicator maximum 2 mm out and fit the bracket for the...
- Page 8 We reserve all rights in this document and in the information contained therein: Reproduction, use or disclosure to third parties without express authority is strictly forbidden. © ABB Technology Ltd. Lock washer Låseskive M 5 x 10 12. Fix the opening coil marked Y1 to the mechanism using a lock...
- Page 9 We reserve all rights in this document and in the information contained therein: Reproduction, use or disclosure to third parties without express authority is strictly forbidden. © ABB Technology Ltd. 13. Re-place the bracket for the push-buttons, which was removed during step 8 Skru fast braketten med trykknapper som ble fjernet i punkt 8 14.
- Page 10 We reserve all rights in this document and in the information contained therein: Reproduction, use or disclosure to third parties without express authority is strictly forbidden. © ABB Technology Ltd. 16. Re-place and fix the front covers Sett tilbake og fest frontdekslene Edition Document No.
- Page 11 We reserve all rights in this document and in the information contained therein: Reproduction, use or disclosure to third parties without express authority is strictly forbidden. © ABB Technology Ltd. Appendix A Used until December 2002 Used until May 2007...
- Page 12 We reserve all rights in this document and in the information contained therein: Reproduction, use or disclosure to third parties without express authority is strictly forbidden. © ABB Technology Ltd. 10. Snap on protection on the edges of the mechanism to avoid damage of wires Monter kantbeskyttelse på...
- Page 13 We reserve all rights in this document and in the information contained therein: Reproduction, use or disclosure to third parties without express authority is strictly forbidden. © ABB Technology Ltd. M6x10 12. Fix the bracket with terminals marked X1 to the mechanism using...
- Page 14 We reserve all rights in this document and in the information contained therein: Reproduction, use or disclosure to third parties without express authority is strictly forbidden. © ABB Technology Ltd. 14. Re-place the bracket for the push-buttons, which was removed...
- Page 15 We reserve all rights in this document and in the information contained therein: Reproduction, use or disclosure to third parties without express authority is strictly forbidden. © ABB Technology Ltd. Cog wheel arrow shall point to the straight line Pilen i tannhjulet...


