
Related Manuals for PRESONUS FIREBOX


Summary of Contents for PRESONUS FIREBOX
- Page 1 User’s Manual Version 1.0 PreSonus Audio Electronics, Inc., © 2005...
- Page 2 W A R R A N T Y PreSonus Limited Warranty PreSonus Audio Electronics Inc. warrants this product to be free of defects in material and workmanship for a period of one year from the date of original retail purchase. This warranty is enforceable only by the original retail purchaser.
-
Page 3: Table Of Contents
2.2 Installation of FIREBOX Drivers 2.3 FIREBOX Control Panel 2.4 FIREBOX Mixer 2.5 CUBASE LE – Quick Start Up 2.6 Testing your FIREBOX with Cubase LE 3 Controls & Connections 3.1 Front Panel Layout and Descriptions 3.2 Back Panel Layout and Descriptions 4 Mixer 4.1 Mixer... -
Page 4: Overview
FIREBOX before trying to connect it to your computer. This will hopefully alleviate any unforeseen issues that you may encounter during installation and set up. Thank you, once again, for buying our product and we hope you enjoy your FIREBOX! -
Page 5: Installation And Setup
2 INSTALLATION AND SETUP 2 . 1 C O M P U T E R R E Q U I R E M E N T S Below are the minimum computer system requirements for your FIREBOX. Windows - OS: Microsoft Windows XP - Computer: Windows compatible computer with FireWire port. -
Page 6: Installation Of Firebox Drivers
FIREBOX_Installer.exe) Carefully read and follow the FIREBOX installation instructions. The installer will prompt you to connect your FIREBOX at the proper time. (NOTE: If you are you connecting the FIREBOX via a standard 6-pin Firewire cable, power for the unit will be supplied via the Firewire cable. -
Page 7: Firebox Control Panel
Once you have verified that you are running OSX 10.3.7 or later, connect your FIREBOX to a FireWire port on your computer (power for the unit will be supplied via the Firewire cable). Your FIREBOX sync light should flash red and then stay blue to signify that your FIREBOX is properly sync’d to your computer. - Page 8 2 INSTALLATION AND SETUP FIREBOX HARDWARE CONTROL PANEL (Windows XP) Sample Rate: Drop down the menu to select the sample rate of the FIREBOX – 44.1, 48, 88.2, 96k. This must be set to the same sample rate in your recording software.
- Page 9 Macintosh - FIREBOX HARDWARE CONTROL PANEL The included CD-ROM contains Macintosh software for the FIREBOX Control Panel as well as the Mixer software. To install the FIREBOX Control Panel, drag and drop the following file to your hard drive: FIREBOX Control Once this file is saved to your hard drive, double click on it to launch the Control Panel.
-
Page 10: Firebox Mixer
Macintosh The included CD-ROM disk contains Macintosh software for the FIREBOX Mixer. To install the FIREBOX Mixer, drag and drop the following file to your hard drive: FIREBOX Mixer Once this file is saved to your hard drive, double click on it to launch the Mixer. -
Page 11: Cubase Le - Quick Start Up
2 . 5 C U B A S E L E – Q U I C K S T A R T U P Once you have installed your FIREBOX drivers, if you plan on using the CUBASE LE software included with your FIREBOX, insert the CUBASE LE installation CD and run the installer. - Page 12 2 INSTALLATION AND SETUP ASIO Driver (pull down menu) – select PreSonus ASIO Driver. Click Switch to save PreSonus Driver Selection...
-
Page 13: Testing Your Firebox With Cubase Le
C U B A S E L E In order to test your FIREBOX, do the following: Launch Cubase LE and make sure that you have selected the PreSonus FIREBOX ASIO driver as described above in Section 2.4. Create a new project:... - Page 14 2 INSTALLATION AND SETUP Create one new audio track within your new project by clicking on Project ->Add Track-> Audio (or you can right click (ctrl-click mac) in the track space within the project: Record enable the track by pressing the Record Enable button.
- Page 15 Plug a microphone into channel one and turn on 48V phantom power if needed for the microphone. Turn up the channel 1 trim control on the front panel of the FIREBOX while speaking into the microphone. You should see the input meter in the Cubase LE track info react to your speaking.
-
Page 16: Controls & Connections
The award winning PreSonus preamplifier design is a Class A input buffer followed by a dual servo gain stage. This arrangement results in ultra low noise and wide gain control allowing the FIREBOX user to boost desirable signal without increasing unwanted background noise. -
Page 17: Controls And Connections
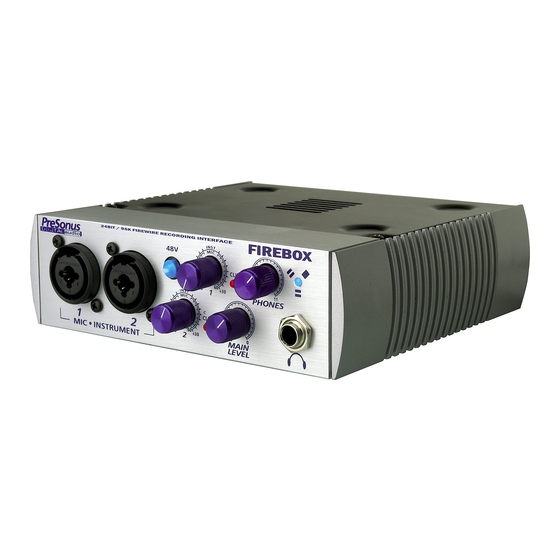
4. Main Level. This knob allows control over the output level for the MAIN CR OUTPUT 1 and 2 on the back of the FIREBOX. It has a range of -80db to +10dB. 5. Headphone Symbol and ¼” Jack. This is where you connect your headphones. -
Page 18: Back Panel Layout And Descriptions
FIREBOX. Please check the power supply to ensure that it is the correct voltage and plug type for your country. Note that you can also power your FIREBOX with a six- pin FireWire port from your computer instead of using the external power supply. - Page 19 3 CONTROLS AND CONNECTIONS MIDI stands for “Musical Instrument Digital Interface”. However, the MIDI standard goes well beyond just instrumentation and sequencing. The MIDI inputs and outputs allow connection and/or communication with external MIDI equipment. One function of this port is MIDI programming. This port can also be used for MMC (MIDI Machine Control) and MTC (MIDI Time Control).
-
Page 20: Mixer
This is helpful to avoid the time it takes to process the audio you are recording – called latency. Therefore, you can mix the input signal going into the FIREBOX with the playback from your software for zero latency recording and monitoring. - Page 21 If using headphones select “Mix” under Mix to Phones. – this will send the output of the Mixer to the headphone output. In the MIXER OUTPUT section of the FIREBOX Mixer, select the pair of outputs to send out of the FIREBOX (for example studio monitors connected to outputs 1/2).
-
Page 22: Operation Of Mixer
4 . 2 O P E R A T I O N O F M I X E R The silver tracks represent the six possible inputs from the FIREBOX as well as the software playback. The blue section contains information on the output of the mixer. - Page 23 LEVEL, SOLO and MUTE. This is a stereo channel. This channel picks up the audio stream that is sent from your software and enables you to mix it with the direct input of your FIREBOX. PLAYBACK – Indicates the stereo stream output channels from your software.
- Page 24 Mixer’s zero latency output to the headphones. Mixer Output – sends the output of the mixer to the selected pair of outputs on the FIREBOX. Save – enables you to save your mixer setups. Load – loads your mixer setups. (note that you...
-
Page 25: Application Notes
5 APPLICATION NOTES 5 . 1 M I C R O P H O N E S The FIREBOX works great with all types of microphones including dynamic, ribbon and condenser microphones. Dynamic microphones and ribbon microphones are generally lower output devices and require no external power source. Condenser microphones are generally more sensitive than dynamic and ribbon microphones and typically require external 48V phantom power. -
Page 26: Technical
PreSonus at 225-216-7887 between the hours of 10 am and 8 PM Central Time. Pops and Clicks The light on the front right panel of the FIREBOX is a clock (sync) indicator. It lets you know if your unit is receiving word clock correctly. Word clock is the manner by which digital devices sync frame rates. - Page 27 Audio Drop Outs – Can occur when the speed of your processor cannot buffer audio fast enough. Windows XP – Try lowering your FIREBOX’s CPU to a lower setting, by right clicking on the FIREBOX control panel icon in your system tray.
- Page 28 Q: I just bought a FIREBOX from (dealer name goes here) in (city and state go here) and I live in Morocco. When I plugged in my FIREBOX it caught on fire and smoke came out of the top. What do I do? A: PreSonus has a distributor in almost every country.
-
Page 29: Specifications
6 TECHNICAL 6 . 2 F I R E B O X S P E C I F I C A T I O N S Preamp Bandwidth ... 10Hz to 50kHz Preamp Input Impedance ... 1.3k Ohms Instrument Input Impedance... 1M Ohms Preamp THD ...
Need help?
Do you have a question about the FIREBOX and is the answer not in the manual?
Questions and answers