PRESONUS Firestudio Project User Manual
24-bit, 96 khz recording interface with 8 microphone preamplifiers
Hide thumbs
Also See for Firestudio Project:
- Connecting manual (1 page) ,
- Connection instruction (1 page) ,
- User manual (41 pages)
Table of Contents
Advertisement
FIRESTUDIO
PROJECT
24-bit, 96 kHz Recording Interface
with 8 Microphone Preamplifiers
FIRESTUDIO
™
10X10 FireWire Interface | 8 XMAX Preamps | 96kHz | MIDI I/O | S/PDIF I/O | Digital Mixer
1
2
3
4
Mic
Inst r ument
© 2009, PreSonus Audio Electronics, Inc.
1
5
6
7
8
-10 0
60 +30
1
Mic
Line
User's Manual
Version 2.0
All Rights Reserved.
2
3
4
5
6
7
48V
0dB
48V
0dB
48V
0dB
48V
-6dB
-6dB
-6dB
-40dB
-40dB
-40dB
1/ 2
3/ 4
5/ 6
7/ 8
-10 0
60 +30
-20 0
60 +20
-20 0
60 +20
-20 0
60 +20
-20 0
60 +20
-20 0
60 +20
-20 0
2
3
4
5
6
7
8
1
11
Phones
60 +20
-80
10
8
Main
Advertisement
Table of Contents

Related Manuals for PRESONUS Firestudio Project


Summary of Contents for PRESONUS Firestudio Project
- Page 1 60 +20 -20 0 60 +20 -20 0 60 +20 -20 0 60 +20 -20 0 60 +20 -20 0 60 +20 Main Inst r ument Line User’s Manual Version 2.0 © 2009, PreSonus Audio Electronics, Inc. All Rights Reserved.
- Page 2 14 days of purchase. During the warranty period, PreSonus shall, at its sole and absolute option, repair or replace, free of charge, any product that proves to be defective on inspection by PreSonus or its authorized service representative. To obtain warranty service, the purchaser must first call or write PreSonus at the address and telephone number printed below to obtain a Return Authorization Number and instructions about where to return the unit for service.
- Page 3 SAFE OPERATION GUIDELINES To avoid damage to your FireStudio Project and your other audio equipment, please review and adhere to the following safety guidelines: Follow the safety guidelines in the manual. Do not drop your FireStudio Project. Do not install the unit near a heat source (radiators, heat registers, amplifier heat sinks, etc.).
-
Page 4: Table Of Contents
2.2.5 Creating a New Song ............................14 2.2.6 Cue Mix and the FireStudio Project ........................17 2.3 Sample Hookup Diagrams ............................20 2.3.1 Recording a Band with a FireStudio Project ..................... 20 2.3.2 Using Multiple FireStudio Projects with the HP60 .................... 21 3 CONTROLS & CONNECTIONS 3.1 PreSonus Universal Control Application Introduction .................... - Page 5 ...
-
Page 6: Overview
We encourage you to contact us at 225-216-7887 with questions or comments about your PreSonus FireStudio Project. We believe the best way to achieve our goal of constant product improvement is by listening to the real experts: our customers. -
Page 7: Features
Mac OS X and Windows compatible The FireStudio Project includes PreSonus Studio One Artist recording software, which comes with over 4 GB of plug-ins, loops, and samples, giving you everything you need for music recording and production. Summary of Studio One Artist features ... -
Page 8: What Is In The Box
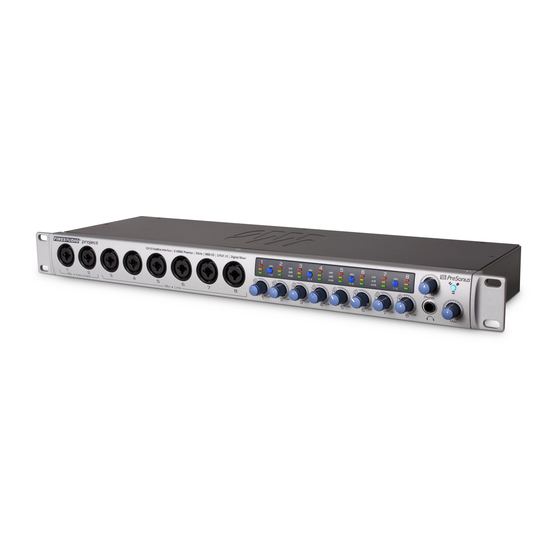
OVERVIEW 1.3 WHAT IS IN THE BOX Your FireStudio Project package contains the following: FIRESTUDIO ™ 10X10 FireWire Interface | 8 XMAX Preamps | 96kHz | MIDI I/O | S/PDIF I/O | Digital Mixer -6dB -6dB -6dB FireStudio Project recording interface... -
Page 9: System Requirements
OVERVIEW 1.4 SYSTEM REQUIREMENTS Here are the computer-system requirements for FireStudio Project and Studio One Artist. Macintosh Operating Systems: Mac OS X 10.4.11 or Mac OS X 10.5.2 or higher Hardware: Minimum: PowerPC G4 1.25 GHz or Intel Core Solo 1.5 GHz processor ... -
Page 10: Getting Started
2.1.1 Installation in Microsoft Windows After you insert the installation CD into your CD or DVD drive, the FireStudio Project installer will take you through each step of the installation process. Please read each message carefully, ensuring especially that you do not connect your FireStudio Project until the installer has finished and you have rebooted your computer. -
Page 11: Studio One Artist
, Studio One Artist provides you with all the tools necessary to capture and mix a great performance. As a valued PreSonus customer, you are also eligible for an upgrade discount for Studio One Pro when you are ready to master your work, create a digital version for the Web, or incorporate third-party VST plug-ins into your recording process. -
Page 12: Enabling The Firestudio Project Driver
PreSonus. If you have an Internet connection on your computer, these links will be updated as new tutorials become available on the PreSonus Web site. -
Page 13: Configuring Your External Midi Devices
OK. After you have verified that the PreSonus FireStudio Project driver has been detected, please continue to Section 2.2.3 to set up your external MIDI devices. If you do not have any MIDI devices to connect at this time, please skip to Section 2.2.4. - Page 14 If you have a sound module you’d like to connect, leave the External Devices window open and proceed to the next part of this section. If not, you can close this window and skip to Section 2.1.4. Setting up an external MIDI sound module from the Start page: 11 | PreSonus 2009...
- Page 15 Instruments. Once you have set up your MIDI keyboard controller, take a moment to configure your sound module. Connect the MIDI In of your external sound module to the MIDI Out of your FireStudio Project. In the External Devices window, click the Add button. The Add Device window will launch.
-
Page 16: Configuring Your Audio I/O
In the browser window, name your Song and choose the directory in which you’d like it saved. You’ll notice a list of templates on the left. The FireStudio Project template will create a Song with a track for each of the available inputs. Every track is armed for recording, and no further setup is required. -
Page 17: Creating A New Song
Click on the Outputs tab, and you will see all of the available outputs on your FireStudio Project. At this time, you can add the number of output buses to which you would like to have access and can give them custom names. - Page 18 To begin recording, create an audio track, assign it to Input 1, and connect a microphone or instrument to Channel 1 on the front panel of the FireStudio Project. Select the record enable ( ) and monitor ( ) on your track in Studio One Artist.
- Page 19 Please Note: MIDI data does not contain audio signals. To hear your sound module, you must connect the audio output of the sound module to a FireStudio Project audio input, then connect the FireStudio Project’s audio outputs to a sound system. (You also can listen on headphones, using the FireStudio Project’s headphone output.) When you are ready to mix your Song, you must convert the recorded MIDI data to an...
-
Page 20: Cue Mix And The Firestudio Project
Together, Studio One Artist and a FireStudio Project make this simple. You can create a cue mix and send it to any output on your FireStudio Project (Mains, General Purpose, or S/PDIF). - Page 21 Enables Zero-Latency Monitoring for FireStudio Project Inputs Cue mixes are normally used in a recording situation in which one or more live inputs need to be monitored. The FireStudio Project features an internal hardware mixer that provides zero-latency monitoring via the device window in the Universal Control.
- Page 22 With the Zero Latency button and Monitor Enable both engaged, you will hear the live zero-latency input straight from your FireStudio Project (as opposed to through software). As such, you will no longer hear the effects of any inserts on the channel. However, you will still hear the result of any sends on the channel, as Bus and FX Channels will still output normally.
-
Page 23: Sample Hookup Diagrams
2.3 SAMPLE HOOKUP DIAGRAM With the FireStudio Project, you can simultaneously record and play back up to ten channels. Since it is loaded with eight preamplifiers, you can plug in eight microphones to the FireStudio Project along with S/PDIF digital input to record a full band. -
Page 24: Using Multiple Firestudio Projects With The Hp60
GETTING STARTED 2.3.2 Using Multiple FireStudio Projects with the HP60 This hookup diagram shows two FireStudio Projects daisy-chained together. One FireStudio Project is dedicated to the microphones on the drum set. All other instruments are connected to the second FireStudio Project. -
Page 25: Controls & Connections
FireStudio Project’s output pairs (mains, general purpose, and S/PDIF). This application also allows you to daisy-chain FireStudio-family interfaces. The FireStudio Project can be connected to up to three other FireStudio-family devices for a maximum of up to 52 inputs and outputs. -
Page 26: Launch Window
As a result, it may fail to sync to the clock source. If your FireStudio Project is not syncing to an external source, make sure that both your master device and the FireStudio Project are set to the same sample rate. -
Page 27: Controls And Connections
Device Window Button Click on this button to open the FireStudio Project Mixer. To give your FireStudio Project a custom name, double-click on the default label (FireStudio Project) to open a text field. When you have finished entering your custom name, hit the Enter key. -
Page 28: Wdm Settings (Windows Pc Only)
3.1.3 WDM Settings (PC only) Like the rest of the FireStudio family of interfaces, the FireStudio Project features advanced WDM features that enhance its use as an audio interface. In the Settings menu of the Launch window, you will find the WDM Setup option. -
Page 29: Device Window: Firestudio Project Mixer
You must set the level for the recording using the gain knobs on the face of the FireStudio Project. If your signal is too hot in your DAW, lower them with these gain controls. - Page 30 A virtual LED meter to the right of each fader displays the postfader level of the channel’s audio. The peak value, in dBFS, of the channel’s audio level is displayed directly above each channel’s virtual LED meter. 27 | PreSonus 2009...
- Page 31 Muting a channel silences the channel’s audio. Soloing a channel mutes all other unsoloed channels. Changes the Source of the FireStudio Project Mixer Channels Input Selectors Choosing “No Input” will hide the channel. “Inputs” are your hardware inputs (Mic, Inst, Line, and S/PDIF).
-
Page 32: Front-Panel Layout
This connector lets you use either female ¼” phone or XLR connectors in the same jack. The first 2 channels of the FireStudio Project are ¼” instrument and microphone XLR inputs. The line-level inputs for these two channels are on the back panel of the FireStudio Project. - Page 33 Instrument Inputs (Channels 1 and 2). The ¼” TS connector on Channels 1 and 2 are for use with an instrument (guitar, bass, etc.). When an instrument is plugged into the ¼” input, a high impedance input buffer is switched into the preamp circuit and the FireStudio Project becomes an active instrument preamplifier.
- Page 34 Notice that the volume indicator goes to 11; use this setting with extreme caution. ¼” Headphone Jack. This is where you connect your headphones to the FireStudio Project. Red-Blue Power/Sync Light. This light is a clock source (sync) indicator. It lets you know if your unit is receiving word clock correctly.
-
Page 35: Back-Panel Layout
Power Adapter Input. This is where you plug the provided IEC power cable into the FireStudio Project. Power Switch. Push the top part of the switch to turn your FireStudio Project on (|). Push the bottom part of the switch to turn your FireStudio Project off (O). - Page 36 1 and 2 preamp outputs, so they take precedence over the corresponding Mic/Instrument input on the front of the FireStudio Project. (This means that if a cable is plugged into the channel 1 return input on the rear of the FireStudio Project, the channel 1 Mic/Instrument input will be inactive, and it will become active again when the cable is removed from return input 1.)
-
Page 37: Cascading Units
PreSonus supports the connection of up to four devices or a limit of 52 inputs and outputs (whichever comes first) to any one system at a time. However, the ability to use more than two units simultaneously depends on your computer’s specifications and optimization. - Page 38 The first time you add any FireStudio-family interface to your system, please follow these guidelines: 1. Go to www.presonus.com and check for the latest build of the Universal Control application. 2. Connect and sync each of your FireStudio-family interfaces to your computer separately before cascading them.
-
Page 39: Technical Information
Pops and clicks in either your input or playback audio are typically caused by momentary losses of synchronization between the FireStudio Project and its clock source. This can be due to a FireWire card that is not suited for FireWire audio devices or to a lack of CPU power or available memory. Try closing all unnecessary programs, increasing the buffer size in the Universal Control, and optimizing your operating system for audio. - Page 40 TECHNICAL INFORMATION Recommended FireWire Chipsets The FireStudio Project will work with a wide range of FireWire cards and configurations. However, due to the plethora of FireWire chipsets currently on the market, it is not possible to thoroughly test each one for compatibility.
-
Page 41: Specifications
, w i t h o u t n o t i f i c a t i o n . 38 | PreSonus 2009...
Need help?
Do you have a question about the Firestudio Project and is the answer not in the manual?
Questions and answers