Ecobee ecobee3 lite Manual
Hide thumbs
Also See for ecobee3 lite:
- User manual ,
- Installation manual (45 pages) ,
- Quick start manual (40 pages)
Advertisement
Table of Contents
- 1 Installation Instructions
- 2 Box Contents
- 3 Tools
- 4 Power off Your Heating, Ventilation and Air Conditioning (HVAC)
- 5 Install Your Ecobee with a C Wire
- 6 Install Your Ecobee Without a C Wire
- 7 Troubleshooting
- 8 Ecobee Overview
- 9 System Mode Icons
- 10 Wiring Diagram
- Download this manual
See also:
Installation Manual
Advertisement
Table of Contents

Related Manuals for Ecobee ecobee3 lite


Summary of Contents for Ecobee ecobee3 lite
- Page 1 How to install your ecobee3 lite...
-
Page 2: Installation Instructions
Download the ecobee You have joined a growing community of people who want to app for customized conserve energy, save money and installation instructions. do something good for our planet. Let’s get started! Or continue reading! - Page 3 First things first. Here’s what You’ll also need these tools: you’ll find in the box. ecobee thermostat ecobee backplate Power Extender Kit Drill for mounting anchors Small flathead Phillips (PEK) (3/16” drill bit) screwdriver screwdriver OPTIONAL Drywall plugs Trim plate...
- Page 4 Guide 1 or Guide 2? Start here to find out. The steps in this section will help you decide which install guide you’ll use to complete the installation. These icons indicate useful tips and important reminders.
- Page 5 STEP 1 STE P 2 Power off your Heating, Ventilation and Air Confirm your system is off by turning on Conditioning (HVAC) system by using the your heat (during winter) or your AC (during master switch or circuit breaker box. This is summer).
- Page 6 Sadly, you might Great, please not be compatible continue to TIP: the next page You can double check here: Many thermostats simply pop off or unclip from the base, while ecobee.com/compatibility others may have screws that you will need to remove.
- Page 7 STEP 4 CHE CKPOINT: C WIRE Take a picture of the wires connected to the Do you have a C wire connected to your terminals of your old thermostat. You may old thermostat? need to reference this photo later on. Continue to Continue to Guide 1...
- Page 8 G UIDE 1 Install your ecobee with a C wire If you have a C wire, it will power your ecobee. You won’t need the Power Extender Kit included in the box.
- Page 9 CHE CKPOIN T: DON’T SKIP AH EAD STE P 5 Have you completed steps 1 - 4 in the ‘Start Carefully disconnect and label the wires from Your Install’ section? your old thermostat one at a time, using the labels provided. Return to step 1 Continue to TIP:...
- Page 10 Decide if you want to use the trim plate with thermostat to remove it from the wall. your ecobee. The trim plate is useful if you want to hide marks or holes left on the wall by your old thermostat.
- Page 11 STEP 8: O PTIONAL STE P 9 If using the trim plate, align the mounting Pull the wires through the hole in the holes on the trim plate and backplate and middle of the backplate and then attach press them into place together. the backplate to the wall using the drywall anchors and screws provided.
- Page 12 CHECKP OINT: INSERT YOUR R WIR E(S) STE P 10 Do you have more than one R wire? Insert your remaining wires into the side (That includes R, Rc, and Rh) (not the front) of their corresponding terminal blocks. Insert your wires: Insert your single R, R or R...
- Page 13 STEP 11 STE P 12 Tug on the wires gently to ensure they are Carefully push any excess wire back into the securely connected. hole and ensure there are no drafts coming from the hole(s) in the wall. TIP: TIP: When a wire has been connected correctly, the lever on that Large holes behind your thermostat will affect temperature readings.
- Page 14 STEP 13 STE P 14 Gently press your ecobee thermostat into the Turn the power to your HVAC system back backplate until it ‘clicks’ into place. on using the master switch or at the circuit breaker box. TIP: If the thermostat ‘rocks’ or is not flush with the wall, be sure the...
- Page 15 STEP 15 ALL DONE ! Say hi to your new ecobee! The screen will Congratulations, power on and guide you through the set-up you did it! and registration. To complete your set-up, follow the instructions on your ecobee screen. TIP: If your thermostat does not power on, please see the troubleshooting tips in the ‘Extras’...
- Page 16 G UIDE 2 Install your ecobee without a C wire If you don’t have a C wire, you’ll need to use the Power Extender Kit (PEK) included to reliably power your ecobee.
- Page 17 Looks like you have one or more Return to step 1 Continue to wires missing. Please contact ecobee support for more in ‘Start Your Install’ The Power Extender kit the next page information. 1.877.932.6233 or will work with your system!
- Page 18 Take your Power Extender Kit, wire labels, Open your HVAC system’s cover to reveal the tools, your smart phone, and go to your control board. HVAC system. ecobee wire labels Power Extender Kit wire labels (not required for all installs) Control board TIP:...
- Page 19 (ignore these) Wires going to your thermostat TIP: If you have wires connected to both R and R terminals at the control board you may have a two transformer system. Please contact support to help you with installation: 1.877.932.6233 or support@ecobee.com.
- Page 20 STEP 9 STE P 10 Disconnect the labeled R, Y, G and W wires Connect the wires you disconnected from from the control board. the control board into their matching gray terminal blocks on the Power Extender Kit. TIP: Press the buttons to insert the wires more easily.
- Page 21 STEP 11 STE P 12 Tug on the wires gently to ensure they are Connect the 5 white wires coming out of the securely connected. Power Extender Kit to the corresponding terminals on your control board. TIP: TIP: When a wire has been connected correctly, the button on that block Once again, tug on the wires gently to ensure they are will lower.
- Page 22 CHE CKPOIN T: POWER EXTENDER KI T STE P 13 Check that you have installed the Power Mount the Power Extender Kit inside your Extender Kit correctly. It should be installed HVAC system, taking care not to strain the between your thermostat wiring and your wires.
- Page 23 STEP 14 STE P 15 Back at your thermostat: Carefully disconnect Unscrew the mounting plate of your old and label the wires from your old thermostat thermostat to remove it from the wall. one at a time, using the labels provided. TIP: WARNING: If you have a jumper between Rc, Rh or R, leave it alone.
- Page 24 Decide if you want to use the trim plate with If using the trim plate, align the mounting your ecobee. The trim plate is useful if you holes on the trim plate and backplate and want to hide marks or holes on the wall left press them into place together.
- Page 25 STEP 18 STE P 19 Pull the wires through the hole in the First, connect these 3 wires as shown: middle of the backplate and then attach it to the wall using the drywall anchors and Then, connect any remaining wires to their screws provided.
- Page 26 STEP 20 STE P 21 Tug on the wires gently to ensure they are Carefully push any excess wire back into the securely connected. hole and ensure there are no drafts coming from the hole(s) in the wall. TIP: TIP: When a wire has been connected correctly, the lever on that Large holes behind your thermostat will affect temperature readings.
- Page 27 STEP 22 STE P 23 Gently press your ecobee thermostat into the Turn the power to your HVAC system back backplate until it ‘clicks’ into place. on using the master switch or at the circuit breaker box. TIP: If the thermostat ‘rocks’ or is not flush with the wall, be sure the...
- Page 28 STEP 24 ALL DONE ! Say hi to your new ecobee! The screen will Congratulations, power on and guide you through the set-up you did it! and registration. To complete your set-up, follow the instructions on your ecobee screen. TIP: If your thermostat does not power on, please see the troubleshooting tips in the ‘Extras’...
- Page 29 EXTRAS In here you’ll find: Troubleshooting Meet your ecobee Wiring diagrams Warranty and Legal...
- Page 30 TROUBL E SHOOT ING T ROU BLE SHOOTING If your ecobee doesn’t turn on, please try If you have only one R wire (either 4. If you installed the Power Extender these steps: R, R , or R ), make sure it’s inserted Kit, make sure you inserted the wires into the Rc terminal.
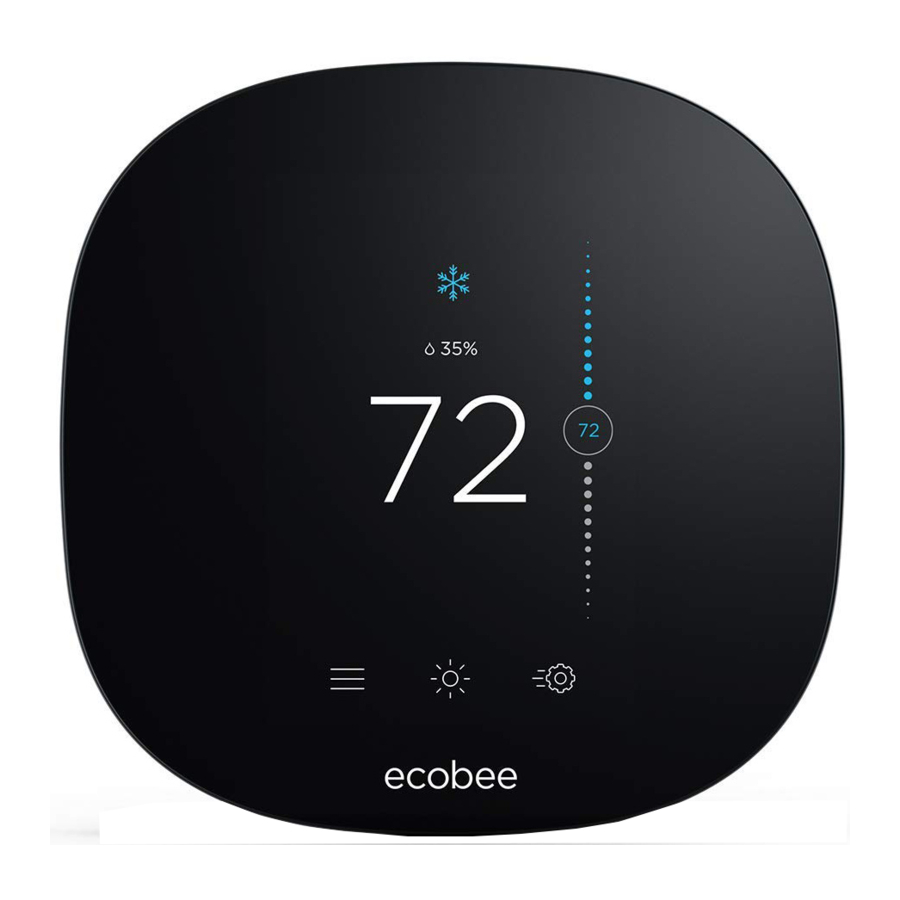
- Page 31 Here’s what you’ll see on the home screen: And here’s what that means: Slider to adjust System Mode Menu Temperature Shows your current ecobee Allows you to control your setting [heat/cool/auto/off] system, schedule a vacation, and more System Mode Humidity...
- Page 32 MEET YOUR ECOB EE MEE T YOUR ECOBE E These system mode icons are shown on the More common icons you’ll find: Home screen and in Quick Changes. Home Screen Menu Menu Weather Quick Changes (with notification) Heat Cool Menu Your system is in heat mode.
- Page 33 Heat Pump Air Handler NOTE: NOTE: Do not jumper Rc or Rh, ecobee does this Do not jumper Rc or Rh, ecobee does this automatically. The R wire needs to go into Stage 2 heat and cool automatically. The R wire needs to go into Stage 2 compressor and the Rc terminal on your ecobee.
- Page 34 *Reversing valve for heat pumps only NOTE: NOTE: Do not jumper Rc or Rh, ecobee does this Do not jumper Rc or Rh, ecobee does this automatically. The R wire needs to go into Stage 2 heat and cool automatically. The R wire needs to go into the Rc terminal on your ecobee.
- Page 35 CNR d’Industrie Canada applicables aux the interference by one or more of the the possibility of exceeding the FCC radio ecobee warrants that for a period of three appareils radio exempts de licence. following measures: frequency exposure limits, human proximity...
- Page 36 Legal Notice a. if Customer did not purchase the do not allow the exclusion or limitation of is found by ecobee to be defective and Product directly from ecobee, contact incidental or consequential damages, so Use of the HomeKit logo means that an...
- Page 37 We’re here to help. ecobee.com support@ecobee.com 1.877.932.6233 © 2016 ecobee Inc. All rights reserved. ecobee and the ecobee logo are trademarks of ecobee inc., registered in the U.S and other countries. EB-STAT3LT01...
Need help?
Do you have a question about the ecobee3 lite and is the answer not in the manual?
Questions and answers
how to set stop and start temperatures on a ecobee 3 lite
To set stop and start temperatures on an Ecobee3 Lite:
1. Use the touchscreen on the thermostat.
2. The current temperature is displayed in the center.
3. To adjust the temperature, press and hold the set temperature.
4. Scroll up or down to raise or lower the temperature.
5. The heating temperature sets when the heat turns on, and the cooling temperature sets when the AC turns on.
6. To switch between heating and cooling, press the fire symbol (for heat) or the snowflake symbol (for cooling).
This answer is automatically generated
How do I set a password to lock the temperature range on my Ecobee3 Lite?
To set a password to lock the temperature range on your Ecobee3 Lite:
1. Go to the Main Menu on the thermostat.
2. Select Settings.
3. Choose Access Control.
4. Enable Security Code.
5. Enter a new code and save it.
This will prevent unauthorized users from changing settings outside the allowed range.
This answer is automatically generated