Table of Contents
Advertisement
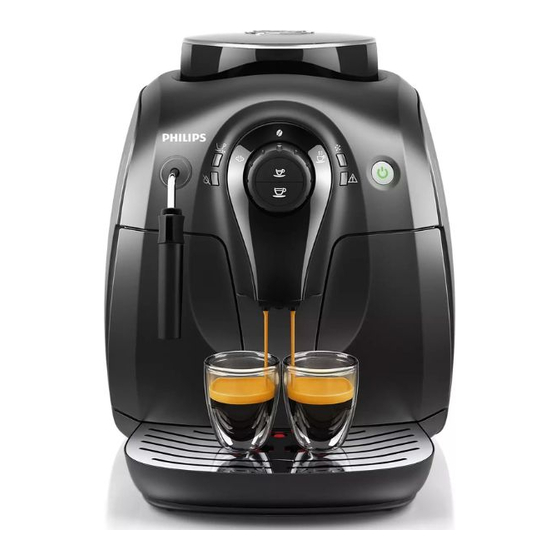
Coffee Machine
Service
General Information
Description
Housing material
Size (w x h x d)
Weight
Power Cord length
Control panel
Cup size
Water tank
Coffee bean hopper capacity
Coffee grounds drawer capacity
Pump pressure
Boiler
Safety devices
Power rating
Nominal voltage
All parts of this document are the property of Saeco International Group.
All rights reserved. This document and all the information herein is provided without liability deriving from any errors or omissions. Furthermore, no part may be reproduced, used or
collected, except where express authorisation has been provided in writing or through a contractual agreement.
Published by Saeco International Group
Service Manual
Value
Plastic
295mm x 325mm x 420mm
6.9 kg (data may vary depending on the model)
0.8m -1.2m
Front type
Up to 95mm
1000ml
200g (Puro) 170g (Vapore)
8
15 bar
Stainless steel
Thermal fuse
Inside of maintenance door
Inside of maintenance door
Subject to modification
Philips 2000 PURO/VAPORE
Rev. 01 August. 2015
EN 4219 400 00030
28/05/2015
Advertisement
Table of Contents

Related Manuals for Philips 2000 PURO/VAPORE


Summary of Contents for Philips 2000 PURO/VAPORE
-
Page 1: Coffee Machine
Coffee Machine Philips 2000 PURO/VAPORE Service Service Manual Rev. 01 August. 2015 General Information Description Value Housing material Plastic Size (w x h x d) 295mm x 325mm x 420mm Weight 6.9 kg (data may vary depending on the model) Power Cord length 0.8m -1.2m... -
Page 2: Table Of Contents
4.1. Water circuit 4.2. Control ringnut and valve Electrical diagram 4.3. Coffee cycle operating diagram 10.1. Electrical diagram PHI 2000 Puro/Vapore 4.4. Single microswitch 4.5. Temperature sensor 4.6. Coffee grinder function 4.7. Low bean level detection, dose quantity adjus tment, coffee grinder blocked 4.8. -
Page 3: Introduction
CHAPTER 1 INTRODUCTION... -
Page 4: Documentation Required
PHI 2000 PURO/VAPORE 01 INTRODUCTION Documentation required The following documentation is needed for repair procedures: • Instruction booklet for specific model • Technical documentation for specific model (diagrams, exploded view, sympton cure and service manual) Tools and resources As well as the standard equipment, the following is required: Qty. - Page 5 PHI 2000 PURO/VAPORE 01 INTRODUCTION Simply turning off the main machine power switch is not an adequate safety precaution. This domestic appliance is rated as insulation class I. On completion of the repair work, insulation and dielectric rigidity tests must be performed.
-
Page 6: Service Policy
PHI 2000 PURO/VAPORE 01 INTRODUCTION Service POLICY grid as used for coffee machines For IN WARRANTY repairs is mandatory to use the single components (not the assembly) avail- able in the exploded views of the coffee machines or of the specific components. If you find the information “SEE THE EXPLODED VIEW E..”... -
Page 7: External Machine Parts (Puro)
PHI 2000 PURO/VAPORE 01 INTRODUCTION 1.6.1 External machine parts (Puro) Control panel Espresso button Descaling light Warning light 2-cup light ’Water tank empty’ light On/off button with light Water tank Coffee spout 10 Drip tray cover 11 ’Drip tray full’ indicator... -
Page 8: External Machine Parts (Vapore)
PHI 2000 PURO/VAPORE 01 INTRODUCTION 1.6.2 External machine parts (Vapore) Control panel Steam icon Control dial Coffee bean icon Espresso button Regular coffee button Hot water icon Descaling light Warning light 10 2-cup light 11 ’Water tank empty’ light 12 On/off button with light... -
Page 9: Internal Machine Parts
PHI 2000 PURO/VAPORE 01 INTRODUCTION 1.6.3 Internal machine parts Coffee grinder motor Coffee grinder Boiler PW/CPU P.C.B. Pump Power cable connector Turbine Valve... -
Page 10: Technical Specifications
CHAPTER 2 TECHNICAL SPECIFICATIONS... -
Page 11: Machine Parameters And Performance
PHI 2000 PURO/VAPORE 02 TECHNICAL SPECIFICATION 2.1. Technical specifications Power supply and output: 230 V~ 50/60 Hz 1500 W - 120 V~ 60 Hz 1500 W - 100 V~ 50/60 Hz 1300 W Temperature monitoring: Variable resistor sensor (NTC) - transmits the value to the electronic P.C.B. -
Page 12: Specification For The Measurement Of The Coffee Products
PHI 2000 PURO/VAPORE 02 TECHNICAL SPECIFICATION 2.3. Specification for the measurement of the coffee products temperature. The temperature is influenced by the flow from the dispenser and stratification of temperatures in the glass. In order to consider these phenomena and to introduce measures that allow comparisons in controlled conditions, below guidelines must be followed: Conditions: a) Water temperature in tank: 23°C (+/-2°C). -
Page 13: Specification For The Measurement Of The Milk Products
PHI 2000 PURO/VAPORE 02 TECHNICAL SPECIFICATION 2.3.1. Specification for the measurement of the Milk products temperature. Milk evaluation To carry out the test, a partially skimmed UHT milk with a percentage of grease between 1.5-1.8% at a refrigerator temperature Trefr. (between 4 to 10°C) must be used. The milk product must be checked on a beaker of 250 ml of capability and with an inner diameter of 70mm, brewing 100gr of product. - Page 14 PHI 2000 PURO/VAPORE 02 TECHNICAL SPECIFICATION How to measure the milk cream. The temperature (Trefr or Tamb) of the milk doesn’t affect as much the test result on measuring the milk cream; by convection is assumed to always use milk at refrigerator temperature Trefr.. Manual systems (Pannarello) Pour 100cc.
-
Page 15: Machine Parameters And Performance
PHI 2000 PURO/VAPORE 02 TECHNICAL SPECIFICATION 2.4. Machine parameters and performance Minimum Default Maximum PRODUCT Programm. Programm. by Pro- amount amount amount by the user duction / Service QUANTITY (Puls.) (Puls.) (Puls.) Espresso button Regular coffee button Hot water Continues until the water supply has been exhausted (capacitive sensor) - Page 16 CHAPTER 3 BRIEF INSTRUCTIONS...
-
Page 17: Customer Menu Phi 2000 Puro
PHI 2000 PURO/VAPORE 03 BRIEF INSTRUCTIONS 3.1. Customer menu PHI 2000 PURO Control Panel Indications Description The on/off button lights up continuously. The machine is ready to brew coffee. The on/off button flashes slowly. The machine is warming up or performing a procedure. - Page 18 The lights flash slowly and simultaneously. The machine is out of order. Switch off the machine for 30 seconds, then switch it back on. Try this two or three times. If the machine does not reset, contact the Philips Consumer Care Centre in your country.
- Page 19 PHI 2000 PURO/VAPORE 03 BRIEF INSTRUCTIONS Problem Solution Make sure the small plug is inserted into the socket. Plug in and switch on the machine. The machine does not work. Make sure that the voltage indicated on the machine corre- sponds to the local mains voltage.
- Page 20 PHI 2000 PURO/VAPORE 03 BRIEF INSTRUCTIONS Problem Solution This is normal. To guarantee the perfect cup of coffee, the ma- chine uses water to rinse the internal circuit and brewing unit. Water ends up in the drip tray. Some of the water flows through the internal system directly into the drip tray.
-
Page 21: Customer Menu Phi 2000 Vapore
PHI 2000 PURO/VAPORE 03 BRIEF INSTRUCTIONS 3.2. Customer menu PHI 2000 VAPORE Control Panel Indications Description The on/off button lights up continuously. The machine is ready for use. The on/off button flashes slowly. The machine is warming up or performing a procedure. - Page 22 The lights flash slowly and simultaneously. The machine is out of order. Switch off the machine for 30 seconds, then switch it back on. Try this two or three times. If the machine does not reset, contact the Philips Consumer Care Centre in your country.
- Page 23 PHI 2000 PURO/VAPORE 03 BRIEF INSTRUCTIONS Problem Solution Make sure the small plug is inserted into the socket. Plug in and switch on the machine. The machine does not work. Make sure that the voltage indicated on the machine corre- sponds to the local mains voltage.
- Page 24 PHI 2000 PURO/VAPORE 03 BRIEF INSTRUCTIONS Problem Solution Adjust the ceramic coffee grinder to a finer setting. Brew a few cups of coffee to let the machine adjust itself to the The coffee is too weak. new grinding settings. Use a different type of coffee beans.
-
Page 25: Operation, Cleaning And Maintenance
PHI 2000 PURO/VAPORE 03 BRIEF INSTRUCTIONS 3.3. Operation, cleaning and maintenance Operating the machine Fill the water tank Fill the coffee bean container Switch on the appliance Press the coffee key Press once for one coffee; twice for two coffees. -
Page 26: Operating Logic
CHAPTER 4 OPERATING LOGIC... -
Page 27: Water Circuit
PHI 2000 PURO/VAPORE 04 OPERATING LOGIC 4.1. Water circuit • Traditional water system • Turbine – Amount of coffee dispensed into the cup • Reciprocating piston type pump (13 - 15 bar) • Compensation valve (opening pressure 16 - 18 bar) - Page 28 PHI 2000 PURO/VAPORE 04 OPERATING LOGIC • Traditional water system • Turbine – Amount of coffee dispensed into the cup • Reciprocating piston type pump (13 - 15 bar) • Compensation valve (opening pressure 16 - 18 bar) • Presblok valve – select coffee – hot water - steam...
-
Page 29: Control Ringnut And Valve
PHI 2000 PURO/VAPORE 04 OPERATING LOGIC 4.2. Control ringnut and valve DESCRIPTION Mushroom valve cap Spring for mushroom valve Mushroom valve support Mushroom valve Sealing OR When dispensing coffee the mushroom valve opens at 4 bar +/- 0.5 Manual opening when dispensing water... -
Page 30: Coffee Cycle Operating Diagram
PHI 2000 PURO/VAPORE 04 OPERATING LOGIC 4.3. Coffee cycle operating diagram Main switch ON START STOP Time Coffee grinder Pulses (Dosage) Heating approx. 45 secs. Pump Pump activity (turbine pulses) depending on the product quantity selected Brewing unit gear motor... -
Page 31: Single Microswitch
PHI 2000 PURO/VAPORE 04 OPERATING LOGIC 4.4. Single microswitch The gear motor is powered by a direct current motor that engages with the smaller double toothed wheel using a worm screw. The unit is mounted on the axle of the large gear wheel... -
Page 32: Coffee Grinder Function
PHI 2000 PURO/VAPORE 04 OPERATING LOGIC 4.6. Coffee grinder function Ceramic coffee grinder The coffee grinder is driven by a direct current motor (1) using a worm screw helicoidal wheel trans- mission (2). The worm screw (2) drives a plastic gear wheel (3), which turns the lower grinder (4) and the in- crement pin (5) There are two magnets (6) in the gear wheel;... -
Page 33: Dose Self-Learning (Sas)
PHI 2000 PURO/VAPORE 04 OPERATING LOGIC Dose self-learning (SAS) The aim of this function is to automatically regulate the average dose of ground coffee (SELF-LEARN- ING); this takes place with an algorithm based on the following values and setting by the user: 1. - Page 34 CHAPTER 5 SERVICE MODE...
-
Page 35: Test Mode Phi 2000 Puro
PHI 2000 PURO/VAPORE 05 SERVICE MODE Test Mode PHI 2000 Puro Double Coffee Led Descaling Led Activity Led ON/OFF button This document describes the test mode of XS PH Puro Machine. This application is used in order to test the machine in its mechanics and electronic components. - Page 36 PHI 2000 PURO/VAPORE 05 SERVICE MODE The user can switch the level by pressing the Button ON/OFF: As long as the button ON-OFF is pressing the machine show the level of the test: 1. Level 1 : Led DoubleCoffee ON (G), Led Calc-Clean OFF (O), Led Activity OFF (G), Led...
- Page 37 PHI 2000 PURO/VAPORE 05 SERVICE MODE Level 1 (Input, Led) LED INDICATION Start condition: NO BU, NO drag drawer, No tank, door open. Activity Descaling Alarm NoWater Double Coffee LED INDICATION Action by user Activity Descaling Alarm NoWater Double Coffee...
- Page 38 PHI 2000 PURO/VAPORE 05 SERVICE MODE Level 2 (Brewing unit) LED INDICATION Start condition: BU, drag drawer and door closed. Activity Descaling Alarm NoWater Double Coffee LED INDICATION Action by user Activity Descaling Alarm NoWater Double Coffee Press the coffee button to move the BU to work When the BU reaches the work position and the current is OK ⇒...
- Page 39 PHI 2000 PURO/VAPORE 05 SERVICE MODE Level 3 (Pump) LED INDICATION Start condition: Activity Descaling Alarm NoWater Double Coffee LED INDICATION Action by user Activity Descaling Alarm NoWater Double Coffee Press the coffee button to switch on the Pump The led activity flashing...
- Page 40 PHI 2000 PURO/VAPORE 05 SERVICE MODE Press the coffee button to switch on the Heater The user checkers that the absorbed current N.A. N.A. N.A. N.A. N.A. is OK ERROR: the absorbed current is KO; check the wiring from the heater to the CPU/POWER N.A.
-
Page 41: Test Mode Phi 2000 Vapore
PHI 2000 PURO/VAPORE 05 SERVICE MODE Test Mode PHI 2000 Vapore Double Coffee Led Short Coffee button Descaling Led ON/OFF button This document describes the test mode of XS PH Vapore machine. This application is used in order to test the machine in its mechanics and electronic components. - Page 42 PHI 2000 PURO/VAPORE 05 SERVICE MODE The user can switch the level by pressing the Button ON/OFF: As long as the button ON-OFF is pressing the machine show the level of the test: 1. Level 1 : Led DoubleCoffee ON (G), Led Calc-Clean OFF (O), Led Activity OFF (G), Led Alarm OFF (R), Led Water OFF (R) 2.
- Page 43 PHI 2000 PURO/VAPORE 05 SERVICE MODE Level 1 (Input, Led) LED INDICATION Start condition: NO BU, NO drag drawer, No tank, door open. Activity Descaling Alarm NoWater Double Coffee LED INDICATION Action by user Activity Descaling Alarm NoWater Double Coffee...
- Page 44 PHI 2000 PURO/VAPORE 05 SERVICE MODE LED INDICATION Action by user Activity Descaling Alarm NoWater Double Coffee Move the knob in the water position Switch on the activity led N.A. N.A. N.A. ERROR: The led activity remain off , check N.A.
- Page 45 PHI 2000 PURO/VAPORE 05 SERVICE MODE Press the long button to move the BU to home When the BU reaches the home position and the current is OK ⇒ the green led activity is switched on. ERROR: the BU moves to Work; check the N.A.
- Page 46 PHI 2000 PURO/VAPORE 05 SERVICE MODE Level 4 (Heater) LED INDICATION Start condition: Activity Descaling Alarm NoWater Double Coffee LED INDICATION Action by user Activity Descaling Alarm NoWater Double Coffee Check the temperature The red led General Alarm remains OFF ERROR: The temperature sensor is shorted or opened, the led GenAlarm switch ON;...
-
Page 47: Steam Out Phi 2000 Puro
05 SERVICE MODE Steam Out PHI 2000 PURO Steam-Out in Philips 2000 and XSmall Puro (without steam tube) This document describes the procedure of SteamOut in PHI 2000 Puro machine. This application is Proceed as follows for perform the Steam-out. -
Page 48: Steam Out Phi 2000 Vapore
PHI 2000 PURO/VAPORE 05 SERVICE MODE Steam Out PHI 2000 VAPORE This document describes the procedure of SteamOut in PHI 2000 Vapore machine. This application is used in order to empty the heater. The machine enters in SteamOut mode by moving the knob in the water position then pushing the COFFEE LONG button and then connecting the machine to the plug. -
Page 49: Service And Maintenance
CHAPTER 6 SERVICING AND MAINTENANCE... -
Page 50: Repair Flow
PHI 2000 PURO/VAPORE 06 SERVICING AND MAINTENANCE 6.1. Repair Flow Proces stap Saeco Action Intake Visual inspection (transport damage) take care for pictures Check Type/serialnumber Log all available accessory Diagnosis Check product for consumer complaint (NFF contact consu- mer) Opening machine Visual inspection check for loosen parts, leaking etc.. - Page 51 PHI 2000 PURO/VAPORE 06 SERVICING AND MAINTENANCE Noise Is the sound normal Crema Blow on the coffee. Does the crema come back together Is the crema colour correct (Hazelnut) Temperature Is the coffee temperature within spec Grinder Is the grinder noise normal...
-
Page 52: Disassembly
CHAPTER 7 DISASSEMBLY... -
Page 53: Outer Shell
PHI 2000 PURO/VAPORE 07 DISASSEMBLY 7.1. Outer shell Remove the dreg drawer, water tank, mush- The USA type is inserted a grid Protective hand room finger protection device on the coffee to replace the mushroom finger protection container lid and coffee container, then loosen the screws shown. -
Page 54: Kyb Interface
PHI 2000 PURO/VAPORE 07 DISASSEMBLY Disassembling the hatch 1) Detach the hatch by pressing the fastenings. 2) Lift the fastenings shown. 3) Slot for pins. 7.2. KYB interface Remove Loosen the screws shown, Slide out the control Remove the flat cable and LHS light guide. -
Page 55: The Boiler Pin
PHI 2000 PURO/VAPORE 07 DISASSEMBLY PHI 2000 Puro To remove the coffee keys from the control keypad, detach them from the anchoring device on the back of it and take them out. Disassembling the power P.C.B. To reprogram the P.C.B. connect the S.S.C 1) Loosen the screw shown and remove the P.C.B. -
Page 56: Gearmotor
PHI 2000 PURO/VAPORE 07 DISASSEMBLY 7.5. Gearmotor 1) Loosen the screws holding the boiler pin in place, remove it and loosen the other screws shown 2) The following are located inside the compartment protected by the casing: - Brew drive (A) with gears (B) and (C) for transmission and timing of the dispensing head. -
Page 57: The Boiler
PHI 2000 PURO/VAPORE 07 DISASSEMBLY 7.6. The boiler 1) Loosen the screws shown. 2) Loosen the screw and remove the plastic sup- port. 7.7. The flow selector faucet Loosen screw Remove the boiler. Loosen the screw and remove the remove the boiler pin. -
Page 58: The Pump And Turbine
PHI 2000 PURO/VAPORE 07 DISASSEMBLY 7.8. The pump and turbine Slide out the support as shown. Remove connection , slide out the silicone hoses. To prevent annoying vibrations when reassembling the pump, take extra care when positioning spring At this point, the turbine may also be removed from its recess. -
Page 59: Grinder Adjustment/Assembly And Disassembly
PHI 2000 PURO/VAPORE 07 DISASSEMBLY 7.10. Grinder adjustment/assembly and disassembly 1) To remove the upper grinder support, using a hex key push down and turn clockwise to release the grinder support from the bayonet coupling 2) To remove the grinder blade from the upper... -
Page 60: Oetiker Clamps Assembly And Disassembly
PHI 2000 PURO/VAPORE 07 DISASSEMBLY 7.11. OETIKER clamps assembly and disassembly 1) Boiler connection 2) Other connections Replacing the hoses 1) Use a suitable pair of pliers to remove the clamp (as illustrated) 2) Tighten the clamp as illustrated... -
Page 61: Notes
CHAPTER 8 NOTES... - Page 62 PHI 2000 PURO/VAPORE 08 NOTES...
-
Page 63: Water Circuit Diagram
CHAPTER 9 WATER CIRCUIT DIAGRAM... -
Page 64: Water Circuit Diagram Puro
PHI 2000 PURO/VAPORE 09 WATER CIRCUIT DIAGRAM 9.1. Water circuit diagram Puro Boiler Pin... -
Page 65: Water Circuit Diagram Vapore
PHI 2000 PURO/VAPORE 09 WATER CIRCUIT DIAGRAM 9.2. Water circuit diagram Vapore Boiler Pin... -
Page 66: Electrical Diagram
CHAPTER 10 ELECTRICAL DIAGRAM... -
Page 67: Electrical Diagram Phi 2000 Puro/Vapore
PHI 2000 PURO/VAPORE 10 ELECTRICAL DIAGRAM 10.1. Electrical diagram PHI 2000 Puro/Vapore...