
Related Manuals for Xterra MBX2500


Summary of Contents for Xterra MBX2500
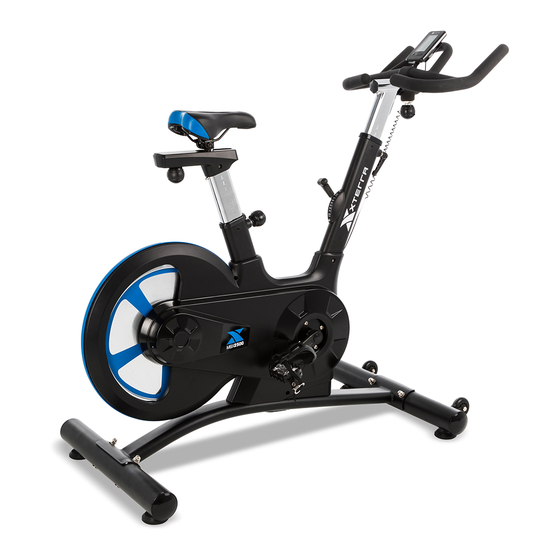
- Page 1 MBX2500 INDOOR CYCLE OWNER’S MANUAL PLEASE CAREFULLY READ THIS ENTIRE MANUAL BEFORE OPERATING YOUR NEW INDOOR CYCLE...
-
Page 2: Table Of Contents
Table Of Contents Product Registration Important Safety Instructions Important Operation Instructions MBX2500 Assembly Instructions Operation of Your New Indoor Cycle Troubleshooting Manufacturer’s Limited Warranty ATTENTION THIS INDOOR CYCLE IS INTENDED FOR RESIDENTIAL USE ONLY AND IS WARRANTED FOR THE APPLICATION. ANY OTHER APPLICATION VOIDS THIS... -
Page 3: Product Registration
XTERRA Fitness will do all we can to make your ownership experience as pleasant as possible for many years to come. -
Page 4: Important Safety Instructions
Failure to follow all guidelines may compromise the effectiveness of the exercise experience, expose yourself (and possibly others) to injury, and reduce the longevity of the equipment. SAVE THESE INSTRUCTIONS - THINK SAFETY! MBX2500 Indoor Cycle... -
Page 5: Important Operation Instructions
5. Proper installation and regular maintenance are required to ensure user’s safety. Maintenance is the sole responsibility of the owner. MBX2500 Indoor Cycle... -
Page 6: Mbx2500 Assembly Instructions
MBX2500 Assembly Pack Checklist Part No. Description Q’TY Carriage Bolt M10*90 Curved Washer φ10 Domed nut M10 Ball Type Quick Release Knob L Type Quick Release Knob Ball Type Knob Cross Head Spanner Spanner Inner Hexagon Spanner MBX2500 Indoor Cycle... - Page 7 MBX2500 Assembly Instructions Part No. Description Q’TY Left Pedal Right Pedal Rear Stabilizer 10/11/12/21/78 Seat Post Assembly Seat Front Stabilizer Main Frame Handlebar Post Handlebar Computer Hardware Pack User Manual MBX2500 Indoor Cycle...
-
Page 8: Seat Post
2. Insert the seat post (10) into the Main frame (16). Secure using the ball type quick release knob (7). Note: The seat can be horizontally and vertically adjustable after your cycle is fully assembled. MBX2500 Indoor Cycle... - Page 9 4. Attach computer (72) onto the computer bracket and secure using 4 screws (73) which are pre-assembled on the backside of computer (72). Attach sensor wire (74) to computer (72). Note: The handlebar post can be vertically adjustable and the handlebar can be horizontal adjusted after your cycle is fully assembled. MBX2500 Indoor Cycle...
- Page 10 2. Attach the right pedal (1R) to the right crank (36). Note: The right pedal should be threaded on clockwise and the left pedal on counter-clockwise. CHECK ALL BOLTS AND NUTS ARE TIGHTENED BEFORE USING THE MACHINE. MBX2500 Indoor Cycle...
- Page 11 • Once proper seat and handlebar height is selected, make sure to tighten securely for a solid feel. Adjusting the Tension Push the tension lever (63) up or down to adjust the tension. MBX2500 Indoor Cycle...
-
Page 12: Operation Of Your New Indoor Cycle
It can be set by the user or automatically count up. CALORIES: You can press “SET” button to set target calories between 0 to 9990 for count down function. It can be set by the user or automatically count up. MBX2500 Indoor Cycle... -
Page 13: Console Operation
You may press any button to have the computer to restart working, the original value will retain.(If re-installing batteries, the original value will reset.) • If the computer displays abnormally, please re-install battery and try again • Battery Spec: 3V CR2032 (1PC). MBX2500 Indoor Cycle... - Page 14 3. Install a new CR2032 battery by tilting the battery slightly to its side and slide it in. (positive+ at upper side and negative- at down side) 4. To change the battery, gently hold the clip on the side and the battery will pop out. A set of tweezers may be helpful. MBX2500 Indoor Cycle...
- Page 15 3. Loosen the quick release under the handlebar and slide the handlebar forward or backward as desired. A suitable forward/back position should allow the rider to comfortably grasp the handlebar with a slight bend at the elbow. 4. Tighten the quick release to secure the handlebar assembly. MBX2500 Indoor Cycle...
-
Page 16: Basic Operation
2. To apply the brake, press down on the tension lever to the maximum resistance setting. 3. Before dismounting increase resistance and let flywheel come to a stop. MBX2500 Indoor Cycle... -
Page 17: Troubleshooting
Do not use silicone-based lubricants 1. Use of lubricants or cleaning solutions other than those so specified will result in diminished performance and a shorter life span for that part. MBX2500 Indoor Cycle... -
Page 18: Manufacturer's Limited Warranty
Effective September 05, 2017 - INDOOR CYCLE LIMITED WARRANTY XTERRA Fitness Inc. warrants all its home use indoor cycle parts for a period of time listed below, from the date of retail sale, as determined by a sales receipt or in the absence of a sales receipt, eighteen (18) months from the original factory shipping date. XTERRA Fitness’s responsibilities include providing new or remanufactured parts, at XTERRA Fitness’s option, and technical support to our independent... - Page 19 MBX2500 Indoor Cycle...
- Page 20 3000 Nestle Road Jonesboro, AR 72401 - Phone:870-336-4286 - Fax:870-935-7611 www.xterrafitness.com ©2017 All RIghts Reserved. MBX2500 Owner’s Manual...
Need help?
Do you have a question about the MBX2500 and is the answer not in the manual?
Questions and answers