Table of Contents
Advertisement
Advertisement
Table of Contents

Subscribe to Our Youtube Channel
Related Manuals for Rae QRAE 3


Summary of Contents for Rae QRAE 3
- Page 1 Wireless Personal Four-Gas Monitors...
-
Page 2: Product Registration
By registering your product, you can: Receive notification of product upgrades or enhancements Be alerted to Training classes in your area Take advantage of RAE Systems special offers and promotions © 2015 RAE Systems by Honeywell... -
Page 3: Table Of Contents
3.3. Menus ........................9 4. Wireless Control And Submenus ..................9 5. Battery ........................... 10 6. Turning The QRAE 3 On And Off ................12 7. Modes Of Operation ..................... 14 8. Programming......................... 15 8.1. Enter Programming In Basic Mode ..............15 8.2. - Page 4 CAUTION! Only use RAE Systems battery pack P/N G02-3004-000 (Li-ion, rechargeable) Charge the instrument Li-ion battery using the appropriate RAE Systems charger and only outside hazardous areas Use of non-RAE Systems components will void the warranty and can compromise the safe performance of this product ...
- Page 5 CAUTION: BEFORE EACH DAY’S USAGE, SENSITIVITY OF THE COMBUSTIBLE GAS SENSOR MUST BE TESTED ON A KNOWN CONCENTRATION OF METHANE GAS EQUIVALENT TO 20 TO 50% OF FULL- SCALE CONCENTRATION. ACCURACY MUST BE WITHIN 0 AND +20% OF ACTUAL. ACCURACY MAY BE CORRECTED BY CALIBRATION PROCEDURE. ATTENTION: AVANT CHAQUE UTILISATION JOURNALIERE VERIFIER LA SENSIBILITE AVEC UNE CONCENTRATION CONNUE DE METHANE EQUIVALENTE A 20-50% DE LA PLEINE ECHELLE.
- Page 6 Product Marking The QRAE 3 (PGM-25XX/D) is certified by IECEx, ATEX and CSA for US and Canada as intrinsically safe. The PGM-25XX/D contains the following marking: RAE SYSTEMS 3775 N. 1 . St., San Jose CA 95134, USA PGM-25XX/D Type PGM-25XX/ PGM-25XXD Serial No/barcode: XXXX-XXXX-XX IECEx CSA 13.0029X...
- Page 7 Sensor Specifications, Cross-Sensitivities, And Calibration Information For information on sensor specifications, cross-sensitivities, and calibration information, refer to RAE Systems Technical Note TN-114: Sensor Specifications And Cross-Sensitivities (available for free download from www.raesystems.com). All specifications presented in this Technical Note reflect the performance of standalone sensors. Actual sensor characteristics may differ when the sensor is installed in different instruments.
-
Page 8: Standard Contents
1. Standard Contents The QRAE 3 is available in various user-specified configurations, each with the accessories shown below. In addition to the instrument, the following are included: Item Part Number Travel charger M02-3005-000 Travel charger for barrier charger (for ATEX/IECEx version) -
Page 9: General Information
Man Down Alarm functionality in one highly portable instrument. QRAE 3 monitors are available in pumped and diffusion versions and offer a selection of field-replaceable electrochemical and combustible sensors to fit a wide variety of applications. -
Page 10: User Interface
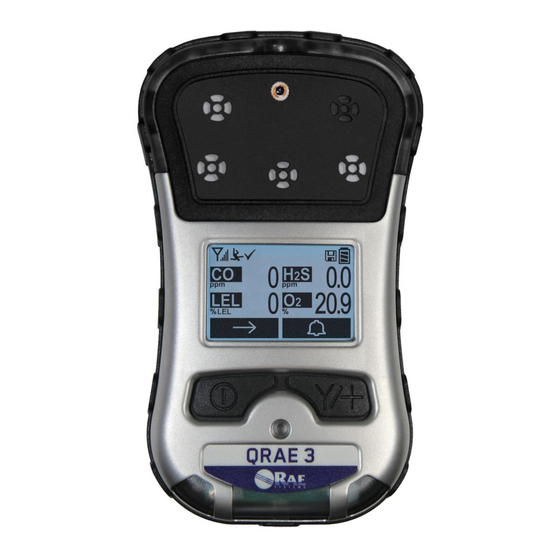
3. User Interface The QRAE 3’s user interface consists of the display, LEDs, an alarm buzzer, and two keys. 3.1. Display Overview The LCD display provides visual feedback that includes the sensor types, readings, battery condition, and other functions. Calibration and bump test... -
Page 11: Lcd Flip
The QRAE 3 senses its vertical/horizontal orientation, and can automatically flip the display180 degrees, making it easy to read if the QRAE 3 is upside down. (You can turn this feature on or off in Programming Mode, under “Monitor.”) As the QRAE 3 is tilted, the sensor detects its orientation and inverts the screen when it passes its horizontal position. -
Page 12: Screen Display For Various Numbers Of Active Sensors
3.2. Screen Display For Various Numbers Of Active Sensors The QRAE 3 family of instruments can accommodate from one to four sensors. In order to maximize readability and the amount of information shown, the display is automatically reconfigured, according to the number and types of sensors in the QRAE 3. -
Page 13: Battery
5. Battery Always fully charge the battery before using the QRAE 3. Its Li-ion battery is charged by placing the QRAE 3 in its Travel Charger. Contacts on the bottom of the instrument meet the Travel Charger’s contact pins, transferring power. -
Page 14: Replacing The Battery
2. Remove the cover plate by tilting up the end closest to the belt clip and lifting off. 3. Slide the QRAE 3’s battery out of its compartment and into your hand. 4. Press a fully charged battery into the battery compartment and place it in the instrument. Pay careful attention to the direction of the battery so that the electrical contacts are on the bottom. -
Page 15: Turning The Qrae 3 On And Off
Policy Enforcement settings Then the QRAE 3’s main reading screen appears. It takes 1 to 2 minutes for sensors to show a reading, so if any have not warmed up by the time the main screen is shown, you will see “- -” instead of a numerical value until the sensor provides data (typically less than 2 minutes). - Page 16 It is possible that any or all of the alarms have been turned off. If all of the alarms are turned on, but one or more of them (buzzer, LED lights, or vibration alarm) does not respond to this test, do not use the instrument. Contact your RAE Systems distributor for technical support. 6.4. Pump Status IMPORTANT! During operation, make sure the probe inlet and the gas outlet are free of obstructions.
-
Page 17: Modes Of Operation
Programming Mode by unauthorized personnel. 7.2. Advanced User Mode In Advanced User Mode, there are no access restrictions (you do not need a password), and the QRAE 3 provides the indications and data you need most for typical monitoring applications. -
Page 18: Programming
8. Programming The menu in Programming Mode is to adjust settings, calibrate sensors, and initiate communication with a computer. It has the following submenus: Calibration Measurement Alarms Datalog Monitor Wireless 8.1. Enter Programming In Basic Mode 1. - Page 19 Once you enter Programming Mode, the Calibration screen is shown. Press [MODE] to step through the programming screens. To enter a menu and view or edit parameters in its submenus, press [Y/+].
-
Page 20: Enter Programming In Advanced Mode
8.2. Enter Programming In Advanced Mode 1. To enter Programming Mode, press and hold [MODE] and [Y/+] until you see the Calibration screen. No password is necessary in Advanced Mode. 2. Press [MODE] to step through the programming screens. To enter a menu and view or edit parameters in its submenus, press [Y/+]. -
Page 21: Menus And Submenus
There are a few basic ways to edit parameters, select sensors, and perform other activities in the QRAE 3. The actions performed by pressing keys always match 1-to-1 with the boxes along the bottom of the display and the two keys. Some parameters are edited by scrolling and selecting individual items (black bars behind white text act as highlighters). -
Page 22: Calibration
8.3.2.1. Multi Bump Depending on the configuration of your QRAE 3 and the span gas you have, you can perform a bump test simultaneously on multiple sensors. The selected sensors and their values are shown on the screen. With calibration gas connected to the instrument, start a multiple bump test by pressing [Y/+]. - Page 23 (target gas). Changing the gas requires selecting the right calibration reference gas in the QRAE 3. Choose the sensor, and then select from the list of reference gases. Select from a Custom Gases list that you create or the built-in Gas Library for your sensor (taken from RAE Systems’...
-
Page 24: Measurement
With “Save” highlighted, press [Y/+] to save your choice. The gas is saved, and then the screen briefly shows the Correction Factor applied to that gas by the QRAE 3. Note: The Gas Library contains many gases. To rapidly scroll through the list, press and hold [Y/+]. - Page 25 Note: The LEL Measurement Gas option is only available if an LEL sensor is installed. The QRAE 3 has extensive onboard gas libraries for combustible gases that you can use to configure your instrument to automatically apply the appropriate correction factors and produce readings in the units of the desired combustible gas.
-
Page 26: Alarm Settings
Man Down Alarm is based on the premise that if the instrument is motionless when it is not supposed to be, something wrong may be happening to its user. If that is the case, the QRAE 3 not only goes into alarm locally on the instrument, but also remotely, over the RAE Systems Dedicated Wireless Network, to notify people in the vicinity, as well as remote safety officers at a command center, that a person is down, so that help can be dispatched quickly. -
Page 27: Datalog
When the Man Down feature is on and there is no gas alarm, the QRAE 3 senses that it is motionless for the amount of time set in the “Motionless Time” parameter. If the instrument is not moved during that time, then a pre-alarm is activated to alert the user, and shows the “Are You OK?”... -
Page 28: Monitor
8.3.4.6. Action When Full When the internal datalog memory is full, the QRAE 3 can either stop collecting data (Stop when full) or go back to the beginning and overwrite the data from the first entry, second entry, etc. (Wraparound). -
Page 29: Date And Time
8.3.5.3. Pump Speed If the QRAE 3 is equipped with a pump, the pump can operate at two speeds, high and low. Running at low speed is quieter, extends pump lifespan, and conserves a small amount of power. There is almost no difference in sampling accuracy. Note: High speed should be used for exotic sensors and for taking samples via a hose from a long distance. -
Page 30: Wireless
Programming Menu when in Advanced User Mode. 8.3.5.7. Zero At Start If your QRAE 3 has been configured to perform a zero (fresh air) calibration upon startup, called Zero At Start, then the startup routine is interrupted so that you can perform a fresh air calibration. - Page 31 8.3.6.3. PAN ID The QRAE 3 and any other devices that you want to connect wirelessly must have the same PAN ID. Note: When Roaming is on, “PAN ID” is not shown in the Wireless menu. You must turn off Roaming to make the “PAN ID”...
-
Page 32: Factory Reset
8.3.6.7. Off Network Alarm If you would like the QRAE 3 to notify you when it loses connection with a network, turn this on. 1. Choose between “On” and “Off” by pressing [MODE]. 2. Select the highlighted state by pressing [Y/+]. -
Page 33: Policy Enforcement
Make sure the AC adapter is connected and that a USB cable is connected to the Travel Charger and a computer running ProRAE Studio II. 1. Turn on the QRAE 3. Allow the system to start up and go through its startup routine. 2. Press [MODE] until “Enter Communications Mode?” is displayed. - Page 34 The Policy Enforcement pane is shown: You can select “Must Calibrate” and/or “Must Bump” and then set whether the user must perform the selected operation in order to use the instrument. 13. Once you have made your selections in ProRAE Studio II, you must upload the changes to the instrument.
- Page 35 Policy Enforcement settings: 1. Use a USB cable to connect the QRAE 3 in its Travel Charger to a computer running ProRAE Studio II. 2. Enter Diagnostic Mode on the QRAE 3 (with the instrument turned off, press and hold [Y/+] and [MODE] until it starts up.
-
Page 36: Calibration And Testing
The QRAE 3 multi-gas detector must be calibrated if it does not pass a bump test, or at least once every 180 days, depending on use and sensor exposure to poisons and contaminants. -
Page 37: Bump (Functional) Testing
T calibration tube (pumped models only). 1. Turn on your QRAE 3 by pressing and holding the [MODE] key, and allow the instrument to boot up fully until the main measurement screen with sensor names and readings is shown. -
Page 38: Zero Calibration
This operation sets the zero point of the sensor calibration curve for clean air. It should be performed before other calibrations. Note: If you use a zero air cylinder, you must use the QRAE 3 Calibration Adapter (and a T calibration tube if the instrument has a pump). Using a calibration adapter is not necessary for calibration in fresh air. -
Page 39: Qrae 3 Diffusion Model
10.4.2. QRAE 3 Diffusion Model Because there is no single inlet on the diffusion (non-pumped) version of the QRAE 3, a Calibration Adapter (calibration cap for diffusion models: P/N M02-3009-000; calibration tube for diffusion models: P/N M03-3010-000) is used for supplying calibration gas to all sensors at one time. -
Page 40: Multi-Sensor Span Calibration
QRAE 3. 1. Start the flow of calibration gas. 2. Attach the calibration adapter and gas to the QRAE 3. 3. Press [Y/+] to begin calibration. A countdown screen is shown. You can abort the calibration at any time during the countdown by pressing [MODE]. -
Page 41: Datalog Transfer, Monitor Configuration, And Firmware Upgrades Via Computer
Datalogs can be downloaded from the QRAE 3 to a computer, and firmware updates can be uploaded to the QRAE 3 via the USB port on the Travel Charger. Use the included Mini B USB (5-pin)-to-USB cable to connect the Travel Charger to a computer running ProRAE Studio II (version 1.7.0 or higher). -
Page 42: Maintenance
WARNING! Do not replace sensors in hazardous locations. All sensors are located inside the sensor compartment in the upper half of the QRAE 3. They are accessed by removing the four screws in the top portion and then turning the instrument over and lifting off the sensor cover. - Page 43 Sensor Locations IMPORTANT! The current QRAE 3 model number is PGM-25XX (“D” indicates Diffusion). Sensors must be placed in the indicated sockets. A diffusion (“D”) instrument cannot be changed to a pumped version, nor can a pumped version be converted to a diffusion version.
- Page 44 Changing The QRAE 3 Sensor Configuration IMPORTANT! The following table lists sensor slot allocations on the printed circuit board inside the QRAE 3. When changing sensors, be careful to make sure each sensor is in the correct slot and that the pins are not bent or incorrectly placed.
- Page 45 1. Connection: a. Connect QRAE 3 unit to PC through the QRAE 3 Travel Charger. b. Set the QRAE 3 into PC Communication mode. c. Start ProRAE Studio II on the PC and go into Setup >> Sensor Maintenance to do the...
- Page 46 2. The locations of 3R LEL sensor & 4R Liquid O sensor are fixed to Slot 1 & Slot 3. So after changing to a new sensor, you must change the sensor S/N (serial number) through ProRAE Studio II. Important: You only need to input last 10 digits of the sensor S/N. It is not necessary to input “S0”.
- Page 47 3. Slot 2 & Slot 4 accommodate 3R EC (electrochemical) sensors. These slots support Group P EC sensors in an updated PGM-2500/D. The drop-down list is used to set the sensor ID after installing a new sensor. You must also input last all 10 digits of the S/N for the new sensor. Note: For an updated PGM-2560/D, Slot 2 only supports Group N sensors, and not Group P sensors.
- Page 48 You must click “OK” to confirm the changes: 5. ProRAE Studio II sends an order to restart the QRAE 3, to confirm all firmware changes. 6. Turn on the QRAE 3 to make sure that unit is showing the correct sensor configuration.
-
Page 49: Alarms Overview
12.5. Replacing The Pump If your QRAE 3 has a pump and it requires replacement, follow these steps. Make sure the battery is removed before proceeding. 1. Remove the rear cover. 2. The pump is held in place by a metal bracket and two Philips screws. Remove the two screws. - Page 50 13.2. Changing The Alarm Mode Your choices are Auto Reset and Latched. A latched alarm stays on until you acknowledge the alarm by pressing a key. An auto-reset alarm turns off when the condition that set off the alarm is no longer present (for instance, a high H2S reading that exceeds the preset threshold and triggers an alarm, but then lowers below that threshold, turning the alarm off).
- Page 51 Reading Lowest No LED flash Notes “Negative” means that the reading is below zero. “Network Lost” means that the QRAE 3 has lost wireless connectivity with its network. “Network Joined” means that the QRAE 3 has joined a wireless network.
- Page 52 General Alarms Message Condition Alarm Indications HIGH Gas exceeds “High Alarm” limit 3 beeps/flashes per second Gas exceeds sensor’s measurement range 3 beeps/flashes per second Gas exceeds electronic circuit’s maximum 3 beeps/flashes per second range Gas exceeds “Low Alarm” limit* 2 beeps/flashes per second Gas exceeds “TWA”...
-
Page 53: Troubleshooting
If you need replacement parts, please contact an authorized RAE Systems distributor. 15. Diagnostic Mode In Diagnostic Mode, the QRAE 3 provides raw counts for sensor, battery, and other readings, as well as a list of installed sensors and information about them (expiration date, serial number, etc.). - Page 54 “Product Model” screen. 15.2. Exiting Diagnostic Mode 1. Turn off the QRAE 3 by pressing and holding [MODE]. There will be a standard shutoff countdown. 2. When the instrument shuts off, you will be alerted. Release your finger.
-
Page 55: Specifications
EchoView Host & QRAE 3: Line of sight >200m (650 ft), receiving data >80% (Typical) ProRAE Guardian & Mesh Reader & QRAE 3: Line of sight >200m (650 ft), receiving data >80% ProRAE Guardian & RAELink3 & QRAE 3: Line of sight >100m (330 ft), receiving... - Page 56 Instrument Specifications continued EM Immunity EMI and EDS test: 100MHz to 1GHz 30V/m, no alarm Contact: ±4kV, Air: ±8kV, no alarm Operating -4° to 122° F (-20° to 50° C) Temperature Humidity 0% to 95% relative humidity (non-condensing) Pumped: IP-65 IP Rating Diffusion: IP-67 Hazardous...
-
Page 57: Sensor Specifications
Nitrogen Dioxide (NO 0 to 50 ppm 0.1 ppm * Only use the liquid electrolyte O sensor in the QRAE 3. Use of other types can degrade performance. All specifications are subject to change without notice. LEL Range, Resolution & Response Time... - Page 58 Year Of Manufacture To identify the year of manufacture, refer to the serial number of the instrument. The second to last digit in the serial number indicates the year of manufacture. For example, “M” indicates the manufacturing year is 2010. First digit Year 2008...
-
Page 59: Controlled Part Of The Manual For Pgm-25Xx/D
CAUTION! Only use RAE Systems battery pack P/N G02-3004-000 (Li-ion, rechargeable) Charge the instrument Li-ion battery using the appropriate RAE Systems charger and only outside hazardous areas Use of non-RAE Systems components will void the warranty and can compromise the safe performance of this product ... - Page 60 WARNINGS: ONLY THE COMBUSTIBLE GAS DETECTION PORTION OF THIS INSTRUMENT HAS BEEN ASSESSED FOR PERFORMANCE. UNIQUMENT, LA PORTION POUR DÉTECTOR LES GAZ COMBUSTIBLES DE CET INSTRUMENT A ÉTÉ ÉVALUÉE. CAUTION: BEFORE EACH DAY’S USAGE, SENSITIVITY OF THE COMBUSTIBLE GAS SENSOR MUST BE TESTED ON A KNOWN CONCENTRATION OF METHANE GAS EQUIVALENT TO 20 TO 50% OF FULL- SCALE CONCENTRATION.
- Page 61 PGM-25XX/D Marking The QRAE 3 (PGM-25XX/D) is certified by IECEx, ATEX and CSA for US and Canada as intrinsically safe. The PGM-25XX/D is certified by IECEx, ATEX and CSA for US and Canada as intrinsically safe. The PGM-25XX/D contains the following marking: RAE SYSTEMS 3775 N.
- Page 62 Operation Area and Conditions Hazardous Areas Classified by Zones PGM-25XX/D is intended to be used in hazardous areas classified Zone 0, Zone 1 or Zone 2, within the T4 temperature code range, where gases of explosion groups IIA, IIB or IIC may be present. For North America and Canada, the equipment can further be used in Class I, Zone 0 in the same T4 temperature range .
- Page 63 Combustible (LEL) Sensor Performance Specifications Range 0 to 100% LEL Resolution Response Time: < 30 sec. Caution: Refer to RAE Systems Technical Note TN-114 for LEL sensor cross-sensitivities. Refer to RAE Systems Technical Note TN-144 for LEL sensor poisoning.
- Page 64 Turning the PGM-25XX/D On With the instrument turned off, press and hold the [MODE] key for 3 seconds, and then release. The startup process begins. The instrument performs a set of self-tests, while displaying information about instrument’s settings, configuration, due dates for calibration and bump tests, etc.
- Page 65 Alarms Summary Message Condition Alarm Indications HIGH Gas exceeds “High Alarm” limit 3 beeps/flashes per second Gas exceeds sensor’s measurement 3 beeps/flashes range per second Gas exceeds electronic circuit’s 3 beeps/flashes maximum range per second Gas exceeds “Low Alarm” limit* 2 beeps/flashes per second Gas exceeds “TWA”...
- Page 66 Alarm Mode Bump Testing and Calibration RAE Systems recommends that a bump test be performed on the PGM-25XX/D prior to each use. A bump test is defined as a brief exposure of the monitor to the calibration gas to confirm that the sensors respond to gas and the alarms are functional and enabled.
- Page 67 Diffusion Models (PGM-25XXD) RAE Systems’ provided calibration cap should be installed on the diffusion versions of the instrument when it is being bump tested or calibrated. A constant-flow regulator with flow rates from 500cc/min to 1000cc/min should be used.
-
Page 68: Battery Replacement
Zero Calibration The instrument should be zero calibrated in clean ambient air with 20.9% oxygen. A zero calibration should precede a span calibration. Changing Span Value Use this function to change the gas concentration to be used for bump testing or span calibration. - Page 69 Troubleshooting Problem Possible Reasons & Solutions Cannot turn on Defective charging circuit. Defective battery. Reason: instrument after Replace battery pack or charger. Try another charger or Solution: charging the battery. battery Lost password Call Technical Support at +1 408-952-8461 or toll- Solution: free at +1 888-723-4800 Buzzer...
-
Page 70: Technical Support
18. Technical Support To contact RAE Systems Technical Support: Monday through Friday, 7:00AM to 5:00PM Pacific (US) Time Phone (toll-free): +1 877-723-2878 Phone: +1 408-952-8200 Fax: +1 408-952-8480 Email: RAE-tech@honeywell.com Outside the Americas: E-Mail: HAexpert@honeywell.com Honeywell Analytics Ltd. Honeywell Analytics 4 Stinsford Road ZAC Athélia 4 –...
Need help?
Do you have a question about the QRAE 3 and is the answer not in the manual?
Questions and answers