Table of Contents
Advertisement
READ AND FOLLOW ALL INSTALLATION INSTRUCTIONS CAREFULLY!
FAILURE TO DO SO MAY RESULT IN PERSONAL INJURY OR PROPERTY DAMAGE!
Before Installation:
•
Install only on a properly operating and balanced door. A door that is operating improperly could cause severe
injury. Have qualified service personnel make repairs to cables, spring assemblies, and other hardware before
installing the operator.
•
Remove all pull ropes and remove, or make inoperative, all locks (unless mechanically and/or electrically
interlocked to the power unit) that are connected to the door before installing the operator.
•
If the operator has exposed moving parts, ensure it is out of reach from pedestrians.
•
Do not connect the door operator to the source of power until instructed to do so. Connection of the high voltage
supply should be done by a qualified professional and within the guidelines of the enforced local electrical codes.
•
For products having a manual release, instruct the end user on the operation of the manual release.
•
The technician must test all safety features before turning over the equipment to the customer.
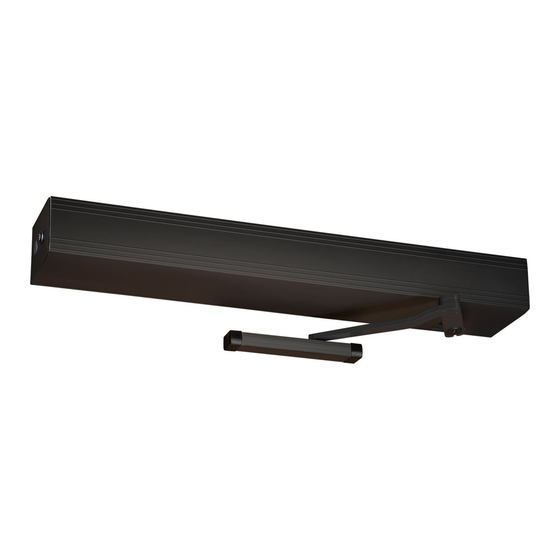
DITEC HA8-LP LOW ENERGY
SWING OPERATOR
Installation & Instruction Manual
Entrematic Canada Inc.
Toll Free: 1-877-348-6837
info.ditec.ca@entrematic.com
www.ditecentrematic.ca
Entrematic USA Inc.
Toll Free: 1-866-901-4284
info.ditec.us@entrematic.com
www.ditecentrematic.us
HA8-LP Manual V. 1.3
Advertisement
Table of Contents

Related Manuals for Entrematic Ditec HA8 LP


Summary of Contents for Entrematic Ditec HA8 LP
- Page 1 For products having a manual release, instruct the end user on the operation of the manual release. • The technician must test all safety features before turning over the equipment to the customer. Entrematic Canada Inc. Entrematic USA Inc. Toll Free: 1-877-348-6837 Toll Free: 1-866-901-4284 info.ditec.ca@entrematic.com...
-
Page 3: Table Of Contents
4.2 Spring Tension Adjustment 11.1 Additional Components: Sensor(s) / Knowing Act Device 5.0 TESTING WITH OBSTRUCTION 11.2 Header Cover Installation 11.3 Safety Decals 12.0 MANUFACTURER INFORMATION Entrematic Canada Inc. Entrematic USA Inc. Pg. 3 Toll Free: 1-877-348-6837 Toll Free: 1-866-901-4284 info.ditec.ca@entrematic.com info.ditec.us@entrematic.com HA8-LP Manual V. -
Page 4: Before Installation
AAADM Stickers (Section 4.0 - 8.0) (Section 11.0) (Section 11.2) Step 10: Install Sensor(s) / Knowing Act Devices (Section 11.1) Entrematic Canada Inc. Entrematic USA Inc. Pg. 4 Toll Free: 1-877-348-6837 Toll Free: 1-866-901-4284 info.ditec.ca@entrematic.com info.ditec.us@entrematic.com HA8-LP Manual V. 1.3 www.ditecentrematic.ca... - Page 5 1.0 BEFORE INSTALLATION Completed/Typical Automatic Door Installation Entrematic Canada Inc. Entrematic USA Inc. Pg. 5 Toll Free: 1-877-348-6837 Toll Free: 1-866-901-4284 info.ditec.ca@entrematic.com info.ditec.us@entrematic.com HA8-LP Manual V. 1.3 www.ditecentrematic.ca www.ditecentrematic.us...
-
Page 6: Replacement Parts
Switch W5-508B Extended Z-Arm RH - Black RS-25-24 W5-507B Extended Z-Arm LH - Black Power Supply Kit PWRKIT Power Supply Kit Entrematic Canada Inc. Entrematic USA Inc. Pg. 6 Toll Free: 1-877-348-6837 Toll Free: 1-866-901-4284 info.ditec.ca@entrematic.com info.ditec.us@entrematic.com HA8-LP Manual V. 1.3 www.ditecentrematic.ca... -
Page 7: General Information
• Report any incorrect items to the general contractor immediately. NO CLAIMS FOR SHORTAGE WILL BE ALLOWED UNLESS REPORTED WITHIN 24 HOURS OF RECEIPT OF SHIPMENT. Entrematic Canada Inc. Entrematic USA Inc. Pg. 7 Toll Free: 1-877-348-6837 Toll Free: 1-866-901-4284 info.ditec.ca@entrematic.com... -
Page 8: Technical Specifications & Required Tools
To avoid bodily injury, material damage and malfunction of the product, the instructions contained in this manual must be strictly observed during installation, adjustment, repairs and service etc. Training is needed to carry out these tasks safely. Only Entrematic-trained technicians should be allowed to carry out these operations. Compliance Codes and Standards The operator complies with the following codes and standards: •... -
Page 9: Door Handings
Check that the electrical feed, all conduits, and electrical junction boxes (for push plates or Power/Control Wires other activation devices, if required) are correctly located in accordance with final approved shop drawings and within the guidelines of the enforced local electrical codes. Entrematic Canada Inc. Entrematic USA Inc. Pg. 9 Toll Free: 1-877-348-6837 Toll Free: 1-866-901-4284 info.ditec.ca@entrematic.com... -
Page 10: Electrical
The door or arm will close very quickly if opened. • If an electrical access hole is added or knocked-out of the end plates, code approved electrical transfers must be used. Hole cannot be knocked out and unfilled. Entrematic Canada Inc. Entrematic USA Inc. Pg. 10 Toll Free: 1-877-348-6837 Toll Free: 1-866-901-4284 info.ditec.ca@entrematic.com... -
Page 11: Operator Installation
Secure the header box to the top of the door frame with the appropriate fasteners as indicated below. Remove the motor/gearbox and control board from the back plate. Make through holes on the back plate for mounting header where appropriate. Entrematic Canada Inc. Entrematic USA Inc. Pg. 11 Toll Free: 1-877-348-6837 Toll Free: 1-866-901-4284 info.ditec.ca@entrematic.com... - Page 12 HOLES CAN BE MADE ANYWHERE IN HEADER TO SECURE. ALL HOLES MUST BE DRILLED INTO SUBSTANTIAL SUPPORT (STUDS, BLOCKS, FRAMING, ETC.). THIS MAY NOT REFLECT YOUR INSTALLATION. Entrematic Canada Inc. Entrematic USA Inc. Pg. 12 Toll Free: 1-877-348-6837 Toll Free: 1-866-901-4284 info.ditec.ca@entrematic.com...
- Page 13 Fasten the bolt to hold the motor/gear box and control board. The motor/gearbox needs to be installed so that the center of the spindle is 5” (12.70 mm) from the end plate Entrematic Canada Inc. Entrematic USA Inc. Pg. 13...
- Page 14 FLUSH 3 7/8 in 1 3/8 in 1.375in 34.93mm [98.4mm] [34.9mm] FLUSH For Universal Arm application, please see section 3.3 Entrematic Canada Inc. Entrematic USA Inc. Pg. 14 Toll Free: 1-877-348-6837 Toll Free: 1-866-901-4284 info.ditec.ca@entrematic.com info.ditec.us@entrematic.com HA8-LP Manual V. 1.3 www.ditecentrematic.ca...
- Page 15 SLEEVE AND ROD LH PUSH/ PULL GEARBOX ORIENTATION ABOVE MAIN HANDLE (”SPINDLE OPENING ROTATION” LABEL FACING DOWN) 2.159in 54.84mm GUIDELINE DIMENSION Entrematic Canada Inc. Entrematic USA Inc. TO MOUNT/REMOUNT GEARBOX, 2.605in 66.17mm FLEXIBLE PUSH ROD JOINT Pg. 15 Toll Free: 1-877-348-6837 Toll Free: 1-866-901-4284 REMOVE THESE SCREWS &...
-
Page 16: Handing Modification - Left To Right (And Vice Versa)
9 Insert spline shaft on the operator (depended on push or pull application and spindle rotation) Right Hand Installation Left Hand Installation (Label is up, facing the ceiling) (Label is down, facing the floor) Entrematic Canada Inc. Entrematic USA Inc. Pg. 16 Toll Free: 1-877-348-6837 Toll Free: 1-866-901-4284 info.ditec.ca@entrematic.com... - Page 17 5 Fully tighten all bolts. LEFT HAND PULL RIGHT HAND PULL (”SPINDLE OPENING ROTATION” LABEL FACING DOWN) (”SPINDLE OPENING ROTATION” LABEL FACING UP) HINGE HINGE Entrematic Canada Inc. Entrematic USA Inc. Pg. 17 Toll Free: 1-877-348-6837 Toll Free: 1-866-901-4284 info.ditec.ca@entrematic.com info.ditec.us@entrematic.com RIGHT HAND PULL HA8-LP Manual V.
-
Page 18: Double Egress Header
Push Config. See Section 3.1 to change the Push arm configuration. LENGTH ‘L’ = DOOR WIDTH + 3” Entrematic Canada Inc. Entrematic USA Inc. Pg. 18 Toll Free: 1-877-348-6837 Toll Free: 1-866-901-4284 info.ditec.ca@entrematic.com... -
Page 19: Gearbox Installation
DISTANCE BETWEEN HEADER END CAP AND BOTTOM GEARBOX BRACKET LP GEARBOX INSTALLATION/REMOVAL LH PUSH/ PULL GEARBOX ORIENTATION (”SPINDLE OPENING ROTATION” LABEL FACING DOWN) Entrematic Canada Inc. Entrematic USA Inc. Pg. 19 Toll Free: 1-877-348-6837 Toll Free: 1-866-901-4284 TO MOUNT/REMOUNT GEARBOX, info.ditec.ca@entrematic.com... - Page 20 HOLDS GEARBOX TO HEADER. TWO (2) 5/16” LOCK WASHERS MUST BE USED AS SHOWN. (1, 2 & 3) M8X1 HEX NUT ANCHORED ALL COMPONENTS TO HEADER. Entrematic Canada Inc. Entrematic USA Inc. Pg. 20 Toll Free: 1-877-348-6837 Toll Free: 1-866-901-4284 info.ditec.ca@entrematic.com info.ditec.us@entrematic.com...
- Page 21 If the motor is not plugged into the circuit board there is no motor resistance against the spring when manually opening the door. The door or arm will close very quickly if opened, which could cause harm to pedestrians! Entrematic Canada Inc. Entrematic USA Inc. Pg. 21...
-
Page 22: Arm Installation
(BOTTOM OF HEADER AND DOOR JAMB) PUSH ARM OPTION 2: DOUBLE EGRESS CONFIGURATION OPTION 2 PROVIDES AN 5in 128mm EXTRA INCH OR SO FOR Entrematic Canada Inc. Entrematic USA Inc. INSTALLATIONS WHERE Pg. 22 Toll Free: 1-877-348-6837 Toll Free: 1-866-901-4284 CLEARANCE IS AN ISSUE info.ditec.ca@entrematic.com... - Page 23 GUIDELINE DIMENSION 2.605in 66.17mm SLEEVE AND ROD FLUSH BELOW MAIN HANDLE FLEXIBLE PUSH ROD JOINT (BOTTOM OF HEADER AND DOOR JAMB) Entrematic Canada Inc. Entrematic USA Inc. Pg. 23 Toll Free: 1-877-348-6837 Toll Free: 1-866-901-4284 info.ditec.ca@entrematic.com info.ditec.us@entrematic.com HA8-LP Manual V. 1.3 www.ditecentrematic.ca...
-
Page 24: Push Arm Installation
Hold Open. Remove jumper to close door. STEP 4 Set Operator Switch to Automatic and allow door to close under spring pressure. Test and adjust if necessary. Entrematic Canada Inc. Entrematic USA Inc. Pg. 24 Toll Free: 1-877-348-6837 Toll Free: 1-866-901-4284 info.ditec.ca@entrematic.com... -
Page 25: Pull Arm (Z-Arm) Installation
Hold Open. Remove jumper to close door. LEFT HAND PULL - SP RIGHT HAND PULL - SP LEFT HAND PULL - SP RIGHT HAND PULL - SP Entrematic Canada Inc. Entrematic USA Inc. Pg. 25 Toll Free: 1-877-348-6837 Toll Free: 1-866-901-4284 info.ditec.ca@entrematic.com... - Page 26 INTO SHAFT GROOVE Make sure Pull Track is installed level with the header. This is to ensure the roller stays inside the track during opening and closing, prolonging the life of the roller. Entrematic Canada Inc. Entrematic USA Inc. Pg. 26...
- Page 27 BOTTOM OF HEADER MUST BE FLUSH WITH DOOR STOP FOR PUSH APPLICATION DOOR (TO ENSURE ARM CLEARS FRAME DURING SWING) HINGE Entrematic Canada Inc. Entrematic USA Inc. Pg. 27 Toll Free: 1-877-348-6837 Toll Free: 1-866-901-4284 info.ditec.ca@entrematic.com info.ditec.us@entrematic.com HA8-LP Manual V. 1.3 www.ditecentrematic.ca...
- Page 28 SOCKET CAP SCREW ON UNIVERSAL ARM STEP 3: UNIVERSAL ARM AT FULLY CLOSE STEP 3: UNIVERSAL ARM AT FULLY CLOSE APPROXIMATE D Entrematic Canada Inc. Entrematic USA Inc. 2 in 50.8 mm (FOR A 90 Pg. 28 Toll Free: 1-877-348-6837...
-
Page 29: Universal Arm Installation
ROLLER TRACK MUST & RE-ATTACH END CAPS COVER THESE MARKS SCREW TRACK INTO DOOR & RE-ATTACH END CAPS STEP 5: ATTACHING UNIVERSAL ARM Entrematic Canada Inc. Entrematic USA Inc. STEP 5: ATTACHING UNIVERSAL ARM Pg. 29 Toll Free: 1-877-348-6837 Toll Free: 1-866-901-4284 info.ditec.ca@entrematic.com... - Page 30 SHAFT GROOVE Make sure Pull Track is installed level with the header. This is to ensure the roller stays inside the track during opening and closing, prolonging the life of the roller. Entrematic Canada Inc. Entrematic USA Inc. Pg. 30...
- Page 31 STEP 3: UNIVERSAL ARM AT FULLY CLOSE jumper Instant Activation and Return to set door to Hold Open. Remove jumper to close door. 10-12in [254-304.8mm] UNIVERSAL ARM Entrematic Canada Inc. Entrematic USA Inc. Pg. 31 Toll Free: 1-877-348-6837 Toll Free: 1-866-901-4284 APPROXIMATE DISTANCE BETWEEN MARKS info.ditec.ca@entrematic.com...
- Page 32 ROLLER TRACK & RE-ATTACH END CAPS CROSS-SECTION STEP 5: ATTACHING UNIVERSAL ARM SET-SCREW DETAIL POINTED TIP SET SCREW MUST BE TIGHTENED INTO Entrematic Canada Inc. Entrematic USA Inc. SHAFT GROOVE Pg. 32 Toll Free: 1-877-348-6837 Toll Free: 1-866-901-4284 info.ditec.ca@entrematic.com info.ditec.us@entrematic.com...
-
Page 33: Operator Tuning
INTO ARM Make sure Pull Track is installed level with the header. This is to ensure the roller stays inside the track during opening and closing, prolonging the life of the roller. Entrematic Canada Inc. Entrematic USA Inc. Pg. 33... -
Page 34: Back Check And Latch Adjustment
Proximity Switch MUST engage at open or close, otherwise door will not operate correctly and power fuse may be blown (overload). TOP VIEW SET UPPER LIMIT SWITCH IN Entrematic Canada Inc. Entrematic USA Inc. LINE WITH REED SWITCH Pg. 34... - Page 35 STEP 2: OPEN DOOR TO BEFORE BACK CHECK DOOR 90% OF FULLY OPEN POSITION (81 FOR A 90 OPEN DOOR) TOP VIEW DOOR HELD AT 90% OF FULLY OPEN Entrematic Canada Inc. Entrematic USA Inc. STEP 3: SETTING BACK CHECK Pg. 35 Toll Free: 1-877-348-6837 Toll Free: 1-866-901-4284 info.ditec.ca@entrematic.com...
- Page 36 Latch Check occurs at 10 degrees before fully open and fully close position, respectively. DOOR FULLY CLOSED UPPER LIMIT SWITCH (TOP VIEW) PASSES UPPER REED Entrematic Canada Inc. Entrematic USA Inc. Pg. 36 Toll Free: 1-877-348-6837 Toll Free: 1-866-901-4284 info.ditec.ca@entrematic.com info.ditec.us@entrematic.com HA8-LP Manual V.
-
Page 37: Spring Tension Adjustment
To Decrease spring tension, allow arm to unwind opposite to spindle rotation. CONTINUE TO ROTATE ARM NSION NDLE ROTATION (WINDING SPRING) TO SEE ROTATION. ADDITIONAL HOLES IN GEAR Entrematic Canada Inc. Entrematic USA Inc. Pg. 37 Toll Free: 1-877-348-6837 Toll Free: 1-866-901-4284 info.ditec.ca@entrematic.com info.ditec.us@entrematic.com STOPPER HA8-LP Manual V. -
Page 38: Testing With Obstruction
• For lighter doors – avoid over setting of overload • For external factors (door condition, wind, stack pressure) – Adjust overload according to each site condition. Entrematic Canada Inc. Entrematic USA Inc. Pg. 38 Toll Free: 1-877-348-6837 Toll Free: 1-866-901-4284 info.ditec.ca@entrematic.com... -
Page 39: Door Operating Mode
• Power will remain ON and supplied to the unit, however all signals will be ignored. The door can be opened easily with minimum force. Entrematic Canada Inc. Entrematic USA Inc. Pg. 39 Toll Free: 1-877-348-6837 Toll Free: 1-866-901-4284 info.ditec.ca@entrematic.com... -
Page 40: Control Board Setting
7.0 CONTROL BOARD SETTING 7.1 Digital Board Diagram Entrematic Canada Inc. Entrematic USA Inc. Pg. 40 Toll Free: 1-877-348-6837 Toll Free: 1-866-901-4284 info.ditec.ca@entrematic.com info.ditec.us@entrematic.com HA8-LP Manual V. 1.3 www.ditecentrematic.ca www.ditecentrematic.us... -
Page 41: Digital Board Wiring Diagram
A Switch or Jumper must be wired from the ON terminal to the OFF terminal for Programming to work! This is only needed if there is no switch on the board. Entrematic Canada Inc. Entrematic USA Inc. Pg. 41... -
Page 42: Digital Board Specification
- 2 motor connectors to drive door in either clockwise or counter clockwise direction. MOTOR DATA and DATA+ - interface with BEA Bodyguard sensor. (replaces LO-21K lockout relay) Entrematic Canada Inc. Entrematic USA Inc. Pg. 42 Toll Free: 1-877-348-6837 Toll Free: 1-866-901-4284 info.ditec.ca@entrematic.com... -
Page 43: Analog Board Diagram
7.0 CONTROL BOARD SETTING 7.4 Analog Board Diagram Entrematic Canada Inc. Entrematic USA Inc. Pg. 43 Toll Free: 1-877-348-6837 Toll Free: 1-866-901-4284 info.ditec.ca@entrematic.com info.ditec.us@entrematic.com HA8-LP Manual V. 1.3 www.ditecentrematic.ca www.ditecentrematic.us... -
Page 44: Analog Board Wiring Diagram
Selectable via Function AA”, Setting A3”. Default is OFF. Must have operator with no clutch. ON/ OFF/ HOLD OPEN Terminal block position to accommodate a 3 way switch for ON, OFF and Hold Open positions. Entrematic Canada Inc. Entrematic USA Inc. Pg. 44... -
Page 45: Analog Board (Potentiometer) Specification
Turning the potentiometer clockwise increases the activation time. Time is adjustable from 1 second to 70 seconds. Selectable opening speed adjustable by potentiometer. Turning the potentiometer clockwise OPEN SPEED increases the opening speed. Entrematic Canada Inc. Entrematic USA Inc. Pg. 45 Toll Free: 1-877-348-6837 Toll Free: 1-866-901-4284 info.ditec.ca@entrematic.com... -
Page 46: Control Board Programming
1 Turn Overload pot fully counter-clockwise – followed by ¼ turn clockwise. 2 Red Overload LED should not go ‘on’ when opening. 3 Test with obstruction – door will cut power after about 2 sec and close by spring pressure. Entrematic Canada Inc. Entrematic USA Inc. Pg. 46... - Page 47 The time between Strike ON and 2 = 0.50sec door starting to open. 3 = 1.00sec 4 = 1.50sec HA board ONLY 5 = 2.00sec Entrematic Canada Inc. Entrematic USA Inc. Pg. 47 Toll Free: 1-877-348-6837 Toll Free: 1-866-901-4284 info.ditec.ca@entrematic.com info.ditec.us@entrematic.com HA8-LP Manual V.
- Page 48 (Door Door Closing - Safety1 sensor ON = door drives at HOLD speed mounted Door Fully Closed - Safety1 sensor has no effect Sensor) Entrematic Canada Inc. Entrematic USA Inc. Pg. 48 Toll Free: 1-877-348-6837 Toll Free: 1-866-901-4284 info.ditec.ca@entrematic.com info.ditec.us@entrematic.com HA8-LP Manual V.
- Page 49 2. Make sure Back Check speed is slow enough that it will not trigger the overload while the door is fully open. RESET TO DEFAULT SETTING - Pressing both SET and PASS buttons for 5 seconds Entrematic Canada Inc. Entrematic USA Inc. Pg. 49...
-
Page 50: Troubleshooting
(if equipped), thus keeping the door open Door will not Close 2. Make sure the 3 position switch is set to Automatic If the problem persists, contact your authorized Ditec Entrematic representative for service! Entrematic Canada Inc. Entrematic USA Inc. -
Page 51: Ada Adjustments
4. Adjust the Activation Time (hold open) as desired, Minimum of 5 seconds 5. Adjust the Activation Delay time as desired. This will depend on the distance of the activation devices to the door Entrematic Canada Inc. Entrematic USA Inc. -
Page 52: Installation Wrap Up
0.125 seconds - 2 seconds. Analog board connection – strike out +ground, jumper between strike in + 24DC Digital Board connection – N.O. + GND Fully automatic boards do not support electric strike. Entrematic Canada Inc. Entrematic USA Inc. Pg. 52 Toll Free: 1-877-348-6837 Toll Free: 1-866-901-4284 info.ditec.ca@entrematic.com... -
Page 53: Header Cover Installation
Before leaving the job site, • Clean up the work area • Make sure all bolts are tight • Clean glass • Install safety decals Entrematic Canada Inc. Entrematic USA Inc. Pg. 53 Toll Free: 1-877-348-6837 Toll Free: 1-866-901-4284 info.ditec.ca@entrematic.com info.ditec.us@entrematic.com... - Page 54 The center of the sticker height should be between 38” [965 mm] and 62” [1574 mm], above the finished floor. See ANSI standard 156.19 requirements for additional safety decal information. LOW ENERGY STICKERS (ON BOTH INGRESS & EGRESS SIDES) "OUT" DOOR "IN" DOOR Entrematic Canada Inc. Entrematic USA Inc. Pg. 54 Toll Free: 1-877-348-6837 Toll Free: 1-866-901-4284 info.ditec.ca@entrematic.com info.ditec.us@entrematic.com HA8-LP Manual V.
-
Page 55: Manufacturer Information
All the rights concerning this material are the exclusive property of Entrematic Group AB. Although the contents of this publication have been drawn up with the greatest care, Entrematic Group AB cannot be held responsible in any way for any damage caused by mistakes or omissions. We reserve the right to make changes without prior notice. - Page 56 Entrematic Canada Inc. Entrematic USA Inc. Toll Free: 1-877-348-6837 Toll Free: 1-866-901-4284 info.ditec.ca@entrematic.com info.ditec.us@entrematic.com www.ditecentrematic.ca www.ditecentrematic.us...
Need help?
Do you have a question about the Ditec HA8 LP and is the answer not in the manual?
Questions and answers