Table of Contents
Advertisement
Advertisement
Table of Contents

Related Manuals for Geemarc amplidect 295 photo


Summary of Contents for Geemarc amplidect 295 photo
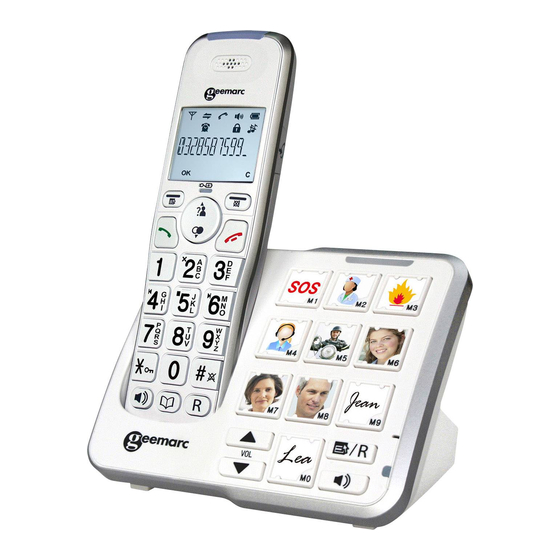
- Page 1 Amplified cordless telephone with answering machine English...
-
Page 2: Table Of Contents
View a Phonebook Entry ............... 20 TABLE OF CONTENTS Edit a Phonebook Entry ..............21 Delete a Phonebook Entry ............21 IMPORTANT SAFETY INSTRUCTIONS ......1 Delete the Entire Private Phonebook ..........21 Check the Phonebook Usage ............22 SET UP THE TELEPHONE ..........2 Set the Fast Dial Numbers ............ -
Page 3: Important Safety Instructions
IMPORTANT SAFETY INSTRUCTIONS 10.5.2 Record your Outgoing Message (OGM) ......38 10.5.3 Playback the Outgoing Message (OGM) ......38 When using your telephone equipment, basic safety precautions should always be 10.5.4 Delete a Personalized OGM (SET OGM to DEFAULT) ..39 followed to reduce the risk of fire, electric shock and injury, including the following: 10.5.5 Set the Answer Delay ............ -
Page 4: Set Up The Telephone
SET UP THE TELEPHONE Connect the Corded Base Station Plug one end of the Package Contents telephone line cord Plug the large end into a telephone jack The package contains the following items: of the larger power or a DSL filter. •... -
Page 5: Install And Charge The Handset Battery
Install and Charge the Handset Battery GET TO KNOW YOUR PHONE Overview of the Handset 1. Plug the battery connector securely into the socket inside the handset battery compartment. Insert the supplied battery as indicated. 2. Align the cover flat against the battery compartment, and then slide it upwards until it clicks into place. - Page 6 INT/MUTE/CLEAR 11. TALK OFF In main menu mode: Press to go back to idle screen. During a call: Press to end a call and go back to idle screen. In menu/editing mode: Press to go back to previous menu. In sub-menu mode: Press to go back to previous menu. In sub-menu mode: Press and hold to go back to idle screen.
-
Page 7: Overview Of The Corded Base
5. MICROPHONE Overview of the Base 6. SPEAKER MODE INDICATOR On when the speaker is on. 7. SPEAKERPHONE KEY NOTE: wait 2 seconds before to dialling the phone number. 8. VOL ( During speaker mode, press to decrease the speaker volume. While in idle mode, press to decrease the base ringer volume. -
Page 8: Handset Lcd Display Icons And Symbols
Handset LCD Display Icons and Symbols Steadily on when more digits are existed after the text currently displayed. The screen display gives you information on the current status of the telephone. Press to confirm the current selection if applicable. Steadily on when there is(are) new call(s) in call list. Scroll up / down the menu items / Phonebook / Redial list / Call List. -
Page 9: Handset Menu Structure
Handset Menu Structure Text and Digit Entry Table In idle mode, pressing LEFT SOFTKEY will access the menu. Refer to the following for The following tables show you where each letter and punctuation character can be the menu structure. found. This will be helpful when storing a name in the phonebook or renaming your handset. -
Page 10: Use Your Phone
4.1.6 Call from the Redial List USE YOUR PHONE Using a handset: Make an External Call 1. Press to access the redial list. 4.1.1 Preparatory Dialing 2. Press to select the desired redial number. 3. Press to dial the selected redial number. Press it again to turn on the Using a handset: speakerphone. -
Page 11: End A Call
End a Call Redial the Last Number Using a handset: You can redial up to 10 of the last numbers called on the cordless handset or on the During a call, press to end the call. OR corded telephone base. If you have stored a name in the phonebook to match with the number, the name will be displayed instead. -
Page 12: Delete The Entire Redial List
4.9.4 Delete the Entire Redial List 4.11.2 Call All Handsets Using a handset: Using a handset: 1. Follow Steps 1 and 2 in section 4.9.1. 1. In idle mode, press RIGHT SOFTKEY and the numbers of the registered handsets will display except the calling handset. 2. -
Page 13: Phonebook
PHONEBOOK Edit a Phonebook Entry Using a handset: Your phone can store up to 50 private phonebooks in the cordless handset and the telephone base with names and numbers. Each phonebook entry can have a In idle: maximum of 20 digits for the phone number and 12 characters for the name. You can 1. -
Page 14: Check The Phonebook Usage
Check the Phonebook Usage 6 CALLER DISPLAY (NETWORK DEPENDENT) You can check how many phonebook entries have been occupied in your phone and This feature is available if you have subscribed the Caller Line Identification service how many phonebook entries are available for you to store in the phonebook. with your network service provider. -
Page 15: Delete An Entry In The Call List
Delete an Entry in the Call List 7 DIRECT MEMORY KEYS Using a handset: Your AMPLIDECT 295PHOTO base can also paired as additional handsets with some specific handset/device like our PhotoDECT295 or SOS PRO 295 5 which need 1. Follow Section 6.1 to access the call list. direct memory numbers programed in the base, and these numbers (4 maxi) have to 2. -
Page 16: Phone Settings
PHONE SETTINGS Alarm Settings You can use this phone to set an alarm clock. When an alarm is set, the displays Your phone comes with a selection of settings that you can change to personalize and “ALARM ON” flash on on the screen. -
Page 17: Handset Settings
9.3. Handset Settings 9.3.4 Set Alert Tones A single beep is emitted when you press a key. You can turn on or off the key tone. 9.3.1. Set the Ringer Melody for Internal Calls You can also turn on the alert tones when low battery and out of range are detected. Low battery tone will be emitted while you are talking with the phone to alert you that You can set special melody to personalize your internal ringer. -
Page 18: Choose The Information To Be Displayed In Idle
9.3.8 Choose the Information to be Displayed in Idle Base Settings You can choose to display time or handset name in your idle screen. using the Handset 1. Press LEFT SOFTKEY to select HS SETTINGS. 9.4.1 Set the Ringer Melody 2. -
Page 19: Set The Dial Mode
9.5. Registration 9.4.4 Set the Dial Mode The default dial mode is best suitable for your country and network operator. It is Your handset and base station is pre-registered. Up to five handsets can be unlikely that you should need to change this setting unless advised to do so. registered to a single base station. -
Page 20: Reset Your Phone
9.6. Reset Your Phone ANSWERING MACHINE You can reset your phone to the default settings. After reset, all your personal settings Your telephone base includes a telephone answering machine that records unanswered and call list entries will be deleted, but your phonebook list remains unchanged. calls when it is on. -
Page 21: Delete All Messages On Tam
NOTE: 10.4 Record Memos on TAM Alternatively, you can use the following shortcut keys to control different operation You can record your memo message for another user. When you record a memo, the during message playback. message counter will increase by one and the message can be played in the same way •... -
Page 22: Record Your Outgoing Message (Ogm)
10.5.2 Record your Outgoing Message (OGM) 10.5.4 Delete a Personalized OGM (SET OGM to DEFAULT) You can record your own OGM for ANS & REC mode or ANSWER ONLY mode. When Using a handset: you record your own OGM, it will be used when the answering machine answers 1. -
Page 23: Set The Tam Language
10.5.7 Set the TAM Language 10.5.10 Activate Remote Access You can choose the voice prompt language of the answering machine from a total of Your phone lets you check your messages, or otherwise operate your answering 3 languages. machine, by calling the answering machine when you are away from home by entering a 4-digit remote access PIN on a tone-dialing phone. -
Page 24: Remote Operations
10.5.10.3 Remote Operations TROUBLESHOOTING If you are away from your home, you can call your answering machine to switch on If you have difficulty with your phone, please try the suggestions listed below. or off the answering machine and listen to your messages remotely using another tone-dialing phone. - Page 25 • There is The handset may be out of range. Move it closer to the Common cure If the telephone is not responding normally, put the handset in the interference telephone base. for electronic telephone base. If it does not respond, try the following (in the during a equipment.
-
Page 26: Technical Specifications
12. TECHNICAL SPECIFICATIONS 13. CARE AND MAINTENANCE INSTRUCTIONS Basic Information Valid range Indoor: 50m Take care of your telephone Your cordless telephone contains sophisticated electronic parts, so you must treat Outdoor: 300m it with care. Handset Operating Time Standby time: 100Hours approx. Avoid rough treatment. -
Page 27: Guarantee
GUARANTEE From the moment your Geemarc product is purchased, Geemarc guarantee it for the period of two years. During this time, all repairs or replacements (at our discretion) are free of charge. Should you experience a problem then contact our help line or visit our website at www.geemarc.com. - Page 28 UG DECT295PHOTO_En_v0.1...
Need help?
Do you have a question about the amplidect 295 photo and is the answer not in the manual?
Questions and answers