Pioneer A-109 Operating Instructions Manual
Pioneer stereo amplifier operating instructions a-109
Hide thumbs
Also See for A-109:
- Service manual (6 pages) ,
- Operating instructions manual (32 pages) ,
- Service manual (6 pages)
Advertisement
Table of Contents
Advertisement
Table of Contents

Related Manuals for Pioneer A-109


Summary of Contents for Pioneer A-109
- Page 1 STEREO AMPLIFIER A-109 Operating Instructions...
-
Page 2: Maintenance Of External Surfaces
Thank you for buying this PIONEER product. Please read through these operating instructions so you will know how to operate your model properly. After you have finished reading the instructions, put them away in a safe place for future reference. -
Page 3: Table Of Contents
PANEL FACILITIES ... 6 FEATURES Advanced Direct Energy MOS Power Amp Pioneer incorporates highest quality amp circuitry featur- ing Advanced Direct Energy MOS FET devices which can achieve higher performance. Together with Pioneer’s origi- nal Wide Range Linear Circuit technology they reduce power consumption while maintaining the power output of current models. -
Page 4: Connections
CONNECTIONS Before making or changing the connections, switch off the power switch and disconnect the power cord from the AC outlet. CD player O U T SIGNAL PHONO TUNER LINE Turntable Cassette deck/ CD recorder/ MD recorder MINIDISC PL AY R EC SPEAKERS TAPE 1/CD-R/MD... -
Page 5: Connecting The Speaker Cords
CONNECTING THE SPEAKER CORDS 1. Strip off the vinyl covering and twist the tip of the wire core. 10mm Twist the wire core 2. Loosen the knob and insert the wire core into the terminal hole. 3. Tighten the knob to fix the wire core in place. NOTE: Do not allow any of the cord conductors to protrude from the terminals or touch any other conductors. -
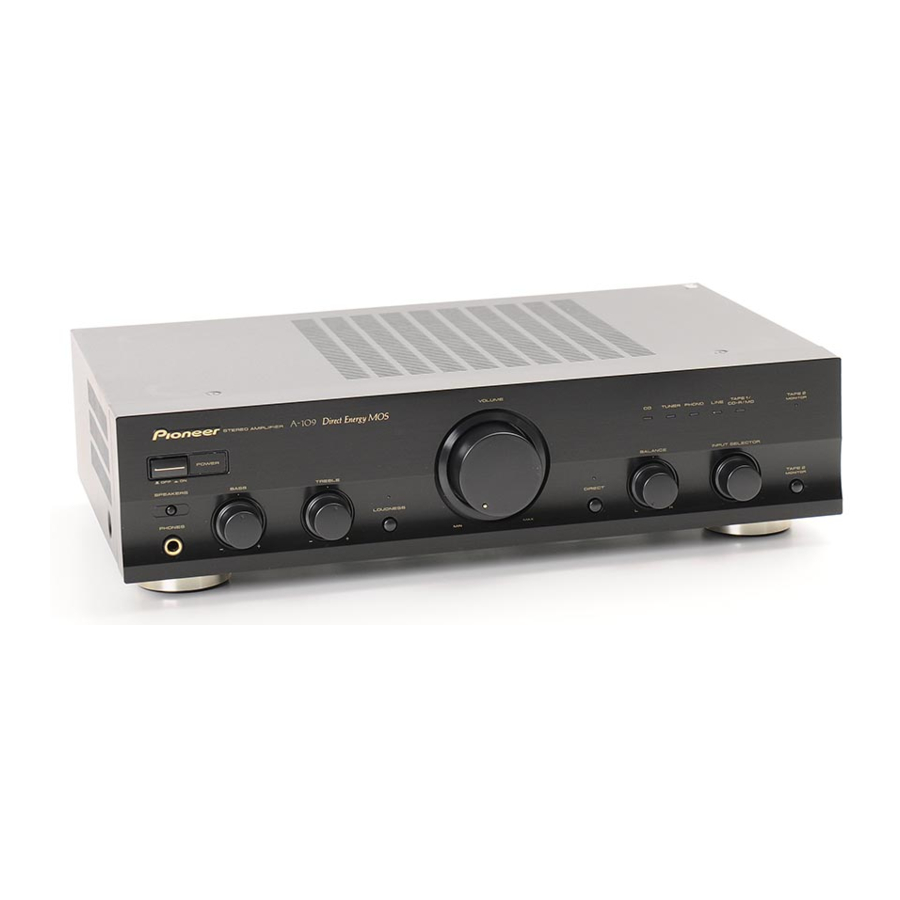
Page 6: Panel Facilities
PANEL FACILITIES [ FRONT PANEL ] z¿,?/ Direct Energy MOS STEREO AMPLIFIER POWER — BASS SPEAKERS PHONES – POWER (—OFF/_ON) switch Press to turn power to the unit ON and OFF. VOLUME control Use to adjust the volume level. INPUT SELECTOR knob/indicators Turn the knob clockwise or counterclockwise so that the indicator lights for your desired input source. - Page 7 BALANCE control Should normally be left in the center position. Adjust balance if the sound is louder from one of the speakers. If the right side is louder, turn toward the L (left) position and if the left side is louder, turn toward the R (right) position.
- Page 8 PANEL FACILITIES [ REAR PANEL ] 2 3 4 SIGNAL PHONO TUNER LINE TAPE 1/CD-R/MD GND (Turntable ground) terminal PHONO terminals TUNER terminals CD terminals LINE terminals TAPE 1/CD-R/MD REC (OUT) terminals TAPE 1/CD-R/MD PLAY (IN) terminals TAPE 2 MONITOR REC (OUT) terminals TAPE 2 MONITOR PLAY (IN) terminals SPEAKERS terminals (Right channel) SPEAKERS terminals (Left channel)
-
Page 9: Playback Procedures
OPERATIONS BEFORE BEGINNING OPERATIONS 1. Set the VOLUME control to minimum. 2. Set the POWER switch to ON. 3. Press the SPEAKERS switch to ON. 4. Set the BALANCE control to the center position. 5. Set the DIRECT button to off. 6. - Page 10 OPERATIONS TO USE THE COMPONENT CONNECTED TO THE TAPE2 MONITOR TERMINALS [For a cassette deck] ÷ A cassette deck connected here can be operated in the same way (recording and playback) as a deck connected to the TAPE2 MONITOR terminals. ÷...
-
Page 11: Troubleshooting
Sometimes the trouble may lie in another component. Investigate the other components and electrical appliances being used. If the trouble cannot be rectified even after exercising the checks listed below, ask your nearest PIONEER authorized service center or your dealer to carry out repair work. -
Page 12: Specifications
P.O. BOX 1540, Long Beach, California 90801-1540, U.S.A. PIONEER ELECTRONICS OF CANADA, INC. PIONEER ELECTRONIC [EUROPE] N.V. PIONEER ELECTRONICS AUSTRALIA PTY. LTD. PIONEER ELECTRONICS DE MEXICO S.A. DE C.V. <00B00ZF0P00> Power Supply/ Miscellaneous Power requirements ... AC 220 - 230 V, 50/60 Hz Power consumption ...
Need help?
Do you have a question about the A-109 and is the answer not in the manual?
Questions and answers