Table of Contents
Advertisement
Quick Links
Advertisement
Table of Contents

Related Manuals for Brickhouse Security Livewire


Summary of Contents for Brickhouse Security Livewire
- Page 1 Livewire GPS Vehicle Tracker User’s Guide WHEN YOU NEED TO KNOW.
-
Page 2: What's Inside
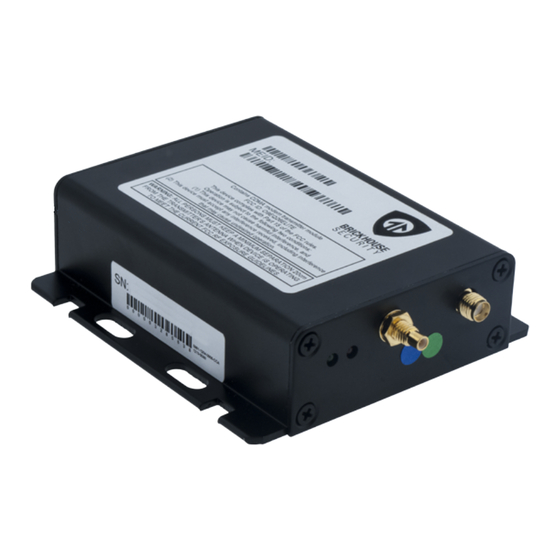
What’s Inside Harness Wiring Antenna Livewire Base Unit... - Page 4 Livewire Wiring Diagram (FAKRA) CELL (FAKRA) Stealth Combo Antenna FUSE POWER (+12v/24v constant ) BLACK Ground WHITE WHITE WHITE/BROWN Relay 1 Output (-) YELLOW Relay 2 Output (-) GREEN Relay 3 Output (-) ORANGE Relay 4 Output (-) GREEN/YELLOW SW1 Input (+)
-
Page 5: Back Panel
Harness PinD escription Wire Color lack GN D Yello w Relay 2 output (-) Gr ee n Relay 3 output (-) Power Connector Data Connector Orange Relay 4 output (-) Pin 2 Pin 20 Blue Switch 3 input (-) 1-Wi re Dat a Pin 2 Not Used Pin 1... -
Page 6: Getting Started
Installation of the Livewire is similar to that of a car stereo. If you are not confident of your ability to install the device, we suggest that you contact a local car stereo/alarm installer. The Livewire is powered by your vehicle; to install the device in your vehicle, connect the wiring harness to the base unit as indicated in the diagram above. - Page 7 Once finished, take the car for a drive for 15-20 minutes so the device can register on the GPS network and begin reporting. The Livewire is motion activated; it will only attempt to communicate with the platform when motion is detected, which will update the tracker’s position on...
- Page 8 Red LED flashes 2-digit codes to help you troubleshoot issues with your Livewire. Roughly speaking, the first digit tells you what general area is having a problem (hardware, modem, GPS, et al). The second digit gives specific error information. Since there can be more than one error condition at a time, the device rotates through the error codes (for example, both the GPS is not tracking a satellite and the modem is not registered).
- Page 9 Navigation Arrows Change Map View Zoom Bar Dashboard Last Known Location...
- Page 10 Tracking Your Device To track your Livewire, open a browser window and go to http://l.bhs.net/gps-login or go to www.brickhousesecurity.com, hover over Login on the top and select GPS Tracking on the drop down menu. Enter your username and password, and the tracking page will appear, the device’s last reported location will be centered on the map.
- Page 12 • Street View will open up a separate window displaying Google’s Street View, if available. BrickHouse shield icon will appear where a tracker transmitted most recently. Click on an icon to bring up a pop-up box. This will show your tracker’s name, the distance it has traveled on this trip, what direction it was moving in, speed, battery information, and start and stop locations.
- Page 14 Live Tracker will open up a separate window displaying your device’s location, as well as allow you to see past locations. Using the drop-down boxes on the bottom right of the window, you can adjust how often your screen refreshes and how many locations will appear on the screen.
-
Page 15: Current Date
Current Date button to return to viewing the current day’s information. When searching by date, all locates generated in the chosen timeframe will display as breadcrumbs. Under the section you can see a list of all devices currently displaying Display information on the map. -
Page 16: Geo-Fence
Click on the Street View button to open a Google Street View window from the most recent location of the device. This function will only work if Google Street View is available in that location. section lets you manage what kinds of alerts your device will create Alerts and how you will be notified. - Page 17 In the Create New Geofence tab you can create geofences around any area in different shapes. Navigate to the area on the map you would like to create a geofence. Click on the Circle, Polygon, or Route button. It is suggested that all geofences be in at least a .2 mile radius, or at least 1 city block around an area to allow for GPS drift.
- Page 18 Assign Geofence tab allows you to activate and deactivate geofences. Select a device from the dropdown menu to see what geofences are currently active. Click on an Assigned Geofence to view and edit its configuration. Click the Remove link to deactivate a geofence. Hit Save once you have finished making changes.
- Page 19 The Livewire does not take advantage of the BrickHouse Tracking platform’s Panic alert function. Power Alert button is used for GPS devices with a battery. This device is hardwired and runs on your vehicle’s power, so disregard this button. You can run four different types of reports, listed below. To run one, select a...
- Page 20 Alert History button will show you all alerts generated during the specified time and where they occurred. Full History button includes individual locate information such as: location, time of transmission, battery life, speed, and distance from its previous locate. button will create a list of addresses that the device has Frequent Visits reported from and show how many times the device reported from that spot.
- Page 21 Support To access FAQs, as well as other support materials for your device and the BrickHouse Security Tracking platform, click on the Help link in the upper right corner of the screen. Live support is available Monday through Friday between the hours of 9 am and 6 pm EST at 1-800-654-7966.
- Page 22 WHEN YOU NEED TO KNOW.
Need help?
Do you have a question about the Livewire and is the answer not in the manual?
Questions and answers