Table of Contents
Troubleshooting

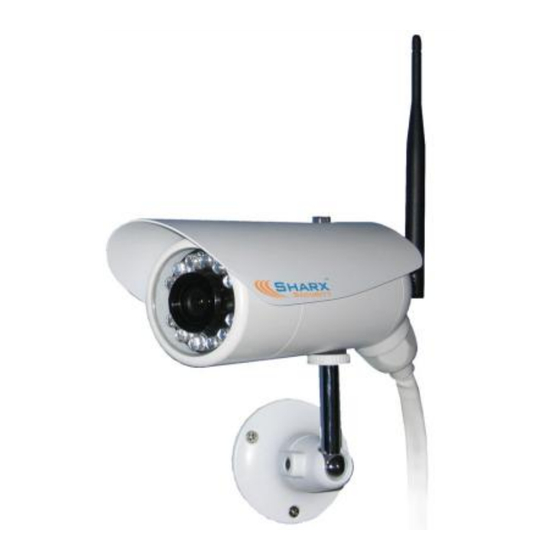
Related Manuals for SHARX SECURITY SCNC2606


Summary of Contents for SHARX SECURITY SCNC2606
- Page 1 IRED IRELESS HARX IP N ECURITY ETWORK AMERA UIDE New 2012 series featuring: Wireless b/g/n networking MicroSD and NAS recording VIPcella™ series cell phone enabled IP cameras SCNC2606, SCNC2607, SCNC2700, SCNC3605,SCNC3606...
-
Page 2: Introduction
Introduction Congratulations! You just purchased one of the finest IP network cameras currently available, and this new version can record to a MicroSD memory card Using a Mac or PC you can view high quality live streaming video with audio direct from the camera. - Page 3 Many common usage scenarios are handled directly by the camera’s built in web server without the need for software installations, downloads, accounts or monthly fees beyond your standard internet service. Setup of the camera is mostly automatic if you have a current, industry standard router with the “Universal Plug and Play”...
-
Page 4: Table Of Contents
Contents Introduction......................... 2 Contents ........................4 Pre-requisites and Setup Overview ................5 Initial Connection ......................6 Mac Quickstart ......................7 PC Quickstart ......................10 PC Only: Troubleshooting Internet Explorer Settings ..........12 Generic Quickstart ..................... 13 Reserving the Camera’s IP Address ................14 Wifi Wireless Setup .................... -
Page 5: Pre-Requisites And Setup Overview
Pre-requisites and Setup Overview This manual applies to all the 2011/2012 series Sharx Security VIPcella™ cameras, which includes the SCNC2606, SCNC2607, SCNC2700, SCNC3605 and SCNC3606 models. Besides the camera, you only need: PC, Mac, or Linux computer with internet browser. The computer is only required for initial setup. -
Page 6: Initial Connection
Initial Connection All cameras come with a Cat5 network cable that can be used to connect the camera to one of the LAN jacks of your router. Then connect the included AC adapter to the camera and to power. Different camera models may use different voltages so be sure not to switch AC adapters. -
Page 7: Mac Quickstart
Mac Quickstart This Quickstart section applies to the most common configuration for Mac users: You have an Apple Airport (Extreme or Time Capsule), and your Airport is directly connected to a standard, non routing DSL or cable modem. In this section you will be interacting mostly with the Airport Utility 5.6. Please note that the Airport Utility (and this Quickstart section) does not apply if you do not have an Apple Airport router. - Page 8 One of these entries will be your Sharx camera. You can tell by comparing the MAC address to the sticker on the back of the camera (or tag on the cable). You could start using your camera immediately using the IP address. Just add http:// in front of it and open it in a browser, such as http://10.0.1.3 To see video, click on “Enter”.
- Page 9 With older generation Airports the IP address reservation feature is missing in the Airport Utility, however the Sharx camera can be set up for a fixed local IP address using the camera’s own TCP/IP setup menu (see page 24). Next you will probably want to set up the wireless connection. To prepare your Airport for easiest and most reliable connection to a Sharx camera, check the following settings using the Airport Utility: 1.
-
Page 10: Pc Quickstart
PC Quickstart This Quickstart section applies to the most common configuration for PC users: You have a current generation router such as NetGear, LinkSys, or Dlink connected to a standard, non routing DSL or cable modem, or you have a combination modem and router which has all functions in one box. - Page 11 your Firewall program or use the alternate method of finding the IP address by checking the menus in your router as described in the next section. Regardless of the method you used to find your camera’s IP address, once you’ve clicked on the icon or entered the IP address manually into your browser (with http://), you get to the main login screen for the camera: To see video, click on “Enter”, then username: admin and password: admin.
-
Page 12: Pc Only: Troubleshooting Internet Explorer Settings
PC Only: Troubleshooting Internet Explorer Settings On PCs, Sharx Security cameras are compatible with Internet Explorer 7 – 10. (For use with Safari, Firefox or Chrome please see page 32) If you find that your Internet Explorer window looks oddly shifted, please check the zoom level / magnification icon at the bottom right of the Internet Explorer window. -
Page 13: Generic Quickstart
Generic Quickstart The previous Quickstart sections showed you how to obtain the initial IP address of the camera if you have a Mac or PC with typical configuration. In other cases it may be easiest to log into your router’s web based setup menu. -
Page 14: Reserving The Camera's Ip Address
Reserving the Camera’s IP Address Some routers tend to remember and keep the camera’s IP address as it was the first time you plugged it in. However, many current generation routers tend to re-assign all IP addresses every time the router or a camera or computer is restarted. Aside from the inconvenience of having to find the camera’s current IP address again, this can also interfere with some of the other setup steps. -
Page 15: Wifi Wireless Setup
Wifi Wireless Setup Most likely your wireless network was set up with a password (also known as wireless key). If you don’t remember it, you can check your router’s wireless setup menu or ask the person who set up your wireless network. Without your password you cannot proceed with your camera’s wireless setup, so you can either continue to use your camera in wired mode or set up a new password in your router. - Page 16 You may see a whole list of networks in your neighborhood. Select your network among this list, then click “Apply”, and check if your network name has now been filled into the SSID field. If nothing shows up, try “Search” again, or un-hide your network name if your router is configured as a closed system.
- Page 17 Current Apple Airport and most new generation routers use WPA2 with AES: However, older Apple Airport and many other routers use WPA with TKIP: Please remember that both WPA and WPA2 keys are case sensitive and need to be between 8 and 63 characters. Please note: do not use the quote or apostrophe characters ` ”...
- Page 18 If you have WEP passwords, the procedure is similar: In almost all cases you would select Authentication to be “Auto” The next setting is critical, so you need to be careful to select the right choice. Some laptop computers are more forgiving and will connect anyway, but the camera needs to know exactly what type of WEP encryption is used.
- Page 19 Congratulations! At this point you should be able to use your camera wired or wireless on your local network using the same local IP address. If it doesn’t connect, we recommend that you temporarily remove wireless security from your router for a quick experiment to see if the setup succeeds with no passwords.
-
Page 20: Wifi Troubleshooting
Wifi Troubleshooting If the camera does not connect and you’ve already checked the settings mentioned on the previous page and you made sure the antenna is connected properly, please log in to your router and double-check the setting for wireless channel selection. -
Page 21: Apple Airport Remote Access Setup
Apple Airport Remote Access Setup If you have a router other than Apple Airport, skip ahead to the next section. In order to access the camera remotely from outside your network, you have to tell your Airport to allow access to the network ports used by the camera. This is called “port forwarding”... -
Page 22: Is The Remote Access Setup Already Done
Is the Remote Access Setup already done? If you have any current generation industry standard router other than Apple Airport, such as NetGear, LinkSys, Dlink or similar, it is likely that the UPnP “Universal Plug ‘n Play” feature of your router has already done the setup for remote access. -
Page 23: Enabling Upnp For Automatic Remote Access Setup
Enabling UPnP for Automatic Remote Access Setup If UPnP did not work, and if you have an up to date router other than Apple Airport, it is worth double checking if UPnP is enabled in your router. Some routers like the ActionTec and Westell units distributed for free with Verizon and Qwest DSL service have the feature initially disabled. -
Page 24: Overview Of Manual Ip Address Setup (Without Upnp)
Overview of Manual IP Address Setup (without UPnP) In the previous section we showed how to tell if your camera was able to automatically configure itself using your router’s UPnP feature. In this section we provide an overview of the manual IP address setup procedure. -
Page 25: Manual Setup Step 1: Assigning A Permanent Local Ip Address
Manual Setup Step 1: Assigning a Permanent Local IP Address Manually assigning an IP address for your camera is only necessary if your router does not have the address reservation feature. As discussed earlier in this manual, all current NetGear, LinkSys, Dlink and similar standard routers have an easy address reservation menu. - Page 26 There is one special case: some routers such as Comcast SMC business gateways have been preconfigured for a DHCP range of .2 - .255 which leaves no available IP address outside the range. In that case you first have to reduce the range by setting it to .2 - .199.
- Page 27 For primary/secondary DNS IP address it is also possible to copy the exact same IP addresses that are shown for primary/secondary DNS IP in your router’s WAN or status menu, or Google’s public DNS such as 8.8.8.8 The HTTP port is usually 80. The RTP port range should start at 30000 for your first camera.
-
Page 28: Manual Setup Step 2: Configuring Your Router To Allow Remote Access
Manual Setup Step 2: Configuring your Router to allow Remote Access If your camera was automatically set up with UPnP you would skip this section and proceed directly to Step 3: Choosing a name for your camera. If you have only 1 camera, it is simplest to configure your router to use “DMZ” for the camera. -
Page 29: Setup Step 3: Choosing A Name For Your Camera On The Internet
Setup Step 3: Choosing a Name for your Camera on the Internet So now you should have been able to have a friend see you on your camera. With typical residential internet service your router’s IP address can change from time to time. Looking up the current IP address can be inconvenient, and buying a static IP address is an unnecessary monthly expense. -
Page 30: Setup Step 4: Automatic Updating Of Your Camera's Internet Ip Address
Setup Step 4: Automatic Updating of your Camera’s Internet IP Address In the previous step we set up a name for your camera. To make sure that this hostname always corresponds to the correct IP address for your camera we have to make sure it is updated automatically when there is a change. -
Page 31: Night Vision Settings
“Off”. It’s worth a try. The “Moonlight mode” setting in the “Camera Setup” menu boosts available light by reducing the frame rate to 7.5 fps. On the SCNC2606 this feature can only be set “On” or “Off”, while other models have the additional “Automatic”... -
Page 32: Video With Audio Using Safari, Firefox, Or Chrome Browser
Video with Audio using Safari, Firefox, or Chrome Browser When using a Mac with Safari or Firefox to view the camera, or when using a PC with any browser other than Internet Explorer, the browser’s standard method of displaying video is MJPEG (Motion JPEG) without audio. It is easy to switch to MPEG4 video with audio. -
Page 33: Positioning And Mounting
Positioning and Mounting The VIPcella series cameras have standard tripod mounts and are compatible with regular photo tripods or security camera mounts. If you want to use a tripod we recommend the very inexpensive QuantaRay / SunPak QSX2001, which is available for under $25 from photo supply stores. Indoor cameras: The included desktop stand can also be used for wall or ceiling mounting. - Page 34 The easiest way to mount the outdoor camera to the wall is to mount the bracket first, as in this sequence: 1) Completely loosen the ball joint of the mounting bracket with the supplied Allen wrench 2) Detach the silver mounting rod from the bracket base, and secure just the bracket base to the wall by itself 3) Screw the silver mounting rod into the camera, first hand tighten it, then lock it with the white plastic lock wheel...
- Page 35 Please note that this AC adapter cannot be exposed to moisture. If you use the AC adapter outdoors, it would have to go into an outdoor power outlet with a completely enclosing cover. For example, see “Code Keeper” or similar brands. If you need more than the length of the power cable on the AC adapter, you can extend it up to 50 ft using splice connectors and any low voltage wire such as doorbell wire or telephone wire.
-
Page 36: Motion Detection Or Timed Emails And Ftp Uploads
Motion Detection or Timed Emails and FTP Uploads The camera refers to motion detection as an “alarm”. You can select what you want the camera to do once the motion is detected. One option is to set up the details of your email server account and have the camera send you JPEG snapshots. - Page 37 Note: Gmail requires that you go to your account settings on Gmail.com and enable POP, disable IMAP, and with a browser other than Google Chrome, select “Basic Attachments” in the “General” settings tab. Chrome hides this option. Important: Without these Gmail settings the camera can’t send email Note that if you have a typo in any of this information, the camera would have no way to let you know about that.
- Page 38 After setting up the email server you would then enable the email alarms through the alarm management menu. Common settings are shown below: Trigger time and trigger FPS (frames per second) have the following meaning: When motion detection is triggered, send pictures at the rate of “Trigger FPS” frames per second for the duration of “Trigger time”.
- Page 39 If you prefer, you can have the pictures uploaded to an FTP or HTTP server instead of an email address. There are many choices for FTP servers. For example, you could enable the built in FTP server function on one of your computers or download free FTP server software such as FileZilla.
-
Page 40: Stream Setup And Recording Options
Stream Setup and Recording Options There are several different ways in which the camera can record video. All methods can be used with or without motion detection. 1) Totally automatic, standalone recording to internal MicroSD card 2) Totally automatic recording to a network (NAS) drive 3) One-click recording on a Windows PC using Internet Explorer 4) Recording on a PC with the included MultiLive software or commercial software (BlueIris, LuxRiot) -
Page 41: Recording To Built-In Micro-Sd Card
Recording to built-in Micro-SD card All new VIPcella series cameras can now accept MicroSD cards up to 16 GB. All cards should be fully formatted prior to use with the official software from http://www.sdcard.org/downloads. A pre-formatted card is included with outdoor cameras only. - Page 42 Errors caused by removal during recording might require reformatting. To access the MicroSD card slot on the SCNC3605/06, please bring the camera indoors (in an area of low humidity), then unscrew the entire front part of the camera. It is easiest to do it if you take the sunshield off first. The MicroSD card slot is right under the reset button shown below: Please be very careful not to touch the lens.
-
Page 43: Using The Camera As A Continuously Recording Dvr
Using the camera as a continuously recording DVR With the larger MicroSD cards it is practical to use the camera as a continuously recording DVR (Digital Video Recorder) with the right settings. A 2 GB MicroSD card has about 1872 usable megabytes of storage space after formatting. -
Page 44: Nas Drive Setup
NAS drive setup The “Storage Setup” submenu allows you to select a NAS (network attached storage) drive instead of MicroSD as the destination for the camera’s standalone recording. If NAS is selected you need the IP address of the drive and the “share”... - Page 45 Network folder as shown on a PC: Network folder as shown on a Mac: To set up a Time Capsule for use with Sharx Cameras: In Airport Utility, go to the “Disks” icon at the top, then to the File Sharing tab, make sure “Enable File Sharing”...
-
Page 46: Automatic Uploading To An Ftp Server
Automatic Uploading to an FTP server If you do not have a locally connected NAS (network attached storage) drive but still want to upload your recorded video files to a server, you can do that with the new “FTP sending” menu. Unlike NAS, FTP works over the internet. First you would set up your FTP server account information in the camera’s “Alarm Server”... -
Page 47: Recording Video Using A Computer
Recording Video using a Computer If you prefer to record video using a computer, there are several different options. On PCs with Internet Explorer the simplest method is to just press the red record button while viewing your camera. Be sure to use the button with the wrench icon first to select a proper folder for storage of your recorded video, and for motion detection recording select the “alarm”... -
Page 48: Multilive: Pc Software For Multiple Camera Recording
MultiLive: PC Software for Multiple Camera Recording Once installed, the included PC MultiLive software allows you to view and record multiple Sharx IP cameras at the same time. The menus are fairly straightforward. You add cameras with the Camera Manager menu (under Option) then you activate them with the Connect menu (under Control). -
Page 49: Viewing Live Video On Your Cell Phone
Viewing Live Video on your Cell Phone As with using a computer, you connect to the camera with your cell phone by typing the complete IP address into your browser or by selecting from previously entered bookmarks. If you’re connected via Wifi to the same local network as the camera, you would use the local IP address (usually starts with 192.168 or 10.0) If connected remotely, you would first make sure you’ve completed the “remote access setup”... - Page 50 Still, passwords can cause problems. In that case we recommend to go to the first button (Picture live) and then entering your username and password with the “Save Password” option on your cell phone checked. If you want to save time or you want to explore other options, there are ways to get to the different video streams without the initial login screens.
-
Page 51: Iphone And Android Apps
On an Amazon Kindle Fire tinyCam can show 4 cameras at the same time. For setup, be sure to select “Sharx Security” in the camera vendor field. Then add your camera’s IP address in the “Hostname or IP address” field, without any extra characters. -
Page 52: Audio/Video Stream Reference
Audio/Video Stream Reference The Sharx VIPcella series of cameras is very versatile and supports multiple simultaneous video streams. Entering through the main login screen automatically activates the highest resolution video stream, called the Primary Stream. On a PC with Internet Explorer this will be MPEG4 video with audio. Other browsers like Safari and Firefox cannot automatically install the ActiveX MPEG4 decoding and recording software and in that case the Motion JPEG stream will be automatically selected. - Page 53 You will notice that some entries start with “RTSP:” instead of “HTTP:”. This is not a typo. RTSP streams can be opened by the “Open URL…” menu in Apple QuickTime 7 on Windows or Macintosh with audio and video. Linux enthusiasts may want to try the VideoLAN VLC Media Player, version 1.xx NOTE: QuickTime 7 works very well.
- Page 54 The reason for having multiple sets of streams is to allow simultaneous access to the camera at different resolutions without changing configuration. For instance, you could access one of the mobile streams from your cell phone and the Primary stream from your work computer, all without changing configuration and only by selecting the corresponding bookmark.
-
Page 55: Resetting The Camera Back To Factory Settings
Resetting the Camera back to Factory Settings If you ever forget your admin password or have any other reason to reset the camera to its factory settings, please use the following procedure: 1) Make sure the camera is powered up 2) For indoor cameras insert the tip of a paper clip in the hole at the side of the camera to press the reset switch. - Page 56 Aperture F2.0 Min.llumination 1.0 Lux (SCNC2606 only). 2607, 2700, 3605/6 can see in total darkness with IR Infrared LEDs 30 on SCNC2607, 28 on SCNC2700, 12 high power LEDs on SCNC3605 / 06 Automatic IR filter for excellent daytime colors on SCNC2700, SCNC3605/06...
-
Page 57: Glossary: A Quick Review Of Networking Terminology
Glossary: A quick Review of Networking Terminology To participate in a computer network, each device needs an “Internet Protocol” address that is unique on that network. This IP address consists of 4 groups of numbers separated by periods. For example: 192.168.0.2 IP addresses are assigned to a device either automatically by the router or manually by a person who is setting up the network. -
Page 58: Appendix A: Wireless Setup Instructions Without Cat5
Appendix A: Wireless setup instructions without Cat5 We have received inquiries from customers with no available wired network jack to plug the camera into for the initial configuration. For instance, if an Airport Express is used as the only router for a network, the single network jack is taken by the required connection to the cable or DSL modem. -
Page 59: Appendix B: Setup Instructions For Att (2Wire) Router
The second application should be named Cam1RTP. The public UDP port range is 30000-30001 and the “map to host port” is 30000. After these 2 applications are defined, you select the SCNC2606 or SCNC2607 in the drop down box titled “Choose the computer…” and add these 2 applications so they are active for your camera, then you save the settings and restart your router. -
Page 60: Appendix C: Motion Detection Adjustment
Appendix C: Motion Detection Adjustment After selecting “motion detection” from the main settings screen, you may need to expand the size of the display window towards the right to see the 4 controls for individual motion detection windows. Each window can have individually adjustable sensitivity and threshold. In general, motion detection works by comparing the current video frame with the averages of the previous video frames. -
Page 61: Appendix D: Known Issues
Appendix D: Known issues 1. Recording multiple cameras on one NAS drive requires multiple network “shares”. A NetGear ReadyNAS and WD World Edition can set up multiple network shares but some lower end NAS drives cannot. The Apple Time Capsule shows only one share, but if you set up individual user accounts for each camera, then the Time Capsule automatically creates a share for each account and therefore can be used with multiple cameras, up to 4 cameras per Time Capsule. -
Page 62: Appendix E: Burglar Alarm System Integration
Appendix E: Burglar Alarm System Integration The outdoor cameras in the SCNC36xx series have additional connectors to help with integration of the cameras into a complete burglar alarm system. 1: GND: Signal ground for use with DI 2: DI: Digital Input (use with GND) 3: DO: Digital Output (open collector) 4: Power + 12 VDC (MAX 0.4 A) Typically this type of wiring is carried out by a professional security system... -
Page 63: Appendix F: The Scnc2607 Sees Too Much Pink And Purple
Appendix F: The SCNC2607 sees too much pink and purple! The SCNC2606 has an optical filter element in the lens to remove all infrared light that cannot be seen by the human eye. This makes the remaining colors look rich and natural to us because we see colors the exact same way. -
Page 64: Contact Us
We pledge that we will not let you fail. Contact us with any questions, no matter how simple or how complicated. Sharx Security and the Sharx Security logo are US and internationally registered trademarks, and VIPcella is a trademark of Sharx Security, Inc.
Need help?
Do you have a question about the SCNC2606 and is the answer not in the manual?
Questions and answers