Table of Contents
Advertisement
BEFORE FLYING, PLEASE
THESE INSTRUCTIONS!
and go to www.knowbeforeyoufly.org
Spare Blades
(2 black, 2 color)
Controller
AAA
Batteries (4)
Camera with Memory Card
DIDE06 Only
Press for auto takeoff
4
or auto landing.
READ & UNDERSTAND
Battery Charger
Screwdriver
AC Adapter
Prop Guards (4)
TO PREVENT MOTOR DAMAGE ALWAYS BE SURE THE THROTTLE IS
OFF WHEN THE BLADES ARE OBSTRUCTED OR CONTROL IS LOST.
1
2
Hold 1.5 s to start
3
or stop motors.
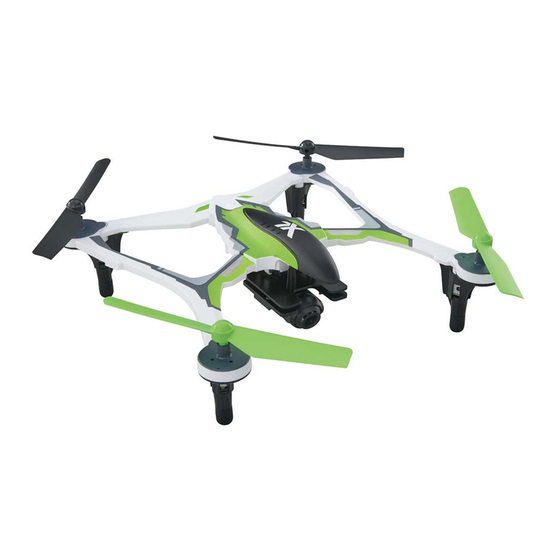
Radio Controlled
Quadcopter
Dromida XL
Quadcopter
Flight
Battery
Use the left
stick to arm the
transmitter.
5
ALTITUDE
HOLD
Advertisement
Table of Contents

Related Manuals for Dromida XL


Summary of Contents for Dromida XL
- Page 1 BEFORE FLYING, PLEASE READ & UNDERSTAND THESE INSTRUCTIONS! and go to www.knowbeforeyoufly.org Radio Controlled Quadcopter Spare Blades Dromida XL (2 black, 2 color) Battery Charger Quadcopter Controller Screwdriver Batteries (4) AC Adapter Flight Battery Prop Guards (4) Camera with Memory Card...
- Page 2 Stop Button to disable power immediately. flying! Damage to the battery FLYING BASICS may result if left connected. 1. Place the Dromida XL on a smooth, level surface away from yourself, spectators, and obstacles. The quad should be facing away from you.
-
Page 3: Low Battery Indicator
4. Move the left stick up or down to increase or decrease altitude. The LEDs on the Dromida XL will fl ash slowly when the LiPo battery voltage is 5. Use the right stick to move left, right, forward, or backward. - Page 4 2. Turn on the controller and connect the battery to the Dromida XL. Before taking the DroneView network. The actual pictures or video you must allow the camera 30 seconds to initialize. Pictures...
- Page 5 Press reset to return the brightness and contrast to the default values. Dromida XL relying solely on the FPV feed. Delays in the FPV feed can cause the Resolution Mode switches the camera output between 1080p @ 30 frames/sec image shown in the app to not represent the exact current position of the Dromida and 720p @ 60 frames/sec.
-
Page 6: Troubleshooting
PROBLEM: The Dromida XL will not respond to the controller. SOLUTION: (1) Charge or change the battery in the Dromida XL. (2) Turn off the 2. Pull the prop off the controller and disconnect the battery for the Dromida XL. Re-link the gear shaft. -
Page 7: Motor Replacement
Check that the part is properly aligned and that the wires and LEDs are not interfering with the installation. 9. Before attempting to fly your Dromida XL, recalibrate the sensors. -
Page 8: Battery Precautions
Maintain a safe pilot-to-quadcopter distance while fl ying. • Your Dromida XL quadcopter should not be considered a toy, but rather a small, working model. If not operated correctly, the model could possibly cause injury to you or spectators and damage to property. -
Page 9: Ce Compliance Information For The European Union
OPTIONAL BATTERY AND CHARGERS following the provisions of the European 2006/95/EC Low Voltage The battery included with the Dromida XL is a standard sized 2200mAh 7.4V LiPo. Directive: The Flight Power FP30 7.4V 2200mAh 30C would be an acceptable substitute. -
Page 10: Replacement Parts
Prop Set Orange DIDE1244 Prop Set Red 12 DIDE1263 E-Board Dampers 3 DIDE1245 Canopy Green 13 DIDE1264 Camera Mount Assembly XL FPV Only DIDE1246 Canopy Blue 14 DIDE1265 Landing Pads DIDE1247 Canopy Orange 15 TACZ1020 DroneView 1080P Wi-Fi Camera FPV Only... -
Page 11: Explode View
EXPLODE VIEW Bold = FPV parts only... - Page 12 TO PREVENT MOTOR DAMAGE ALWAYS BE SURE THE THROTTLE IS OFF WHEN THE BLADES ARE OBSTRUCTED OR CONTROL IS LOST. PRESS AND HOLD THE MOTOR OFF PANIC BUTTON! dromida.com © 2016 Dromida, a Hobbico ® company DIDE05xx DIDE06xx...
Need help?
Do you have a question about the XL and is the answer not in the manual?
Questions and answers