Advertisement
thank you for purchasing a Sealey product. manufactured to a high standard, this product will, if used according to these instructions,
and properly maintained, give you years of trouble free performance.
IMPORTANT: PLEASE READ THESE INSTRUCTIONS CAREFULLY. NOTE THE SAFE OPERATIONAL REQUIREMENTS, WARNINGS & CAUTIONS. USE
THE PRODUCT CORRECTLY AND WITH CARE FOR THE PURPOSE FOR WHICH IT IS INTENDED. FAILURE TO DO SO MAY CAUSE DAMAGE AND/OR
PERSONAL INJURY AND WILL INVALIDATE THE WARRANTY. KEEP THESE INSTRUCTIONS SAFE FOR FUTURE USE.
refer to
instruction
manual
1. SafetY
1.1.
electrical Safety
WarninG! it is the user's responsibility to check the following:
‰
1.1.1.
check all electrical equipment and appliances to ensure that they are safe before using. inspect power supply leads, plugs and all
electrical connections for wear and damage. ensure the risk of electric shock is minimised by the installation of appropriate safety
devices. An rccB (residual current circuit Breaker) should be incorporated in the main distribution board. We recommend that an
rcd (residual current device) is used with all electrical products. it is particularly important to use an rcd with portable products
that are plugged into a supply not protected by an RCCB. If in doubt consult a qualified electrician. You may obtain an RCD by
contacting your local sealey dealer.
electrical safety information, it is important that the following information is read and understood.
1.2.
The Electricity at Work Act 1989 requires that all portable electrical appliances, if used on business premises, are tested by a qualified
electrician, using a Portable Appliance tester (PAt), at least once a year.
1.2.1.
the Health & safety at Work Act 1974 makes owners of electrical appliances responsible for the safe condition of those appliances
and the safety of the appliance operators. If in any doubt about electrical safety, contact a qualified electrician.
1.2.2.
ensure that the insulation on all cables and on the appliance is safe before connecting it to the power supply. see 1.1.1. and use a
Portable Appliance tester.
1.2.3.
ensure that cables are always protected against short circuit and overload.
regularly inspect power supply cables and plugs for wear or damage and check all connections to ensure that they are secure.
Important: Ensure that the voltage rating on the appliance suits the power supply to be used and that the plug is fitted with the correct
fuse - see fuse rating in these instructions.
do not pull or carry the appliance by the power cable.
8
do not pull the plug from the socket by the cable. Remove the plug from the socket by maintaining a firm grip on the plug.
8
do not use worn or damaged cables, plugs or connectors. ensure that any faulty item is repaired or replaced immediately by a
8
qualified electrician.
1.3.
This product is fitted with a BS1363/A 13 Amp 3 pin plug.
if the cable or plug is damaged, remove from use and ensure that repairs are carried out by a
qualified electrician.
Replace a damaged plug with a BS1363/A 13A 3 pin plug. If in doubt contact a qualified electrician.
a) Connect the GREEN/YELLOW earth wire to the earth terminal 'E'.
b) Connect the BROWN live wire to the live terminal 'L'.
c) Connect the BLUE neutral wire to the neutral terminal 'N'.
d) After wiring, check that there are no bare wires and ensure that wires have been correctly connected.
ensure that the cable outer sheath extends beyond the cable restraint and that the restraint is tight.
double insulated products are marked with the class ii symbol.
class ii products are wired with live (brown) and neutral (blue) only. to rewire,
connect the wires as indicated in diagram.
do not connect either wire to the earth terminal.
Products which require more than 13 amps are supplied without a plug. Contact a qualified electrician
to ensure that a suitably rated supply is available. ensure that an industrial round pin plug and socket are
fitted by a qualified electrician.
if an extension cable reel is used, ensure that it is fully unwound before connection. use a reel that includes an rcd, an appliance
will be protected by the rcd. the cable core section is important and should be at least 1.5mm². ensure that the cable of the reel is
appropriate for this product. We recommend the use of 2.5mm² core section cable.
1.4.
General Safety
check that the unit is in sound condition and good working order. take immediate action to repair or replace damaged parts.
9
use recommended parts only. unauthorised parts may be dangerous and will invalidate the warranty.
9
do not stand or place any object closer than 500mm from the unit.
8
do not obstruct the air intakes or outlets of the unit, and do not cover with washed clothes.
8
do not place any object into the outlets - the unit has a fan running at high speed, contact with this will cause injury.
8
do not operate the unit when you are tired or under the influence of alcohol, drugs or intoxicating medication.
8
do not switch the unit off by disconnecting it from the mains. ALWAYS switch to the "OFF" position first.
8
do not remove the float lever from the water collection tank.
8
© Jack sealey limited
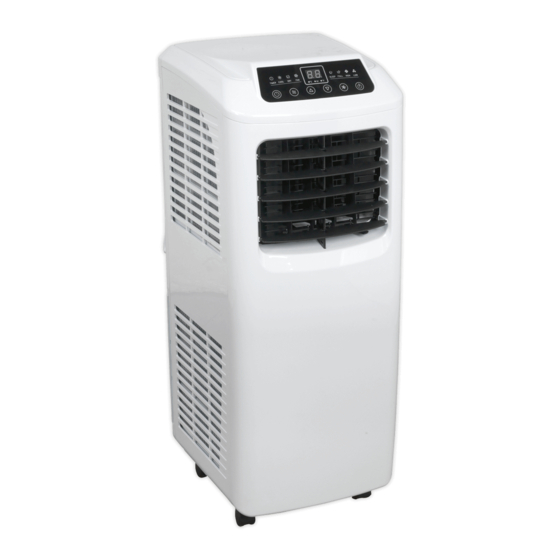
instructions for
air conditioner/dehumidifier 9000btu/hr
Sac9001
model no:
Original Language Version
recommended fuse rating
13amp
sAC9001 | Issue 3 (L) 29/11/16
Advertisement
Table of Contents

Related Manuals for Sealey Sac9001


Summary of Contents for Sealey Sac9001
- Page 1 Sac9001 model no: thank you for purchasing a Sealey product. manufactured to a high standard, this product will, if used according to these instructions, and properly maintained, give you years of trouble free performance. IMPORTANT: PLEASE READ THESE INSTRUCTIONS CAREFULLY. NOTE THE SAFE OPERATIONAL REQUIREMENTS, WARNINGS & CAUTIONS. USE THE PRODUCT CORRECTLY AND WITH CARE FOR THE PURPOSE FOR WHICH IT IS INTENDED.
-
Page 2: Specification
3. Specification model no:......Sac9001 cooling Capacity: .....9000Btu/hr supply........230V Power . -
Page 3: Installation
4.6. Snap the flat end of the exhaust hose connector into the elliptical hole of the window sealing board assembly (as shown in Fig 4 and fig 5). 4.7. to ensure adequate operation, ensure that the exhaust hose is not kinked, do not bend the exhaust hose any more than 45°. important: ‰ The exhaust hose is 280mm-1500mm long and this length is determined based on the specification of the air-conditioner (s). Do not use hoses with other specifications. Do not replace with non-genuine components as this may affect the functions of the air-conditioner. The flow of exhaust must be smooth. Obstructed exhaust may cause the air-conditioner to overheat. Original Language Version sAC9001 | Issue 3 (L) 29/11/16 © Jack sealey limited... -
Page 4: Operation
After operating for another 2 hours, the set temperature will increase 1°c (1°f) again. then the set temperature will not change and the fan will switch to low level. dehumidifying mode: 5.3.2. If the ambient temperature ≥17°C (62°F), the compressor will start. Then, the unit is controlled in the following manner: When the ambient temperature ≤15°C (59°F), the compressor shuts down. When the ambient temperature rises to be ≥17°C (62°F), the compressor starts again. The start/stop of the compressor meets the requirement for 3-minute protection time. 5.3.3. fan mode: Fan runs on both high speed or low speed. Temperature setting displays environment temperature between 0 / 35°C (50 / 95°F). Original Language Version sAC9001 | Issue 3 (L) 29/11/16 © Jack sealey limited... -
Page 5: Water Drainage
Place a vessel beneath the water outlet, at the back of the unit, to drain water. Unscrew the drain cap and remove the water plug to allow water to flow into the vessel. note: Protect the drain cap and water plug from becoming detached. tilt the unit slightly backward when draining. fig.6 Original Language Version sAC9001 | Issue 3 (L) 29/11/16 © Jack sealey limited... -
Page 6: Maintenance And Servicing
40°c). use neutral cleaner. dry in the shade. (fig 11) fig.11 fig.10 fig.12 fig.9 note: Do not damage the mesh fabric on the filter frame and filter mesh. 7.3. Installation of the filter frame and filter mesh 7.2.7. Install the filter mesh first and then install the filter frame. 7.2.8. To install the evaporator filter mesh and condenser filter mesh, point the back end of the filter mesh toward the socket and then push the filter mesh evenly and gently into the socket. note: Install the filter mesh in the reverse order of removal. The filter mesh must be installed into place; otherwise, the filter frame may not be installed into place. Original Language Version sAC9001 | Issue 3 (L) 29/11/16 © Jack sealey limited... -
Page 7: Moving The Unit
Pack the air-conditioner in a soft plastic bag. store the unit in a dry and dust proof place. Keep the unit out of the reach of children. 9.6. remove batteries from the remote control. store remote control in an appropriate place. 9.7. ensure that the unit is stored in a dry place. troubleShootinG Repairs should be carried out by suitably qualified persons only. Original Language Version sAC9001 | Issue 3 (L) 29/11/16 © Jack sealey limited... - Page 8 Waste batteries and accumulators regulations 2009, Jack Sealey ltd are required to inform potential purchasers of products containing batteries (as defined within these regulations), that they are registered with Valpak’s registered compliance scheme. Jack Sealey Ltd’s Batteries Producer Registration Number (BPRN) is BPRN00705.
Need help?
Do you have a question about the Sac9001 and is the answer not in the manual?
Questions and answers