Table of Contents

Related Manuals for CDA WC371


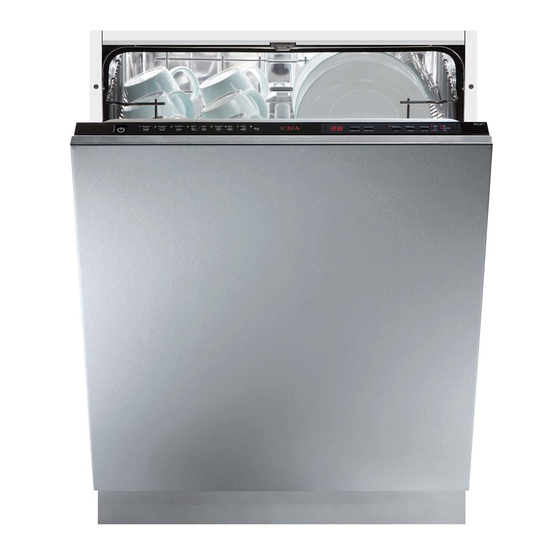
Summary of Contents for CDA WC371
- Page 1 Intelligent Dishwasher Installation, Use and Maintenance Customer Care Department • The Group Ltd. • Harby Road • Langar • Nottinghamshire • NG13 9HY T : 01949 862 012 F : 01949 862 003 E : customer.care@cda.eu W : www.cda.eu www.cda.eu...
-
Page 2: Table Of Contents
Contents Important information Important notes Before first use Using your dishwasher Starting a programme Changing a programme Cancelling a programme Detergent information Salt information Softener adjustment Rinse aid information Dishwasher basket information Standard loading Programme listing 23 Care and Maintenance 25 Fault code information 26 Troubleshooting Electrical Information... - Page 3 Appliance information: Please enter the details on the appliance rating plate below for reference, to assist CDA Customer Care in the event of a fault with your appliance and to register your appliance for guarantee purposes. Appliance Model Serial Number This appliance has been designed for domestic use only.
-
Page 4: Important Information
CE marking. Availability of this manual in an alternative format: A soft copy of this manual is available for download from www.cda.eu. IMPORTANT INFORMATION FOR CORRECT DISPOSAL OF THE PRODUCT IN ACCORDANCE WITH EC DIRECTIVE 2012/19/EU. - Page 5 Important • Read the instructions prior to installation and use of the appliance. • Do not lean or climb on the open dishwasher door, to prevent damage. • Close the dishwasher door after use to prevent accidents. • Use only detergents, salt and rinse aid specifically designed for dishwashers.
-
Page 6: Before First Use
• This appliance can be used by children aged from 8 years and above and persons with reduced physical, sensory or mental capabilities or lack of experience and knowledge if they have been given supervision or instruction concerning use of the appliance in a safe way and understand the hazards involved. -
Page 7: Control Panel
• Remove all the packaging materials from the interior of the dishwasher. • Fill the rinse aid compartment. • Run a hot programme without any dishes in the dishwasher. Control panel Power button (1) • To switch the dishwasher on or off, press the power button (1). When you switch on the dishwasher, the end of programme light will illuminate, and two dashes will appear on the display. - Page 8 Delay timer button (4) The dishwasher is equipped with a variable timer of up to 19 hours’ duration at hourly intervals. • To set the delay timer, press the delay timer button (4). This will switch the timer on for one hour. •...
- Page 9 The prewash is also an independent programme (8) which can be used to rinse the contents of the dishwasher, for example if the dishwasher is not yet full and a complete programme is not yet required. • To use this function, select the programme as described on page Half-load button (7) and indicator lights The dishwasher is equipped with a half-load function that allows for either the upper or lower basket to be washed independently, or for...
-
Page 10: Starting A Programme
extra function, press the specific extra function button (5, 6 or 7) until the indicator light for that function goes out. Starting a programme • Press the Power button (the end of programme light will be switched on) • Press the Programme Selection button until the required programme is shown on the display. -
Page 11: Cancelling A Programme
programme is shown on the display. • Then close the door. The dishwasher will begin the new programme from the point at which the old programme stopped. Cancelling a programme It is possible to cancel the programme once it has started. •... - Page 12 Detergent To fill the detergent compartment 1. Push the latch to open the compartment. 2. Add the required amount of detergent. The main detergent compartment (b in Fig. 1) Fig. 1 has lines to allow for specific amounts of detergent. These are marked at either 15cm 25cm , depending on how dirty the dishes...
- Page 13 CDA recommends the use of separate detergent, rinse aid and dishwasher salt, rather than combination tablets, as separates achieve better wash performance. If you do use combination detergents, add salt and rinse aid to the dishwasher and then adjust the water hardness setting and rinse aid setting to the minimum.
-
Page 14: Softener Adjustment
3. Replace the cap and the lower basket. When the ‘Salt Warning’ light on the control panel illuminates, you should refill the salt compartment with salt only – do not add water to the salt compartment after the first use. You should run a programme immediately after adding dishwasher salt, to prevent any damage to the dishwasher systems. - Page 15 If the hardness of the water you use is above 63dE or if you are using well water; you are recommended to use filter and water refinement devices. Please note: The level of water hardness is preset to level 3. 1.
-
Page 16: Rinse Aid Information
Rinse aid To fill the rinse aid compartment: 1. Open the rinse aid compartment by turning and removing the cap as shown in Fig. 4. Fig. 4 2. Fill the rinse aid compartment until the rinse aid indicator goes dark, as shown in Fig. -
Page 17: Dishwasher Baskets
Dishwasher baskets Top basket height adjustment while it is To adjust the height of the upper basket: Basket he your mach Top basket height adjustment while it is full Top basket height adjustment while it is full 1. Take hold of the basket handles, as top basket Basket height adjustment mechanism on the top basket of Basket height adjustment mechanism on the top basket of... - Page 18 Upper basket Poorly stacked loads...
- Page 19 Glass Guards The upper basket racks come with a ‘GlassGuard’ feature. These allow you to place wine glasses securely into the dishwasher and help to prevent the glasses from causing or receiving damage. They are simple to use and involve placing the stem of the glass into the blue grooves along the outside edge of the racks.
-
Page 20: Standard Loading And Test Data
Standard Loading and Test Data Capacity • Upper and lower baskets: 13 place settings. • The upper basket should be adjusted to high position. • Cups should be placed onto the dish rack pins. Detergent / Rinse aid • 5 + 25cm³, in accordance with EN50242-DIN 44990 IEC 436 (international norms) / Rinse aid dosage adjustment: 5. -
Page 21: Programme Listing
Programme Listing... - Page 22 Warning: Short programmes do not include a drying stage. The values and times provided on the previous page have been ob- tained under laboratory conditions according to relevant standards. This information can change depending on the conditions of the dishwasher’s use and environment (network voltage, water pressure, water input temperature and environment temperature).
-
Page 23: Care And Maintenance
Care and Maintenance Before beginning any care or maintenance, you should always disconnect the appliance from the electricity supply, and also turn off the water supply. Fig. 9 Door seals Wipe the dishwasher door seals regularly with a damp cloth to remove any residues. Fig. - Page 24 Incorrect fitting of the filters may reduce wash performance and potentially damage your appliance. Spray arms You should clean the spray arms at least once a month. 1. Remove the lower basket. 2. Pull the lower spray arm upwards to remove it. 3.
-
Page 25: Fault Codes
The filters of your machine might be blocked The waste water cannot be discharged • Restart the dishwasher and cancel the programme • If the error continues, contact CDA Customer Care Continual fill error • Contact CDA Customer Care Faulty flow meter •... -
Page 26: Troubleshooting
Troubleshooting Problem Possible cause Check the plug, fuse and circuit breakers of the mains supply. The water tap is turned off. The programme will not start The dishwasher door is not fully closed. The water inlet filter or the machine filters are blocked. The water drain hose is blocked or kinked. -
Page 27: Electrical Information
Electrical Information Warning! This appliance must be earthed. Fig. 13 The mains lead of this appliance has been fitted with a BS 1363A 13 amp fused plug. To change a fuse in this type of plug, follow the steps below: 1. - Page 28 As the colours of the wires in the mains lead of this appliance may not correspond with the coloured markings identifying the terminals in your plug, proceed as follows:- • The wire which is coloured GREEN and YELLOW must be connected to the terminal which is marked with the letter (E) or by the Earth symbol or coloured GREEN and YELLOW.
-
Page 29: Installation
Installation • Do not install this appliance if it is damaged in any way. Installing a damaged appliance may invalidate the warranty and could cause further damage to the surrounding area. • Do not hold the appliance by the door or control panel to move it as this may cause damage. - Page 30 Figures 14 and 15 on page 31 show the recommended installations of our dishwashers. The set-ups in these figures should be mimicked wherever possible to help to ensure the best performance of the ap- pliance. Please carry out the below checks/measures before, dur- ing and after installation.
- Page 31 • Use the additional fitting template and kit supplied with the appli- ance to fit the appliance into the cabinetry, secure it and fit and secure the decor door. • Adjust the dishwasher door hinge tension as necessary to ensure the appliance door opens and closes properly and safely with the decor door attached.
-
Page 32: Fitting The Decor Door
Fitting the decor door Where non-standard decor doors are to be used, additional fitting instructions are required to ensure compatibility with this product. The appliance is supplied with a fitting template and these instructions should be followed as normal. However, the fitting template needs to be located lower down the fascia door. - Page 33 IMPORTANT After completing the installation, test that the appliance fills and drains without issue on any programme. Below are two potential faults that you may encounter (displayed by programme indicator lights and/or fault code) and their potential causes. Inadequate water supply. Check that the Intensive Super Quick...
- Page 34 NOTES:...
- Page 35 This programme is suitable to clean normally soiled tableware and it is the most e cient programme in terms of combined energy and water consumption. E & O E. All instructions, dimensions and illustrations are provided for guidance only. CDA reserve the right to change specifications without prior notice.
- Page 36 T : 01949 862 012 F : 01949 862 003 E : customer.care@cda.eu Customer Care Department • The Group Ltd. • Harby Road • Langar • Nottinghamshire • NG13 9HY T : 01949 862 012 F : 01949 862 003 E : customer.care@cda.eu W : www.cda.eu www.cda.eu Copyright © CDA 2017...
Need help?
Do you have a question about the WC371 and is the answer not in the manual?
Questions and answers