Table of Contents
Advertisement
Quick Links
See also:
User Manual
Advertisement
Table of Contents

Related Manuals for Psion Teklogix 7545


Summary of Contents for Psion Teklogix 7545
- Page 1 7545 Hand-Held Computer User Manual May 27, 2011 P/N 8000211.A ISO 9001 Certified Quality Management System...
- Page 2 2100 Meadowvale Boulevard, Mississauga, Ontario, Canada L5N 7J9 http://www.psionteklogix.com This document and the information it contains is the property of Psion Teklogix Inc., is issued in strict confidence, and is not to be reproduced or copied, in whole or in part, except for the sole purpose of promoting the sale of Psion Teklogix manufactured goods and ser- vices.
- Page 3 Return-To-Factory Warranty Psion Teklogix Inc. provides a return to factory warranty on this product for a period of twelve (12) months in accordance with the Statement of Limited Warranty and Limitation of Liability provided at: www.psionteklogix.com/warranty The warranty on Psion Teklogix manufactured equipment does not extend to any product that has been tampered with, altered, or repaired by any person other than an employee of an authorized Psion Teklogix service organization.
- Page 5 1. DECLARATION OF CONFORMITY When used in a residential, commercial or light industrial environ- ment the product and its approved UK and European peripherals ful- fil all requirements for CE marking. EU Directives This equipment complies with the essential requirements of EU Directives 1999/5/EC, 2004/108/EC and 2006/95/EC, as applicable.
- Page 6 ES, 2004/108/ES in 2006/95/ES. Deklaracije so na voljo pri vašem krajevnem predstavniku. Αυτός ο εξοπλισμός συμμορφώνεται με τις βασικές απαιτήσεις των εφαρμοσμένων οδηγιών 1999/5/EC, 2004/108/EC kai 2006/95/EC της Ευρωπαικής Ένωσης. Οι επίσημες δηλώσεις είναι διαθέσιμες από τον τοπικό σας αντιπρόσωπο. Psion Teklogix Omnii Regulatory & Warranty Guide...
- Page 7 Use of the 802.11 device in France: owing to French Government restrictions, the 802.11 device is limited to indoor use. It may be used out- doors, on private property, only with prior authorization from the French Ministry of Defense. Psion Teklogix Omnii Regulatory & Warranty Guide...
- Page 8 FCC Caution: Any changes or modifications made to this equipment not expressly approved by Psion Teklogix Inc. may void the FCC authorization to operate this equipment. IMPORTANT NOTE:...
- Page 9 Omnii and contact your medical specialist for assistance. Note: To maintain compliance with the FCC RF exposure guidelines, if you wear the Omnii on your body, use the Psion Teklogix approved carrying case. Use of non-approved accessories may violate FCC RF exposure guidelines.
-
Page 10: Table Of Contents
2.10.2 Using Windows Mobile Device Center .........31 Psion Teklogix Omnii Hand-Held Computer User Manual... - Page 11 Contents Chapter 3: Getting To Know Your 7545 Battery Details................41 3.1.1...
- Page 12 Keyboard Backlight ..........102 Psion Teklogix Omnii Hand-Held Computer User Manual...
- Page 13 The Bluetooth GPRS WAN Connection ........142 Psion Teklogix Omnii Hand-Held Computer User Manual...
- Page 14 5.14.2 User................177 Psion Teklogix Omnii Hand-Held Computer User Manual...
- Page 15 Decoded (Internal) Scanners ............C-5 viii Psion Teklogix Omnii Hand-Held Computer User Manual...
- Page 16 C.4.18 RSS Code (Reduced Space Symbology) ........C-36 Psion Teklogix Omnii Hand-Held Computer User Manual...
- Page 17 Code 39 ..............D-23 Psion Teklogix Omnii Hand-Held Computer User Manual...
- Page 18 Index ............. . . I Psion Teklogix Omnii Hand-Held Computer User Manual...
- Page 19 Contents Psion Teklogix Omnii Hand-Held Computer User Manual...
- Page 20 1.4 Regulatory Labels ........8 Psion Teklogix Omnii Hand-Held Computer User Manual...
-
Page 22: Chapter 1: Introduction
Chapter 1: Introduction About the User Manual About the User Manual This User Manual describes how to configure, operate, and maintain the Psion Teklogix Omnii Hand-Held Computer. Chapter 1: Introduction provides a basic overview of the hand-held. Chapter 2: Basic Operation describes preparing Omnii for operation, including setting up your wireless network. -
Page 23: Text Conventions
Note: Omnii Hand-Held Computer is a body worn device, and to maintain compliance with the FCC RF exposure guidelines, use a Psion Teklogix approved carrying case. Use of non-approved accessories may violate FCC RF exposure guidelines. -
Page 24: Overview Of Omnii Hand-Held Computer
- VGA/QVGA, 480 x 640 resolution - High visibility version: superior sunlight visibility - High Impact version: withstands 1.25 Joule impact • Touchscreen - Passive stylus or finger operation; pan and flick gestures supported - Signature capture Psion Teklogix Omnii Hand-Held Computer User Manual... - Page 25 Integrated Bluetooth class II, V 2.0 + EDR • Optional SIRF III GPS Receiver The following figures illustrate the main features of 7545 —for detailed views, please see “Omnii Features” on page 11. Psion Teklogix Omnii Hand-Held Computer User Manual...
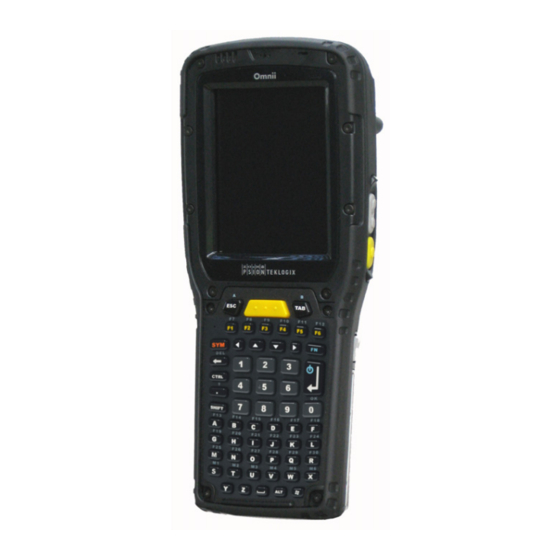
- Page 26 Chapter 1: Introduction Overview of Omnii Hand-Held Computer Figure 1.1 7545 Model Figure 1.2 Bottom View (Docking Connector) Psion Teklogix Omnii Hand-Held Computer User Manual...
- Page 27 2.11.2 Voice Menu ....... . . 32 2.11.3 File Menu – Phonebook Management ....35 Psion Teklogix Omnii Hand-Held Computer User Manual...
-
Page 29: Chapter 2: Basic Operation
Chapter 2: Basic Operation Omnii Features 7545 Features Figure 2.1 Front View Speaker Beeper LEDs Display Scan Key Microphone FN Modifier Key Symbol Modifier Key ENTER/Power Key Psion Teklogix Omnii Hand-Held Computer User Manual... - Page 30 Side Rail Slot for Snap Module Arm Figure 2.3 Bottom View 1 - Docking Connector 2 - Alignment Pin Holes 3 - M2.5 Locking Screws (for firmly attaching devices) 4 - Hand Strap Slot Psion Teklogix Omnii Hand-Held Computer User Manual...
-
Page 31: Preparing Omnii For Operation
5 minutes—you will not lose data if the battery is replaced within this time frame. Figure 2.6 Omnii Battery Battery Top Contacts 1 - Release Latch 2 - Battery Compartment 3 - Guide Tabs Battery Bottom 4 - Latch Tabs Psion Teklogix Omnii Hand-Held Computer User Manual... -
Page 32: Removing The Battery Pack
When the unit is turned off, normally it automatically enters a power-saving, “suspend” state. When Omnii is switched on from the suspend state, operation resumes within a few seconds in the screen in which you were working prior to turning the computer off. Psion Teklogix Omnii Hand-Held Computer User Manual... -
Page 33: Resetting Omnii
Important: If your Omnii fails to power up, consider the following troubleshooting options: The battery may be overheated (>60C°), a non-Psion Teklogix battery may be installed, or the battery may have fallen below the configured Suspend Threshold. See “Suspend Threshold and Estimated Battery Backup” on page 117 for details. - Page 34 The desktop is displayed after a few moments. Bootloader Important: This reset returns Omnii to factory settings. To implement the bootloader: Psion Teklogix Omnii Hand-Held Computer User Manual...
-
Page 35: Attaching Carrying Accessories
Replace the battery and power Omnii on. The terminal will boot as if from a cold reset. Attaching Carrying Accessories Psion Teklogix recommends that a carrying accessory—a hand strap or shoulder strap—be installed on Omnii before use. For detailed information, please see “Carrying and Protective Accessories”... -
Page 36: Configuring Your Wireless Network
Note: In most situations, the configuration of your 802.11 radio will require parameter set- ting and access keys from a network administrator. To launch the Wi-Fi Config application: • Tap on Start>Programs>Wi-Fi Config. The Wi-Fi Config screen is displayed. Psion Teklogix Omnii Hand-Held Computer User Manual... -
Page 37: Wi-Fi Config: Status Tab
Connect: Used to connect to an already existing wireless network configuration. Add New: Used to create a new wireless network configuration. Edit: Used to change values in an already existing wireless network configuration. Remove: Used to delete a wireless network configuration. Psion Teklogix Omnii Hand-Held Computer User Manual... -
Page 38: Authentication Mode
Enter the SSID (Service Set Identifier) for your network. 2.8.2.1 Authentication Mode Omnii supports several classes of authentication—Open, WEP, WPA/WPA2 (Personal PSK, Enterprise, CCKM-WPA, CCKM-WPA2), and 802.1x with EAP. Tapping on the Auth. Mode menu displays your authentication options. Psion Teklogix Omnii Hand-Held Computer User Manual... - Page 39 These authentication modes use 802.1X with EAP authentication. When 802.1X is selected, Omnii uses WEP encryption with automatic (as opposed to static) keying. For the others, the user may choose TKIP, AES or TKIP+AES encryption. Psion Teklogix Omnii Hand-Held Computer User Manual...
-
Page 40: Encryption
This menu allows you to choose the EAP (Extensible Authentication Protocol) type used for 802.1x authentication to an access point. The following EAP types are supported by Wi-Fi Config: • TLS: Provides strong security via the use of client certificates for user authentication. Psion Teklogix Omnii Hand-Held Computer User Manual... -
Page 41: Verify Server Certificate
Omnii for the verification. 2.8.2.5 Enable OPMK When used with compatible wireless infrastructure, Opportunistic Key Caching (OPMK) reduces the number of full authentications required when roaming. Only available with WPA2-Enterprise (EAP) authentication mode. Psion Teklogix Omnii Hand-Held Computer User Manual... -
Page 42: Connecting The Wireless Network
The Status tab is displayed. The Status field displays ASSOCIATING while the 802.11b/g radio attempts to connect to the network. Once the association is complete, the Status tab is populated with the appropriate information about your network. Psion Teklogix Omnii Hand-Held Computer User Manual... -
Page 43: Configuring Tcp/Ip
Tap on the radio icon in the taskbar, Tap on Start>Settings>Network and Dial-up Connections. Tap on the radio icon for which you want to assign an IP address—in the sample screen below, the icon is labelled SDIO86861. Psion Teklogix Omnii Hand-Held Computer User Manual... - Page 44 IP address. This is useful if, for example, you are out of communication range for a longer period of time and your hand-held is dropped from the network. To define a static IP address: • Tap on the Configure button. Psion Teklogix Omnii Hand-Held Computer User Manual...
-
Page 45: Name Server
• Tap on the Name Servers tab. The DNS and WINS fields in the Name Servers tab allow you to specify additional WINS and DNS resolvers. The format for these fields is ###.###.###.###. Psion Teklogix Omnii Hand-Held Computer User Manual... -
Page 46: Wi-Fi Config: Advanced Tab
Values range from 5 to 30 dBm. Concluding the Wi-Fi Configuration If you’ve made changes in the Advanced menus, you will need to warm reset your Omnii. • Choose Start>Shutdown>Warm Reset. Psion Teklogix Omnii Hand-Held Computer User Manual... -
Page 47: Checking The Scanner
Drag and drop files between Omnii and the PC in the same way that you would between PC drives. • Back up Omnii files to the PC, restore them from the PC to the hand-held again, etc. Psion Teklogix Omnii Hand-Held Computer User Manual... -
Page 48: Using Microsoft Activesync
Tap on the Wireless WAN icon, and then tap on the Voice tab. The Voice tab displays a phone dialer used to dial phone numbers. The Voice menu provides commands which allow you to manage your phone contacts, view your phone history, and so on. Psion Teklogix Omnii Hand-Held Computer User Manual... -
Page 49: Dialing A Number
The + symbol replaces the universal dialing prefix 011. 2.11.2 Voice Menu This menu allows you to manage calls, view your call history, and if required, assign a call forwarding service to your hand-held. Psion Teklogix Omnii Hand-Held Computer User Manual... - Page 50 Add to phonebook to add the highlighted phone number to your phonebook. (Refer to “Phonebook” on page 35 for details additional details about the Phonebook.) In the Call List: • Highlight the phone number with which you want to work. Psion Teklogix Omnii Hand-Held Computer User Manual...
- Page 51 The Call Management option only becomes available in the Voice menu when at least one phone call is either On hold or Active. When you choose this command, the currently active phone call is listed in a dialog box. Psion Teklogix Omnii Hand-Held Computer User Manual...
-
Page 52: File Menu - Phonebook Management
Tapping on the File menu provides access to your Phonebook. Phonebook The Phonebook allows you to store frequently used phone numbers. When no numbers have been added to your phonebook, the only command available to you is New Entry. Psion Teklogix Omnii Hand-Held Computer User Manual... - Page 53 Tap on the Execute button to save the phone number in your Phonebook. Phonebook entries are saved even after you exit Wireless WAN. Once you’ve added a phone number to the Phonebook, a list of new commands is available in the drop-down menu. Psion Teklogix Omnii Hand-Held Computer User Manual...
- Page 54 Delete Entry to erase an existing phone entry. In the Phonebook: • Highlight the entry with which you want to work. • Choose a command from the drop-down menu, and tap on Execute to carry out the command. Psion Teklogix Omnii Hand-Held Computer User Manual...
- Page 56 3.8 General Maintenance ........57 Psion Teklogix Omnii Hand-Held Computer User Manual...
- Page 57 3.8.2 Cleaning Omnii ....... . 58 Psion Teklogix Omnii Hand-Held Computer User Manual...
-
Page 58: Battery Details
If you choose Maximum Backup Time, Omnii shuts off with more energy left in the battery so RAM can be backed up for a longer period of time. Psion Teklogix Omnii Hand-Held Computer User Manual... -
Page 59: Charging The Battery
Important: If your Omnii fails to power up, consider the following troubleshooting options: The battery may be overheated (>60C°), a non-Psion Teklogix battery may be installed, or the battery may have fallen below the configured Suspend Threshold. See “Suspend Threshold and Estimated Battery Backup” on page 117 for details. -
Page 60: Regular Keys
The [SPACE] key is represented on the keyboard by a long, low horizontal line contained by a small vertical line on each side. Pressing this key inserts a blank space between characters. In a Windows dialog box, pressing the [SPACE] key enables or disables a checkbox. Psion Teklogix Omnii Hand-Held Computer User Manual... -
Page 61: Modifier Keys
Note: Modifier keys are remapped in the Control Panel, and the Symbol SIP will automat- ically show and use the new mappings after the next reboot. The onscreen keyboard corresponds to the specific keyboard on your Omnii—either numeric or alphanumeric. Psion Teklogix Omnii Hand-Held Computer User Manual... -
Page 62: Function Keys And Macro Keys
Function keys F25 through F30 can only be accessed by remapping another key to that function. To access the white function keys, press the [SHIFT] key followed by the appropriate function key. Psion Teklogix Omnii Hand-Held Computer User Manual... -
Page 63: Macro Keys
Note: The following examples assume that the [FN] key is enabled as ‘Lock’ mode in the ‘One Shot’ screen (accessible through the Control Panel Keyboard icon). In ‘Lock’ mode, pressing the [FN] key once locks it ‘on’. Refer to “Keyboard One Shot Modes” on page 102 for details. Psion Teklogix Omnii Hand-Held Computer User Manual... -
Page 64: The Keypad Backlight
Panel. The behaviour of the keypad backlight is tailored in the Keyboard Properties dialog box. Refer to “Keyboard Backlight” on page 102 for details about this option. Note: Keep in mind that this option may be restricted to supervisory use only. Psion Teklogix Omnii Hand-Held Computer User Manual... -
Page 65: The Display
In the Control Panel, choose the Stylus icon to display the Stylus Properties window. • Select the Calibration tab, and then choose the Recalibrate button. • Follow the directions on the calibration screen to calibrate the screen. Psion Teklogix Omnii Hand-Held Computer User Manual... -
Page 66: Indicators
The far left LED is reserved for battery charge status. This indicator is active even when the hand-held is inserted in a docking station (and in suspend mode) so that the charge status of the battery can be detected easily. Psion Teklogix Omnii Hand-Held Computer User Manual... -
Page 67: Operating System Status Led
The third LED from the left indicates the status of the GPS radio in Omnii. Radio Traffic LED Behaviour Function The GPS radio is disabled. Slow Flashing Blue The GPS radio is enabled and active. Psion Teklogix Omnii Hand-Held Computer User Manual... -
Page 68: Scanner Status Led
The taskbar changes dynamically, and only those icons that are applicable are displayed. For example, if a radio is not installed in your Omnii, the radio signal icon is not displayed in the taskbar. Psion Teklogix Omnii Hand-Held Computer User Manual... - Page 69 When a hand-held is inserted in a docking station, charger or cradle, an associated icon appears in the taskbar. Combo Charger & Quad Docking Station Powered Vehicle Cradle, Desktop Dock Combo Docking Station & Snap Module Psion Teklogix Omnii Hand-Held Computer User Manual...
-
Page 70: Audio Indicators
Press [ENTER] to display the Wireless Statistics dialog box. Note: Moving in and out of the radio coverage area can have varying effects on a network session. At times, you may need to renew your connection by logging in again. Psion Teklogix Omnii Hand-Held Computer User Manual... -
Page 71: Inserting The Microsd Card And Sim Card
Slide the microSD card door to the left to unlock it. Flip it open. • Slide the microSD card into the guides on the SD card door. • Close the microSD card door, and slide it to the right to lock it. Psion Teklogix Omnii Hand-Held Computer User Manual... -
Page 72: Uploading Data In A Docking Station
The chemicals listed below must not come into contact with the touchscreen: • mustard • ketchup • sodium hydroxide • concentrated caustic solutions • benzyl alcohol • concentrated acids Psion Teklogix Omnii Hand-Held Computer User Manual... -
Page 73: Cleaning Omnii
The plastic is partially soluble in oils, mineral spirits and gasoline. The plastic slowly decomposes in strong alkaline solutions. • To clean ink marks from the keypad and touchscreen, use isopropyl alcohol. Psion Teklogix Omnii Hand-Held Computer User Manual... - Page 74 4.5 The PsionVU Desktop Shell ......76 Psion Teklogix Omnii Hand-Held Computer User Manual...
- Page 75 Draft 1...
-
Page 76: Chapter 4: Windows Embedded Ce 6.0
Table 4.1 for a description of the navigation keys. Table 4.1 Keyboard Navigation Operation Key or Key Combination Switch between active applications [ALT] [TAB] Open task manager [ALT] [ESC] Move the cursor Arrow keys Psion Teklogix Omnii Hand-Held Computer User Manual... -
Page 77: Working With Files, Folders, And Programs
Working with Files, Folders, and Programs Figure 4.1 Working with Windows Icons Folder Program Icon File • Double-tap on the appropriate icon—either a folder icon, a program icon or a file icon—to open or launch your selection. Psion Teklogix Omnii Hand-Held Computer User Manual... -
Page 78: Using A Dialog Box
To display the information in the next tab from anywhere in the window, press [CTRL] [TAB]. Textbox: A textbox requires that you type information. Press the [TAB] key to highlight the textbox and then type the appropriate information. Psion Teklogix Omnii Hand-Held Computer User Manual... - Page 79 Saving Your Choices: Once you’ve made all your changes, press the [ENTER] key to save your changes and exit the window. Note: A dialog box item that is displayed in grey text indicates that it is not currently available. Psion Teklogix Omnii Hand-Held Computer User Manual...
-
Page 80: The Windows Classic Shell Startup Desktop
“in focus” and the arrow keys will highlight the icons. 4.4.1 The Desktop Icons The icons displayed in the startup desktop operate in much the same way as those displayed on any standard PC desktop that is running Windows. Psion Teklogix Omnii Hand-Held Computer User Manual... - Page 81 The appearance and actions of the desktop can be changed by tapping on the Shell Switch icon, which activates the PsionVU shell. After switching to PsionVU, the desktop appear- ance will be very different. For detailed information, please go to “The PsionVU Desktop Shell” on page 76. Psion Teklogix Omnii Hand-Held Computer User Manual...
-
Page 82: The Taskbar
Control Panel dialog box associated with the icon. For example, double-tap the battery icon to display a dialog box listing the current battery capacity information. On the keyboard: • Press [Windows] to display the Start Menu. Psion Teklogix Omnii Hand-Held Computer User Manual... -
Page 83: Customizing The Taskbar
The Start Menu lists the operations you can access and work with. It is available from the startup desktop or from within any application. • To display the menu, tap on the Start Menu. Psion Teklogix Omnii Hand-Held Computer User Manual... - Page 84 Use the arrow keys to highlight a menu item, and press [ENTER], or If the menu item has an underlined character: • Type the underlined alpha character. For example, to display the Run dialog box, type the letter ‘r’. Psion Teklogix Omnii Hand-Held Computer User Manual...
-
Page 85: The Desktop
Choosing the Desktop option from the Start Menu displays the Omnii desktop. 4.4.3.2 Programs • Choose Programs to display a sub-menu of options. The programs displayed will be those resident in the Windows\Programs folder of the computer. Figure 4.4 Program Sub-Menu Psion Teklogix Omnii Hand-Held Computer User Manual... - Page 86 Server so that you can run a “session” on the Server machine using the hand-held (Windows Embedded CE device). “Remote Desktop Connection” on page 87 provides a website with details about this option. Psion Teklogix Omnii Hand-Held Computer User Manual...
-
Page 87: Shortcuts
Use the arrow keys to highlight an icon, for example, the Bluetooth icon. • Press [ENTER] to display the Bluetooth menus. Cycle Tasks When Cycle Tasks is selected (and the Task Manager is not open), you can cycle through active applications. Psion Teklogix Omnii Hand-Held Computer User Manual... - Page 88 The Task Manager allows you to switch to another task or to end an active task. To display the task manager window: • Tap on Shortcuts, Task Manager, or • Press [ALT] [ESC]. Psion Teklogix Omnii Hand-Held Computer User Manual...
-
Page 89: Settings
Control Panel The Control Panel contains applets used to configure hardware, the operating system and the shell. If your Omnii is running with the Psion Teklogix TekTerm application or another application, additional configuration applets may appear in the Control Panel. -
Page 90: Run
4.4.3.6 Shutdown The Shutdown menu includes these options: Suspend, Warm Reset and Cold Reset. Suspend The Suspend option suspends Omnii immediately. This is equivalent to turning the hand- held off. Psion Teklogix Omnii Hand-Held Computer User Manual... -
Page 91: The Psionvu Desktop Shell
(or stylus) taps and swipes. If there are more applications than shown on one screen, a white animated dot will be present on the side of the screen in the direction Psion Teklogix Omnii Hand-Held Computer User Manual... - Page 92 Task Manager of the Windows Classic Shell. Date/Time Bar Tapping once on the date or time will open the Date/Time Properties settings to enable you to change your settings and time zone. Psion Teklogix Omnii Hand-Held Computer User Manual...
- Page 93 For details see “PsionVU Access” on page 122. To change your Desktop background, refer to “Shell Settings” on page 124. To open PsionVU: • Tap on the PsionVU Access icon in the Favourites Bar. Psion Teklogix Omnii Hand-Held Computer User Manual...
-
Page 94: Restoring The Windows Classic Shell
[FN] key twice followed by [ENTER/Power] to switch Omnii off. However, if you’ve set the mode to “Lock” (see “Keyboard One Shot Modes” on page 102), Omnii can be turned off even when the [FN] key is locked ‘on’. Psion Teklogix Omnii Hand-Held Computer User Manual... - Page 95 • Press and hold down the [FN] key, the [ENTER/Power] key, and the [SCAN] key, simultaneously for a minimum of four seconds. After the cold reset, the BooSt menu appears. • Type ‘1’ to “Run Main OS” (continue loading the Windows Embedded CE operating system). Psion Teklogix Omnii Hand-Held Computer User Manual...
- Page 96 Using a coin, or other conductive item, connect pins 5 and 6 of the Omnii battery con- tacts for at least 6 seconds. Pin 6 Pin 5 • Replace the battery and power Omnii on. The terminal will boot as if from a cold reset. Psion Teklogix Omnii Hand-Held Computer User Manual...
- Page 97 Draft 1...
- Page 98 5.5.8.5 Built-in Devices ......119 5.5.8.6 Battery Health ......120 Psion Teklogix Omnii Hand-Held Computer User Manual...
- Page 99 5.10 Storage Manager ........153 Psion Teklogix Omnii Hand-Held Computer User Manual...
- Page 100 5.14.3 Registry Editor .......178 Psion Teklogix Omnii Hand-Held Computer User Manual...
- Page 101 Draft 1...
-
Page 102: Chapter 5: Configuration
TekTerm is a powerful emulation application ideally suited for real time data transaction ap- plications associated with mainframes and servers. Omnii includes unique features that support TekTerm—a Psion Teklogix application that has the ability to maintain multiple si- multaneous sessions with a variety of host computers. For detailed information, please refer to the TekTerm Software User Manual, P/N 8000073. -
Page 103: Control Panel Icons
“Control Panel Applications: Basic Setup” on page 93 describes the basic configuration for these applications. App Launch Keys By mapping keys to applications using this program, you can then launch those applications from a single key-press. Psion Teklogix Omnii Hand-Held Computer User Manual... - Page 104 Allows you to enable and configure GPS operation. Input Panel Provides the framework for a Microsoft Soft Input Panel (SIP) should you need to design your own SIP, or change some soft keyboard options. Psion Teklogix Omnii Hand-Held Computer User Manual...
- Page 105 Allows you to assign a password to restrict access to elements of the unit. Once assigned, password access cannot be circumvented so it is important that you write down your pass- word and keep it in a safe place. Psion Teklogix Omnii Hand-Held Computer User Manual...
- Page 106 Recalibrate button and following the directions on the screen. System You can display the system and memory properties, as well as create your device name. In the Memory tab, you can allocate memory between storage memory and program memory. Psion Teklogix Omnii Hand-Held Computer User Manual...
- Page 107 Volume & Sounds Allows you to adjust the volume of the sound emitted to indicate events like warnings, key clicks, and screen taps. You can also configure system (Windows) sounds and .wav files. Psion Teklogix Omnii Hand-Held Computer User Manual...
-
Page 108: Control Panel Applications: Basic Setup
The cursor moves to the App field and a new screen is displayed where you can choose the application to which you want to assign the application key. If you need to, you can Browse through the information in your Omnii until you locate the application you want to launch. Psion Teklogix Omnii Hand-Held Computer User Manual... - Page 109 If you need to Edit, Remove or Add another App Launch Key, you can do it from this final screen. Otherwise, tap on OK to save your Application Launch Key. • To launch the application you chose, press the application key you assigned. Psion Teklogix Omnii Hand-Held Computer User Manual...
-
Page 110: Certificates
You can import or remove certificates, and view certificate information for any listing, in- cluding names, dates, serial numbers, etc. For a detailed description about Certificate setup for both the server and client-side devices (Omnii Hand-Held Computers), refer to the following website: http://www.microsoft.com/windowsserver2003/techinfo/overview/security.mspx Psion Teklogix Omnii Hand-Held Computer User Manual... -
Page 111: Display Properties
In the Display Properties dialog box, open the Background tab. This dialog box allows you to customize your background image. 5.5.3.2 Appearance • In the Display Properties dialog box, open the Appearance tab. Psion Teklogix Omnii Hand-Held Computer User Manual... -
Page 112: Backlight
(no key press, scanner trigger, etc.). Note: Keep in mind that this option may be restricted to supervisory use only. • In the Display Properties dialog box, open the Backlight tab. Psion Teklogix Omnii Hand-Held Computer User Manual... -
Page 113: Input Panel
Display Properties dialog box take effect. 5.5.4 Input Panel Omnii is equipped with a Soft Input Panel (SIP). Shown below is the standard Microsoft SIP, accessed from the Control Panel. Psion Teklogix Omnii Hand-Held Computer User Manual... - Page 114 Omnii screen. To customize the appearance and behaviour of the soft keyboard: Tap on the Input Panel icon in the Control Panel. Psion Teklogix Omnii Hand-Held Computer User Manual...
-
Page 115: Keyboard Properties
[FN] and [SYM] modifier keys. This dialog box also allows you to define macro keys and Unicode characters. Psion Teklogix Omnii Hand-Held Computer User Manual... -
Page 116: Key Repeat
Note: Use the field at the bottom of this dialog box to test the repeat delay and rate set- tings you’ve chosen. Psion Teklogix Omnii Hand-Held Computer User Manual... -
Page 117: Keyboard Backlight
ON’ forces the keypad backlight to remain on when the unit is operating with external power. 5.5.5.3 Keyboard One Shot Modes • In the Keyboard Properties dialog box, open the One Shots tab. Psion Teklogix Omnii Hand-Held Computer User Manual... - Page 118 If you press the modifier key twice, it is locked ‘on’, remaining active until the modifier key is pressed a third time to turn it ‘off’. Psion Teklogix Omnii Hand-Held Computer User Manual...
-
Page 119: Keyboard Macro Keys
In the Macro menu highlight a macro key number, for example macro 1, to assign a macro to macro key [M1]. Choose the Record button. A message screen is displayed instructing you to Enter Key Strokes to Record. Psion Teklogix Omnii Hand-Held Computer User Manual... - Page 120 1, press [M1] to execute the macro. Deleting a Macro To delete a macro: • In the Macros tab, highlight the macro number you want to delete. • Choose the Delete button. Psion Teklogix Omnii Hand-Held Computer User Manual...
-
Page 121: Unicode Mapping
Unicode mapping is mapped to the default Unicode value. Adding and Changing Unicode Values Important: Changes to Unicode mappings are not saved until you exit the Keyboard Properties dialog box. • Choose the Add/Change button. Psion Teklogix Omnii Hand-Held Computer User Manual... -
Page 122: Scancode Remapping
[ENTER/Power] key, etc.), perform a function (e.g. turn the scanner on, change volume, etc.) or run a macro. There are three different tables of scancode mappings: the Normal table, the FN table and the SYM table. Psion Teklogix Omnii Hand-Held Computer User Manual... - Page 123 (e.g., Macro 2). Adding a Remap To add a new remapping: • Choose the Add button at the bottom of the dialog box. The Remap Scancode dialog box is displayed. Psion Teklogix Omnii Hand-Held Computer User Manual...
- Page 124 • In the Scancode Remapping tab, tap on the remap you want to edit. • Tap on the Edit button, and make the appropriate changes. • Tap on OK to save your changes. Psion Teklogix Omnii Hand-Held Computer User Manual...
-
Page 125: Lock Sequence
A locked keyboard icon is displayed in the softkey bar when the keyboard is locked. Psion Teklogix Omnii Hand-Held Computer User Manual... -
Page 126: Manage Triggers
You can configure the trigger ID for each trigger button for both single- and double-click, and the double-click time. • In the Control Panel, choose the Manage Triggers icon. • In the Manage Triggers screen you’ll see a list of trigger mappings. Psion Teklogix Omnii Hand-Held Computer User Manual... -
Page 127: Trigger Mappings
By default, the trigger mapping list only shows active mappings. Mappings for drivers or applications that are not currently active are not normally displayed. By checking this checkbox, all mappings, both active and inactive, are displayed. Psion Teklogix Omnii Hand-Held Computer User Manual... -
Page 128: Add And Edit Trigger Mapping
These dialogs allow you to add and edit trigger mappings. Trigger Key This drop-down list allows you to specify the source of the trigger events, such as the Soft Scan, Left Scan, etc., for the trigger module selected. Psion Teklogix Omnii Hand-Held Computer User Manual... - Page 129 “double-click” event will have occurred. If a mapping with the type Up/Down has also been configured for the same source, it will only receive the first set of trigger events. Module Trigger This identifies the driver or application receiving the trigger presses. Psion Teklogix Omnii Hand-Held Computer User Manual...
-
Page 130: Microphone
Tapping on Default All sets all microphones listed to their default gain. 5.5.8 Power Properties This icon displays a Power Properties dialog box that indicates the unit’s battery capacity and allows you to manage battery use. Psion Teklogix Omnii Hand-Held Computer User Manual... -
Page 131: Battery Capacity
5.5.8.1 Battery Capacity • In the Power Properties dialog box, open the Battery tab to view battery details. 5.5.8.2 Power Saving Suspend • In the Power Properties dialog box, open the Suspend tab. Psion Teklogix Omnii Hand-Held Computer User Manual... -
Page 132: Suspend Threshold And Estimated Battery Backup
This drop-down menu allows you to specify whether the unit is using AC Power or Battery Power. Suspend Timeout Important: Psion Teklogix recommends setting the Suspend value to 3 minutes. To further reduce power consumption, carefully consider the duration of time that the display backlight is ‘on’ (see “Backlight” on page 97). - Page 133 Batch transaction environments, where data is not saved to a non-volatile memory (such as an SD FLASH card), may need to pay particular attention to this parameter. Psion Teklogix does not recommend the storage of any valuable data in system RAM.
-
Page 134: Advanced
The sliding scale at the bottom of this menu allows you to specify the remaining battery ca- pacity at which a warning message is displayed on the Omnii screen, from 0% to 20%. 5.5.8.5 Built-in Devices • In the Power Properties dialog box, open the Built-in Devices tab. Psion Teklogix Omnii Hand-Held Computer User Manual... -
Page 135: Battery Health
* (Battery should be replaced). If you tap on the battery icon in the taskbar, a pop-up screen will show the state of the battery. The image below shows the default Excellent status screen. Psion Teklogix Omnii Hand-Held Computer User Manual... - Page 136 Bold <b> (or removing the tag to unbold the text), you can change the text that will appear in the pop-up battery status screen. For example, the default text “Excellent” can be changed to: “Battery is excellent, and will last one day shift.”... Psion Teklogix Omnii Hand-Held Computer User Manual...
-
Page 137: Psionvu Access
Access mode to the other (Administrator or User). The computer must be reset following a change, and a confirmation will appear to enable you to continue or dismiss the change. When opening the PsionVu Settings option, the following menus will be available: Psion Teklogix Omnii Hand-Held Computer User Manual... -
Page 138: Administrator Password
Once a password has been set, the message will disappear. When an administrator password is set, the restricted options are accessed using a key com- bination. If a password has been set, the user would be prompted for the password. Psion Teklogix Omnii Hand-Held Computer User Manual... -
Page 139: Shell Settings
The Add and Edit buttons allow you to search for and add an application to the list of items in the selection window. You can add a maximum of 18 applications, after which the Add option will be greyed out and the following message is displayed: “!Maximum 18 entries reached.” Psion Teklogix Omnii Hand-Held Computer User Manual... - Page 140 The Notification tooltips will still display. Any changes made will occur after a device reset. • Start Button: If disabled, access to the Start Button and Notifications are disabled. The Notification tooltips will still display. Psion Teklogix Omnii Hand-Held Computer User Manual...
- Page 141 • Notifications: If disabled, the Notifications tooltips will still display. • Launch an application Startup: A window is displayed listing all of the installed and added applications. Any applications selected will startup after a reboot. Psion Teklogix Omnii Hand-Held Computer User Manual...
-
Page 142: Restrictions
This section deals with items that are by default available to users but can be restricted by an administrator. Advanced The Advanced menu lists the system features you can restrict or block. Notifications The Notifications menu allows you to block or disable notifications. Psion Teklogix Omnii Hand-Held Computer User Manual... -
Page 143: Control Panel Settings
Important: A copy of this file should also be saved in a central repository for all Psion Teklogix .xml files with a predefined name so that other Psion Teklogix utili- ties can locate it. - Page 144 If further changes to the configuration are made, they will overwrite the changes caused by the import operation. After importing a file, a dialog will appear to enable you to reset now or later. Psion Teklogix Omnii Hand-Held Computer User Manual...
-
Page 145: Stylus Properties
• Choose the Calibration tab, and then tap on the Recalibrate button. Psion Teklogix Omnii Hand-Held Computer User Manual... -
Page 146: Touch
Follow the directions in the Calibration tab to recalibrate the screen You will be prompted to save the calibration data. Important: If you do not receive a prompt to save your data, there could be a problem with your touchscreen hardware. Contact your Psion Teklogix representative. 5.5.10.3 Touch This tab allows you to disable the touchscreen. -
Page 147: Volume & Sounds Properties
The optional rear speaker can be used for system (Windows) sounds and .wav files. When a rear speaker is absent, those sounds are routed to the front receiver. Psion Teklogix Omnii Hand-Held Computer User Manual... -
Page 148: Volume Adjustments
Slide the volume button to the left to lower the volume or to the right to increase the volume. • Under the heading Enable sounds for, enable the conditions under which you want the hand-held to emit a sound. 5.5.12.2 Sound Adjustments Psion Teklogix Omnii Hand-Held Computer User Manual... -
Page 149: Bluetooth ® Setup
This tab lists all paired devices and their corresponding services. The format of the name is <Device Name>:<Service Name>. Additional information may appear in this screen such as the Port Numbers for Serial Profiles service. Psion Teklogix Omnii Hand-Held Computer User Manual...
Need help?
Do you have a question about the 7545 and is the answer not in the manual?
Questions and answers