
Related Manuals for Matterport Scan a Space


Summary of Contents for Matterport Scan a Space
- Page 1 Scan a Space Matterport Pro Camera & Matterport Capture App User Guide Published October 7th, 2016 Copyright © 2017 User Guide - Scan a Space (Camera & Capture) 1 ...
- Page 2 Safety Before using the camera, please ensure that you r ead and understand the safety precautions described below. Always ensure that the camera is operated correctly. Keep these safety instructions where all those who use the product will read them. Do not use the camera around volatile or flammable materials. The camera is not designed for dangerous environments. Use at your own risk. Warnings Do not open or disassemble the camera. The camera contains no user-serviceable parts inside. This product contains a lithium ion battery. D o not attempt to open or service the battery . Batteries are only intended to be removed by a professional. Use only the included power supply. D o not use with another power converter/transformer . ...
-
Page 3: Table Of Contents
Equipment Scanning a Space 1) Prepare for your visit 2) Stage the site 3) Set up your equipment 4) Scan the space Start scanning Choose the next scan location Mark windows & mirrors FAQ (Frequently Asked Questions) Scanning multiple floors Tips for multiple floors Final checks 5) Upload to Cloud Common Issues Capture App Errors & Warnings Other Issues Matterport Capture App Home Screen Edit Models Sidebar Settings Matterport Pro Camera Diagrams Symbols LCD Screen Error Messages Care Firmware Hardware Specifications Government Compliances Warranty Contact Us ... -
Page 4: Equipment
Apple ® iPad iPad carrying case ™ See list of supported models Power charger - 128GB model Transformer with recommended connection to camera and - 8GB current free power cord to the wall. The space check space) power cord can be swapped - Most recent iOS for another cord based on version your local outlet type (North America, UK, EU, etc). Refer to c harger specifications for Matterport Capture a pp more information. Free on pple App Store User Guide - Scan a Space (Camera & Capture) 4 ... -
Page 5: Scanning A Space
4 .5 hours to fully charge the camera. A camera can scan 8 to 10 hours continuously on a full charge. To see the current battery level, turn the camera on by pressing the power button and check the LCD display. You can also press the button below the power button. This displays the battery level on the LCD without turning on the camera. If your camera does not have an LCD display, first connect to the camera’s WiFi . Then open Matterport Capture on the iPad to see the camera’s current battery level. User Guide - Scan a Space (Camera & Capture) 5 ... - Page 6 Check available space on iPad We recommend a t least 8 GB of free space on the iPad to scan several spaces and keep a generous margin for your iPad. Most properties can be captured in 100 scans or less, which is about 2 to 3 GB. If your site is particularly large (by number of scans) then judge appropriately. To check the available storage space on your iPad, first open S ettings in iOS (grey gear icon). Tap G eneral > Storage & iCloud Usage . Tap M anage Storage f or details about each app’s usage. User Guide - Scan a Space (Camera & Capture) 6 ...
- Page 7 Tour model completely in Workshop's Mesh View to check window and mirror markings, trim markings, doors that might block movement, and missing areas that might need rescanning. If you delete a model from your iPad, y ou CANNOT recover it . If there is an issue you will have to go back and rescan the space. Deleting a model from the Matterport Capture app deletes the r aw scan data for that model . The final processed model is still available in Matterport Cloud for editing and sharing. Do not delete models prematurely. Only delete models you’ve uploaded, edited, shared, and your customers are completely happy with. To delete a model from your iPad open M atterport Capture and tap E dit > ( t ap the model to delete ) > Delete > Delete Item. T he app will warn you if the model hasn’t been uploaded yet. ...
- Page 8 Keep doors c ompletely open or closed f or the duration of the scan. A closed door should mean that you aren’t scanning that room. Use door stops to avoid unintentional movement. If you need to prop a door do so at a 45° angle. Avoid modifications while scanning Do not move any objects while scanning (chairs, doors, furniture, etc). Keep out moving objects like pets and people. Adjust lighting Turn on all the lights you want before starting. Make sure the space is well lit. You can’t scan a dark room. Avoid casting a shadow of the tripod or camera. The Matterport Pro Camera comes with HDR (high dynamic range) to help balance uneven lighting, but it’s best to avoid extreme light differences. Minimize bright, direct sunlight i nto the property when possible. Time your visit appropriately or use shades. Spaces lit by bright sunlight can be scanned but can result in poor 3D geometry (holes in the Floorplan View or Dollhouse View). Do not perform a 3D scan in direct sunlight (outside or pointed at the sun). Plan your path Walk through the space and make a plan of where you will place the camera. Make additional scans at points of interest where visitors want more details. ...
- Page 9 Attach the quick-release clamp t o the tripod. Make sure the tripod is a s level as possible . Use a level or eyeball it t he best you can. Check that all tripod legs are the same length. Spin the camera manually to ensure a level camera. Mount the camera by sliding the adapter plate (on the bottom of camera) into the quick release clamp on the tripod. T ighten the clamp to ensure a s trong connection. Check the connection periodically while scanning a site. The clamp may become loose and cause the camera to fall. Visit s upport.matterport.com for a list of r ecommended tripods and mounts . User Guide - Scan a Space (Camera & Capture) 9 ...
- Page 10 Turn on the camera Press the power button on the back of the camera. Wait for it to turn solid blue. This can take up to a minute. When the WiFi symbol starts blinking you are ready to connect the camera to the iPad. Connect camera to iPad Go to your iPad settings and turn on Wi-Fi. Bluetooth is not necessary. In C hoose a network… tap on “ M atterport [Serial Number] ” . The camera’s serial number is located on the bottom of the camera. Open M atterport C apture . You should see the camera’s name and battery life indicator. ...
-
Page 11: Start Scanning
Tap the b lue Scan button on your iPad to begin scanning. You may have to wait for the camera to finish warming up. Your camera will make a full 360° rotation and then transfer the scan data to the M atterport Capture app. If someone moves into the frame while scanning, tap the X in the top-right to cancel the scan. You can also press the button below the power button on the Matterport Camera to cancel a scan. If you don’t hear any sounds i ncrease the volume on your iPad. Check the settings menu within Matterport Capture to make sure S ounds are on . User Guide - Scan a Space (Camera & Capture) 11 ... - Page 12 Matterport Capture will process the scan data and create a preview of the space on the right. The preview pane is a simple top-down view of the space. r efers to first scan you took. Similarly, a icon would refer to the second scan, and so on. Deleted or unaligned scans will not appear in the preview, but will increase the scan count. The scan number in Workshop will be different from the scan number in the Capture app. Black areas are ‘shadows’ -- areas that were not captured by that scan. The camera does not scan all the way to the floor to avoid capturing the tripod legs. You can see this in the black circle around 1 in the picture above. Your next scan should be within a line-of-sight to a previous scan to capture this area. Mark windows and mirrors immediately after every scan. This reduces alignment errors and improves the quality of the finished model. User Guide - Scan a Space (Camera & Capture) 12 ...
-
Page 13: Choose The Next Scan Location
Choose the next scan location Move the camera Place the camera 5 to 8 ft (1.5 to 2.5 m) from a previous scan. The maximum distance can be less depending on the space. Maintain a clear line of sight to a previous scan. Keep camera 2 ft away from walls and objects to avoid distortion, slices, and warps. Scan before a door and after entering but n ot inside or near a door frame. When possible, scan in a c lean, clear grid pattern for a professional look. Plan your path Follow a n ormal walking path through the space. Place the camera w here a person would normally stand . Usually this means avoiding corners, walls, and doorframes. Scan at n atural points of interest within the space. Make ... -
Page 14: Mark Windows & Mirrors
Mark windows & mirrors Reduce errors and improve the finished quality by using the W indows , M irrors , and T rim tools. Mark windows and mirrors immediately after every scan. This reduces alignment errors and improves the quality of the finished model. Use the p inch-to-zoom gesture to zoom in on the preview pane. Tap M ark Features. Choose the appropriate feature. In the preview pane tap and drag the indicator to the correct spot. User Interface Tips To extend or rotate a line segment, t ap and drag an endpoint as desired. To move an entire line, ... - Page 15 Windows Make sure the i nside direction is pointed the right way. No need to mark interior glass doors as windows. Mark exterior glass doors as windows o nly if you will not open a nd scan outside. Do not mark windows and mirrors above doorways. Window and mirror markings create an ‘invisible wall’ that impedes movement in the 3D Space. Mirrors Cover the e ntire length of the mirror plus a foot or two extra, as long as it does not cover the hallway or the wall. Mark other highly reflective surfaces such as flat screen TVs on walls and stainless steel refrigerators. Marking mirrors is v ery important to r educe alignment errors...
- Page 16 Trim The trim tool is u sually not necessary if you have been correctly marking windows and mirrors along the way. Use the trim tool as a b ackup tool to eliminate unwanted depth data (spray). This is important so the Dollhouse View does not contain artifacts or jagged edges. Trimming is like cropping for two dimensional images. Trim just outside the wall, not directly on the wall. Y ou might trim the wall out of the model. Anything outside the trim line w ill not appear in Dollhouse View or Floorplan View. User Guide - Scan a Space (Camera & Capture) 16 ...
-
Page 17: Faq (Frequently Asked Questions)
Most sites can be done in l ess than 100 scans . Processing time increases with the number of scans. In addition, very large models can be slow to load in Matterport 3D Showcase. The maximum supported number is 2 00 scans or about 10,000 ft 2 . Sites nearing 200 scans can take 24-48 hours to process. Consider s plitting the site into two or more models. Do I need to scan a site in a single, connected path? Not necessary. At the end of your visit if you want to add a new room or get more detail in a previous room just go back and scan again. Make sure you s elect the right floor in the Matterport Capture app. You may need to s can again at an existing scan location to “pick up the scan trail” so the app recognizes the area and aligns properly. Each scan should be within a line-of-sight of a previously completed scan. Can I delete a scan location? You may want to delete a scan if: An object moved and t he scan did not align. Consider deleting more scans. Movement such as a person, dog, door, etc in the camera’s frame. ... -
Page 18: Scanning Multiple Floors
Scanning multiple floors Once you have completely scanned an entire floor, take a scan a t the bottom of the stairs (A in the illustration below). Scan up the stairs, making sure that each scan is within a l ine-of-sight to the previous scan and about five feet away from the previous scan (B in illustration). Straight run (standard) stairs Stairs with a simple landing When you reach the top of the stairs (C in illustration) add a new floor. In M atterport Capture tap F loor 1 then A dd new floor… Enter the name of the floor and tap C reate . ... - Page 19 When you make a new floor, the preview will be empty. This is normal behavior. It means you do not have any scan data for this floor yet. Continue scanning the new floor as normal. Stairs always belong to the floor below. User Guide - Scan a Space (Camera & Capture) 19 ...
-
Page 20: Tips For Multiple Floors
Tips for multiple floors Remember to mark any windows and mirrors on the staircase. Sunken living rooms belong to the floor they are closest to. Split levels (levels halfway between two full floors) belong to the floor below. You can move scans to other floors. From the home screen tap Edit > (tap the scans to move) > Move to Floor > (which floor) If you want to go back to a previously completed floor and add more scans, tap the F loor menu, the floor name, and then start scanning. This is important since alignment is done on a per-floor basis . Remember that your new scan should be within a line-of-sight of a previous scan. To further manipulate floors, tap E dit at the top of the Floor Screen. To delete a floor tap the red circle. ... -
Page 21: Final Checks
Final checks Mark windows and mirrors immediately after every scan. This reduces alignment errors and improves the quality of the finished model. Check for complete coverage by reviewing the preview pane. Zoom in (pinch-and-zoom) for more detail. You may see parts of the preview pane that are solid black or are ‘sprayed’ with black dots as shown above. Scan close to these black areas (but not right on top of them) so the camera can capture 3D data there. Remember that every scan should be within a line-of-sight to a previous scan so it can align. If you’re going back to an old area you may need to scan again over an existing location at a normal or lower height to “pick up the scan trail.” This is so the Capture app can recognize the area and new scans will align properly. User Guide - Scan a Space (Camera & Capture) 21 ... - Page 22 In the picture above, M P_Net is an external WiFi network (normal internet). This is different from M atterport B004 , which is between the camera and the iPad only. 2) Login to Matterport Cloud on your iPad Open the M atterport C apture app. Home > Account > (enter email and password) > Sign In If you are uploading to more than one account, m ake sure you are logged in to the correct account . Matterport cannot move models between accounts. Use your m y.matterport.com email address (not buy.matterport.com). User Guide - Scan a Space (Camera & Capture) 22 ...
- Page 23 3) Open the model. Tap Upload and wait. Keep the app open while uploading. You can see the upload progress via an indicator below Upload. Once complete you will see a “Last Uploaded” timestamp. The model will then show as “Processing” in Matterport Cloud. 4) Wait Matterport Cloud will process your scans into a complete 3D model. Processing is generally on the scale of several hours. Processing time depends upon how many scans, the complexity of the model, and other models in the processing queue. Once complete you will receive an email with a link to your Space. 5) Done! Log in to M atterport Cloud at m y.matterport.com to see your processed Space. User Guide - Scan a Space (Camera & Capture) 23 ...
- Page 24 What if I need to make changes after I’ve uploaded to Matterport Cloud? If you still have the model on your iPad … Feel free to change markings and add/remove scans and then upload again. Matterport Cloud will process the model and email you when ready. You can reupload the same model or duplicates thereof multiple times for no additional fee. If you upload again after modifying, then the scan data will become an entirely new model . You will then need to repeat any edits such as Mattertags and Snapshots on the new model. If you uploaded the model to Matterport Cloud but later deleted it from your iPad ... The processed model will still be in Matterport Cloud. However you cannot add new scans or make changes to markings. If you need to do these, you will have to scan the space over again and this will be a new model. P lease be careful when deleting models . User Guide - Scan a Space (Camera & Capture) 24 ...
-
Page 25: Common Issues
(empty factory) If necessary add unique objects to assist alignment. Make sure l ighting conditions have not significantly changed compared to previous scans. Try scanning again over a previous location or doing a low scan if you can’t adjust the lighting. Refer to s canning multiple floors for the proper procedure on scanning stairs. Low certainty. Verify or Look at the preview pane and verify that the scan is in the correct delete scan. location. If correct, continue scanning. If incorrect, delete scan and try again closer to a previous scan location. Camera unstable. Tighten Tighten mount or tripod and scan again. After uploading data to mount or tripod. Matterport Cloud, verify in Matterport Workshop that image quality is good. If you continue to get this message, make sure you have a supported tripod and avoid ball-joint clamps. Camera calibration error After uploading data to Matterport Cloud, verify in Matterport Workshop that quality is good. If issue persists c ontact support . User Guide - Scan a Space (Camera & Capture) 25 ... -
Page 26: Other Issues
Make sure you are c onnected to the camera’s WiFi . If you move out of range the connection will drop and the iPad may connect to another network it has used before. Check the signal strength of your WiFi connection. Move the iPad closer to the camera. Turn off bluetooth, iPad cellular data, microwave ovens, and other WiFi networks if possible. The capture button is Return to the Home screen and check the camera icon on the left grey and doesn’t sidebar. The camera may be warming up or you may have lost the respond when I tap it. connection to the camera. T ry reconnecting the iPad to the camera . The camera is stuck Force the camera to turn off by holding the power button for 5 and does not rotate. seconds. Wait a few seconds and then turn the camera back on. Questions? Visit s upport.matterport.com or c all us User Guide - Scan a Space (Camera & Capture) 26 ... -
Page 27: Matterport Capture App
Matterport Capture App Home Screen User Guide - Scan a Space (Camera & Capture) 27 ... -
Page 28: Edit Models
Edit Models To edit a model’s details you can also open the model and then tap the name. User Guide - Scan a Space (Camera & Capture) 28 ... -
Page 29: Sidebar
Sidebar Settings User Guide - Scan a Space (Camera & Capture) 29 ... -
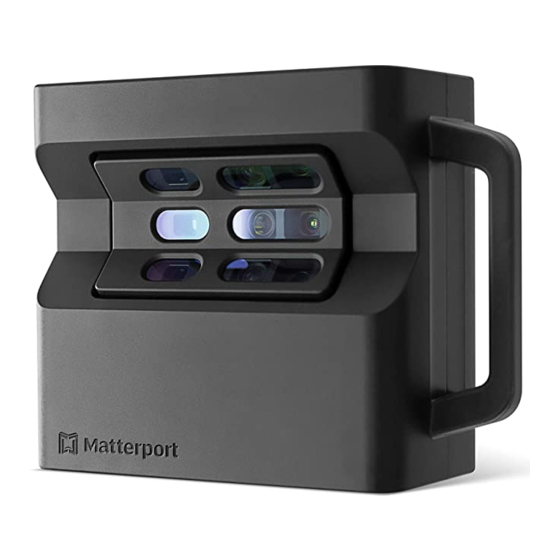
Page 30: Matterport Pro Camera
Matterport Pro Camera Diagrams Front View Rear View User Guide - Scan a Space (Camera & Capture) 30 ... -
Page 31: Symbols
Bottom View Symbols WiFi European compliance Bluetooth (not used) Lithium-ion battery WEEE directives Handle with care See disposal notices User Guide - Scan a Space (Camera & Capture) 31 ... -
Page 32: Lcd Screen Error Messages
Contact us for RMA instructions. The camera will have to be returned to Matterport for service. Boot timed out WiFi fault Care In general treat the M atterport Pro Camera with the same level of care as you would treat an expensive DSLR camera. Transport Always transport the camera in a padded carrying bag or case. H andle with care -- the Matterport Pro Camera is a precision-calibrated instrument. Matterport is not responsible for damage you incur while transporting the camera. The following paragraph is a list of suggestions only. If transporting in a vehicle, ensure the camera is secure and will not shift. If traveling by air, keep the camera as a carry-on. If you check it in as luggage, use a hard, padded case with thick foam inserts. Always ship your camera in the original padded shipping box provided by Matterport. Lenses Remove dust from the lenses using a small, bulb-style hand air pump. Remove fingerprints from lenses with a microfiber cloth. ... -
Page 33: Firmware
Firmware Firmware is l ow-level software inside the Matterport Camera to manage the hardware components. Firmware updates are important to improve scan quality. You will be notified inside the Matterport Capture app when a firmware update is available. Find current firmware version 1) Connect iPad to the camera over Wifi Refer to previous section 2) Open M atterport Capture 3) On the left sidebar tap the camera User Guide - Scan a Space (Camera & Capture) 33 ... - Page 34 4) The current firmware version is located at the bottom Update firmware 1) Download firmware from internet Connect your iPad to the normal internet (an external WiFI network). Open the M atterport Capture app. If there a firmware update the app will s ilently download it in the background. Leave the app open for several minutes to make sure the download is complete. 2) Connect to the camera Connect to the Matterport Camera's WiFi network. If the camera’s firmware is out of date, a dialog will appear and ask you approve the update. If no dialog appears then the camera already has the latest firmware version. If you decline to update you will be notified every time you connect to the camera. User Guide - Scan a Space (Camera & Capture) 34 ...
-
Page 35: Hardware Specifications
Hardware Specifications Matterport Pro Camera (MC200) Input Voltage 15V (only use power supply provided by Matterport) Battery Type Lithium ion Battery Capacity 8 hours (continuous use) Charge Time 4.5 hours Weight 2.5 kg (6.5 lb) Dimensions (H x W x D) 229 x 260 x 111 mm (9.0 x 10.25 x 4.38 in) Color Black Wireless Connection Wi-Fi 802.11 b/g/n 2.4 GHz Mounting Female 3/8" 16 thread 3/8-16 Acra-Swiss style quick release Operating Temperature 10°C to 32°C (50°F to 90° F) Storage Temperature 0°C to 40°C (32°F to 104°F) Leveling Self correcting within 10 degrees of perfectly level Power Charger Input Voltage 100 - 240 V Input Current 2 Amps Input Frequency 50/60 Hz Output Voltage ... -
Page 36: Government Compliances
FCC This device complies with Part 15 of the FCC Rules. Operation is subject to the following two conditions: (1) this device may not cause harmful interference; and (2) this device must accept any interference received, including interference that may cause undesired operation. This equipment has been tested and found to comply with the limits for a Class B digital device, pursuant to part 15 of the FCC Rules. These limits are designed to provide reasonable protection against harmful interference in a residential installation. This equipment generates, uses, and can radiate radio frequency energy and, if not installed and used in accordance with the instructions, may cause harmful interference to radio communications. However, there is no guarantee that interference will not occur in a particular installation. If this equipment does cause harmful interference to radio or television reception, which can be determined by turning the equipment on and off, the user is encouraged to try to correct the interference by one or more of the following measures: ● Reorient or relocate the receiving antenna. ● Increase the separation between the equipment and receiver. ● Connect the equipment into an outlet on a circuit different from that to which the receiver is connected. ● Consult Matterport or an experienced radio/TV technician for help. Changes or modifications not expressly approved by Matterport could void the user's authority to operate the equipment. Industry Canada This device complies with Industry Canada license-exempt RSS standard(s). Operation is subject to the following two conditions: (1) this device may not cause interference, and (2) this device must accept any interference, including interference that may cause undesired operation of the device. Le présent appareil est conforme aux CNR d'Industrie Canada applicables aux appareils radio exempts de licence. L'exploitation est autorisée aux deux conditions suivantes : (1) l'appareil ne doit pas produire de brouillage, et (2) l'utilisateur de l'appareil doit accepter tout brouillage radioélectrique subi, même si le brouillage est susceptible d'en compromettre le fonctionnement. ... - Page 37 Europe The Matterport Pro Camera conforms to the following standards: EN 300 328 2.4GHz ISM; Harmonized EN covering article 3.2 of R&TTE Directive EN 301 489-1 Radio Equipment, EMC, Common Technical Requirements EN 300 328-17 Radio Equipment, EMC, Specific conditions for Broadband Data TX Systems EN 55022 Electromagnetic Compatibility, Class B Emissions EN 55024 Electromagnetic Compatibility, Immunity EN 60950-1 Information Technology equipment, safety The Matterport Pro Camera follows the provisions of the following directives: 2014/30/EU EMC Directive 1999/5/EC Radio & Telecommunications Terminal Equipment Directive 2012/19/EU Directive on Waste Electrical and Electronic Equipment 2006/66/EC Batteries and Accumulators Waste Batteries Directive 2011/65/EU Restriction of Hazardous Substances (RoHS) Directive ...
-
Page 38: Warranty
Warranty Limited Warranty. Matterport warrants the Camera against defects in material and workmanship for a period of one (1) year from original date of shipment, or such longer period under any extended warranty purchased by You at Matterport’s then-available extended warranty rate (collectively, the “Warranty Period”). This limited warranty is for the benefit of the original purchaser only and is not transferable. THIS LIMITED WARRANTY IS IN LIEU OF ALL OTHER WARRANTIES OF QUALITY AND PERFORMANCE, WRITTEN, ORAL OR IMPLIED, INCLUDING ANY IMPLIED WARRANTY OF MERCHANTABILITY OR FITNESS FOR A PARTICULAR PURPOSE. THIS LIMITED WARRANTY SHALL NOT APPLY IF THE CAMERA HAS BEEN REPAIRED OR ALTERED, EXCEPT BY MATTERPORT, OR IF IT HAS BEEN SUBJECTED TO MISUSE, NEGLIGENCE, OR ACCIDENT. In the event any defect in the material or workmanship of the Camera arises during the Warranty Period, Matterport’s sole liability shall be (at the option of Matterport) to repair, provide a refund for, or replace any Camera returned by You during the Warranty Period, provided that (a) Matterport is notified in writing by You of the claimed defect(s) during the Warranty Period, (b) the Camera is returned to Matterport in the undamaged original Camera packaging, and (c) Matterport’s examination of the Camera discloses to its satisfaction that the defect(s) were not caused by misuse, negligence, accident, or unauthorized repair or alteration by You or on Your behalf. All shipping costs to Matterport from any location in the United States, or from Matterport to any location in the United States, for any Camera that is repaired or replaced under this limited warranty, will be at Matterport’s expense; provided, however, that You will bear the expense of shipping any such Camera to or from any non-U.S. location. MATTERPORT’S ONLY LIABILITY AND YOUR EXCLUSIVE REMEDY FOR ANY CLAIM OF A DEFECT IN THE CAMERA, WHETHER ARISING IN TORT OR CONTRACT, IS AS STATED IN THIS SECTION 5. IN NO EVENT SHALL MATTERPORT OR ITS AFFILIATES OR LICENSORS BE LIABLE FOR ANY LOSS OR DAMAGE, WHETHER IN CONTRACT, TORT (INCLUDING, BUT NOT LIMITED TO, NEGLIGENCE), BREACH OF STATUTORY DUTY, OR OTHERWISE, EVEN IF FORESEEABLE, ARISING UNDER OR IN CONNECTION WITH THIS AGREEMENT. IN PARTICULAR, MATTERPORT SHALL NOT BE LIABLE FOR (A) LOST PROFITS, (B) LOST DATA, (C) LOSS OF BUSINESS, GOODWILL OR REPUTATION, OR (D) FOR ANY OTHER SPECIAL, EXEMPLARY, PUNITIVE, INDIRECT, INCIDENTAL OR CONSEQUENTIAL DAMAGES OF ANY KIND, EVEN IF MATTERPORT HAS BEEN ADVISED OF THE POSSIBILITY OF SUCH DAMAGES. IN NO EVENT WILL THE TOTAL CUMULATIVE LIABILITY OF MATTERPORT AND ITS AFFILIATES AND LICENSORS UNDER THIS AGREEMENT FROM ALL CAUSES OF ACTION OF ANY KIND, INCLUDING TORT, CONTRACT, NEGLIGENCE AND STRICT LIABILITY, EXCEED THE LESSER OF THE TOTAL AMOUNTS YOU PAID TO MATTERPORT UNDER THIS AGREEMENT DURING THE SIX (6) MONTHS PRECEDING YOUR CLAIM(S), OR $500. THESE LIMITATIONS SHALL APPLY NOTWITHSTANDING ANY FAILURE OF ESSENTIAL PURPOSE OF ANY REMEDY. WITHOUT LIMITING ANY OTHER CONDITION SET FORTH IN THIS SECTION, MATTERPORT WILL HAVE NO WARRANTY OBLIGATION HEREUNDER IF YOU FAIL TO RETURN THE CAMERA IN THE UNDAMAGED ORIGINAL PACKAGING OR IF YOU HAVE INSTALLED ANY FIRMWARE IN THE CAMERA OTHER THAN THE FIRMWARE INITIALLY EMBEDDED IN THE CAMERA OR ANY FIRMWARE UPDATE SUBSEQUENTLY PROVIDED BY MATTERPORT. APPLICABLE LAW MAY NOT ALLOW THE EXCLUSION OF IMPLIED WARRANTIES, OR SOME OR ALL OF THE FOREGOING LIMITATION OF LIABILITY, SO SOME OR ALL OF THE FOREGOING DISCLAIMERS AND/OR LIMITATION MAY ... - Page 39 Disposal This symbol indicates that electrical and electronic equipment is to be collected separately. The following apply only to users in European countries: This product is designated for separate collection at an appropriate collection point. Do not dispose of as household waste. Separate collection and recycling helps conserve natural resources and prevent negative consequences for human health and the environment that might result from incorrect disposal. For more information, contact the retailer or the local authorities in charge of waste management. Matterport will not be held liable for any damages resulting from the use of this product. While every effort has been made to ensure that the information in these manuals is accurate and complete, we would appreciate it were you to bring any errors or omissions to the attention of Matterport Customer Support at upport@matterport.com This symbol on the battery indicates that the battery is to be collected separately. The following apply only to users in European countries: All batteries, whether marked with this symbol or not, are designated for separate collection at an appropriate collection point. Do not dispose of as household waste. For more information, contact your Matterport Local Reseller or the local authorities in charge of waste management. ...
-
Page 40: Contact Us
Contact Us Company Support matterport.com support.matterport.com Contact us Ask a question Preferred communication method (650) 641-2241 (650) 437-6159 Normal support requests P lease leave a detailed voicemail. We’ll call you back! Urgent onsite requests P ress extension 4 All requests are answered in the order they were received. Please do not create additional tickets across different formats. User Guide - Scan a Space (Camera & Capture) 40 ...
Need help?
Do you have a question about the Scan a Space and is the answer not in the manual?
Questions and answers