Chubbsafes Duoguard 60 Technical Manual
For more information, please visit www.chubbsafes.com
Table of Contents
Advertisement
The methods and specifications described herein may be
changed in case of modifications made by the constructor
to the manufacture of various aquipment items and accessories .
TECHNICAL DOCUMENTATION
DuoGuard
TECHNICAL MANUAL
All right reserved
page 1/14
page 1/14
GUNNEBO
Engineer
luc LENGELEE
Le 14.11.2007
N° 4804-00
ECB-S
EN 1047-1 / S60 DIS
EN 1143-1 Classe 0/I
A2P Classe 0/I
Reproduction of this docuent, whether partial or whole,
as well as the use of the numbering system, are prohibited
without prior written permission from GUNNEBO
Advertisement
Table of Contents

Related Manuals for Chubbsafes Duoguard 60


Summary of Contents for Chubbsafes Duoguard 60
- Page 1 TECHNICAL DOCUMENTATION Engineer DuoGuard luc LENGELEE Le 14.11.2007 TECHNICAL MANUAL N° 4804-00 ECB-S EN 1047-1 / S60 DIS EN 1143-1 Classe 0/I A2P Classe 0/I The methods and specifications described herein may be Reproduction of this docuent, whether partial or whole, All right reserved page 1/14 page 1/14...
- Page 2 1- PRESENTATION..............Page 3 2- TESTS AND CERTIFICATION..........Page 4 3- CHARACTERISTICS............Page 5 4- DELIVERY / INSTALLATION / FIXING........Page 6 5- TECHNICAL NOTICE............Page 7 6- REPLACEMENT OF THE HANDLE.......... Page 8 7- REPLACEMENT OF KEY LOCK..........Page 9 8- REPLACEMENT OF THE ELECTONIC LOCK Z DRIVE....
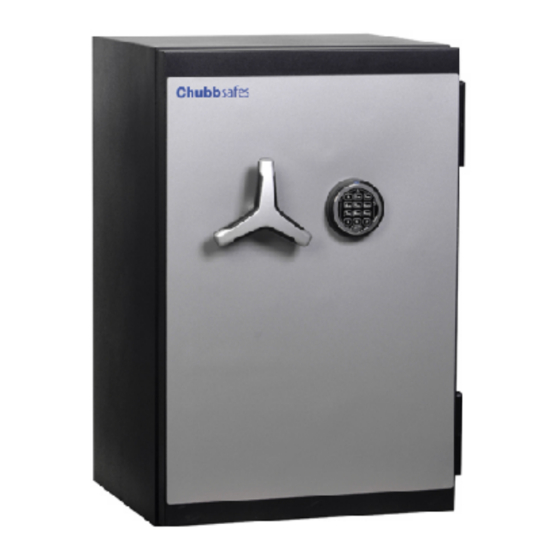
- Page 3 - The Duogard range. - The Duoguard range is available in 8 models (40, 60, 110, 150, 200, 300, 350, 450) ranging from 40 litres to 450 litres. - The models are designed for protection against burglary and fire and are certified to : EN 1143-1 European test against burglary attack.
- Page 4 - The DuoGuard range has been tested and approved to the European standard as per the table below. Certification Authority Standard Fire resistance ECB-S S 60 DIS EN 1047-1 European Certification Board Security Systems Certification Authority Standard Burglary resistance ECB-S Grade 0/I EN 1143-1 European Certification Board...
- Page 5 - Dimensions. Int Dimensions Internal Weight Model Ext Dimensions volume Height x Width x Depth Height x Width x Depth overall ( Kgs ) ( mm ) ( mm ) ( litres ) DG 40 435 x 500 x 456 335 x 400 x 295 DG 60 530 x 500 x 521...
- Page 6 INSTALLATION : Please ensure that the safe is correctly positionned and that the safe is level and flush; this will avoid any “run” of the door and will ensure a correct functioning and longevity of the door opening parts. 1- Position the safe in it’s definitive place. 2- Ensure that the safe is level by using a spirit level.
- Page 7 page 7/14...
- Page 8 1- Remove the 4 retaining screws. 2- throw the bolts and lock the lock in order to block the handle mechanism. 3- Remove the nut which hold the cam on the square spindle of the handle, then remove the cam. 4- Pull the handle towards the outside of the door in order to extract the handle.
- Page 9 1- Remove the 4 retaining screws. 2- Remove the 4 M6 screws which hold the Mauer lock. 3- Remove the 2 fixing screws wich hold the locking angle plate. Nota : To replace the handle, follow the above steps in reverse order. page 9/14...
- Page 10 Remove the 4 retaining screws. 2- Remove the silver screw cover . 3- Unscrew the + screw from the key pad. 4- Pull the terminal to clear. 5- Unplug the cable connecting the terminal to the lock. Screw 6- Remove the 3 lock fixing screws, and remove the lock from it’s mounting plate.
- Page 11 - Commissioning of DuoGuard with key lock only. OPENING : 1- Swing the escutcheon to reveal the key hole. 2- Introduce the key verticaly into the key hole.(hole in key ring to the top) 3- Fully turn the key clockwise. NOTE: The key is held in position when the key is in unlock position.
- Page 12 - Commissioning of DuoGuard with Z-Drive. BATTERY INSTALLATION : 1-Pull towards you the small blue tab. 2-Turn the black housing anticlockwise then pull towards you. 3-Connect the battery, then place it in the battery holder and push the black housing back into place, then turn to the right untill it locks in situ. OPENING : 1- Enter the ex factory master code “123456#”.
- Page 13 - Commissioning of DuoGuard with president key + D-Drive BATTERY INSTALLATION: ( see page 12) OPENING OF THE D-DRIVE ELECTRONIC LOCK : 1- Enter the ex factory master code “123456#”. 2- Turn the black housing to the right until it comes to a complete stop. OPENING OF THE PRESIDENT LOCK : 1- Swing the escutcheon to reveal the key hole.
- Page 14 1- Insert the shelf fixing clips (4 per shelf) according to the height desired. 2- Position the shelf first of all on one side, and the on the other. 3- Check that the shelf is securely positioned before loading any object. page 14/14...
Need help?
Do you have a question about the Duoguard 60 and is the answer not in the manual?
Questions and answers