Table of Contents
Advertisement
Advertisement
Table of Contents

Related Manuals for Fritz! FRITZ!Box 7560


Summary of Contents for Fritz! FRITZ!Box 7560
- Page 1 FRITZ!Box 7560 Configuration Configuration and Operation and Operation...
-
Page 2: Table Of Contents
Requirements for Operation ....... 17 Handling the FRITZ!Box ........18 Tips for Passwords . - Page 3 Setting a FRITZ!Box Password ......34 Creating FRITZ!Box Users........36 “No login”...
- Page 4 IPv6: The New Internet Protocol ......73 12.10 LISP: FRITZ!Box as a LISP Router ......75 FRITZ!Box as a Wireless Access Point .
- Page 5 Starting FRITZ!NAS ........
- Page 6 25.3 Restarting the FRITZ!Box ....... . . 150 Update: Updating FRITZ!OS .....
- Page 7 30.3 Feedback on FRITZ!Box ........172 30.4 Assistance from the Support Team .
-
Page 8: Safety Instructions
Provide for sufficient air circulation around the FRITZ!Box. – Make sure that the ventilation slits on the FRITZ!Box housing are always unobstructed. – The FRITZ!Box should not be placed on a carpet or on upholstered furniture. – Do not cover the FRITZ!Box. FRITZ!Box 7560... - Page 9 • The base of the FRITZ!Box can heat up during normal op- eration. This heat can cause damage to heat-sensitive surfaces. – Do not place the FRITZ!Box on heat-sensitive surfac- • During electrical storms, lightning and electrical surges present a danger to connected electrical devices.
-
Page 10: Conventions In The Manual
Bold type in the text emphasizes important words. Example Do not leave the page without saving. • Blue font in the text designates links and references within this manual and addresses to be entered in the browser. Example See also the information on page FRITZ!Box 7560... -
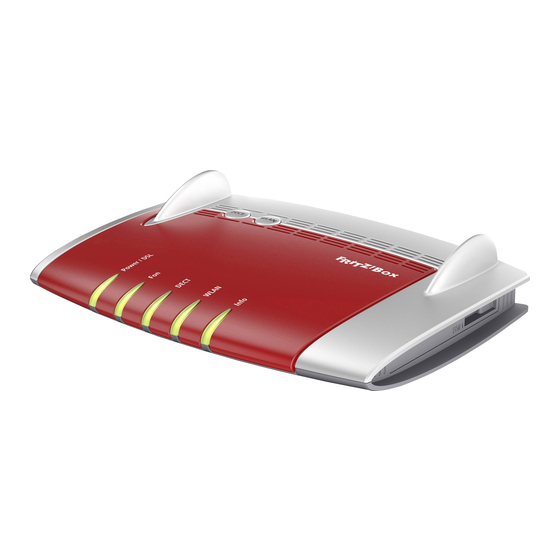
Page 11: The Fritz!Box 7560
FRITZ!Box 7560 is the hub of your home network, connecting your computers and network devices with the Internet. You can operate the FRITZ!Box as an Internet router on a ADSL or VDSL line. The FRITZ!Box is equipped with ports to connect computers, a USB device and a telephone, an answering machine or a fax machine. -
Page 12: Ports, Interfaces, Buttons And Leds
2.4 GHz and 5 GHz network Possibilities for connecting the FRITZ!Box • Socket for connecting to ADSL, ADSL2+ or VDSL • FON 1 one RJ11 socket for connecting an analog telephone or... -
Page 13: Buttons
Integrated DECT base station that supports the DECT-ULE standard. Up to 6 cordless telephones that use the DECT radio standard can be connected, as well as up to 10 FRITZ!DECT smart plugs. Buttons The FRITZ!Box has the following buttons: WLAN DECT WLAN WLAN... -
Page 14: Leds
“System / Buttons and LEDs” on the “Keylock” tab. LEDs The FRITZ!Box 7560 has five LEDs, which flash or light up to display various connection statuses and events. For the “Info” LED you can assign any event desired in addi- tion to the preset events. - Page 15 • devices are performing WPS at the same time. Repeat the WPS procedure. Info glows green Stick & Surf procedure with FRITZ!WLAN USB Stick from • AVM concluded The LED signals an event specified in the user interface • under “System / Buttons and LEDs / “Info” Display”...
- Page 16 The “Info” LED signals various events. Some events for which the “Info” LED flashes or lights up are preset. You can also as- sign to the LED any additional event you like. Open the FRITZ!Box user interface. Under “System / Buttons and LEDs”, click the ““Info” Display” tab.
-
Page 17: Before You Connect The Fritz!Box
Contents of the FRITZ!Box Package The FRITZ!Box 7560 is available in several different product variants, each of which is delivered with different compo- nents. See the FRITZ!Box 7560 box for details about what is included in your FRITZ!Box package. •... -
Page 18: Handling The Fritz!Box
FRITZ!Box on a wall, see page 176. • Place or hang the FRITZ!Box in a dry location that is free of dust and protected from direct sunlight. • For ideal operating conditions, mount the FRITZ!Box on a wall with the cables connected on the bottom. -
Page 19: Tips For Passwords
Tips for Passwords Passwords are assigned at various places in the user inter- face to protect your settings and data in the FRITZ!Box. The FRITZ!Box assists you in assigning secure passwords, for in- stance when creating new users or configuring MyFRITZ!: A graphic display indicates how secure the password is. -
Page 20: Connecting The Fritz!Box
Connecting to Electrical Power F O N F O N Connecting to the power supply Pick up the power supply unit included in the FRITZ!Box package. Use only this power supply unit for connecting to electri- cal power. Connect the power supply unit to the socket on the FRITZ!Box labeled “Power”. - Page 21 Insert the free end of the cable into the telephone socket on the wall. After a short time the “Power / DSL” LED on the FRITZ!Box lights up. The FRITZ!Box is ready to connect to the Internet. Connecting to the Cable Junction With an additional cable modem you can also use your FRITZ!Box 7560 on a cable connection.
- Page 22 Connecting to a Router or a Network You can use the FRITZ!Box at an already existing Internet ac- cess. To do this the FRITZ!Box is connected to the router or network. A network cable is required to connect the FRITZ!Box to a rout- Insert one end of the cable into the socket on the FRITZ!Box labeled “LAN 1”.
-
Page 23: Connecting A Computer With A Network Cable
You can also use any other network cable. For more in- formation, see page 168. Insert the free end of the cable into a LAN socket on the FRITZ!Box. Now the FRITZ!Box and the computer are connected with each other. FRITZ!Box 7560... -
Page 24: Connecting A Network Hub Or Switch
168. Insert the free end of the cable into a LAN socket on the FRITZ!Box. The FRITZ!Box and the network hub are now connected with each other. Saving Energy at the LAN Ports For energy-efficient use of your gigabit LAN ports you can... - Page 25 1 Gbit/s. Higher power consumption than in green mode if the LAN port is used. Green Mode As needed, the FRITZ!Box establishes LAN connections with a transmission rate of 100 Mbit/s. Lower power consumption than for the “Power Mode” setting.
-
Page 26: Connecting Devices With The Fritz!Box Over Wireless Lan
Here is how to establish a wireless connection with WPS on a computer with Windows 10, 8, or 7: If the “WLAN” LED on the FRITZ!Box is off, press the “WLAN” button briefly. The wireless radio network of the FRITZ!Box will be switched on. - Page 27 Here is how to establish a wireless connection with WPS on a wireless LAN device without Windows: If the “WLAN” LED on the FRITZ!Box is off, press the “WLAN” button briefly. The wireless radio network of the FRITZ!Box will be switched on.
-
Page 28: Entering The Network Key On The Wireless Device
FRITZ!Box network key on the wireless device. The preset network key is printed on the bottom on the FRITZ!Box. A new network key can be entered in the user inter- face. If the “WLAN” LED on the FRITZ!Box is off, press the “WLAN”... -
Page 29: Connecting To Mobile Devices Wirelessly Using The Qr Code
Connecting to Mobile Devices Wirelessly Using the QR Code Select the wireless radio network of the FRITZ!Box. The preconfigured name of the wireless radio network (SSID) is consists of “FRITZ!Box 7560” and two capital letters, and is printed on the bottom. Click “Connect”. -
Page 30: The Fritz!Box User Interface
The FRITZ!Box User Interface The FRITZ!Box User Interface The FRITZ!Box has a user interface you can open in a web browser on your computer or on mobile devices like a tablet or smartphone. In the user interface you can configure the FRITZ!Box, enable or disable functions and receive information on the FRITZ!Box and on your connections. -
Page 31: Overview: Fritz!Box At A Glance
The “Overview” page of the FRITZ!Box The name of your FRITZ!Box model is displayed in the header of the FRITZ!Box user interface. Next to it are the links to the FRITZ!Box areas FRITZ!NAS and MyFRITZ!. Under the title line containing the name of the given menu is... -
Page 32: Standard View And Advanced View
In- correct combinations of settings in these areas can produce a situation in which the FRITZ!Box user interface can no lon- ger be opened. Upon delivery, the FRITZ!Box interface is set to display the standard view. -
Page 33: Assigning Fritz!Box A Name
Assigning FRITZ!Box a Name Assigning FRITZ!Box a Name You can assign an individual name for your FRITZ!Box in the FRITZ!Box user interface. The name is set up under “Home Network / FRITZ!Box Name” and appears in the following ar- eas of your home network display: •... -
Page 34: Password Protection: Using Fritz!Box Safely
Internet. Setting a FRITZ!Box Password Overview The basic method of logging in to the FRITZ!Box user interface is to enter the FRITZ!Box password. With this password all us- ers can open the user interface and access all of the FRITZ!Box’s contents and settings. - Page 35 If you lose your FRITZ!Box password, you will have to restore the factory settings to the FRITZ!Box and you will have to re- configure all of your personal settings for your Internet con- nection, your telephone system and your home network.
-
Page 36: Creating Fritz!Box Users
Creating FRITZ!Box Users Creating FRITZ!Box Users Overview You can set up as many as 18 user accounts in the FRITZ!Box. A FRITZ!Box user opens the user interface of the FRITZ!Box by entering her or his personal password. There she or he can view and change those contents or settings for which she or he has been granted access rights. - Page 37 Internet the FRITZ!Box contents for which she or he has access rights. Keep in mind that in order to access the FRITZ!Box from the Internet, a corresponding service must also be en- abled in the FRITZ!Box. Continue with the section...
- Page 38 If you use only the login method with FRITZ!Box user name and password to access your FRITZ!Box, you can also set up a user account with NAS access rights. You can delete the preconfigured “ftpuser” account only if you always use your FRITZ!Box user account to access the FRITZ!Box, be it from home or via the Internet.
- Page 39 Check at regular intervals whether a FRITZ!Box user still re- quires access to the FRITZ!Box from the Internet, and if not, disable this feature in the properties of the user. For reasons of security we recommend disabling Internet access to the...
- Page 40 Creating FRITZ!Box Users • As a FRITZ!Box user with the “Smart home” right, you can switch your lamps or aquarium pumps on and off from anywhere in the world. The prerequisite is that you connect them to smart home devices from AVM (like FRITZ!DECT 200, for instance) which are integrated in the home network of your FRITZ!Box.
-
Page 41: No Login" Mode
FRITZ!Box without password protection! Protect your FRITZ!Box by defining a password for the FRITZ!Box user interface. To do this, go to the “System / FRITZ!Box Users / Login to the Home Network” menu and se- lect one of the password protection methods. -
Page 42: Configuring An Internet Connection In The Fritz!Box
Configuring an Internet Connection in the FRITZ!Box Configuring an Internet Connection in the FRITZ!Box Once you have connected the FRITZ!Box to your Internet con- nection, you must configure the Internet connection in the FRITZ!Box user interface so that the FRITZ!Box can establish the connection to your Internet service provider and connect to the Internet. -
Page 43: Configuring An Internet Connection For Cable
Configuring an Internet Connection for Cable Configuring Your Internet Connection Without the Wizard Choose this method if the FRITZ!Box is connected to a DSL modem or a DSL router, or integrated into an existing net- work. Open the FRITZ!Box user interface. -
Page 44: Internet Connection Over Lan 1: Fritz!Box As A Router
Router You can use the FRITZ!Box at an already existing Internet ac- cess via the “LAN 1” socket. To do this the FRITZ!Box is con- nected to the router or network. For this kind of connection the FRITZ!Box can be configured as an independent router or as an IP client in the existing network. - Page 45 Internet connection in the network (IP client mode)”. The FRITZ!Box is integrated into the existing network as an IP client. The FRITZ!Box and the connected network devices re- ceive an IP address from the IP address range of the existing network.
-
Page 46: Connecting Telephones And Other Terminal Devices
Connecting a Telephone Connect the telephone to the appropriate “FON 1” port on the FRITZ!Box. Note that one “FON 1” port must re- main free (unassigned). F O N F O N Configure the telephone in the FRITZ!Box;... -
Page 47: Registering Fritz!Fon And Other Cordless (Dect) Telephones
FRITZ!Box. How FRITZ!App Fon Works Once it has been set up on your smartphone, FRITZ!App Fon remains active in the background. Whenever the smartphone is connected with the FRITZ!Box over wireless LAN, the follow-... - Page 48 Apple App Store. Start the FRITZ!App Fon. The Icon in the FRITZ!App Fon Title Bar The icon in the title bar of FRITZ!App Fon indicates whether you are making calls with the smartphone via FRITZ!Box: Icon Meaning Active wireless LAN connection between smart- phone and FRITZ!Box.
-
Page 49: Connecting An Ip Telephone
You can configure a special ring tone to signal the doorbell on a FRITZ!Fon. You can also have the camera image from your door intercom sys- tem displayed on FRITZ!Fon telephones with a color display. -
Page 50: Configuring The Fritz!Box For Telephone Calls
FRITZ!Box automatically. This procedure is al- so known as “remote configuration”. Remote configuration starts right after the FRITZ!Box is con- nected to the Internet or right after the FRITZ!Box user inter- face is opened. The configured Internet telephone numbers are located in the user interface under “Telephony / Telephone Numbers”. -
Page 51: Configuring Telephones And Other Terminal Devices
Configuring Telephones and Other Terminal Devices in the FRITZ!Box 11.2 Configuring Telephones and Other Terminal Devices in the FRITZ!Box Configure your telephones and other terminal devices in the FRITZ!Box. To do this, for each terminal device define: • the internal name to be displayed in the call list of the FRITZ!Box. -
Page 52: In The Fritz!Box
FRITZ!Box as an Internet Router The FRITZ!Box connects computers in your home network with the Internet. This chapter explains the possibilities presented by using the FRITZ!Box as an Internet router and how to take advantage of them. 12.1 Parental Controls: Access Profiles for Internet Using access profiles you can control the use of the Internet by devices in your network. - Page 53 • Network devices that log in to the FRITZ!Box guest net- work are automatically assigned the “Guest” access profile. This is the only access profile possible in the guest network.
- Page 54 Web access is blocked for all other network applications. Changes The “Guest” profile can be changed. Automatic assignment All network devices that are con- nected with the FRITZ!Box via the guest access always receive the “Guest” profile. The “Unrestricted” Access Profile Property Description Limitations This profile allows unrestricted use of the Internet.
- Page 55 Internet is allowed to be used. shared budget You decide and define whether all network devices that use the same access profile must share this online time limit. For the preconfig- ured “Standard” and “Guest” access profiles, no budget sharing is permitted. FRITZ!Box 7560...
- Page 56 The blacklist is a filter list that should be used when access to most websites is to be permitted, and the number of blocked websites is relatively small. – Access to web pages entered in the blacklist is blocked. FRITZ!Box 7560...
- Page 57 The extension of the online time applies to the device re- deeming the ticket. Tickets: Offer The tickets are available at “Internet / Filters / Access Pro- files” in the FRITZ!Box user interface. For more information on the subject, also use the online help of the FRITZ!Box. FRITZ!Box 7560...
- Page 58 Internet connection. Limitations The “Internet / Filters” menu is not available if you have con- figured the FRITZ!Box as an IP client. In this case, use the cor- responding functions of the router whose Internet connection is being shared.
- Page 59 Parental Controls: Access Profiles for Internet Use Limitations The “Internet / Filters” menu is not available if you have con- figured the FRITZ!Box as an IP client. In this case, use the cor- responding functions of the router whose Internet connection is being shared.
- Page 60 Internet connection. Limitations The “Internet / Filters” menu is not available if you have con- figured the FRITZ!Box as an IP client. In this case, use the cor- responding functions of the router whose Internet connection is being shared.
- Page 61 AVM FRITZ!Box parental controls are installed on the computer as a service. The service must be enabled at all times. If it is not enabled, the FRITZ!Box will not de- tect the user accounts. Windows users that are not de- tected are treated like user accounts without any paren- tal controls.
-
Page 62: Sharing: Making Computers Accessible From The Internet
Sharing: Making Computers Accessible from the Internet 12.2 Sharing: Making Computers Accessible from the Internet With default settings in the FRITZ!Box, programs on your com- puter and LAN cannot be accessed from the Internet. For applications like online games and file sharing software... - Page 63 Sharing: Making Computers Accessible from the Internet IPv4: Within IPv4 networks you can open the FRITZ!Box firewall for the protocols TCP and UDP when en- tering the port range. One port can be opened for exactly one computer. IPv6: Within IPv6 networks you can open the FRITZ!Box firewall for the protocols TCP and UDP when en- tering the port range.
-
Page 64: Dynamic Dns: Name Instead Of Ip Address
Dynamic DNS: Name Instead of IP Address Determining the IPv4 Address for Accessing the FRITZ!Box If you have enabled ports for forwarding in the FRITZ!Box, oth- er Internet users can access your computers at the IP address assigned to your FRITZ!Box by the Internet service provider. -
Page 65: Access From The Internet Via Https, Ftp And Ftps
12.4 Access from the Internet via HTTPS, FTP and FTPS Over the Internet it is possible to access the user interface of the FRITZ!Box. With a laptop, smartphone or tablet PC you can configure settings in the FRITZ!Box user interface. - Page 66 HTTPS (Hypertext Transfer Protocol Secure) HTTPS is an Internet protocol for bug-proof communica- tion between the web server and the browser in the World Wide Web. Enable this protocol to allow access to the FRITZ!Box from the Internet. • FTP (File Transfer Protocol) FTP is a network protocol for transmitting files in IP net- works.
-
Page 67: Prioritization: Right Of Way For Internet Access
If multiple network applications are assigned to this cat- egory, then they must share the available capacity. • Whenever Internet telephony is included in this catego- ry, this application always has the highest priority, even over other real-time applications. FRITZ!Box 7560... - Page 68 If no other network applications are active, then the background applications receive the entire bandwidth. Prioritization Method in the FRITZ!Box The following techniques are used in the FRITZ!Box to send data packets according to their prioritization: • Changing the order in which packets are sent to the...
-
Page 69: Vpn: Remote Access To The Home Network
Via a VPN (Virtual Private Network) a secure remote access to the network of the FRITZ!Box can be established. VPN in the FRITZ!Box IPSec VPN in the FRITZ!Box is based on the IPSec standard. Computer—LAN Computer-LAN linkup: VPN connections can be configured for individual remote com- puters. - Page 70 AVM web- site. The AVM website offers a service page which presents com- prehensive information on VPN in general and in connection with the FRITZ!Box. Visit this page to obtain more detailed in- formation. en.avm.de/service/vpn/overview Configuring VPN in the FRITZ!Box Open the FRITZ!Box user interface.
-
Page 71: Freely Selectable Dns Servers
VPN Service page on the AVM website: en.avm.de/service/vpn/overview 12.7 Freely Selectable DNS Servers DNS servers are preset in the FRITZ!Box for IPv4 and IPv6. These are the DNS servers assigned by the Internet service provider. For both IPv4 and IPv6, the preset DNS server can be replaced by a free DNS server. -
Page 72: Dnssec: Security For Dns Queries
Support with the FRITZ!Box The FRITZ!Box supports DNSSEC queries over UDP. The FRITZ!Box has a DNS proxy. The computers in the home network use the FRITZ!Box as a DNS server. The FRITZ!Box for- wards DNSSEC queries from the home network to the Inter- net. -
Page 73: Ipv6: The New Internet Protocol
12.9 IPv6: The New Internet Protocol IPv6 stands for Internet protocol version 6 and is the succes- sor to IPv4. The FRITZ!Box supports the new IPv6 web protocol and can establish IPv6 connections: • IPv6 support can be switched on in the FRITZ!Box user interface. - Page 74 Enable the advanced view. Select the “Internet / Account Information” menu. Select the “IPv6” page and configure IPv6 in the FRITZ!Box. See the help available in the FRITZ!Box user interface for more information. Configuring IPv6 on the Computer You can establish connections in the IPv6 range of the Inter- net only if IPv6 is installed and enabled on the computers in your home network.
-
Page 75: Lisp: Fritz!Box As A Lisp Router
LISP is a routing architecture which separates information about location and identity. There are two IP addresses: one for the location and one for the identity. The FRITZ!Box can be configured as a LISP router. • This chapter address system administrators. - Page 76 LISP: FRITZ!Box as a LISP Router Properties of RLOC and EID RLOC specifies the location where the addressed network • (network segment or network device) is located is assigned by the Internet service provider • is a public IP address •...
- Page 77 FRITZ!Box as a LISP Router • The FRITZ!Box can be configured as a LISP router. • As a LISP router the FRITZ!Box is an xTR (ETR and ITR). Preparations You need a LISP provider. Register with a LISP provider.
- Page 78 LISP: FRITZ!Box as a LISP Router Configuring a LISP Router Open the FRITZ!Box user interface. Enable the advanced view. Select the “Internet / Account Information” menu. Select the “LISP” tab. Enable the setting “LISP support enabled”. Enter in the fields the information you received from the LISP provider.
-
Page 79: Fritz!Box As A Wireless Access Point
Off by Schedule You can configure a schedule for times at which the wireless network of the FRITZ!Box is to be turned on and off automati- cally. This reduces the power consumption of the FRITZ!Box. The FRITZ!Box schedule also affects any other AVM products... -
Page 80: Extending A Wireless Lan Network
FRITZ!Box that work in the same frequency range You can extend the range of your wireless radio network with a wireless LAN repeater. Or you can set up a second FRITZ!Box as a wireless LAN re- peater. Extending a Wireless Radio Network with a... - Page 81 FRITZ!Box with an additional FRITZ!Box you already have. To extend your wireless LAN, configure the repeater function in this device. You can configure a FRITZ!Box as a repeater by working through the following steps: Open the FRITZ!Box user interface. Enable the advanced view.
-
Page 82: Fritz!Box As A Telephone System
FRITZ!Box as a Telephone System FRITZ!Box as a Telephone System This chapter describes how to use the FRITZ!Box as a tele- phone system (PBX). 14.1 Telephone Book How Can I Use the Telephone Book? On FRITZ!Fon telephones, the telephone book is available in the menu. - Page 83 Detailed instructions are included in the help of the FRITZ!Box user interface. Synchronizing Online Contacts The FRITZ!Box synchronizes the configured online telephone books with the telephone book of your e-mail account every 24 hours. You can also synchronize the telephone books with the click of a button.
-
Page 84: Call List
Enable click to dial and select a telephone. Save with “OK”. You can use click to dial. Detailed instructions are included in the help of the FRITZ!Box user interface. 14.2 Call List The call list contains your telephone conversations and calls you missed. - Page 85 Select “Save” or “Save File”. What to do next depends on the web browser you are using. FRITZ!App Ticker for Android Smartphones FRITZ!App Ticker shows the call list and new messages on the answering machine on your Android smartphone. For more information, read en.avm.de/products/fritzapps.
-
Page 86: Answering Machine
Answering Machine 14.3 Answering Machine You can use the FRITZ!Box as an answering machine without connecting any additional devices. If you have several telephone numbers, you can configure up to five different answering machines. Features • Voice to mail: If desired you can receive any new mes- sages automatically by e-mail. - Page 87 Answering Machine Operating the Answering Machine on FRITZ!Fon You can operate the answering machine in the menu of your FRITZ!Fon cordless telephones. For comprehensive instructions, see the current FRITZ!Fon manual on en.avm.de/service/manuals/fritzfon. Operating the Answering Machine Using the Voice Menu Using a voice menu you can operate the answering machine on any telephone connected with the FRITZ!Box.
- Page 88 Closing message at end of recording length Listing to greetings > Select greeting with Delete greeting/announcement Start recording > End recording with In All Menus Function Listen to messages in current menu from the beginning Back to main menu FRITZ!Box 7560...
-
Page 89: Fax Function
Fax Function 14.4 Fax Function With the FRITZ!Box you can send and receive faxes without a fax machine. The FRITZ!Box can be configured to forward re- ceived faxes by e-mail. Configuring the fax function Open the FRITZ!Box user interface. Select “Telephony / Telephony Devices”. - Page 90 Fax Function Here is how to enable automatic fax detection: Open the FRITZ!Box user interface. Configure the fax function; see page Select “Telephony / Telephony Devices”. Click the “Edit” button to open the settings of the fax function Click the “Help” button.
-
Page 91: Call Diversion
You can divert calls to: • Another telephone number (a different telephone line or mobile telephone number) • One of the FRITZ!Box’s internal answering machines Configuring Call Diversion Open the FRITZ!Box user interface. Select the “Telephony / Call Handling / Call Diversion” menu. -
Page 92: Dialing Rules For Outgoing Calls
If you would like to use a dial around service number for certain calls, set up a dialing rule in the FRITZ!Box. A dialing rule can specify, for example, that the FRITZ!Box automati- cally dials all international calls using a dial around service. -
Page 93: International Calls
Dial Around Service Using Dialing Rules Switch to the “Carrier Prefixes” tab. If the tab is not available, the FRITZ!Box does not sup- port the use of dial around service on your connection type. Under “Additional Provider Prefixes”, enter all of the dial around service numbers you would like to use in dialing rules. -
Page 94: Blocking Telephone Numbers And Callers
Click “OK” to save the dialing rule. Now whenever you call a telephone number that begins with 00 (2 zeroes) with the FRITZ!Box the call will be dialed using the dial around service number defined in the dialing rule. 14.8 Blocking Telephone Numbers and Callers In the FRITZ!Box you can block telephone numbers for outgo- ing and for incoming calls. -
Page 95: Do Not Disturb
Click “OK” to save the settings. 14.9 Do Not Disturb Do Not Disturb keeps a telephone from ringing at specified times. Calls you miss then appear in the FRITZ!Box call list. Configuring Do Not Disturb Open the FRITZ!Box user interface. -
Page 96: Alarm
14.10 Alarm When you configure an alarm, your telephone rings at the specified time. Configuring the Alarm Open the FRITZ!Box user interface. Select “Telephony / Alarm”. Enable the alarm and enter a time. Select which telephone should ring at the specified time. - Page 97 Enter an external telephone number, an internal tele- phone number or ss9 for an internal broadcast call. The internal numbers of the telephones you have con- nected are listed in the telephone book of the FRITZ!Box user interface. Press “OK”.
-
Page 98: Making Telephone Calls With Convenience Functions
You can conduct free internal calls between telephones con- nected to the FRITZ!Box. Enter an internal telephone number on the telephone. The internal numbers of the telephones you have con- nected are listed in the telephone book of the FRITZ!Box user interface. Pick up the handset. FRITZ!Box 7560... - Page 99 The call is on hold. Enter an internal number. The internal numbers of the telephones you have con- nected are listed in the telephone book of the FRITZ!Box user interface. When the called party accepts the call the second call is connected.
- Page 100 Accepting or Rejecting Waiting Calls on FON 1 Requirements • The “Call waiting” feature must be enabled for the indi- vidual telephone in the FRITZ!Box. The telephone set- tings can be edited in the user interface of the FRITZ!Box under “Telephony / Telephony Devices”. FRITZ!Box 7560...
- Page 101 While you are conducting the call, press the Hold button R on the telephone. Call 1 is on hold. Enter an internal or external telephone number. When the called party accepts the call the second call is connected. FRITZ!Box 7560...
- Page 102 They can be used to control ser- vices and features in the telephone network. For information about which keypad sequences you can use, contact your carrier. Press the keys sr<Seq>. <Seq> stands for a keyboard se- quence. Pick up the handset. FRITZ!Box 7560...
-
Page 103: Configuring Fritz!Box On The Telephone
Various functions can be configured using a telephone con- nected to the FRITZ!Box. 15.1 Alarm Requirements You set up an alarm in the FRITZ!Box; see Alarm page Can I Switch More than One Alarm On and Off? No. There should be no problem. With the telephone keys you always switch the first alarm on or off. - Page 104 You can configure call diversion that applies only to all calls that arrive for a certain telephone number. Calls for your other telephone numbers will not be diverted. Here is how to configure call diversion to an external number (destination number): FRITZ!Box 7560...
- Page 105 Type of call diversion Keys s21ss Immediately <own telephone number> s61ss Delayed (after 20 seconds) <own telephone number> s67ss Only when busy <own telephone number> Pick up the handset. Wait for the second-long positive acknowledgment tone. Hang up the handset. FRITZ!Box 7560...
-
Page 106: Switching The Wireless Network On And Off
Hang up the handset. 15.3 Switching the Wireless Network On and Off Press the following keys on the telephone: Function Keys r96s1s Wireless LAN on r96s0s Wireless LAN off Pick up the handset and hang it up again. FRITZ!Box 7560... -
Page 107: Loading Factory Settings
Loading Factory Settings 15.4 Loading Factory Settings All settings you made in the FRITZ!Box will be deleted. Press the keys r991s15901590s. Pick up the handset and hang it up again. The factory settings are loaded. Then the FRITZ!Box will re- start. -
Page 108: Fritz!Box As A Base Station For Dect
FRITZ!Box as a Base Station for DECT Cordless Telephones FRITZ!Box as a Base Station for DECT Cordless Telephones The FRITZ!Box is equipped with a DECT base station, on which you can register and configure a total of up to six DECT cord- less telephones. -
Page 109: Enabling Dect Eco
How Does DECT Eco Work? When all registered cordless telephones are in standby oper- ation, the DECT radio network of the FRITZ!Box and the tele- phones is switched off. When a call arrives or you press a key on a cordless telephone, the DECT radio network is switched back on. -
Page 110: Fritz!Box Connects Network Devices
The “All Devices” tab displays all devices that are attached to the FRITZ!Box or connected with the FRITZ!Box wirelessly. If the FRITZ!Box is being operated in IP client mode, the “All Devices” tab will not be shown. The following devices are displayed: •... - Page 111 ...), powerline devices, wireless repeat- ers, network-compatible TVs. • All of the telephones connected with the FRITZ!Box. • All smart home devices registered with the FRITZ!Box are displayed (smart plugs, radiator controls). • All of the USB devices connected with the FRITZ!Box. Network Connections The “Network Connections”...
- Page 112 For network devices there is the setting “Always assign this network device the same IP address”. This setting has the effect that the DHCP server of the FRITZ!Box will assign the same IP address to the device every time it connects to the network. FRITZ!Box 7560...
- Page 113 Internet. For instance, you can access a computer using remote main- tenance software, without wasting electricity by keeping the computer switched on permanently. The FRITZ!Box supports Wake on LAN both for IPv4 and for IPv6 connections. Requirements: •...
- Page 114 Network Settings in the FRITZ!Box IPv4 Settings in the FRITZ!Box Factory Settings The following IPv4 settings are preconfigured in the FRITZ!Box upon delivery: Setting Preconfigured Value IPv4 address 192.168.178.1 Subnet mask 255.255.255.0 DHCP server enabled The following IP addresses can be derived from the IP address...
- Page 115 • You want to connect the FRITZ!Box to the local IPv4 net- work in order to make the FRITZ!Box features available to all of the computers in the IPv4 network.
- Page 116 162. DHCP Server for IPv4 The FRITZ!Box has a DHCP server for the IPv4 range. The DHCP server is enabled by default in the factory settings. The fol- lowing range of IP addresses is reserved for the DHCP server...
- Page 117 DHCP server of the FRITZ!Box. Please note that the FRITZ!Box must be located in the same IP network as all of the device connected with it. Integrate the FRITZ!Box in your network by adjusting the IP address of the FRITZ!Box to your home network.
- Page 118 ULA and communication between them is restricted. For this case you can set the FRITZ!Box such that the network devices receive the ULA from the FRITZ!Box. DHCPv6 Server in the Home Network The FRITZ!Box is equipped with its own DHCPv6 server.
-
Page 119: Upnp Settings
Note that changes to the network settings in the FRITZ!Box may make it necessary to adjust the network settings of your computers so that you can continue to access the FRITZ!Box user interface. -
Page 120: Obtaining An Ip Address Automatically
Obtaining an IP Address Automatically 17.2 Obtaining an IP Address Automatically The FRITZ!Box has its own DHCP server, which assigns IP ad- dresses to the connected computers. The connected comput- ers must be configured such that they can receive their IP ad- dresses automatically. - Page 121 Select the “Using DHCP” option from the “Configure IPv4:” drop-down list. Click “OK”. The computer now receives an IP address from the FRITZ!Box. Obtaining an IP Address Automatically in Linux For comprehensive information and tips on network settings in Linux, see, for example: www.tldp.org/HOWTO/NET3-4-HOWTO-5.html...
-
Page 122: Connecting Usb Devices To The Fritz!Box
Connecting USB Devices to the FRITZ!Box Connecting USB Devices to the FRITZ!Box The FRITZ!Box has a USB port to which you can connect various USB devices. All network devices in the FRITZ!Box home network can use these USB devices jointly and simultaneously. -
Page 123: Using Usb Devices Safely
126. • You can connect a USB hub to the FRITZ!Box and use up to four USB devices at this hub. You can use USB hubs with or without a separate power supply. We recommend deploying a USB hub with its own power supply if the USB devices to be connected ex- ceed a total current consumption of 500 mA;... -
Page 124: Configuring Access Rights
You can protect the data on your USB storage from unautho- rized access by securing the user interface of your FRITZ!Box with a password. In the “System / FRITZ!Box Users” menu you • configure a shared password that is requested every time anyone in your home network accesses the FRITZ!Box and the connected USB storage media. -
Page 125: Enabling Energy-Saving Mode For Usb Hard Drives
Server”. 18.6 Enabling Energy-saving Mode for USB Hard Drives In the FRITZ!Box you can enable an energy-saving function for USB hard drives connected to the FRITZ!Box. When the ener- gy-saving function is enabled, connected USB hard drives will be switched off when they are idle—as long as the hard drives support the energy-saving function. -
Page 126: Sharing A Usb Printer
Sharing a USB Printer 18.7 Sharing a USB Printer You can connect a USB printer to the FRITZ!Box to make it available to all participants in your home network. Using a USB Printer: Possibilities A USB printer connected to the FRITZ!Box can be configured in... - Page 127 “Next”. Enter “fritz.box” in the “Hostname or IP address:” field. If the FRITZ!Box is configured as a wireless repeater or an IP client, enter here the IP address at which the FRITZ!Box can be reached within the network.
- Page 128 “Next”. Enter “fritz.box” in the Hostname or IP address: field. If the FRITZ!Box is configured as a wireless repeater or an IP client, enter here the IP address at which the FRITZ!Box can be reached within the network.
- Page 129 As the “Device Type”, select “Automatic detection” and enter in the input field “Host name or IP address”: fritz.box. If the FRITZ!Box is configured as a wireless repeater or an IP client, enter here the IP address at which the FRITZ!Box can be reached within the network.
- Page 130 Enter “9100” as the port. • Enter fritz.box as the printer name. If the FRITZ!Box is configured as a wireless repeater or an IP client, enter here the IP address at which the FRITZ!Box can be reached within the network.
-
Page 131: Remote Connection
Windows 10, Windows 8 or Windows 7 (32- and 64-bit). Installing FRITZ!Box USB Remote Connection Install the program for FRITZ!Box USB remote connection on all of the computers with which you want to use the connect- ed USB device. - Page 132 Click the USB printer in the “Devices” area. The USB printer is being connected to the computer. Do not conduct any firmware updates for USB devices that are connected with the computer via the FRITZ!Box USB re- mote connection. FRITZ!Box 7560...
-
Page 133: Managing Memory With Fritz!Nas
Managing Memory with FRITZ!NAS Managing Memory with FRITZ!NAS With FRITZ!NAS you can display the data on the storage media of your FRITZ!Box in a clearly arranged interface. All partici- pants in the FRITZ!Box home network can start FRITZ!NAS in a web browser and use it as a platform to access music, imag- es, videos and documents in the FRITZ!Box memory. - Page 134 FRITZ!NAS Password Protection FRITZ!NAS can be reached in the home network by entering the shared FRITZ!Box password. From the Internet you can reach FRITZ!NAS only by logging in with your individual user name and password. Information on the password protection of your FRITZ!Box is...
-
Page 135: Extending The Scope Of Functions With Smart Home
Extending the Scope of Functions with Smart Home Extending the Scope of Functions with Smart Home You can expand the scope of functions of your FRITZ!Box with AVM smart home devices for home automation. A Smart Home device that is especially easy to integrate in your home network is FRITZ!DECT 200. -
Page 136: Configuring Internet Access For Guests
The guest access in the FRITZ!Box can be configured and pro- vided only if the FRITZ!Box establishes the Internet connec- tion itself. If the FRITZ!Box is operated as an IP client, no guest access can be configured. 21.2 Wireless Guest Access: Private Hotspot For your guests you can configure a wireless guest access. - Page 137 Assign a name for the guest wireless network (SSID) and enter a network key. This concludes the configuration of your guest access. Now guests can register their wireless devices with the FRITZ!Box. Manually Registering a Wireless Device with the Wireless Guest Access Your guest starts the wireless LAN software of her or his wireless device and searches for the guest network.
-
Page 138: Configuring Guest Access On The Lan 4 Port
Filters” menu on the “Access Profiles” tab. Configuring Guest Access Set up the guest access as follows: Open the FRITZ!Box user interface. In the “Home Network / Home Network Overview” menu, select the “Network Settings” tab. In the “Guest Access” area, check the box in front of the “Guest access enabled for LAN 4”... -
Page 139: Myfritz!: Accessing The Fritz!Box From Anywhere
Using an active Internet connection on any computer, tablet or smartphone, with MyFRITZ! accessing your FRITZ!Box from anywhere is safe and simple. Depending on the rights in your FRITZ!Box user account, you can use the following areas of your FRITZ!Box: Area... -
Page 140: Creating A Myfritz! Account
Creating a MyFRITZ! Account Configuring MyFRITZ! Configuration of MyFRITZ! consists of the following steps: • Creating a MyFRITZ! account in the FRITZ!Box. • Registering the FRITZ!Box with the MyFRITZ! account. • Configuring the MyFRITZ! on your smartphone or tablet (optional). -
Page 141: Registering A Fritz!Box With An Existing Myfritz! Account
Registering a FRITZ!Box with an Existing MyFRITZ! Account Enter your e-mail address. If you are already configured as a FRITZ!Box user, enter here the e-mail address you use for the FRITZ!Box user account. Assign a MyFRITZ! password. This password must be dif- ferent from the password for your FRITZ!Box account. -
Page 142: Configuring The Myfritz!App
Configuring the MyFRITZ!App 22.4 Configuring the MyFRITZ!App Overview If you would like to access your FRITZ!Box from a smartphone or tablet, you can do so using the free MyFRITZ!App from AVM. The MyFRITZ!App is available in the Google Play Store... -
Page 143: Using Myfritz
Using MyFRITZ! 22.5 Using MyFRITZ! Overview With MyFRITZ! you can access your FRITZ!Box directly via your home network, the Internet, or the MyFRITZ!App on your mo- bile device. Note that you have access to only those FRITZ!Box areas which your rights in the FRITZ!Box authorize you to access. -
Page 144: Push Services: Using Notification Services
Push Services: Using Notification Services Push services are notification services that inform you about the activities of your FRITZ!Box and assist you in saving your passwords and FRITZ!Box settings. With the push services you can have e-mail sent to you at regular intervals informing you about the latest connections, usage and configuration of your FRITZ!Box. -
Page 145: Enabling Push Services
FRITZ!Box settings and about security-rele- vant events. 23.2 Enabling Push Services A wizard is available in the FRITZ!Box user interface to guide you step by step through the configuration of push services. Open the FRITZ!Box user interface. On the “Overview” page, select the “Wizards” menu. -
Page 146: Diagnostics: Checking Function And Security
In the “Diagnostics” area the FRITZ!Box offers you the possi- bility of checking the status of functions and security-relevant settings of your FRITZ!Box. This ensures safe operation of the FRITZ!Box and makes sure that it is kept up with the latest technical developments. 24.1 Checking FRITZ!Box Functions... -
Page 147: Checking The Security Of The Fritz!Box
Checking the Security of the FRITZ!Box 24.2 Checking the Security of the FRITZ!Box In the “Security” overview the FRITZ!Box offers you a list of all security-relevant settings that control access to the FRITZ!Box from the Internet or from the home network. This shows, for... -
Page 148: Saving And Restoring Settings
Saving and Restoring Settings Saving and Restoring Settings All of the settings you configure in the FRITZ!Box can be saved in a backup file. With this file you can restore your settings at any time: • in the same FRITZ!Box or another FRITZ!Box of the same model •... -
Page 149: Restoring Settings
Backup files created with a different FRITZ!Box of the same model. If you apply settings from a backup file that was created with a different FRITZ!Box of the same model, you can re- store all settings if the backup file was protected with a password. -
Page 150: Restarting The Fritz!Box
Restarting the FRITZ!Box 25.3 Restarting the FRITZ!Box You can restart the FRITZ!Box via the user interface or on the device. A restart may be necessary if the FRITZ!Box no longer reacts, or if Internet connections can no longer be estab- lished for no apparent reason. -
Page 151: Update: Updating Fritz!Os
Update: Updating FRITZ!OS Update: Updating FRITZ!OS Always install the latest version of FRITZ!OS on all FRITZ! products in your FRITZ!Box home network. This keeps your FRITZ! products up to date and ensures optimum synchroni- zation of all devices in your home network. - Page 152 Procedure Description Notify me about new The FRITZ!Box indicates that a new ver- versions of FRITZ!OS and sion of FRITZ!OS is available on the start install necessary up- page. You start the update yourself; see page 153 dates automatically (recommended)
-
Page 153: Performing An Update With The Wizard
Performing an Update with the Wizard 26.2 Performing an Update with the Wizard A wizard is available in the FRITZ!Box user interface to assist you in updating your FRITZ!Box. The wizard checks whether an update of the FRITZ!Box is available for your FRITZ!OS and guides you step by step through installation. -
Page 154: Updating The Firmware Manually
Perform an update only if the downloaded FRITZ!OS is a newer version than the FRITZ!OS currently installed. Now you can copy the FRITZ!OS file to the computer that is connected to the FRITZ!Box, for instance using a USB flash drive. - Page 155 Select “System / Update / FRITZ!OS File”. Click the “Save Settings” button to save the current set- tings of your FRITZ!Box on your computer and save the export file on your computer. Using this file you can restore the settings of your FRITZ!Box as needed.
-
Page 156: Taking Fritz!Box Out Of Operation
FRITZ!Box are restored to their condition upon delivery. Restoring the factory settings is recommended if you would like to pass the FRITZ!Box on to another user. By restoring the factory settings you can delete incorrect settings that prevent the FRITZ!Box from functioning properly. -
Page 157: Uninstalling Supplementary Software
Saving FRITZ!Box Settings Before loading the factory settings, save all of the settings you made in your FRITZ!Box to a backup file. With this backup file you can restore your settings to the FRITZ!Box at any time or load them to another FRITZ!Box. For more information on... - Page 158 Click the “Programs and Features” entry. The “Uninstall or change a program” list shows all of the programs installed on your computer. Mark the AVM program you want to remove in the list. Click the “Uninstall” button. The program will be removed. FRITZ!Box 7560...
-
Page 159: Help In Case Of Errors
Help in Case of Errors Here you can find assistance if you are not able to open the user interface of your FRITZ!Box or if errors occur with wireless LAN connections. For more help, see the AVM Knowledge Base in the Internet: en.avm.de/service... - Page 160 Select “the beginning of time”, and below it only the op- tion “Cached images and files”. Click “Clear browsing data”. Other Web Browsers If you use a different web browser, see the help for your browser for instructions on how to clear the cache. FRITZ!Box 7560...
- Page 161 The User Interface Does Not Open Checking the Proxy Settings of the Web Browser If a proxy server is enabled in your web browser, the address of the FRITZ!Box must be entered as an exception. Check your web browser settings. Firefox Click the orange Firefox button and select “Options /...
- Page 162 Connect your computer to the “LAN 2” port of the FRITZ!Box using a LAN cable. If your computer is already connected with the FRITZ!Box over wireless LAN, clear the wireless connection. Make sure that the computer obtains its IP address auto- matically;...
-
Page 163: Cannot Establish A Wireless Lan Connection
28.2 Cannot Establish a Wireless LAN Connection If you cannot establish a wireless LAN connection between your computer and the FRITZ!Box, this may be due to a variety of causes. Work through the following steps in sequence until the error has been resolved. -
Page 164: Wireless Lan Connection Interrupted
28.3 Wireless LAN Connection Interrupted If the wireless LAN connection between your computer and the FRITZ!Box is disrupted, this may be due to a variety of causes. Work through the following steps in sequence until the error has been resolved. - Page 165 Wireless LAN Connection Interrupted Configuring Automatic Radio Channel Selection Configure automatic selection of the radio channel in the FRITZ!Box. Then the FRITZ!Box will automatically select a radio channel with as little interference as possible. Open the FRITZ!Box user interface. Select “Wireless / Radio Channel”.
-
Page 166: Technical Specifications
Technical Specifications Technical Specifications Facts worth knowing: Here you will find comprehensive tech- nical data on your FRITZ!Box 7560. 29.1 Ports and Interfaces • VDSL/ADSL modem for use with ADSL/ADSL2/ADSL2+ in accordance with ITU G.992.1, ITU G.992.3, ITU G.992.5 (Annex B or J) or VDSL2 in accordance with ITU G.993.2 including G.vector... -
Page 167: Router Functions
Ring tone: 1 s tone, 4 s pause +/– 100 ms 29.5 Device Properties • Dimensions (W x D x H): approx. 227 x 56 x 160 mm • FRITZ!OS can be updated • Conforms to CE standards • Ambient conditions –... -
Page 168: Cable
FRITZ!Box 7560. • AVM recommends using a network cable no more than 100 meters long. • Additional network cable is required if you would like to use all of the FRITZ!Box 7560 network ports. Extension FRITZ!Box 7560... - Page 169 As a replacement, use a standard Cat-5 network cable. Replacement cable is available from specialized vendors. DSL Cable The DSL cable is for connecting the FRITZ!Box to a ADSL or VDSL line without a landline. Extension You will need the following components to extend the length of the cable on the end with the RJ45 connector: •...
- Page 170 Cable Replacement The DSL cable is a standard cable. • As a replacement cable, use a DSL cable with one RJ45 or RJ11 connector. Replacement cable is available from specialized vendors. FRITZ!Box 7560...
-
Page 171: Customer Service
30.1 FRITZ!Box Help In the FRITZ!Box user interface you can open the detailed help by clicking the “question mark” icon. The help presents de- scriptions and instructions on all settings and functions of your FRITZ!Box. -
Page 172: Feedback On Fritz!Box
AVM. The error report helps improve the stability of FRITZ!OS. The feature for automatically sending error reports is located on the “Contents / AVM Services” page of the FRITZ!Box user interface. Evaluating the DSL Connection On the “Internet / DSL Information / Feedback” page you can evaluate your DSL connection. -
Page 173: Assistance From The Support Team
Assistance from the Support Team 30.4 Assistance from the Support Team If you have problems with your FRITZ!Box, proceed as follows: If you have questions about starting operation of your FRITZ!Box, please consult the following chapters: – Before You Connect the FRITZ!Box... -
Page 174: Legal Notice
The licensing conditions are presented in the help for the FRITZ!Box user interface under the “Le- gal Notice” heading. This documentation and software have been produced with all due care and checked for correct- ness in accordance with the best available technology. -
Page 175: Manufacturer's Warranty
Disposal Information In accordance with European regulations and the Waste Electrical and Electronic Equipment Direc- tive (WEEE), the FRITZ!Box 7560, as well as all devices and electronic components contained in the package, may not be disposed with household waste. In accordance with European regulations, FRITZ!Box 7560, as well as all devices and electronic components contained in the package, may not be disposed with household waste. -
Page 176: Drilling Template
Drilling Template A drilling template is presented below. Use the drilling tem- plate as a guide to mark the holes needed to mount the FRITZ!Box on a wall. FRITZ!Box 7560... - Page 177 Be sure to print out the page with the drilling template in its original size, or 100%. Do not enlarge it, adjust its size, reformat or rescale it in your printer settings.
-
Page 178: Index
....FRITZ!App Fon ....conventions..... . - Page 179 HTTPS......FRITZ!App Fon ....
- Page 180 38, 52, 65 Internet access ... registering FRITZ!Box ..Internet connection overview ....
- Page 181 (LAN) ....FRITZ!OS ....provider prefixes ....
- Page 182 ..... . overview ..... password protection ... FRITZ!Box 7560...
Need help?
Do you have a question about the FRITZ!Box 7560 and is the answer not in the manual?
Questions and answers