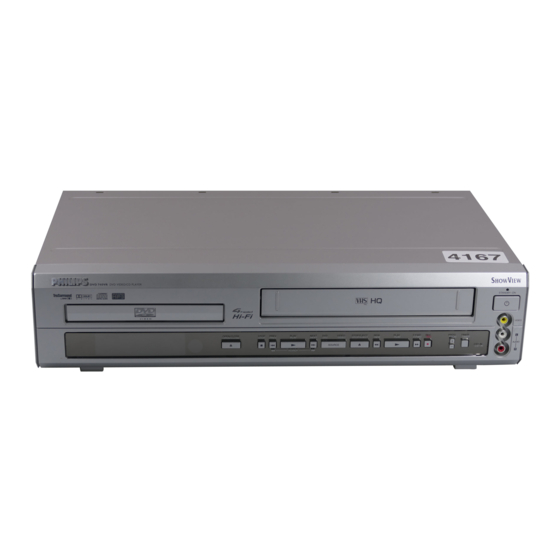
Philips DVD740VR Owner's Manual
Digital video disc player & video cassette recorder
Hide thumbs
Also See for DVD740VR:
- Owner's manual (80 pages) ,
- Technical specifications (4 pages) ,
- Service manual (107 pages)
Table of Contents
Advertisement
DVD740VR
4/12/02
12:08 PM
Digital Video Disc Player &
Video Cassette Recorder
Owner's Manual
Page 1
Read this manual first!
Congratulations on purchasing this Philips product.
We've included everything you need to get started.
If you have any problems, Philips Representatives can
help you get the most from your new product by explaining:
• Hookups,
• First Time Setup, and
• Feature Operation.
Do not attempt to return this product to the store.
For fast help, call us first!
1-800-531-0039
Thank you for making Philips a part of your home!
DVD740VR
Important!
Return your
Warranty
Registration Card
within 10 days.
See why inside.
Advertisement
Table of Contents

Related Manuals for Philips DVD740VR


Summary of Contents for Philips DVD740VR
- Page 1 • Hookups, • First Time Setup, and • Feature Operation. Do not attempt to return this product to the store. Thank you for making Philips a part of your home! For fast help, call us first! 1-800-531-0039 DVD740VR Important!
- Page 2 Return your Warranty Registration card today to ensure you receive all the benefits you’re entitled to. Once your PHILIPS purchase is registered, you’re eligible to receive all the privileges of owning a PHILIPS product. So complete and return the Warranty Registration Card enclosed with your purchase at once.
-
Page 3: Safety And General Information 3
Knoxville, TN 37914-1810 (865) 521-4316 Manufactured under license from Dolby Laboratories. "Dolby" and the double-D symbol are trademarks of Dolby Laboratories. Copyright 2002 Philips Consumer Electronics. All rights reserved. Safety and General Information 3 This Class B digital apparatus This equipment has been tested and found to comply... -
Page 4: Table Of Contents
DVD740VR 4/12/02 12:08 PM Page 4 4 Table of Contents General Information Safety and General Information ....3 Table of Contents ......4 Introduction . -
Page 5: Introduction 5
DVD740VR 4/12/02 12:08 PM Page 5 Welcome! This DVD/VCR combines a Digital Video Disc (DVD) Player and a Hi-Fi Video Cassette Recorder (VCR) into one unit, letting you play DVDs, Audio Compact Discs (Audio CDs), and Video Cassettes on one piece of equipment. -
Page 6: Playable Discs And Video Cassettes
Playable Video Cassettes The VCR of this DVD/VCR has a High Quality (HQ) system and is compatible with existing Video Home System (VHS) equipment. Philips recommends you use only Video Cassettes that have the picture quality and excessive deposits on the video heads, which may not be covered by the warranty if damage occurs. -
Page 7: Hookups 7
DVD740VR 4/12/02 12:08 PM Page 7 Determining the best possible connection... Your hookup will be determined primarily by your existing equipment, especially your TV. However, the fol- lowing guidelines describe which options have the best picture (video) and sound (audio) quality. - Page 8 DVD740VR 4/12/02 12:08 PM Page 8 8 Hookups (cont’d) Simplest connection using only supplied black RF coaxial cable This connection will let you use the features of both the VCR and the DVD Player. Disconnect the antenna or cable from your TV and connect it to the ANT-IN (Antenna In) Jack of your DVD/VCR.
- Page 9 DVD740VR 4/12/02 12:08 PM Page 9 DVD/VCR to Cable Box/DBS (Satellite Receiver) and TV This connection will let you use the features of both the VCR and the DVD Player. Cable Box/DBS Cable Signal RF coaxial cable Connections Connect a Cable signal to the IN Jack on the Cable Box/DBS.
- Page 10 DVD740VR 4/12/02 12:08 PM Page 10 10 Hookups (cont’d) DVD/VCR to Cable Box/DBS (Satellite Receiver) and TV This connection will let you use the features of both the VCR and the DVD Player. DVD/VCR ANT-IN ANT-OUT CH3 CH4 Cable Signal...
- Page 11 DVD740VR 4/12/02 12:08 PM Page 11 DVD/VCR to a TV that has Audio and Video In jacks Using the supplied red, white, and yellow cables This connection will let you use the features of both the VCR and the DVD Player.
- Page 12 DVD740VR 4/12/02 12:08 PM Page 12 12 Hookups (cont’d) DVD/VCR to a Stereo and to a TV that has Component Video In jacks Antenna/Cable TV Signal ANT-IN ANT-OUT CH3 CH4 Back of Stereo (example only) Connect the antenna or Cable TV signal to the ANT-IN (Antenna In) jack of your DVD/VCR.
- Page 13 DVD740VR 4/12/02 12:08 PM Page 13 DVD/VCR to a TV and to a Stereo Receiver that is Dolby Digital-compatible Antenna/Cable TV ANT-IN ANT-OUT VIDEO IN Back of TV (example only) Connect the antenna or Cable TV signal to the ANT-IN (Antenna In) jack of your DVD/VCR.
-
Page 14: Remote Control Setup
DVD740VR 4/12/02 12:08 PM Page 14 14 Remote Control Setup Putting Batteries in the Remote Control Remove the battery compartment lid on the bottom of the remote control by pressing the tab, then lifting the lid. Place two AA batteries inside the battery compart- ment with their + and –... -
Page 15: First-Time Dvd/Vcr Setup 15
DVD740VR 4/12/02 12:08 PM Page 15 Before turning on your DVD/VCR, make sure batteries are in the remote control and the DVD/VCR and TV are connected correctly. You cannot program channels if you are using a Cable Box or a Direct Broadcast System. -
Page 16: Video Cassette Playback
DVD740VR 4/12/02 12:08 PM Page 16 16 Video Cassette Playback Read and follow the steps below to play a tape. Turn on the TV and set it to channel 3 or 4, whichever channel the CH3/CH4 switch on the back of the DVD/VCR is set to. -
Page 17: Disc Playback 17
DVD740VR 4/12/02 12:08 PM Page 17 AUDIO CD Before you begin, turn on the power of the TV, stereo receiv- er and any other equipment connected to the DVD/VCR. Make sure the TV and the stereo receiver (if applicable) are set to the correct channel. -
Page 18: Display Panel (Dvd)
DVD740VR 4/12/02 12:08 PM Page 18 18 Display Panel (DVD) Display with Dimmer Messages about current Disc oper- ations appear here. See Display Messages below. You can adjust the brightness of the display. Details are on pages 66-67. MP3 CD PLAYBACK... -
Page 19: Display Panel (Vcr) 19
DVD740VR 4/12/02 12:08 PM Page 19 MP3 CD PLAYBACK VIDEO Light (Green) This light appears when the DVD/VCR is in VCR mode. You can only watch video cassettes or access VCR features and TV channels when the green VIDEO light is on. -
Page 20: Front Panel
DVD740VR 4/12/02 12:08 PM Page 20 20 Front Panel SOURCE Button Press to select DVD mode or VCR mode. The red DVD light appears in DVD mode. The green VIDEO light appears in the VCR mode. PLAY Button (DVD) Press to start Disc playback. -
Page 21: Rear Panel 21
DVD740VR 4/12/02 12:08 PM Page 21 ANT-IN (Antenna In) Jack Connect your antenna or Cable TV signal here. Details are on pages 8-13. AUDIO IN (right/left) Jacks Connect audio cables coming from the audio out jacks of a camcorder, another VCR, or an audio source here. -
Page 22: Remote Control Buttons
DVD740VR 4/12/02 12:08 PM Page 22 22 Remote Control Buttons MARKER Button Press to set a Marker, which gives you quick access to points you select on a Disc. Details are on page 54. SUBTITLE Button Press to select a language for DVD subtitles. -
Page 23: Remote Control Buttons
DVD740VR 4/12/02 12:08 PM Page 23 SETUP Button Press to access or remove the DVD Player’s Setup menu. REC/OTR (record/one- touch recording) Button Press once to start a VCR recording. Details are on page 31. Press repeatedly to start a One-Touch Recording. -
Page 24: Channel Setup
DVD740VR 4/12/02 12:08 PM Page 24 24 Channel Setup Although your DVD/VCR may automatically memorize the chan- nels you receive when you turn it on for the first time, you can set up the channels again. Before you begin, place the DVD/VCR in VCR mode. Press OUTPUT SELECT so the green VIDEO light appears on the front of the DVD/VCR. -
Page 25: Adding/Deleting Channels
DVD740VR 4/12/02 12:08 PM Page 25 Adding/Deleting Channels You may want to add or delete TV channels if your channel lineup changes or if you no longer watch some channels. Before you begin, place the DVD/VCR in VCR mode. Press OUTPUT SELECT so the green VIDEO light appears on the front of the DVD/VCR. -
Page 26: Channel Setup
DVD740VR 4/12/02 12:08 PM Page 26 26 Channel Setup (cont’d) Reviewing Memorized Channels To see which TV channels the DVD/VCR has memorized, follow the steps below. Before you begin, place the DVD/VCR in VCR mode. Press OUTPUT SELECT so the green VIDEO light appears on the front of the DVD/VCR. -
Page 27: Clock (Vcr) 27
DVD740VR 4/12/02 12:08 PM Page 27 Follow the steps below to set the clock for the VCR. Make sure: The DVD/VCR is on and the VCR/TV light appears on the front of the DVD/VCR. (If it does not, press VCR/TV once.) You make each entry within 60 seconds of the previous entry. -
Page 28: Daylight-Savings Time
DVD740VR 4/12/02 12:08 PM Page 28 28 Daylight-Savings Time You may program the DVD/VCR so the VCR clock will automati- cally move forward one hour in April and turn back one hour in October. Daylight-Savings Time is ON when you receive your DVD/VCR. -
Page 29: Language Selection (Vcr) 29
DVD740VR 4/12/02 12:08 PM Page 29 Follow the steps below to change the language of the VCR on- screen displays and menus. Before you begin, place the DVD/VCR in VCR mode. Press OUTPUT SELECT so the green VIDEO light appears on the front of the DVD/VCR. -
Page 30: Vcr On-Screen Status Displays
DVD740VR 4/12/02 12:08 PM Page 30 30 VCR On-Screen Status Displays A status display will appear when you press DISPLAY/STATUS/EXIT or certain function buttons. The contents of the status display will vary. To choose the status display mode, follow the steps below. -
Page 31: Video Cassette Recording
DVD740VR 4/12/02 12:08 PM Page 31 Read and follow the steps below to record a television program onto a video cassette tape. Before you begin, make sure the DVD/VCR is in VCR mode. Press OUTPUT SELECT so the green VIDEO light appears on the front of the DVD/VCR. -
Page 32: Recording One Channel/Watching Another
DVD740VR 4/12/02 12:08 PM Page 32 32 Recording One Channel/Watching Another Before you begin, place the DVD/VCR in VCR mode. Press OUTPUT SELECT so the green VIDEO light appears on the front of the DVD/VCR. Press VCR/TV so the green VCR/TV light appears on the front of the DVD/VCR. -
Page 33: One-Touch Recording 33
DVD740VR 4/12/02 12:08 PM Page 33 One-Touch Recording (OTR) lets you set an immediate timed recording 30 minutes to eight hours long. Before you begin: Place the DVD/VCR in VCR mode. Press OUTPUT SELECT so the green VIDEO light appears on the front of the DVD/VCR. -
Page 34: Timer Recording
DVD740VR 4/12/02 12:08 PM Page 34 34 Timer Recording Follow the steps below to program your DVD/VCR to record TV programs while you’re away from home. Before you begin: Set up the TV channels at the DVD/VCR. Details are on page 24. - Page 35 DVD740VR 4/12/02 12:08 PM Page 35 Use the Number buttons (1-8) to select a slot in which to store the timer recording. There are eight slots. Numbers for open slots will flash on the screen. NOTE: If you enter a number for a slot that has already been used to store a timer recording, PREVIOUSLY SET PROGRAM will appear on the screen briefly.
- Page 36 DVD740VR 4/12/02 12:09 PM Page 36 36 Timer Recording (cont’d) Press the Number 1 button to record in SP speed or the Number 2 button to record in SLP speed. (See the chart below.) You cannot use the SPEED button at this time.
-
Page 37: Timer Recording
DVD740VR 4/12/02 12:09 PM Page 37 Checking or Cancelling Timer Recordings Before you begin, place the DVD/VCR in VCR mode. Press OUTPUT SELECT so the green VIDEO light appears on the front of the DVD/VCR. With the DVD/VCR on and in VCR mode and in VCR... -
Page 38: Rerecording (Tape Duplication)
DVD740VR 4/12/02 12:09 PM Page 38 38 Rerecording (Tape Duplication) The instructions on this page show you how to copy tapes. The illustration uses two DVD/VCRs. Different VCRs may operate differently. 1. Audio cables from DVD/VCR AUDIO OUT Jacks of DVD/VCR 1 to AUDIO IN Jacks of DVD/ VCR 2... -
Page 39: Repeat Play 39
DVD740VR 4/12/02 12:09 PM Page 39 Follow the steps below to play a video cassette repeatedly. Before you begin, place the DVD/VCR in VCR mode. Press OUTPUT SELECT so the green VIDEO light appears on the front of the DVD/VCR. -
Page 40: Real-Time Tape Counter Memory
DVD740VR 4/12/02 12:09 PM Page 40 40 Real-Time Tape Counter Memory Follow the steps below to reset the real-time tape counter to zero at a tape location you want to refer to later. Before you begin, place the DVD/VCR in VCR mode. -
Page 41: Time Search 41
DVD740VR 4/12/02 12:09 PM Page 41 Follow the steps below to program the DVD/VCR to search for- ward or backward on a tape a specific length of time. There must be a tape in the DVD/VCR. Before you begin, place the DVD/VCR in VCR mode. Press OUTPUT SELECT so the green VIDEO light appears on the front of the DVD/VCR. -
Page 42: Special Effects Playback
DVD740VR 4/12/02 12:09 PM Page 42 42 Special Effects Playback Before you begin, press OUTPUT SELECT so the green VIDEO light appears on the front of the DVD/VCR. Press VCR/TV so the green VCR/TV light appears on the front of the DVD/VCR. -
Page 43: Automatic Operation Features 43
DVD740VR 4/12/02 12:09 PM Page 43 The following tape playback features are available in VCR mode. (Press OUTPUT SELECT so the green VIDEO light is on, if necessary.) Automatic Playback When you put a tape in the DVD/VCR, the power will come on automatically. -
Page 44: Multi-Channel Television Sound
DVD740VR 4/12/02 12:09 PM Page 44 44 Multi-Channel Television Sound Your DVD/VCR can play tapes recorded in Hi-Fi (high fidelity) stereo, which produces a crisp, clear sound from the left and right audio channels. Your DVD/VCR also can play tapes recorded in a second audio (usually, that means your program is recorded in a second language). - Page 45 DVD740VR 4/12/02 12:09 PM Page 45 Multi-Channel Television Sound (cont’d) 45 Before you begin, place the DVD/VCR in VCR mode. Press OUTPUT SELECT so the green VIDEO light appears on the front of the DVD/VCR. Press VCR/TV so the green VCR/TV light appears on the front of the DVD/VCR.
-
Page 46: Hi-Fi Stereo Sound
DVD740VR 4/12/02 12:09 PM Page 46 46 Hi-Fi Stereo Sound Multi-Channel Television Sound system broadcasts are automati- cally recorded in Hi-Fi stereo. To play in Hi-Fi stereo the tapes recorded in Hi-Fi stereo, however, follow steps 1-5 below. Before you begin, place the DVD/VCR in VCR mode. Press OUTPUT SELECT so the green VIDEO light appears on the front of the DVD/VCR. -
Page 47: Blue Background 47
DVD740VR 4/12/02 12:09 PM Page 47 If you want the TV screen to be solid blue when a weak signal is received, set BLUE BACKGROUND to ON. The screen will be blue and the sound will be muted. Or, if you want to receive the weak signal, set BLUE BACK- GROUND to OFF. -
Page 48: Disc Menus
DVD740VR 4/12/02 12:09 PM Page 48 48 Disc Menus Using the DVD Disc Menus Some DVDs contain menus that describe the contents of the DVD or allow you to customize DVD playback. For example, the menu may offer choices for subtitle languages, special features, or scene selection. -
Page 49: Fast Forward/Reverse Search 49
DVD740VR 4/12/02 12:09 PM Page 49 AUDIO CD Before you begin, place the DVD/VCR in DVD mode. Press OUTPUT SELECT so the red DVD light appears on the front of the DVD/VCR. During playback, press DVD, then press FF g (B) or REW h (s) on the remote control. -
Page 50: Specific Title/Chapter Playback, Specific Time Playback
DVD740VR 4/12/02 12:09 PM Page 50 50 Specific Title/Chapter Playback, Specific Time Playback Specific Title/Chapter Playback Before you begin, place the DVD/VCR in DVD mode. Press OUTPUT SELECT so the red DVD light appears on the front of the DVD/VCR. -
Page 51: Specific Track Playback 51
DVD740VR 4/12/02 12:09 PM Page 51 AUDIO CD There are three ways to begin playback on an Audio CD at a specif- ic Track: Use the Number buttons, the SEARCH MODE/TIME SEARCH button, or CHANNEL/SKIP j/i (p/o). Before you begin, place the DVD/VCR in DVD mode. -
Page 52: Paused And Step-By-Step Playback, Resuming Playback
DVD740VR 4/12/02 12:09 PM Page 52 52 Paused and Step-by-Step Playback, Resuming Playback AUDIO CD Paused and Step-by-Step Playback During playback, press DVD, then press PAUSE k. Play will pause and the sound will be muted. When playing a DVD, press PAUSE k repeatedly to see the picture advance one frame (or step) at a time. -
Page 53: Repeat, A-B Repeat 53
DVD740VR 4/12/02 12:09 PM Page 53 AUDIO CD Repeat Before you begin, place the DVD/VCR in DVD mode. Press OUTPUT SELECT so the red DVD light appears on the front of the DVD/VCR. During disc playback, press DVD, then repeatedly press REPEAT until the repeat mode you want appears on the TV screen as shown in the examples below. -
Page 54: Markers
DVD740VR 4/12/02 12:09 PM Page 54 54 Markers AUDIO CD Use Markers to remember your favorite places on a disc. To set the Markers, follow these steps. Before you begin, place the DVD/VCR in DVD mode. Press OUTPUT SELECT so the red DVD light appears on the front of the DVD/VCR. -
Page 55: Subtitles, Camera Angles 55
DVD740VR 4/12/02 12:09 PM Page 55 Subtitles You can select a language for DVD subtitles during playback. You can select only languages that are available on the DVD. Before you begin, place the DVD/VCR in DVD mode. Press OUTPUT SELECT so the red DVD light appears on the front of the DVD/VCR. -
Page 56: Parental Controls Password
DVD740VR 4/12/02 12:09 PM Page 56 56 Parental Controls Password Parental Controls limits viewing of DVDs that exceed the limits you set. This feature will not limit viewing if the DVD maker did not code the DVD. So, make sure your DVDs play according to your settings before you allow children access to the DVD/VCR. -
Page 57: Parental Controls Levels 57
DVD740VR 4/12/02 12:09 PM Page 57 Follow these steps to set the rating level for your DVDs. DVDs whose ratings exceed the level you set will not play. Before you begin, place the DVD/VCR in DVD mode. Press OUTPUT SELECT so the red DVD light appears on the front of the DVD/VCR. -
Page 58: Audio Language
DVD740VR 4/12/02 12:09 PM Page 58 58 Audio Language You can select a language for DVDs during playback. You can change the language only if multiple languages are available on the DVD. Before you begin, press OUTPUT SELECT so the red DVD light appears on the front of the DVD/VCR. -
Page 59: Slow Motion, Zoom 59
DVD740VR 4/12/02 12:09 PM Page 59 Slow Motion During playback, press DVD, then press PAUSE k. Press FF g (B). Slow motion playback will begin. Press FF g (B) repeatedly to vary the speed of slow motion playback. You may play the DVD at 1/16, 1/8, or 1/2 the normal playback speed;... -
Page 60: Programmed Playback
DVD740VR 4/12/02 12:09 PM Page 60 60 Programmed Playback AUDIO CD You may determine the order in which Tracks will play. The order that you set is called the Program. To set up programmed playback, follow these steps. Before you begin, place the DVD/VCR in DVD mode. -
Page 61: Random Playback, Stereo Sound Mode 61
DVD740VR 4/12/02 12:09 PM Page 61 AUDIO CD Random Playback You may play the Tracks of an Audio CD in Random order instead of the order in which they are recorded (1,2,3...). To set up Random Playback, follow these steps. -
Page 62: Mp3 Playback
DVD740VR 4/12/02 12:09 PM Page 62 62 MP3 Playback The DVD/VCR will play MP3 files recorded on a CD-RW (Compact Disc-Rewritable). Before you begin, place the DVD/VCR in DVD mode. Press OUTPUT SELECT so the red DVD light appears on the front of the DVD/VCR. -
Page 63: Mp3 Display Information, Mp3 Track Selection 63
DVD740VR 4/12/02 12:09 PM Page 63 MP3 Display Information, MP3 Track Selection 63 MP3 Display Information You can review MP3 file information during playback. Before you begin, place the DVD/VCR in DVD mode. Press OUTPUT SELECT so the red DVD light appears on the front of the DVD/VCR. -
Page 64: Random Mp3 Playback, Programmed Mp3 Playback
DVD740VR 4/12/02 12:09 PM Page 64 64 Random MP3 Playback, Programmed MP3 Playback Random MP3 Playback Before you begin, place the DVD/VCR in DVD mode. Press OUTPUT SELECT so the red DVD light appears on the front of the DVD/VCR. -
Page 65: On-Screen Displays 65
DVD740VR 4/12/02 12:09 PM Page 65 You can check information about the current DVD by pressing DISPLAY/STATUS/EXIT on the remote control. Press DVD, then press DISPLAY/STATUS/EXIT during playback. CH 7/49 0:01:46 - 0:03:27 CH (Chapter): Current Chapter number / total Chapters Press DISPLAY/STATUS/EXIT again. -
Page 66: Display Settings
DVD740VR 4/12/02 12:09 PM Page 66 66 Display Settings You can change certain aspects of the DVD Player’s display screens, on-screen messages, and the display panel on the front of the DVD/VCR. You also can change the Aspect Ratio. To change such settings, follow these steps. -
Page 67: Display Settings
DVD740VR 4/12/02 12:09 PM Page 67 Press K or L to select an item, then press OK. If you selected TV ASPECT, press o or p to select a setting, then press OK. Choose 4:3 LETTER BOX if you want black bars to appear at the top and bottom of the picture. -
Page 68: Language Settings
DVD740VR 4/12/02 12:09 PM Page 68 68 Language Settings You can use the LANGUAGE settings to select different languages for the Audio or Subtitles of DVDs, as well as languages for DVD Disc menus and the menus of the DVD Player SETUP menus of the DVD/VCR. -
Page 69: Language Settings
DVD740VR 4/12/02 12:09 PM Page 69 Press o o or p p to select a setting, then press OK. If you select OTHER at the AUDIO, SUBTITLE, or DISC MENU screen, press four Number buttons to enter the code for the language you desire. Refer to the list below for the correct language code. -
Page 70: Audio Settings
DVD740VR 4/12/02 12:09 PM Page 70 70 Audio Settings Choose the appropriate Audio Settings for your equipment. These settings only affect the playback of the DVD Player of the DVD/VCR. Before you begin, place the DVD/VCR in DVD mode. Press OUTPUT SELECT so the red DVD light appears on the front of the DVD/VCR. -
Page 71: Black Level Settings, Trusurround Setting 71
DVD740VR 4/12/02 12:09 PM Page 71 Black Level Settings, TruSurround Setting 71 Black Level Settings Adjust the Black Level Settings to make the black parts of the DVD picture as bright as you prefer. Before you begin, place the DVD/VCR in DVD mode. Press OUTPUT SELECT so the red DVD light appears on the front of the DVD/VCR. -
Page 72: Care And Maintenance/Specifications
DVD740VR 4/12/02 12:09 PM Page 72 72 Care and Maintenance, Specifications Care and Maintenance Cleaning the DVD/VCR • Wipe the front panel and other exterior surfaces of the DVD/VCR with a soft, slightly damp cloth. • Never use a solvent, thinner, benzene, or alcohol to clean the DVD/VCR. Do not spray insecticide liquid near the DVD/VCR. -
Page 73: Glossary 73
DVD740VR 4/12/02 12:09 PM Page 73 AUDIO IN/OUT Jacks: jacks on the front and back of the DVD/VCR that receive audio from another source (IN) or send audio to another system (OUT). Automatic Channel Setup: process in which the VCR memorizes all available TV channels. -
Page 74: Helpful Hints
DVD740VR 4/12/02 12:09 PM Page 74 74 Helpful Hints If you are having problems with your product, check this list of problems and possible solutions before requesting service. You may be able to solve the problem yourself. If you need to call a customer service representative, please know the model number and serial number of your product before you call. - Page 75 DVD740VR 4/12/02 12:09 PM Page 75 There is no sound. • Connect the audio cables firmly. Make sure the cables are connected to the AUDIO IN jacks on the TV or Stereo Receiver. Details are on pages 11-13. • Check the audio settings of the DVD Player. Details are on pages 70-71.
- Page 76 DVD740VR 4/12/02 12:09 PM Page 76 76 Helpful Hints (cont’d) Power Failure • VCR timer recordings, clock setting, language selection, and channel setup may be lost if the power fails for more than one minute. See pages 24-29 to set up the channels, clock, and language again. See pages 34-37 to reprogram your timer recordings.
-
Page 77: Helpful Hints
DVD740VR 4/12/02 12:09 PM Page 77 You can not insert a video cassette. • Insert the tape, window side up, with the record tab facing you. • Make sure a tape isn’t already in the VCR by pressing STOP/EJECT on the front of the DVD/VCR. -
Page 78: Limited Warranty
When it is necessary for you to ship the product to Philips for exchange, you will pay the shipping costs for shipment to Philips. Philips will pay the shipping costs when returning a product to you. - Page 79 A replacement will be sent to you via UPS within 48 business hours of Philips’ receipt of the product. When it is necessary for you to ship the product to Philips for exchange, you will pay the shipping costs for shipment to Philips.
-
Page 80: Information Index
DVD740VR 4/12/02 12:09 PM Page 80 80 Information Index ac power cord ....21 angle button ....22, 55 ant-in (antenna in) jack .