Table of Contents
Advertisement
Thank you for purchasing a Panasonic product.
Please follow all instructions in this document and save it for future reference.
Carefully read the information found in the section titled "Important safety information" in
particular.
This system is an auxiliary system; it is not designed to provide complete protection from
property loss. Panasonic will not be held responsible in the event that property loss occurs
while this system is in operation.
Note to the installer
R This document includes instructions for both installation and operation. See the
section titled "Installation" for installation instructions.
R Please read this document carefully, and install the product safely and correctly by
following the instructions.
R Only use attachments/accessories specified by the manufacturer.
R The installation shall be carried out in accordance with all applicable installation rules.
Installation and Operating Instructions
Video Intercom System — Door Station
VL-VN1500
Model No.
Advertisement
Table of Contents

Related Manuals for Panasonic VL-VN1500


Summary of Contents for Panasonic VL-VN1500
- Page 1 This system is an auxiliary system; it is not designed to provide complete protection from property loss. Panasonic will not be held responsible in the event that property loss occurs while this system is in operation. Note to the installer R This document includes instructions for both installation and operation.
-
Page 2: Table Of Contents
Table of Contents Introduction System overview ..........3 Included items .............3 Optional items .............3 About this document ...........4 Important information Important safety information .......5 Important safety instructions .......5 Privacy and rights of portrait .......5 Data security ............6 Disclaimer ............6 Other important information ........6 General information ..........7 For India only ............8 For Europe ............8... -
Page 3: Introduction
Used to connect wires to the R1/R2 This document explains basic information required connection terminals. to install and configure a VL-VN1500 Door Station for use with a Video Intercom System that is comprised of the following devices. R VL-MN1000 Room Monitor... -
Page 4: About This Document
2000 SIP devices. About this document Terms and illustrations R Model number suffixes (e.g., the "BX" in "VL-VN1500") are omitted unless necessary. R Design and specifications are subject to change without notice. R Illustrations may vary slightly from the actual product. -
Page 5: Important Information
Important information – The product emits smoke, an abnormal smell Important safety information or makes unusual noise – The power cables are damaged or frayed – Metal objects have been dropped inside the To prevent severe injury and loss of life/property, product read this section carefully before using the product R When existing wires are used, it is possible that... -
Page 6: Data Security
R When power fails, this product cannot be used. over to a third party. R Panasonic may not be liable for damages due to – Use the product's reset function to initialise external factors such as power failures. -
Page 7: General Information
Important information Disposal of Old Equipment and Batteries (Only General information for European Union and countries with recycling systems) R In the event of problems, you should contact your equipment supplier in the first instance. R After removing the product and any included items from the packaging, store, dispose, or recycle the packaging as necessary. -
Page 8: For India Only
For the purpose of recycling to facilitate effective utilization of resources, please return this product to a nearby authorized collection centre, registered dismantler or recycler, or Panasonic service centre when disposing of this product. Please see the Panasonic website for further information on collection centres, etc., or call the... -
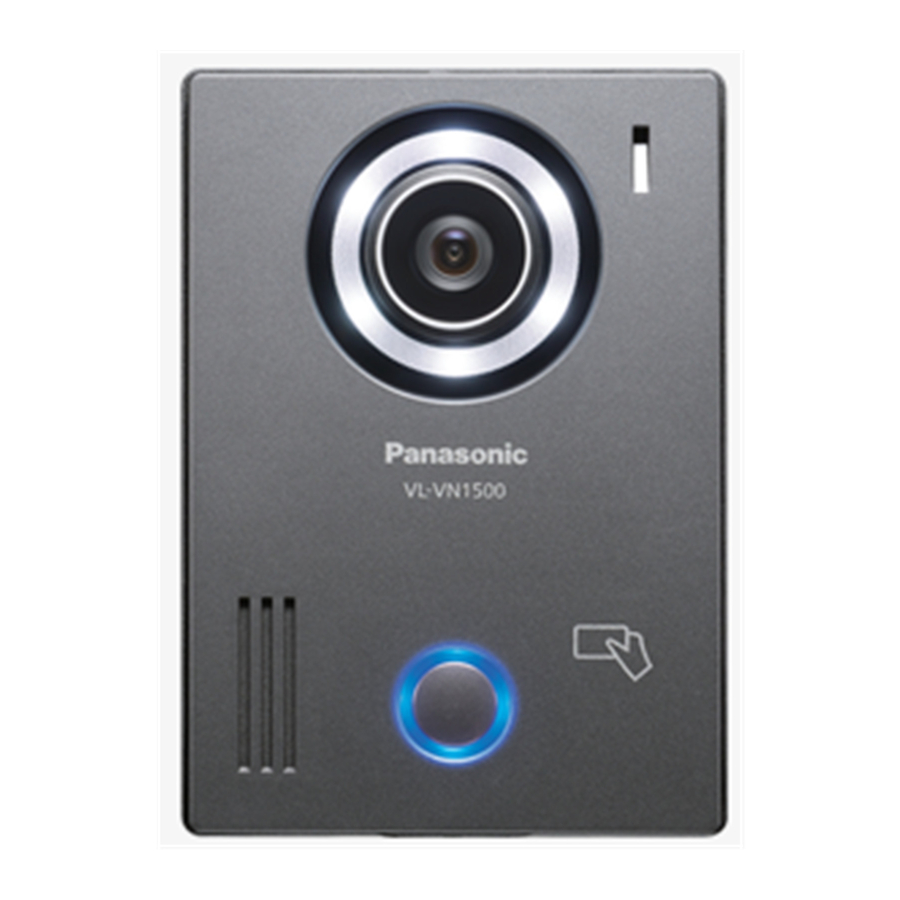
Page 9: Preparation
Preparation DC IN connector Device diagrams Used to connect the door station to a power supply unit (sold separately) when no PoE power supply is available. Front view R1/R2 connection terminals Used to connect a relay box (sold separately) so that signals can be sent to an electric lock. Rear view Lens cover Camera lens... -
Page 10: Installation
Installation Installation cautions Installing the power supply unit (sold separately) Refer to the information found in “Important information”, Page 5 before installing the product. If the door station will not be powered via PoE, you must install a power supply unit. CAUTION Required items –... - Page 11 Installation Remove the cable cover screws and then the cable binder holes on the top and bottom remove the cable covers. on the power supply unit. A Screws Terminal screws B Cable covers Cable binders connected to cable binder holes Connect the AC wires to the AC IN terminals on the top of the power supply unit, and then To door station...
-
Page 12: Installing The Door Station
Installation Mounting on a DIN rail Installing the door station Attach the power supply unit to the DIN rail so that the bottom hook is positioned at the bottom of the Required items power supply unit. – Mounting base (included) Hang the top hooks of the power supply unit –... - Page 13 Installation Installation position of the door Installation station and camera range Important: Refer to the following examples and confirm the R When existing wiring (such as chime wires) is used: area viewable by the camera. In each illustration, the viewable area is indicated by "A" and the –...
- Page 14 Installation 56 mm Connecting the wires and cables Connect the LAN cable to the LAN connector. Optional 71.5 mm If you are using a power supply unit to power the door station, connect the DC plug to the DC IN connector. R See “Installing the power supply unit (sold separately)”, Page 10 for information about installing the power supply unit.
-
Page 15: Installing The Relay Box (Sold Separately)
Installation Note: Installing the relay box (sold R Refer to the documentation of the compatible room monitor for wiring schematics. separately) R Refer to “Wire and cable specifications”, Page 17 for information on the type and length A relay box must be used when connecting an of wires that can be used. - Page 16 Installation Connect the electric lock wires to connection Connect the wires from the door station by terminals S1 and S2 on the top of the relay pressing the wire release button with a pointed box. object such as a screwdriver while inserting the wire into connection terminals R1 and R2.
-
Page 17: Wire And Cable Specifications
Installation Wire and cable specifications Wiring run Specifications Max. length Cat-5e or higher, « Door station Switching hub stranded, twisted pair, 100 m straight 0.65 mm (22 AWG) approx. 10 m « Power supply unit Door station 2 mm (12 AWG) approx. -
Page 18: Other Information
Other information Communication Speed, Duplex AUTO Specifications mode (10BASE-T/100BASE-TX, FULL/HALF) (Auto Door station (VL-VN1500) negotiation) Power source When using PoE: Class 2, *1 Water resistance is only assured if the product IEEE 802.3af is installed correctly according to the When using power supply... -
Page 19: Cleaning
At least three (3) years from delivery of this product, Panasonic Corporation will give to any third party who contacts us at the contact information provided below, for a charge of no... - Page 20 1006, Oaza Kadoma, Kadoma-shi, Osaka 571-8501, Japan http://www.panasonic.com © Panasonic Corporation 2017 PNQP1320YA C0317MG1067...