Table of Contents
Advertisement
Use and Care Instructions:
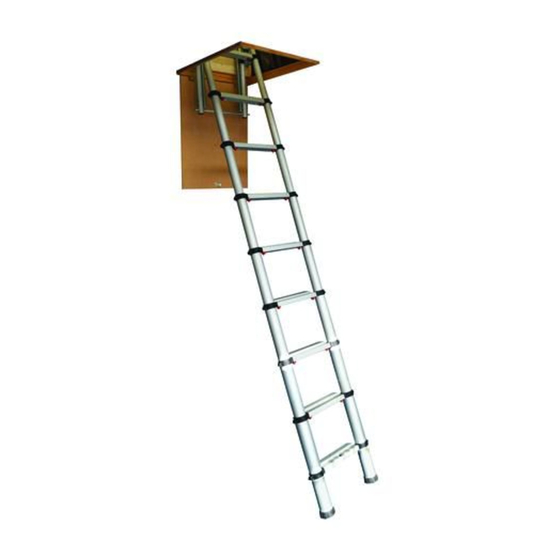
Youngman Telescopic Loft Ladder
Safety
Please ensure you read the Safety section in this manual starting on page 4 before
installing or using the equipment. Your safety and that of others is important.
Youngman Group Ltd
The Causeway, Maldon, Essex, CM9 4LJ, UK
t: +44 (0)1621 745900
e: sales@youngmangroup.com
youngmangroup.com
2.6m and 2.9m
Introduction
The Youngman Telescopic Loft
Ladder is manufactured in
aluminium with an anodised finish.
It is built to withstand the toughest
handling and working conditions.
Suitable for home and commercial
use. Spare parts are readily
available.
We recommend you take time
and read these instructions. They
contain full installation details and
describe how to deploy the ladder
and how to store it after use to
ensure you get the very best
performance from your purchase.
Keep these instructions in a safe
place for future reference.
For more information about the
Youngman Telescopic Loft Ladder
and other products, please visit our
website www.youngmangroup.com
Models:
Advertisement
Table of Contents

Related Manuals for Youngman Telescopic Loft Ladder


Summary of Contents for Youngman Telescopic Loft Ladder
-
Page 1: Introduction
Use and Care Instructions: Models: Youngman Telescopic Loft Ladder 2.6m and 2.9m Safety Please ensure you read the Safety section in this manual starting on page 4 before installing or using the equipment. Your safety and that of others is important. -
Page 2: Table Of Contents
Warranty In the Box Carefully remove your Youngman Telescopic Loft Ladder and fitments and accessories from the box it arrived in. It is recommended that you retain this packaging should the item need to be returned under warranty. The following items are supplied: •... -
Page 3: Important Safety Information
Safety Considerations General • Do not install or use the Youngman Telescopic Loft Ladder if damaged in any way. • Never exceed the maximum load of 150 kg. • Never operate any of the red buttons while on the ladder or allow anyone else to operate the buttons while it is in use. -
Page 4: Main Features
Main Features The main features of the Youngman Telescopic Loft Ladder are listed below: • There are two models each adjustable to three lengths for optimium usability. See the table below for details. • Manufactured in anodised Aluminium with steel fixing brackets and fitments. -
Page 5: Loft Ladder Components Identified
Loft Ladder Components Identified Parts Components Ladder Mounting brackets (x2) Swivel arms (x2) Hinge swivel pins (x2) Ladder sub-frame carrier bar (x1) Ladder sub-frame carrier tubes (x2) Springs (x2) Telescopic pole with hook (x1) Bracket fixing screws (x8) Instructions youngmangroup.com... -
Page 6: Step 1: To Install The Loft Ladder
Step 1: To Install the Loft Ladder Installation Consideration The following points should be considered before installing the Loft Ladder. Loft Hatch The loft hatch must be downward opening. It may be necessary to refit your loft hatch door so that it opens downwards so that the hatch when open hangs down behind the ladder when it is deployed. - Page 7 Step 1: To Install the Loft Ladder Installation Ceiling Joist 188mm 188mm Marking Out 1.1 Measure and draw the ‘centre line’ Centre Line on the ceiling joist midway across the width of the loft opening where the mounting brackets will be fitted, Fig 1.1. Measure 188 mm either side of this line Mounting Bracket and draw a vertical line at these points...
- Page 8 Step 1: To Install the Loft Ladder Swivel Arm 1.4. Place the Right Swivel arm in position on the Right Mounting bracket and align their holes, Fig 1.4. 1.5. From the outer edge, guide the Hinged swivel pin through the arm and bracket holes and push in completely, Fig 1.5.
- Page 9 Step 1: To Install the Loft Ladder Extending the Springs The next step is to anchor the free end of the spring to its anchor point on the hinged swivel pin. Lay the swivel arms back so they are horizontal. Hook a loop of strong string to the end of the spring.
- Page 10 Step 1: To Install the Loft Ladder Warning 1.12 Be very careful when carrying out the next stage as there is no ladder to stop the sub-frame from swinging forward with considerable force if it is moved inadvertently. 1.12. Pull down on the sub-frame carrier bar until it touches against its stop.
- Page 11 Step 1: To Install the Loft Ladder 1.15. On the side you are adjusting 1.15 first (left shown here), depress the red button on the top rung to disengage the locking bolt from the top stile. 1.16. Keep the button pressed and Hold in the Button rotate the stile until the required extension position is reached and then...
- Page 12 Step 1: To Install the Loft Ladder Extend the Ladder 1.19 1.19. Fully extend the ladder until all rungs are locked. This is indicated in the illustration below by the red buttons being extended. Rung Locked Important Ensure that all the red buttons on the underside of the rungs are in the locked position, see above right.
-
Page 13: Step 2: To Close And Stow The Loft Ladder
Step 2: To Close and Stow the Loft Ladder 2.1. Depress the two red buttons on the underside of rung 2 to unlock the rung, see Fig 2.1 then push the rung Rung 3 upwards in the direction of the arrows. You can now release your fingers from the buttons and continue to raise the rung. -
Page 14: Step 3: To Open The Loft Ladder
Step 3: To Open the Loft Ladder Open the Loft Hatch 3.1. Use the hook end of the pole to pull down on the Ladder sub-frame Stowage Bracket carrier bar to swivel the ladder to the vertical position. If at this point, the ladder can be reached by hand then ignore paragraph 3.2 and unhook from the carrier bar and lower to the floor. -
Page 15: Specifications
All rights reserved. No part of this publication may be reproduced, transmitted, transcribed, translated or stored in a retrieval system in any form by any means without the written permission of Youngman® Limited. Technical details contained in this publication are correct for the equipment model numbers supplied. The Instruction and Reference Manual will be revised as necessary for subsequent revisions to the equipment. -
Page 16: Warranty
Warranty Your Youngman Telescopic Loft Ladder is covered by a 12 month warranty. The Company undertakes to replace or repair, free of charge, any defect which the Company considers to be due to faulty workmanship or material within 12 months of the sale date, except for: •...
Need help?
Do you have a question about the Telescopic Loft Ladder and is the answer not in the manual?
Questions and answers