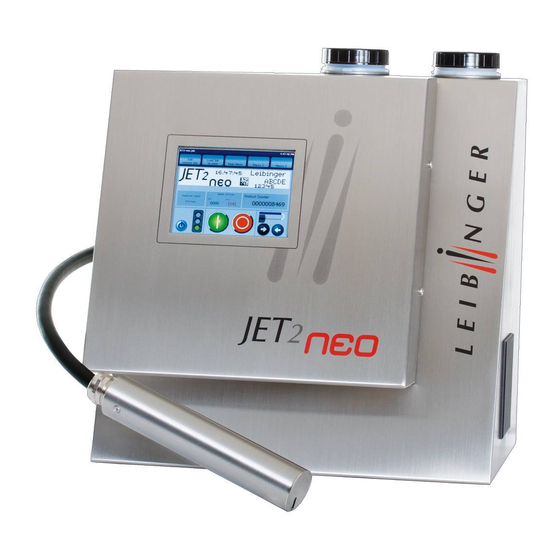
Leibinger JET2 neo Manual
Hide thumbs
Also See for JET2 neo:
- Instruction manual and quick start manual (134 pages) ,
- Manual (294 pages)
Table of Contents
Advertisement
Advertisement
Table of Contents

Related Manuals for Leibinger JET2 neo


Summary of Contents for Leibinger JET2 neo
- Page 1 Manual LEIBINGER JET2 Release 1.07en...
-
Page 3: Table Of Contents
4.3 Ambient conditions .................. 28 4.4 Interfaces, Inputs, Outputs ................ 28 4.5 Performance parameter ................29 4.6 Fonts ..................... 29 4.7 Types of writing ..................29 4.8 Font combinations ................... 29 4.9 Function ....................30 4.10 Software ....................30 JET2 neo Release R1.07 en... - Page 4 6.2.7 Example of use ................55 6.3 Safety instructions ................... 55 6.4 Essential operating- and information elements ..........56 6.4.1 Number blocks ................. 62 6.4.2 Keyboard fields ................63 6.5 Basic operating processes ................. 64 Release R1.07 en JET2 neo...
-
Page 5: Jet2 Neo
7.2.2.1.5 Load an existing graphic ............98 7.2.2.1.6 Save graphic ................. 99 7.2.2.1.7 Create and process graphic elements ........101 7.2.2.1.8 Set editor size ..............104 7.2.2.2 Explorer .................. 105 7.2.2.2.1 Start explorer ..............105 JET2 neo Release R1.07 en... -
Page 6: Table Of Contents
7.2.3.3.7 Select ink no. and display of the solvent no......137 7.2.3.3.8 Set nozzle diameter ............. 137 7.2.3.4 Password settings and user authorizations ........138 7.2.3.4.1 Menu password settings ............138 7.2.3.4.2 Selection of user level ............140 7.2.3.4.3 Definition of password ............140 Release R1.07 en JET2 neo... -
Page 7: Jet2 Neo
8.4.1 Font selection ................181 8.4.2 Contrast value ................182 8.4.3 Position settings ................183 8.4.4 Bold level (Bold text) ............... 183 8.4.5 ICG-value ..................184 8.4.6 Orientation ..................184 8.4.7 Display settings ................185 JET2 neo Release R1.07 en... -
Page 8: Jet2 Neo
8.6.1.1 Barcode informations ..............210 8.6.1.2 Barcode selection and insertions ..........212 8.6.1.2.1 Barcode type ..............213 8.6.1.2.2 Content ................213 8.6.1.2.3 Textposition ............... 213 8.6.1.2.4 Barcode format ..............214 8.6.1.2.5 Pasting of … ............... 214 Release R1.07 en JET2 neo... -
Page 9: Jet2 Neo
8.6.4.2 Compile shift times and integrate shift codes ........230 8.6.4.3 Remove shift times ..............232 8.6.5 Text ..................... 233 8.6.6 Extern text ..................233 8.7 Replacements ..................247 8.7.1 Carry out replacements ..............248 8.8 Job (editor) management ................ 250 JET2 neo Release R1.07 en... -
Page 10: Jet2 Neo
12.2.2 Interface X4 (Inputs) ..............273 12.2.2.1 Increment Counter Signal (PIN 2) ..........273 12.2.3.2 Reset Counter Signal ............... 273 12.2.2.3 Jobselect Input ............... 274 12.2.2.4 Inputs ................... 275 12.2.4.5 ON Input ................275 12.3 Drawings .................... 276 Release R1.07 en JET2 neo... - Page 11 Group 1 Table of contents Page 9 12.3.1 Print head ..................276 12.3.2 Cabinet JET2 neo ................. 277 List of keywords/Index ..................278 List of illustrations ..................285 JET2 neo Release R1.07 en...
-
Page 13: Group Directory
Disturbances/Trouble shooting ..........253 Equipping/Maintenance ............256 Taking out of operation/Dismantling ........... 269 Appendix ................270 Circuit diagrams of the interfaces ..........270 Connection examples of the interfaces ........271 Drawings ................275 List of illustrations ..............285 JET2 neo Release R1.07 en... -
Page 14: Publisher
Page 12 Publisher Group 1 1.3 Publisher For questions regarding the operation and running of the LEIBINGER JET2 neo as well as in service case please contact the listed dealer address. Dealer address Paul Leibinger GmbH & Co. KG Marking & Coding Systems Daimlerstraße 14... - Page 15 Nevertheless errors cannot be excluded. Consequently no guarantee can be assumed for the correctness of the content of this manual and no claims can be asserted against Paul Leibinger GmbH & Co. KG. We shall be grateful for information regarding possible printing errors as well as for suggestions for the further optimisation of the device manual.
-
Page 16: Introduction
It is only through the use of inks and solvents from Paul Leibinger GmbH & Co. KG that optimum operating characteristics can be achieved. Should other inks and solvents be used all guarantee claims will expire. -
Page 17: Document Information
Stick in serial number 1.6 Guarantee The guarantee conditions for the LEIBINGER JET2 neo can be seen from the order confirmation. The warranty presupposes that the device or the installation is operated correctly in accordance with the available guarantee manual and any possible additional manuals and descriptions prepared by us. -
Page 18: Safety
In case of improper handling or misuse, however, there are dangers for the health of the operating staff the high performance printer JET2 neo and other real assets of the plant operator the efficient operation of the high performance printer... - Page 19 Failure to observe this instruction can lead to material damage, the loss of guarantee and to injury! Indicates service activities! This work may only be carried out by trained personnel or Leibinger- service technicians! JET2 neo Release R1.07 en...
-
Page 20: Intended Use
2.3 Intended use The high performance printer JET2 neo serves exclusively the contact-free marking, inscribing and coding of surfaces using the continuous ink jet process. The high performance printer can be used on the most varying materials (e.g. metal, synthetic material, glass, paper, wood, pressed materials, rubber etc.) with both,... -
Page 21: Safety Sticker
Group 2 Safety Page 19 2.4 Safety sticker Figure 1 Safety sticker JET2 neo Release R1.07 en... -
Page 22: Operating Staff
2.5 Operating staff Only trained personnel must operate the device. The personnel must have appropriate training to enable them to be able to operate the JET2 neo high performance printer professionally. Within the working area of the LEIBINGER JET2 neo device the operator is responsible with regard to third parties. -
Page 23: Safety Measures At The Place Of Installation
Prior to assembly the place of setting up must be cleaned of dirt and contamination (residue lubricants etc.). working place surroundings should be kept clean at all times in order to ensure unrestricted access to the LEIBINGER JET2 neo device. JET2 neo Release R1.07 en... -
Page 24: Dangers Through Consumables
In addition we recommend observance of the safety information leaflets of the inks and solvents used. In the following you will find examples for the marking of inks and solvents. Figure 2 Examples: Labels for the marking of inks and solvents. Release R1.07 en JET2 neo... -
Page 25: Conformity
Group 2 Safety Page 23 2.11 Conformity JET2 neo Release R1.07 en... -
Page 26: Accident Prevention
Keep sources of heat and sparks as well as open flames well away. Use only spark-free tools. Electrical devices must be protected in accordance with the corresponding standard. Avoid contact with the skin and eyes. Do not inhale vapours and spray mist. Release R1.07 en JET2 neo... -
Page 27: First Aid Measures
Decomposition products can constitute a danger to health. Extinguishing waste water must not enter the waste water channels or waters. PROTECTIVE If necessary suitable, independent breathing apparatus is MEASURES required. JET2 neo Release R1.07 en... -
Page 28: Measures In The Event Of Accidental Release (Spillage)
Restrict and suck up spilled substances with a non-combustible absorbent material (e.g. sand, earth, vermiculite, infusorial earth) and collect in a suitable container for removal. Preferably clean areas with spilled substances with a detergent. Avoid solvents. Release R1.07 en JET2 neo... -
Page 29: Technical Data
Length (total) 212 mm, diameter 43 mm Length of the print head lead 3 m Weight: 1,5 kg Any fitting position, also for overhead conveyor applications Figure 3 Dimensions 295 mm 400 mm 212 mm Protection class: IP 54 Release R1.07en JET2 neo... -
Page 30: Electrical Connection Values
4.4 Interfaces, Inputs, Outputs Product sensor input: NPN/PNP 24V Incremental encoder input: TTL 5V, HTL 24V, RS422 5V Inputs: 3 digitals, free selectable 8 inputs for ext. job selection Outputs: 4 digitals, e.g. for alarm, re-filling, etc. Interfaces: Release R1.07 en JET2 neo... -
Page 31: Performance Parameter
Symbols mirror-inverted Symbols mirror-inverted and upside down Symbols mirror-inverted, upside down and text backwards Alternating readable font, reverse, bold text, inverse 4.8 Font combinations All fonts can be presented in one writing in the requested matrix. JET2 neo Release R1.07 en... -
Page 32: Function
Job editor allows the saving and calling of texts and all printing relevant parameters Programmable batch processing of jobs and bonding of several jobs „External-Text“ function Variable text (Data base processing) Replacements: all date-, time- and counter functions are codable by replacements Shift operation Release R1.07 en JET2 neo... -
Page 33: Transport/Start Up
In order to avoid damage during transport the following instructions must be observed. The LEIBINGER JET2 neo must only be transported in a standing position. It is packed in a cardboard box with special polystyrene inserts for safe dispatch during delivery. - Page 34 Movable underframe for JET2 neo Ground plate 1 – Movable underframe 2 – Adapter plate JET2 neo (2x) 3 – Printer JET2neo For this it is expedient to place the device on a device support. Remark: Device carrier set is available as an accessory.
-
Page 35: Installation
The LEIBINGER JET2 neo should be connected to AC voltage 100-240 V AC, 50-60 Hz with an appropriate plug. The socket should be provided with a clear designation (e.g.: JET2 neo). - Page 36 The connection must be carried with a solid bonding that corresponds with existing guidelines. Annotation: A suitable grounding cable is available optionally (accessories). The installation (machine) and the printer must have the same potential/ground. Release R1.07 en JET2 neo...
-
Page 37: Explosion Protection
For this a head ventilation is required which can be purchased optionally. The print head mounting should be carried out that a fast separation of the print head from the device for cleaning purposes is possible. JET2 neo Release R1.07 en... - Page 38 As smaller the required character height, as smaller the distance of the print head to the product (smaller distances produce better type quality) Note: In general a distance of round about 8-10 mm is recommended. Release R1.07 en JET2 neo...
-
Page 39: Starting
(2). Attention! The cable tie at the main filter (3) should not be removed! Remove the transportation protection (cable ties). Now attach the back cover of the hydraulic cabinet again with the according fixing screws. JET2 neo Release R1.07 en... - Page 40 Group 5 Figure 8 Remove transportation protection Attention! Do not remove the cable tie! 1 – Back cover (Hydraulic cabinet) 3 – Main filter (Do not remove the cable tie) 2 – Fixing screws (8x) Release R1.07 en JET2 neo...
-
Page 41: Fill Reservoir Tank
Before filling the device with the consumables, measures for the electrostatic discharge have to be made! The operator can carry out a discharge either by the direct touching of the JET2 neo cabinet or by standing with the appropriate ESD-shoes on an grounded surface! - Page 42 Now proceed absolutely according to the instructions in the chapter Execution of the Tag-activation and refilling (page 257) in the group Equipping/Maintenance. You will find supplementary information about the TAG-reader in the chapter TAG-reader (page 257). Release R1.07 en JET2 neo...
-
Page 43: Carry Out Fill Up Routine
5 – Register card <Special funktions> 2 – Message <Initialization> 6 – Button <Fill up routine> 3 – Message <Emergency Shutdown> 7 – Message <Fill up routine> 4 – Schaltfläche <OK ( )> 8 – Button <Next> JET2 neo Release R1.07 en... - Page 44 During the process the message <Bleeding> (14) is displayed. The bleeding takes between 1–5 min. The process can be canceled by pressing the button <Cancel> (15). The basic menu (16) is now displayed and the printer is ready to operate. Release R1.07 en JET2 neo...
- Page 45 9 – Message <Fill up routine finished> 13 – Button <OK ( )> 10 – Button <OK ( )> 14 – Message <Bleeding> 11 – Button <Close> 15 – Button <Cancel> 12 – Message <Hydraulic control> 16 – Basic menu JET2 neo Release R1.07 en...
-
Page 46: Interfaces
5 – Interface X4 – digital inputs 2 – Interface X1 – Encoder 6 – Network connection RJ 45 3 – Interface X5 – PrintGo 7 – USB connection 4 – Interface X3 – digital outputs Release R1.07 en JET2 neo... -
Page 47: Interface X1 (Encoder)
12 up to 28V Input level Low -0,5 up to 3,5V Max. frequency 500 kHz Input resistance 4 kOhm All 24V inputs which are designated with (1) are protected by a self-reset fuse with 700 mA. JET2 neo Release R1.07 en... -
Page 48: Mechanical Installation
Regarding the software you can select additionally if the positive edge or the negative edge should be used for the release of the print out. Note: To inform the JET2 neo when a print text should be printed, you require a so- called Print-Go signal. - Page 49 100μS Input resistance 6,8 kOhm You will find a circuit diagram of the interface in the appendix of this manual! All 24V outputs designated with (1) are protected by a self-reset fuse with 700 mA. JET2 neo Release R1.07 en...
-
Page 50: Interface X3 (Outputs)
0,28 Ohm Features Short-circuit-proof Overcurrent- and excess temperature –proof The function allocations of the outputs are carried out with the software of the JET2 neo in the menu Main menu Settings I/O- settings Outputs. You will find a circuit diagram of the interface in the appendix of this... -
Page 51: Interface X4 (Inputs)
All 24V ouputs which are designated with (1) are protected by a self-reset fuse with 700 mA. For a change of the Jobselect inputs it has to be carried out within the duration of bounce, that means only after termination of this period of time the new Jobselect No. is validated. JET2 neo Release R1.07 en... -
Page 52: Usb-Connection
200ms Gauger synchronization signal 200ms The function allocations of the inputs 1 up to 3 happen by the software of the JET2 neo in the menu Main menu Settings I/O settings Inputs. You will find a circuit diagram of the interface in the appendix of this manual! 5.5.5 USB-Connection... -
Page 53: Operation
6. Operation 6.1 Construction/Structure of the device The high-performance LEIBINGER JET2 neo is manufactured of a solid two parts stainless steel cabinet. Due to the two parts construction you will get a thermal separation between the hydraulic- and electronic section. The device consists of the following main components. -
Page 54: Functional Principle
6.2 Functional principle 6.2.1 Method of working The JET2 neo works in accordance with the continuous ink jet process. In this a constant ink jet is emitted from a jet nozzle which is broken down into a series of equal size drops under the influence of mechanical oscillations. -
Page 55: Drop Charging
The controller (CPU) of the printer calculates the values which are required for the generation of charging voltages of the single characters. JET2 neo Release R1.07 en... -
Page 56: Summary Of The Individual Procedures
Character height created by drop deflection Character „E“ build with a 7 x 5 matrix Rel. movement direction of the description area Drop brake-off point Gutter Deflector plate Charge electrode with deflector electrode Nozzle (jet) Oscillator Release R1.07 en JET2 neo... -
Page 57: Example Of Use
Combustible gases and liquids cause serious burns. Sources of ignition must be kept away from the print head and the device! Risk of injury! Ink escapes from the head aperture. Spraying of ink into the eyes can cause blindness. Eye protection is necessary! JET2 neo Release R1.07 en... -
Page 58: Essential Operating- And Information Elements
Operation – Elements and procedures Group 6 6.4 Essential operating- and information elements This chapter describes the essential operating- and information elements of the LEIBINGER JET2 neo basic menu. Figure 15 Basic menu (Construction) 1 – Title bar 7 – Status field <Product counter>... - Page 59 Group 6 Operation – Elements and procedures Page 57 Menu bar (4): The appropriate menus or specific functions of the JET2 neo can be opened with the buttons in the menu bar. The following buttons are available: Figure 16 Menu bar Pos.
-
Page 60: General
Figure 17 Status field <Product counter> You will find further information also in the chapters Reset production counter and Change production counter as well as in the chapter Pre-defined print stop! Release R1.07 en JET2 neo... - Page 61 With the buttons <Opening nozzle> (1) and <Closing nozzle> (2) you can open or close the nozzle. The executable button is backgrounded blue-grey. Device status (traffic light) (9): The status traffic light visualizes the current condition of the JET2 neo. Figure 19 Status traffic light 1 –...
- Page 62 If the message is acknowledged pending. without changing the condition (e.g. no refill has been carried If the JET2 neo is in the print out) the message will appear mode, the print process will be again after one minute. continued.
-
Page 63: Switch Off Device
Button <Printstop> (12): The released print job is stopped with this button. If a print stop is activated, the button is displayed backlighted. = Print stop inactive = Print stop active (current print job is stopped or no job for processing is released) JET2 neo Release R1.07 en... -
Page 64: Number Blocks
With the button < > (4) you can shift the current cursor position by one digit to the right.. With the button < > (5) yi ou can shift the current cursor position by one digit to the left. With the button <Return > (8) Release R1.07 en JET2 neo...
Need help?
Do you have a question about the JET2 neo and is the answer not in the manual?
Questions and answers