Table of Contents
Advertisement
Quick Links
Advertisement
Table of Contents
Troubleshooting

Related Manuals for Owandy Radiology i-max touch


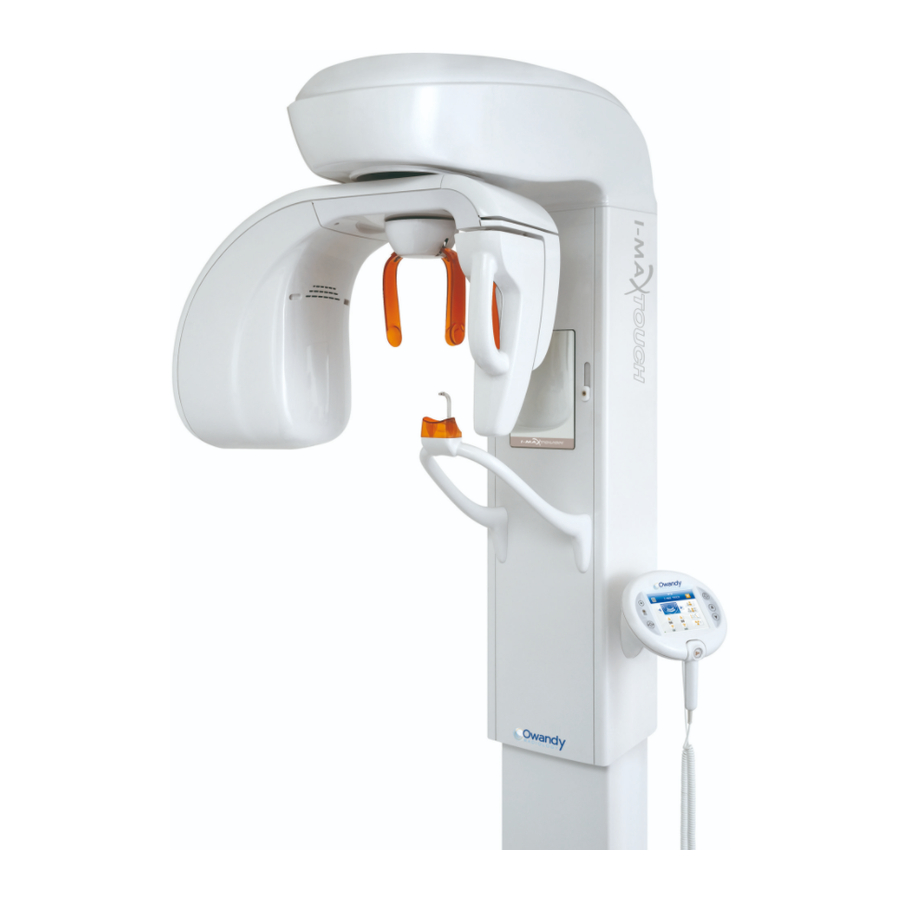
Summary of Contents for Owandy Radiology i-max touch
- Page 1 SERVICE MANUAL 0051 Revision 4 - July 2014...
- Page 2 I-Max Touch / I-Max Touch 3D Service Manual The manufacturer OWANDY RADIOLOGY reserves the right to make modifications to its products or to their specifications in order to improve the performance, quality, or ease of production. Specifications of products or accessories may be modified without prior notice.
-
Page 3: Table Of Contents
4.1.3 Identification plates and laser labels I-Max Touch 220-240V ..........24 4.1.4 Identification plates and laser labels locations I-Max Touch 3D ..........25 4.1.5 Identification plates and laser labels I-Max Touch 3D 110-120V ..........26 ... - Page 4 Computer installation ........................94 7.7.1 Installation I-Max Touch computer and network ..............94 7.7.2 Installation I-Max Touch 3D computer and network ..............95 7.7.3 Installation O.S.P. (drivers) ...................... 95 7.7.4 Installation 3D sensor calibration files ..................99 ...
- Page 5 9.3.2 Panoramic X-ray beam centering verification (I-Max Touch only) ......... 133 9.3.3 Panoramic X-ray beam centering verification (I-Max Touch 3D only) ........136 9.3.4 3D image adjustment (I-Max Touch 3D only) ................ 141 ...
- Page 6 12.4 Covers ............................256 12.5 12.5.1 Accessories and service tools ....................258 SPARE PARTS I-MAX TOUCH 3D ....................260 Column ............................260 13.1 13.1.1 Electrical and mechanical parts ..................... 260 ...
-
Page 7: Introduction
I-Max Touch or I-Max Touch 3D unit. WARNING: 1. The I-Max Touch/I-Max Touch 3D is an electro-medical device and it can be used only under the supervision of a physician or of highly qualified personnel, with the necessary knowledge on X-ray protection. -
Page 8: Description Of The System
Carpus exam. Physical principles of operation The I-Max Touch (2D) unit uses a CCD sensor that converts the amount of dose that affects every single sensor element (pixel) into an electrical signal that can be processed through an analog-digital conversion system. -
Page 9: Image Acquisition On The I-Max Touch 3D
In this mode, the X-ray emission is continuous, as in normal panoramic radiography. The sequence of images obtained are the input for special reconstruction software, developed specifically for the I-Max Touch 3D, which allows the reconstruction of the standard panoramic X-ray simulating the physical mechanism of "kinetic cancelation"... -
Page 10: Usability
USABILITY The I-Max Touch or I-Max Touch 3D medical system is intended to be used in radiology or dental practices. In the first case the user is either the radiologist or the technician specialized in radiology, in the latter case it is the dentist. -
Page 11: Safety Information
Owandy Radiology cannot be held responsible for: The use of the I-Max Touch or I-Max Touch 3D in a different way from the intended use. Damage to the unit, the operator or the patient, caused both by installation and maintenance procedures different from those described in the user and service manuals supplied with the unit and by wrong operation of the unit. -
Page 12: Classifications
Classifications 3.1.2 The I-Max Touch is an electro-medical X-ray device belonging to Class 1 and Type B as per the IEC 60601- 1 classification; it foreseen for continuous working at intermittent load. According to the CE 93/42 directive for medical devices the equipment belongs to class II B. -
Page 13: Warnings
SERVICE MANUAL Warnings The I-Max Touch and I-Max Touch 3D units must be used in dental surgeries, radiology and hospital surroundings. The unit has been built to support a continuous operation at intermittent load; therefore please follow the use cycles described in the manual to enable the device to cool down. - Page 14 If it is necessary to operate the unit near the patient stay as far as the remote control cable allows or at least 1.5 m (4.9 ft) (I-Max Touch) or 2m (6.6 ft) (I-Max Touch 3D) both from the X-ray source and from the patient...
- Page 15 NOTE: The dimension of the "patient's environment" is defined as a distance of at least 1.5 m (4.9 ft) (I-Max Touch) or at least 2 m (6.6 ft) (I-Max Touch 3D) from the actual patient. If the computer is positioned inside the patient's environment it must conform to the requirements specified by the IEC 60601-1 standard for medical devices;...
-
Page 16: Distribution Of Stray Radiation (I-Max Touch 3D Only)
Electromagnetic emissions 3.2.2 In accordance with the IEC 60601-1-2 standard, the I-Max Touch/I-Max Touch 3D is suitable for use in a specified electromagnetic environment. The purchaser or user of the system should assure that it is used in an electromagnetic environment as described below. -
Page 17: Electromagnetic Immunity
Electromagnetic immunity 3.2.3 In accordance with the IEC 60601-1-2 standard, the I-Max Touch/I-Max Touch 3D is suitable for use in a specified electromagnetic environment. The purchaser or user of the system should assure that it is used in an electromagnetic environment as described below. -
Page 18: Recommended Separation Distances For Non-Life Supporting Equipment
3.2.4.1 I-Max Touch The I-Max Touch is intended for use in an electromagnetic environment in which the radiated RF disturbances are controlled. The customer or the user of the system can help prevent electromagnetic interference by maintaining a minimum distance between portable and mobile RF communications equipment (transmitters) and the I-Max Touch as recommended below, according to the maximum output power of the communications equipment. - Page 19 P is the rated power of the transmitter in watt (W) according to the transmitter manufacturer. 3.2.4.2 I-Max Touch 3D The I-Max Touch 3D is intended for use in an electromagnetic environment in which the radiated RF disturbances are controlled. The customer or the user of the system can help prevent electromagnetic...
-
Page 20: Environmental Risks And Disposal
Illegal disposal of the product by the holder implies the application of administrative sanctions provided by law I-Max Touch / I-Max Touch 3D – Ver. 4 Page: 20... -
Page 21: Symbols Used
SERVICE MANUAL Symbols used Apart from the symbols indicated on the control panel, the following icons are also used in the manuals and on the I-Max Touch/I-Max Touch 3D itself: Symbol Description Device with type B applied parts In some of its parts, the device contains materials and liquids that, at the end of the... -
Page 22: Description
SERVICE MANUAL DESCRIPTION Identification plates and laser labels Identification plates and laser labels locations I-Max Touch 4.1.1 6, 7 1, 8 (*) I-Max Touch / I-Max Touch 3D – Ver. 4 Page: 22... -
Page 23: Identification Plates And Laser Labels I-Max Touch 110-120V
SERVICE MANUAL Identification plates and laser labels I-Max Touch 110-120V 4.1.2 1 - I-Max Touch identification plate 2 - Tube-head identification plate 3 - Cephalometric device plate 5 - PanCeph digital sensor plate 4 - Pan digital sensor plate 6 - Spot Laser indicator plate (x2) -
Page 24: Identification Plates And Laser Labels I-Max Touch 220-240V
SERVICE MANUAL Identification plates and laser labels I-Max Touch 220-240V 4.1.3 2 - Tube-head identification plate 1 - I-Max Touch identification plate 3 - Cephalometric device plate 5 - PanCeph digital sensor plate 4 - Pan digital sensor plate 6 - Spot Laser indicator plate (x2) -
Page 25: Identification Plates And Laser Labels Locations I-Max Touch 3D
SERVICE MANUAL Identification plates and laser labels locations I-Max Touch 3D 4.1.4 5, 6 1, 7 I-Max Touch / I-Max Touch 3D – Ver. 4 Page: 25... -
Page 26: Identification Plates And Laser Labels I-Max Touch 3D 110-120V
SERVICE MANUAL Identification plates and laser labels I-Max Touch 3D 110-120V 4.1.5 2 - Tube-head identification plate 1 - I-Max Touch 3D identification plate 3 - Cephalometric device plate 4 - PanCeph digital sensor plate 5 - Spot Laser indicator plate (x2) -
Page 27: Identification Plates And Laser Labels I-Max Touch 3D 220-240V
SERVICE MANUAL Identification plates and laser labels I-Max Touch 3D 220-240V 4.1.6 2 - Tube-head characteristics plate 1 - I-Max Touch 3D data plate 3 - Cephalometric device plate 4 - PanCeph digital sensor plate 5 - Spot Laser indicator plate (x2) -
Page 28: Functions, Models And Versions
Frontal dentition, Improved orthogonality Panoramic, Sinus, TMJ and implant (crosssectional) examinations. The I-Max Touch 3D is a complete panoramic system that enables the user to perform all X-rays acquisitions commonly required in the dental field (except for intra-oral X-rays) and volumetric three-dimensional images. -
Page 29: Version With Cephalometric Arm
Block diagram This paragraph provides a brief description, at block diagram level, of the I-Max Touch/I-Max Touch 3D; the aim of this paragraph is to provide a brief description of the system. More details about the electronic circuits which compose the system can be obtained by analyzing the schematics provided at the end of the manual. -
Page 30: I-Max Touch Block Diagram
SERVICE MANUAL I-Max Touch block diagram 4.3.1 Figure 4 I-Max Touch / I-Max Touch 3D – Ver. 4 Page: 30... -
Page 31: I-Max Touch 3D Block Diagram
SERVICE MANUAL I-Max Touch 3D block diagram 4.3.2 Figure 4 I-Max Touch / I-Max Touch 3D – Ver. 4 Page: 31... -
Page 32: Power Supply Assembly
CPU board. The number and the type of sensors depend on the function of each motor; in general optical switches are used. I-Max Touch / I-Max Touch 3D – Ver. 4 Page: 32... - Page 33 XJ6 = 2-3 XJ13 = Closed XJ8 = 2-3 XJ11 = Open 4.3.4.2 CPU Board jumper configuration I-Max Touch 3D The CPU board contains some jumpers that define the system configuration. Wrong settings may affect the system functionality. XJ1 = Open...
-
Page 34: Generator Board (A10) And Tubehead
(English, French, Spanish, Italian, Portuguese, German, Dutch and Turkish). The language selection is only available for the user messages; the messages in the service programs are always in English. I-Max Touch / I-Max Touch 3D – Ver. 4 Page: 34... -
Page 35: Control Panel Layout
Standard user interface 4.4.1 The control panel of the I-Max Touch/I-Max Touch 3D is divided into function areas plus a display to view the operative messages and error signals. The next figure shows a general view of the control panel while full details on each function are provided in the user manual. -
Page 36: Acquired Image Interface (I-Max Touch Only)
4.4.2 On the I-Max Touch it is possible to display the acquired image; this option is not available on the I-Max Touch 3D. The next figure shows a general view of the acquired image interface while full details on each function are provided in the user manual. -
Page 37: Technical Interface
Technical interface 4.4.3 The technical control panel interface of the I-Max Touch/I-Max Touch 3D is divided into function areas plus a display to view the operative messages and error signals. The next figure shows a general view of the technical control panel while full details on each function are provided on the chapter about the technical service programs. -
Page 38: Technical Characteristics
6 to 10 mA with 1 mA steps for Pan, TMJ and Sinus 6 to 10 mA with 1 mA steps for Implant (I-Max Touch only) 6 to 12 mA with 1 mA steps for Ceph (up to 76 kVp) - Page 39 Cephalometry and Carpus Normal resolution in Latero-Lateral or Antero-Posterior projections (different sizes) High resolution Latero-Lateral Postero-Anterior projections (different sizes) High resolution Carpus exams Motorized Soft Tissue Filter I-Max Touch / I-Max Touch 3D – Ver. 4 Page: 39...
- Page 40 I-Max Touch: 1:1.20 (nominal) I-Max Touch 3D:1:1.25 (nominal) Sinus I-Max Touch: 1:1.22 (nominal) I-Max Touch 3D: 1:1.27 (nominal) Implant I-Max Touch only: 1 : 1.32 (constant) Ceph 1:1.10 on the sagittal medial plane in LL projection Tube-head characteristics Model MRE 05 Manufacturer Villa Sistemi Medicali S.p.A., 20090 Buccinasco (MI), Italia...
- Page 41 Reconstructed volume (H x Ø) 83 x 93 mm (3.3 x 3.7") NOTE: The I-Max Touch 3D version without the cephalometric arm uses only the flat panel sensor for both the 3D volumes and for the panoramic images (narrow beam), while in the version with the cephalometric arm a second (PanCeph) sensor is used for the Ceph exams.
- Page 42 A1:1997 + A2:2001 Mechanical features SID (Source to Image Distance) Pan, I-Max Touch: 50 cm (20”) TMJ and Sinus I-Max Touch 3D: 52 cm (20.5") SID (Source to Image Distance) Ceph 165 cm (65") Telescopic motorized column run 85 cm (33.5") Maximum total height 245 cm (96.5")
-
Page 43: Dimensions
SERVICE MANUAL Dimensions Dimensions I-Max Touch 5.2.1 1020 (40,16") Ø 1040 (40,95") Ø 1140 (44,88") with free standing base Figure 7 – I-Max Touch dimensions, standard version I-Max Touch / I-Max Touch 3D – Ver. 4 Page: 43... - Page 44 Ø 1040 (40,95") Ø 1140 (44,88") with free standing base 1910 (75,20") 1970 (77,56") with free standing base Figure 8 – I-Max Touch dimensions, version equipped with cephalometric option I-Max Touch / I-Max Touch 3D – Ver. 4 Page: 44...
-
Page 45: Dimensions I-Max Touch 3D
Ø 1 0 4 0 (4 0 ,9 5 ") Ø 1 1 4 0 (4 4 ,8 8 ") w ith free standin g b ase Figure 7 – I-Max Touch 3D dimensions, standard version I-Max Touch / I-Max Touch 3D – Ver. 4 Page: 45... - Page 46 1 9 1 0 (7 5 ,2 0 ") 197 0 (77 ,56 ") w ith free sta nding ba se Figure 8 – I-Max Touch 3D dimensions, version equipped with cephalometric option I-Max Touch / I-Max Touch 3D – Ver. 4...
-
Page 47: Loading Curve Tube And Cooling Curve Anode
SERVICE MANUAL Loading curve tube and cooling curve anode "CEI - OPX/105" (0.5 IEC 60336) tube Load Anode cooling curve Tubehead heating and cooling curve I-Max Touch / I-Max Touch 3D – Ver. 4 Page: 47... -
Page 48: Accessories
SERVICE MANUAL Accessories The I-Max Touch/I-Max Touch 3D comes with the following removable accessories: Temple clamp centering device I-Max Touch I-Max Touch 3D Chin rest for panoramic exams supplied with biteblocks and removable chin stop (for edentulous patients) Reduced height chin rest for panoramic... -
Page 49: Measurement Method Technical Factors
It may result helpful to use a fluorescent screen to locate the X-ray beam and consequently position the probe of the kV meter. I-Max Touch / I-Max Touch 3D – Ver. 4 Page: 49... -
Page 50: Technical Service Programs
3 seconds this screen and message are displayed: SERVICE MENU CONFIGURATION NOTE: The service menus can be accessed directly but some critical functions are protected by further passwords. I-Max Touch / I-Max Touch 3D – Ver. 4 Page: 50... -
Page 51: Control Panel Service Mode
CEPH SETTINGS menu (password 124). I-Max Touch / I-Max Touch 3D – Ver. 4 Page: 51... -
Page 52: Configuration Menu (Password 92)
(T); the values of a submenu will be updated or not by pressing the appropriate button in response to this message: UPDATE CHANGES? >0< = Y, T = N In both cases, the service menu returns to the higher level of menus. I-Max Touch / I-Max Touch 3D – Ver. 4 Page: 52... - Page 53 Pressing the "Patient centering" key >O< to confirm the time change; the display changes as follows: ADJUST TIME: H>XX M XX S XX To change the time setting, follow the same procedure as that to change the date setting. I-Max Touch / I-Max Touch 3D – Ver. 4 Page: 53...
- Page 54 5.6.3.6 LED brightness 5.6.3.7 Key click sound 5.6.3.8 Key click volume NOTE: The above options are not used on Owandy Radiology units. 5.6.3.9 Manage pan options This submenu allows the enabling or disabling of panoramic examinations; the programs are only enabled if the protection key matches the hardware value.
- Page 55 “Patient centering” key >O< to accept the modifications. WARNING: Changing this mode will affect the complete system functionality. NOTE: This option is not used on Owandy Radiology units. 5.6.3.13 Collimator setup type In this submenu it is possible to set the collimator type.
- Page 56 Select “PAN-CEPH SYSTEM” for pan with ceph units. Select “3D SYSTEM” for 3D with ceph units and “WITHOUT SYSTEM” for pan-only units. WARNING: A wrong setting can severely impaire the functionality of the unit. I-Max Touch / I-Max Touch 3D – Ver. 4 Page: 56...
- Page 57 Press the “Patient centering” key >O< to accept the modifications. I-Max Touch / I-Max Touch 3D – Ver. 4 Page: 57...
- Page 58 QSD IP address (I-Max Touch 3D only) The QSD on the I-Max Touch 3D has its own static IP address that is used for the connection with the computer. The default value for this IP address is 192.168.002.045. Change the value as for the DSPU IP address and set it according to the values mentioned above.
- Page 59 Select “STANDARD” to use the standard panoramic curve for the standard panoramic, right panoramic, left panoramic and reduced dose panoramic exams; select “EVO” to use the alternative panoramic curve for these 4 exams. I-Max Touch / I-Max Touch 3D – Ver. 4 Page: 59...
-
Page 60: Axis Alignment Menu (Password 118)
"xxxx" is the current value of the offset that can be changed with the left and right arrow keys, the value can be negative or positive. Press the “T” key to accept or cancel the modifications. I-Max Touch / I-Max Touch 3D – Ver. 4 Page: 60... - Page 61 “zzzz” is the current value of the offset that can be changed with the left and right arrow keys, the value can be negative or positive. Press the “T” key to accept or cancel the modifications. I-Max Touch / I-Max Touch 3D – Ver. 4 Page: 61...
- Page 62 5.6.4.7 Primary collimator 3D (I-Max Touch 3D only) Set this parameter with the same value used to set the "Primary collimator PAN". WARNING: This function is not active on an I-Max Touch; if selected it will generate an E420 error message.
-
Page 63: Ceph Settings Menu (Password 124)
It is possible to change the set value using the up and down arrow keys. Pressing the "T" key will quit the menu and the disabled/enabled status is temporarily stored in the volatile memory. I-Max Touch / I-Max Touch 3D – Ver. 4 Page: 63... - Page 64 CEPH MEAS. UNIT METER CEPH MEAS. UNIT INCHES Use the up and down arrow keys to change the value and the “T” key >O< to accept the modifications. I-Max Touch / I-Max Touch 3D – Ver. 4 Page: 64...
- Page 65 Use the up and down arrow keys to change the value and the “T” key >O< to accept the modifications. Set the value to “HS IS ENABLED”. WARNING: A wrong setting can impaire the functionality of the system. I-Max Touch / I-Max Touch 3D – Ver. 4 Page: 65...
-
Page 66: Troubleshooting Menu (Password 112)
CEPH RX EMISSION AUTO-CALIBRATION I2C BUS TEST TEST COLUMN The selection is confirmed pressing the "Patient centering" key >O<. To exit from any menu use the "Test" key (T). I-Max Touch / I-Max Touch 3D – Ver. 4 Page: 66... - Page 67 Ry = Selected port code (R4, R5, R6, R7) using the left and right arrow keys. 76543210 = Logic status of the port inputs. Press the “T” key to exit this submenu. I-Max Touch / I-Max Touch 3D – Ver. 4 Page: 67...
- Page 68 (**) Functionality only available on digital version NOTE: The logic status of these signals depends on the physical position of the relevant optical sensor / microswitch with respect to the "0" position. I-Max Touch / I-Max Touch 3D – Ver. 4 Page: 68...
- Page 69 "XX" is the tubehead filament current value that can be changed using the left and right arrow keys. "YYY" is the tubehead pre-heating value that can be changed with the up and down arrow keys. Press the “T” key to exit this submenu. I-Max Touch / I-Max Touch 3D – Ver. 4 Page: 69...
-
Page 70: System Menu
Both these submenus are only used for factory settings and testing; they are not available for field service. Access to these submenus is protected by a special password to avoid the risk of dangerous operations. I-Max Touch / I-Max Touch 3D – Ver. 4 Page: 70... -
Page 71: Show Configuration Menu
9 points on the screen successively. Please use a stylus to touch each point as precisely as possible. After the last point has been touched the screen reverts back to the setup display. I-Max Touch / I-Max Touch 3D – Ver. 4 Page: 71... -
Page 72: Pre-Installation
The instructions of this and the following chapter guarantee a correct installation and will ensure that the I- Max Touch/I-Max Touch 3D will function correctly. The supplier can provide the assistance and the necessary technical advice for pre-installation, while all masonry work and the pre-installation phase are at the customer’s charge and must be performed complying with the indications given below. - Page 73 Power voltages for the relevant devices have to be provided from outside, making sure not to exceed the indicated ratings. To connect all control and warning devices it is advisable to use 6 wires with a 0.5 mm² section as a minimum. I-Max Touch / I-Max Touch 3D – Ver. 4 Page: 73...
-
Page 74: Packaging
SERVICE MANUAL Packaging The I-Max Touch/I-Max Touch 3D with or without cephalometric option is shipped in two cardboard boxes. Weight Contents Dimensions Gross - Unit head with rotation arm including the 80 kg 90 kg tubehead and sensor connector 120 x 80 x 67 cm... -
Page 75: Space Requirements
SERVICE MANUAL Space requirements Standard version without Ceph option 6.3.1 Figure 10 (*) A = minimum 600 mm (23.6"), recommended 800 mm (31.5") for service purpose I-Max Touch / I-Max Touch 3D – Ver. 4 Page: 75... -
Page 76: Version With Ceph Option
(*) A = 600 mm (23.6") minimum, 800 mm (31.5") recommended for service purpose (**) B = 1460 mm (57.52") minimum front space, 1610 mm (63.39") recommended frontal space for service purpose I-Max Touch / I-Max Touch 3D – Ver. 4 Page: 76... -
Page 77: Computer Requirements
I-Max Touch computer requirements 6.4.1 The I-Max Touch must be connected to a dedicated computer or to the existing practice network for the acquisition of the panoramic images. When it is connected to the existing network of the practice any computer installed with the drivers of the unit will be able to make an acquisition and display the image from the unit. - Page 78 6.4.2.4 Network configuration An Intel Pro 1000 Gigabit network board with two network ports is provided with the I-Max Touch 3D unit to connect it to the dedicated computer; it must be connected using the network cable provided with the unit or an Ethernet cable with similar specifications (Cat 5e, 5+ or 6).
-
Page 79: Installation
1. Mark the wall with a centre punch at the level of the fixing holes; drill holes in the wall according to the type of dowels to be used (see previous chapter). 70.5 70.5 (2.76") (2.76") (3,9") (3,9") Figure 12 I-Max Touch / I-Max Touch 3D – Ver. 4 Page: 79... -
Page 80: Column Mounting
2. Open the upper side of the box. If the unit is equipped with a ceph arm remove the carpus plate placed at the side of the ceph head. I-Max Touch / I-Max Touch 3D – Ver. 4 Page: 80... - Page 81 SERVICE MANUAL 3. Remove the wooden transversal support frame at the bottom end of the column. 4. Lift and remove the cardboard box to expose the column and ceph arm. I-Max Touch / I-Max Touch 3D – Ver. 4 Page: 81...
- Page 82 5. Remove the other wooden frames and the box containing the accessories and covers. 6. If the unit is equipped with a ceph arm remove the ceph arm using the special grip. I-Max Touch / I-Max Touch 3D – Ver. 4 Page: 82...
- Page 83 8. Remove the column following the sequence shown in the images below. Move the bottom of the column about 30 cm over the side of the wooden pallet. About 30 cm I-Max Touch / I-Max Touch 3D – Ver. 4 Page: 83...
-
Page 84: Mounting The Column
8. Acting on the feet grub screws, adjust them in order to level the feet on the floor. When finished, cover the grub screws with the provided plastic cups. I-Max Touch / I-Max Touch 3D – Ver. 4 Page: 84... - Page 85 NOTE: The unit is equipped with a switch (S2) which allows the user to lower or raise column for servicing; it is located on the lower back side of the column and is protected by a small metallic cover. I-Max Touch / I-Max Touch 3D – Ver. 4 Page: 85...
-
Page 86: Mounting Of The Head (Rotating Arm Assembly)
Empty the corner below the back of the head and position a polyethylene foam block at the bottom of the box. Place the polystyrene foam block on top. I-Max Touch / I-Max Touch 3D – Ver. 4 Page: 86... - Page 87 3. Close the box and slide it off the pallet. Tilt it over so it rests on its side. 4. Cut the box along the edges and open it. Remove the polyethylene foam blocks protecting the head. I-Max Touch / I-Max Touch 3D – Ver. 4 Page: 87...
-
Page 88: Mounting The Head
1. Lift the head using the handles mounted at the top of the head and on the fenerator. and m Move it close to the column sideways to avoid contact between the digital sensor holder and the chin support. I-Max Touch / I-Max Touch 3D – Ver. 4 Page: 88... - Page 89 Figure 17 4. Insert reference pins "B" in the rotating arm and column using a hammer then insert the remaining two "C" screws and tighten all the fixing screws. I-Max Touch / I-Max Touch 3D – Ver. 4 Page: 89...
- Page 90 NOTE: In case of a single sensor or a ceph upgradable version it is necessary to remove the internal covers of the sensor holder to be able to mount the lower cover of the rotating arm. Figure 19 I-Max Touch / I-Max Touch 3D – Ver. 4 Page: 90...
-
Page 91: Mounting Of Ceph Arm (Optional)
8. Mount the temple support group by positioning the notch on the group to the front of the unit, sliding it on the shaft attachment and rotating it clockwise until it is locked. This operation is identical for the temple support group of the I-Max Touch and the I-Max Touch 3D. Temple support shaft Figure 20 9. - Page 92 3. Detach the attachment box from the end of the ceph arm (separate the base plate from the cover plate) and attach the ceph base plate to the back of the column using the reference pins and screws. Reference pin Reference pin Figure 22 I-Max Touch / I-Max Touch 3D – Ver. 4 Page: 92...
-
Page 93: How To Mount The Covers
"F" screws (see previous subchapter) from upper bracket "C". Rotate the column in clockwise direction to reach the back side of the column. Figure 23 I-Max Touch / I-Max Touch 3D – Ver. 4 Page: 93... -
Page 94: Inserting Sensor In Sensor Holder
NOTE: The color change of the shock detection indicator voids the warranty on that sensor. Computer installation Installation I-Max Touch computer and network 7.7.1 The computer or computers used for the acquisition of panoramic and cephalometric images must be installed with Windows XP SP2 or SP3, Vista (32bit only), 7 or 8 (installation on partition C:\). -
Page 95: Installation I-Max Touch 3D Computer And Network
Windows XP SP2 or SP3 or 7 (installation on partition C:\). The Intel Pro 1000 Gigabit network board provided with the I-Max Touch 3D unit must be installed in the dedicated computer using a free PCI-express slot; it must be connected using the network cables provided with the unit or Ethernet cables with similar specifications (Cat 5e, 5+ or 6). - Page 96 3. Select “LAN” in the menu that appears. 4. The selection screen allows for the choice of drivers for an I-Max Touch, an I-Max Touch 3D with 1 network cable (1x RJ-45) and an I-Max Touch 3D with 2 network cables (2x RJ-45). Select the unit you are installing;...
- Page 97 "LAN PANORAMIC" folder with these utilities: Hardware settings: allows to manually change the type of I-Max Touch unit (between 2D and 3D). LAN PANORAMIC: launches the Panolan utility used for testing the unit and its sensor(s); this software performs 2D and 3D acquisitions without having to use imaging software.
- Page 98 SERVICE MANUAL 13. The IP address of the network board (I-Max Touch) or the Intel Pro 1000 board (I-Max Touch 3D) in the computer must be set according to the IP addresses stored in the I-Max Touch 3D unit: a. From the Windows control panel display the list of network boards and select the network board you wish to configure (network board of the computer for the 2D unit or Intel Pro 1000 for the 3D unit);...
-
Page 99: Installation 3D Sensor Calibration Files
To access the sensor switch off the unit, remove the front and back covers of the sensor and check the Mac address mentioned on the sticker on the back of the sensor. Remount the covers. I-Max Touch / I-Max Touch 3D – Ver. 4 Page: 99... -
Page 100: Installation Pan And Ceph Sensor Calibration Files
The O.S.P. (drivers and utilities), the calibration files of the sensor(s) and the imaging software have been installed and configured on the computer. Refer to the computer installation instructions for any missing step. I-Max Touch / I-Max Touch 3D – Ver. 4 Page: 100... -
Page 101: Verification Firmware Versions
3. Place the centering phantom tool on the chin rest and the sensor calibration tool in front of the sensor (refer to the accessories and tools in the schematics chapter for details) attaching it with tape. I-Max Touch / I-Max Touch 3D – Ver. 4 Page: 101... -
Page 102: Verification 3D Function
At 72 kV - 6 mA for the I-Max Touch At 68kV - 6mA for the I-Max Touch 3D using the copper filter or 60kV - 6mA without the copper filter this image will be displayed. 5. Set contrast and brightness levels to have a good visibility of all the centering balls of the centering tool. -
Page 103: Verification Ceph Function
NOTE: When verifying the ceph function on an I-Max Touch 3D, select the I-Max Touch (not the I-Max Touch 3D) unit in the panoramic control panel of the O.S.P. (drivers) before working on the Ceph arm. Switch back to the I-Max Touch 3D unit once Ceph maintenance has been finalized. - Page 104 If the beam is centered but the rings are not centered, it is necessary to adjust the mechanical position of the rings (see the ear rings alignement procedure in the maintenance chapter. Figure 31 I-Max Touch / I-Max Touch 3D – Ver. 4 Page: 104...
- Page 105 "LAN PANORAMIC" shortcut to start the Panolan utility. Wait until the message "Board is connected" is displayed at the bottom left. Check that in the "Image processing" menu all the items are deselected (no "V" sign). Figure 33 I-Max Touch / I-Max Touch 3D – Ver. 4 Page: 105...
- Page 106 Figure 34 11. The image has to be centered with the arc: Figure 35 I-Max Touch / I-Max Touch 3D – Ver. 4 Page: 106...
-
Page 107: Verification Exposure Parameters - Invasive Method
>O< (5). At the selection of the X-ray emission test, the display will show this message: X-RAY EMISSION 72kV 06mA 14.0S WARNING: From this point onward X-ray emission is enabled; it will start when pressing the X-ray trigger. I-Max Touch / I-Max Touch 3D – Ver. 4 Page: 107... - Page 108 The high voltage value must be within 8% of the set value while the time value must be within 10% of the set value. If the voltage is not within the expected range replace the tubehead otherwise replace the generator CPU board. I-Max Touch / I-Max Touch 3D – Ver. 4 Page: 108...
-
Page 109: Verification Exposure Parameters - Non-Invasive Method
2. Press the "Anatomic/Manual" mode indicator (13) until it turns green and displays "S", then press the "Test" key (4); the display will show: xxkV xxmA xx.xs EMISSION PROGRAM I-Max Touch / I-Max Touch 3D – Ver. 4 Page: 109... -
Page 110: Storing Of Personalised Automatic Exposure Parameters
After pressing the key, the display will show this message: UPDATE CHANGES? >0< = Y, T = N Press the "Patient entry" key >O< (5) to confirm or the "Test" key (4) to cancel the setting. I-Max Touch / I-Max Touch 3D – Ver. 4 Page: 110... -
Page 111: Test Acquisitions
Alternatively make an acquisition using the imaging software installed on the dedicated computer. NOTE: When using an I-Max Touch 3D it is possible to recuperate the .RAW and .INI files in the "AcquisitionSave" folder for a later manual reconstruction (refer to the chapter about manual reconstruction). -
Page 112: Manual Reconstruction 3D Volume (I-Max Touch 3D Only)
SERVICE MANUAL Manual reconstruction 3D volume (I-Max Touch 3D only) 7.9.3 To launch a manual reconstruction form the ".raw" and ".ini" files acquired by the machine you must: 1. Close the Panolan utility and/or the imaging software. 2. Copy the ".raw" and ".ini" files of the 3D volume to be reconstructed ... -
Page 113: Troubleshooting
Check the correct insertion of X53 and X57; if it is correctly inserted replace the tubehead otherwise insert it correctly and make another exposure. Replace the tubehead if it lights up again. As per H5 above. I-Max Touch / I-Max Touch 3D – Ver. 4 Page: 113... -
Page 114: Led Cpu Board A5
NOTE: If all the LEDs are OFF verify column fuse F3; if it is OK verify cable X11 between column CPU board A1 and CPU board A5 on both sides. Verify the column CPU board A1. I-Max Touch / I-Max Touch 3D – Ver. 4 Page: 114... -
Page 115: Display Messages
SERVICE MANUAL Display messages The I-Max Touch/I-Max Touch 3D is fully driven by a microprocessor which controls the programming of the emission parameters and indicates the different conditions of the unit and any defects and errors that occur with messages on the touch screen. - Page 116 Generator board (A10) not answering Soft Tissue Filter (STF) Timeout of zero position optical sensor of STF STF zero position sensor always active Other Wrong setting in pan and ceph system configuration I-Max Touch / I-Max Touch 3D – Ver. 4 Page: 116...
-
Page 117: Error Codes E000 To E199
8.2.1.1 E108: Hardware key fault This error is shown when the firmware of the I-Max Touch 3D does not sense the presence of the U.I.C. (Unique Identification Code). The unique code is read with its check byte from the control system at the start- up;... -
Page 118: Error Codes E200 To E299
CPU board. 8.2.2.4 E205: Timeout on rotation This message means that no change on the rotation’s signal is detected; please follow the steps described above. I-Max Touch / I-Max Touch 3D – Ver. 4 Page: 118... - Page 119 In case no collision has been observed or the message is frequently displayed follow the procedure below. I-Max Touch / I-Max Touch 3D – Ver. 4 Page: 119...
-
Page 120: Error Codes E300 To E399
Check the continuity of the cables mentioned above from M7 to X4 of board A12 and from X1-2 of A12 up to X23, X24 and X34 of the main CPU. Repeat the power on sequence while checking the motion. I-Max Touch / I-Max Touch 3D – Ver. 4 Page: 120... - Page 121 B8 to X58 and from that connector to X31 of the main CPU A5; check the continuity of these wires and replace the faulty ones (if any). If all cables are OK the fault is on the CPU and it needs replacing. I-Max Touch / I-Max Touch 3D – Ver. 4 Page: 121...
- Page 122 CPU board (A9). Check CANBus cable X20-X20 and replace it if faulty, otherwise replace the generator CPU board and then the generator board. I-Max Touch / I-Max Touch 3D – Ver. 4 Page: 122...
-
Page 123: Error Codes E400 To E499
In case of error messages E759 and E755 the system must be immediately powered off because there is an unexpected X-ray emission (error E759) or the emission has not been terminated in the expected time. I-Max Touch / I-Max Touch 3D – Ver. 4 Page: 123... - Page 124 (A10). If the error appears during an exposure reset the error and repeat the exposure; if the error still appears replace the generator board, then the tubehead. I-Max Touch / I-Max Touch 3D – Ver. 4 Page: 124...
- Page 125 CPU A5 (cable X20-X20). Check the correct insertion of cables X56 and X57 between the generator board and the tubehead. If all connections are OK and the fault is repetitive replace the generator CPU board (A9). I-Max Touch / I-Max Touch 3D – Ver. 4 Page: 125...
-
Page 126: Error Codes E800 And E801
F4 is not blown. Check that the column movement safety microswitches work correctly otherwise replace the microswitch assembly (microswitch and cable). Check CANBus cable X11-X11 and replace it if faulty otherwise replace the column CPU board. I-Max Touch / I-Max Touch 3D – Ver. 4 Page: 126... -
Page 127: Error Codes E831 (I-Max Touch 3D Only)
SERVICE MANUAL Error codes E831 (I-Max Touch 3D only) 8.2.7 Error 831 is related to VDSIB board A22. Check all the cables of this board (e.g. X75). Check the power HUB board in the rack under the CPU board and the connections of this board with the CPU (e.g. cable X82) and with the VDSIB board ;... -
Page 128: Maintenance
I-Max Touch / I-Max Touch 3D – Ver. 4 Page: 128... -
Page 129: Service Tools
I-Max Touch 3D at least one hour before the calibration. 1. Access the technical setup menu and enter the CONFIGURATION menu (password 92) to set the "Skip sensor"... - Page 130 (Cu) filter of 1.5mm thickness. Start the X-ray emission; as soon as the emission starts press on the "Continue" button to start the data acquisition for the gain calibration. Figure 40 I-Max Touch / I-Max Touch 3D – Ver. 4 Page: 130...
- Page 131 "1x1 0,5pF G4 10fps" in the dropdown menu at the top left. 13. In order to calibrate the panoramic modality, select the "1x1 0,5pF G4 64 zoom" option in the dropdown menu at the top left. I-Max Touch / I-Max Touch 3D – Ver. 4 Page: 131...
- Page 132 Figure 44 16. Set the I-Max Touch to "Panoramic" mode and set these parameters: 60kV - 6mA. Remove the copper (Cu) filter of 1.5mm thickness used for the 3D calibration. Start the X-ray emission; as soon as the emission starts press on the "Continue" button to start the acquisition for the gain calibration.
-
Page 133: Procedure For Sensor Or Tubehead Replacement
2. Configure the Mac address of the new sensor in the "Hcpconfig.ini" file of the new calibrations files, in section “[HcpFgPleora]” under the heading “PleoraMacAddress=”. Panoramic X-ray beam centering verification (I-Max Touch only) 9.3.2 NOTE: This subchapter is applicable for both a sensor and a tubehead replacement. - Page 134 At 72 kV - 6 mA for the I-Max Touch At 68kV - 6mA for the I-Max Touch 3D using the copper filter or 60kV - 6mA without the copper filter this image will be displayed. Figure 27 5.
- Page 135 At 72 kV - 6 mA for the I-Max Touch At 68kV - 6mA for the I-Max Touch 3D using the copper filter or 60kV - 6mA without the copper filter Figure 27 11. Set contrast and brightness levels to have a good visibility of all the centering balls of the centering tool.
-
Page 136: Panoramic X-Ray Beam Centering Verification (I-Max Touch 3D Only)
SERVICE MANUAL Panoramic X-ray beam centering verification (I-Max Touch 3D 9.3.3 only) NOTE: This subchapter is applicable for both a sensor and a tubehead replacement. WARNING: X-rays will be emitted during these operations. The authorised technicians are therefore recommended to use the greatest caution and to comply with the safety regulations and laws of their country. - Page 137 In the window that appears set the number of frames (acquired images) to “1000” and confirm with the "OK" button. Figure 47 I-Max Touch / I-Max Touch 3D – Ver. 4 Page: 137...
- Page 138 NOTE: When you replace the digital sensor, ONLY move the sensor in order to center the X-ray beam. In case you replace the tubehead, move ONLY the tubehead. It is very important to have a fixed reference point for the beam centering. I-Max Touch / I-Max Touch 3D – Ver. 4 Page: 138...
- Page 139 (to the left or right) in the green frame, which correspond to a vertical misalignment on the sensor, it is necessary to move the primary collimator by acting on screws "1", "2" and "3" (see below). Figure 50 I-Max Touch / I-Max Touch 3D – Ver. 4 Page: 139...
- Page 140 "1" (see below). Figure 51 10. At the end of the adjustment, the image must be completely visible and well aligned and centered in the green window. Figure 52 I-Max Touch / I-Max Touch 3D – Ver. 4 Page: 140...
-
Page 141: Image Adjustment (I-Max Touch 3D Only)
SERVICE MANUAL 3D image adjustment (I-Max Touch 3D only) 9.3.4 To verify the lateral offset for the 3D acquisitions this procedure must be followed: 1. Open folder "LAN PANORAMIC" in the "OWANDY SOFTWARE PACKAGE" folder on your Windows desktop and double click the "LAN PANORAMIC" shortcut to start the Panolan utility. -
Page 142: Procedure Cpu Board Replacement
CPU board in the system. This component includes the U.I.C. (Unique Identification Code) that determines the enabling codes for the radiological exams. Figure 54 I-Max Touch / I-Max Touch 3D – Ver. 4 Page: 142... -
Page 143: Procedure Ceph Arm Alignment
NOTE: When aligning the ceph on an I-Max Touch 3D unit select the I-Max Touch (not the I-Max Touch 3D) unit in the panoramic control panel of the O.S.P. (drivers) before working on the Ceph arm. Switch back to the I-Max Touch 3D unit once Ceph maintenance has been finalized. -
Page 144: Alignment Ear Rings
Patient entrance" key >O< (5) to reset the message. DIGITAL SENSOR IS NOT READY 7. Press the X-ray trigger and keep it pressed until the end of the exposure. I-Max Touch / I-Max Touch 3D – Ver. 4 Page: 144... - Page 145 "A" screws and adjust the height of the ceph arm acting on screw "B". Repeat the exposure until the vertical alignment is reached then tighten the "A" screws. Figure 56 I-Max Touch / I-Max Touch 3D – Ver. 4 Page: 145...
- Page 146 Make another exposure and repeat until the big circle is centered in the X-ray beam. NOTE: Write down the new value in the relevant box in the appendix of this manual. I-Max Touch / I-Max Touch 3D – Ver. 4 Page: 146...
-
Page 147: Ceph Sensor Centering
1. Measure the distance between the borders of the image and the borders of the central (black) vertical stripe. The right and left distances must not differ more than ±3mm (see below). Figure 59 I-Max Touch / I-Max Touch 3D – Ver. 4 Page: 147... -
Page 148: Secondary Collimator Centering
7. Press the "P" key then use the up and down arrow keys to set the exposure parameters (suggested values: 60kV, 6mA and 0.5s). I-Max Touch / I-Max Touch 3D – Ver. 4 Page: 148... - Page 149 Increasing the offset value if the distance on the left is smaller than the distance on the right. b. Decreasing the offset value it if the distance on the left is larger than the distance on the right. I-Max Touch / I-Max Touch 3D – Ver. 4 Page: 149...
-
Page 150: Soft Tissue Filter (Stf) Adjustment
WARNING: X-rays will be emitted during the performance of these operations. The authorised technicians are therefore recommended to use the greatest caution and to comply with the safety regulations and laws of their country. I-Max Touch / I-Max Touch 3D – Ver. 4 Page: 150... - Page 151 >0< = Y, T = N Press the "Test" key (T) again to exit the menu and store the changes. NOTE: Write down the new value in the appendix of this manual. I-Max Touch / I-Max Touch 3D – Ver. 4 Page: 151...
-
Page 152: Procedure Computer Replacement And Software Update
The O.S.P. (drivers and utilities), the calibration files of the sensor(s) and the imaging software have been installed and configured on the computer. Refer to the computer installation instructions for the different installation procedures. SCHEMATICS AND DRAWINGS I-MAX TOUCH I-Max Touch / I-Max Touch 3D – Ver. 4 Page: 152... -
Page 153: General Diagram
SERVICE MANUAL General diagram 10.1 General diagram - Code 39069001 Rev. 4 - Page 1 of 9 I-Max Touch / I-Max Touch 3D – Ver. 4 Page: 153... - Page 154 SERVICE MANUAL General diagram - Code 39069001 Rev. 4 - Page 2 of 9 I-Max Touch / I-Max Touch 3D – Ver. 4 Page: 154...
- Page 155 SERVICE MANUAL General diagram - Code 39069001 Rev. 4 - Page 3 of 9 I-Max Touch / I-Max Touch 3D – Ver. 4 Page: 155...
- Page 156 SERVICE MANUAL General diagram - Code 39069001 Rev. 4 - Page 4 of 9 I-Max Touch / I-Max Touch 3D – Ver. 4 Page: 156...
- Page 157 SERVICE MANUAL General diagram - Code 39069001 Rev. 4 - Page 5 of 9 I-Max Touch / I-Max Touch 3D – Ver. 4 Page: 157...
- Page 158 SERVICE MANUAL General diagram - Code 39069001 Rev. 4 - Page 6 of 9 I-Max Touch / I-Max Touch 3D – Ver. 4 Page: 158...
- Page 159 SERVICE MANUAL General diagram - Code 39069001 Rev. 4 - Page 7 of 9 I-Max Touch / I-Max Touch 3D – Ver. 4 Page: 159...
- Page 160 SERVICE MANUAL General diagram - Code 39069001 Rev. 4 - Page 8 of 9 I-Max Touch / I-Max Touch 3D – Ver. 4 Page: 160...
- Page 161 SERVICE MANUAL General diagram - Code 39069001 Rev. 4 - Page 9 of 9 I-Max Touch / I-Max Touch 3D – Ver. 4 Page: 161...
-
Page 162: Layout Column Cpu Board A1
SERVICE MANUAL Layout column CPU board A1 10.2 Layout column CPU board A1 - Code 58071010 Rev. P - Page 1 of 1 I-Max Touch / I-Max Touch 3D – Ver. 4 Page: 162... -
Page 163: Circuit Diagram Column Cpu Board A1
SERVICE MANUAL Circuit diagram column CPU board A1 10.3 Circuit diagram column CPU board A1 - Code 39079005 Rev. P - Page 1 of 3 I-Max Touch / I-Max Touch 3D – Ver. 4 Page: 163... - Page 164 SERVICE MANUAL Circuit diagram column CPU board A1 - Code 39079005 Rev. P - Page 2 of 3 I-Max Touch / I-Max Touch 3D – Ver. 4 Page: 164...
- Page 165 SERVICE MANUAL Circuit diagram column CPU board A1 - Code 39079005 Rev. P - Page 3 of 3 I-Max Touch / I-Max Touch 3D – Ver. 4 Page: 165...
-
Page 166: Layout Control Panel Board A4
SERVICE MANUAL Layout control panel board A4 10.4 Layout keyboard board STC - Code OW10139 Rev. 2.0 - Page 1 of 1 I-Max Touch / I-Max Touch 3D – Ver. 4 Page: 166... -
Page 167: Layout Cpu Board A5
SERVICE MANUAL Layout CPU board A5 10.5 Layout CPU board A5 - Code 58073033 Rev. 2 - Page 1 of 1 I-Max Touch / I-Max Touch 3D – Ver. 4 Page: 167... -
Page 168: Circuit Diagram Cpu Board A5
SERVICE MANUAL Circuit diagram CPU board A5 10.6 Circuit diagram CPU board A5 - Code 39079036 Rev. 1 - Page 1 of 9 I-Max Touch / I-Max Touch 3D – Ver. 4 Page: 168... - Page 169 SERVICE MANUAL Circuit diagram CPU board A5 - Code 39079036 Rev. 1 - Page 2 of 9 I-Max Touch / I-Max Touch 3D – Ver. 4 Page: 169...
- Page 170 SERVICE MANUAL Circuit diagram CPU board A5 - Code 39079036 Rev. 1 - Page 3 of 9 I-Max Touch / I-Max Touch 3D – Ver. 4 Page: 170...
- Page 171 SERVICE MANUAL Circuit diagram CPU board A5 - Code 39079036 Rev. 1 - Page 4 of 9 I-Max Touch / I-Max Touch 3D – Ver. 4 Page: 171...
- Page 172 SERVICE MANUAL Circuit diagram CPU board A5 - Code 39079036 Rev. 1 - Page 5 of 9 I-Max Touch / I-Max Touch 3D – Ver. 4 Page: 172...
- Page 173 SERVICE MANUAL Ciircuit diagram CPU board A5 - Code 39079036 Rev. 1 - Page 6 of 9 I-Max Touch / I-Max Touch 3D – Ver. 4 Page: 173...
- Page 174 SERVICE MANUAL Circuit diagram CPU board A5 - Code 39079036 Rev. 1 - Page 7 of 9 I-Max Touch / I-Max Touch 3D – Ver. 4 Page: 174...
- Page 175 SERVICE MANUAL Circuit diagram CPU board A5 - Code 39079036 Rev. 1 - Page 8 of 9 I-Max Touch / I-Max Touch 3D – Ver. 4 Page: 175...
- Page 176 SERVICE MANUAL Circuit diagram CPU board A5 - Code 39079036 Rev. 1 - Page 9 of 9 I-Max Touch / I-Max Touch 3D – Ver. 4 Page: 176...
-
Page 177: Layout Microprocessor Board A6
SERVICE MANUAL Layout microprocessor board A6 10.7 Layout microprocessor board A6 - Code 58073042 Rev. 1 - Page 1 of 1 I-Max Touch / I-Max Touch 3D – Ver. 4 Page: 177... -
Page 178: Circuit Diagram Microprocessor Board A6
SERVICE MANUAL Circuit diagram microprocessor board A6 10.8 Circuit diagram microprocessor board A6 - Code 39079009 Rev. 1 - Page 1 of 4 I-Max Touch / I-Max Touch 3D – Ver. 4 Page: 178... - Page 179 SERVICE MANUAL Circuit diagram microprocessor board A6 - Code 39079009 Rev. 1 - Page 2 of 4 I-Max Touch / I-Max Touch 3D – Ver. 4 Page: 179...
- Page 180 SERVICE MANUAL Circuit diagram microprocessor board A6 - Code 39079009 Rev. 1 - Page 3 of 4 I-Max Touch / I-Max Touch 3D – Ver. 4 Page: 180...
- Page 181 SERVICE MANUAL Circuit diagram microprocessor board A6 - Code 39079009 Rev. 1 - Page 4 of 4 I-Max Touch / I-Max Touch 3D – Ver. 4 Page: 181...
-
Page 182: Layout And Circuit Diagram Rotation Arm Board A7
SERVICE MANUAL Layout and circuit diagram rotation arm board A7 10.9 Layout & circuit diagram rotation arm board A7 - Code 58073025 Rev. P - Page 1 of 1 I-Max Touch / I-Max Touch 3D – Ver. 4 Page: 182... -
Page 183: Layout Generator Cpu Board A9
SERVICE MANUAL Layout generator CPU board A9 10.10 Layout generator CPU board A9 - Code 58074037 Rev. P - Page 1 of 1 I-Max Touch / I-Max Touch 3D – Ver. 4 Page: 183... -
Page 184: Circuit Diagram Generator Cpu Board A9
SERVICE MANUAL Circuit diagram generator CPU board A9 10.11 Circuit diagram generator CPU board A9 - Code 39079040 Rev. P - Page 1 of 2 I-Max Touch / I-Max Touch 3D – Ver. 4 Page: 184... - Page 185 SERVICE MANUAL Circuit diagram generator CPU board A9 - Code 39079040 Rev. P - Page 2 of 2 I-Max Touch / I-Max Touch 3D – Ver. 4 Page: 185...
-
Page 186: Layout Generator Board A10
SERVICE MANUAL Layout generator board A10 10.12 Layout generator board A10 - Code 58074021 Rev. 9 - Page 1 of 1 I-Max Touch / I-Max Touch 3D – Ver. 4 Page: 186... -
Page 187: Circuit Diagram Generator Board A10
SERVICE MANUAL Circuit diagram generator board A10 10.13 Circuit diagram generator board A10 - Code 39079013 Rev. 7 - Page 1 of 3 I-Max Touch / I-Max Touch 3D – Ver. 4 Page: 187... - Page 188 SERVICE MANUAL Circuit diagram generator board A10 - Code 39079013 Rev. 7 - Page 2 of 3 I-Max Touch / I-Max Touch 3D – Ver. 4 Page: 188...
- Page 189 SERVICE MANUAL Circuit diagram generator board A10 - Code 39079013 Rev. 7 - Page 3 of 3 I-Max Touch / I-Max Touch 3D – Ver. 4 Page: 189...
-
Page 190: Layout And Circuit Diagram Ceph Arm Connection Board A12
10.14 + FOTOCEL. (+PHOTOCELL) - FOTOCEL. (-PHOTOCELL) + FOTOCEL. (+PHOTOCELL) - FOTOCEL. (-PHOTOCELL) Layout & circuit diagram board A12 - Code 58098150 Rev. 0 - Page 1 of 1 I-Max Touch / I-Max Touch 3D – Ver. 4 Page: 190... -
Page 191: Layout Dspu Board A14
SERVICE MANUAL Layout DSPU board A14 10.15 Layout DSPU board A14 - - Page 1 of 1 I-Max Touch / I-Max Touch 3D – Ver. 4 Page: 191... -
Page 192: Schematics And Drawings I-Max Touch 3D
SERVICE MANUAL SCHEMATICS AND DRAWINGS I-MAX TOUCH 3D I-Max Touch / I-Max Touch 3D – Ver. 4 Page: 192... -
Page 193: General Diagram
SERVICE MANUAL General diagram 11.1 General diagram - Code 39079003 Rev. 0 - Page 1 of 9 I-Max Touch / I-Max Touch 3D – Ver. 4 Page: 193... - Page 194 SERVICE MANUAL General diagram - Code 39079003 Rev. 0 - Page 2 of 9 I-Max Touch / I-Max Touch 3D – Ver. 4 Page: 194...
- Page 195 SERVICE MANUAL General diagram - Code 39079003 Rev. 0 - Page 3 of 9 I-Max Touch / I-Max Touch 3D – Ver. 4 Page: 195...
- Page 196 SERVICE MANUAL General diagram - Code 39079003 Rev. 0 - Page 4 of 9 I-Max Touch / I-Max Touch 3D – Ver. 4 Page: 196...
- Page 197 SERVICE MANUAL General diagram - Code 39079003 Rev. 0 - Page 5 of 9 I-Max Touch / I-Max Touch 3D – Ver. 4 Page: 197...
- Page 198 SERVICE MANUAL General diagram - Code 39079003 Rev. 0 - Page 6 of 9 I-Max Touch / I-Max Touch 3D – Ver. 4 Page: 198...
- Page 199 SERVICE MANUAL General diagram - Code 39079003 Rev. 0 - Page 7 of 9 I-Max Touch / I-Max Touch 3D – Ver. 4 Page: 199...
- Page 200 SERVICE MANUAL General diagram - Code 39079003 Rev. 0 - Page 8 of 9 I-Max Touch / I-Max Touch 3D – Ver. 4 Page: 200...
- Page 201 SERVICE MANUAL General diagram - Code 39079003 Rev. 0 - Page 9 of 9 I-Max Touch / I-Max Touch 3D – Ver. 4 Page: 201...
-
Page 202: Layout Column Cpu Board A1
SERVICE MANUAL Layout column CPU board A1 11.2 Layout column CPU board A1 - Code 58071010 Rev. P - Page 1 of 1 I-Max Touch / I-Max Touch 3D – Ver. 4 Page: 202... -
Page 203: Circuit Diagram Column Cpu Board A1
SERVICE MANUAL Circuit diagram column CPU board A1 11.3 Circuit diagram column CPU board A1 - Code 39079005 Rev. P - Page 1 of 3 I-Max Touch / I-Max Touch 3D – Ver. 4 Page: 203... - Page 204 SERVICE MANUAL Circuit diagram column CPU board A1 - Code 39079005 Rev. P - Page 2 of 3 I-Max Touch / I-Max Touch 3D – Ver. 4 Page: 204...
- Page 205 SERVICE MANUAL Circuit diagram column CPU board A1 - Code 39079005 Rev. P - Page 3 of 3 I-Max Touch / I-Max Touch 3D – Ver. 4 Page: 205...
-
Page 206: Layout Keyboard Board A4
SERVICE MANUAL Layout keyboard board A4 11.4 Layout keyboard board STC - Code OW10139 Rev. 2.0 - Page 1 of 1 I-Max Touch / I-Max Touch 3D – Ver. 4 Page: 206... -
Page 207: Layout Cpu Board A5
SERVICE MANUAL Layout CPU board A5 11.5 Layout CPU board A5 - Code 58073033 Rev. P - Page 1 of 1 I-Max Touch / I-Max Touch 3D – Ver. 4 Page: 207... -
Page 208: Circuit Diagram Cpu Board A5
SERVICE MANUAL Circuit diagram CPU board A5 11.6 Circuit diagram CPU board A5 - Code 39079036 Rev. P - Page 1 of 9 I-Max Touch / I-Max Touch 3D – Ver. 4 Page: 208... - Page 209 SERVICE MANUAL Circuit diagram CPU board A5 - Code 39079036 Rev. P - Page 2 of 9 I-Max Touch / I-Max Touch 3D – Ver. 4 Page: 209...
- Page 210 SERVICE MANUAL Circuit diagram CPU board A5 - Code 39079036 Rev. P - Page 3 of 9 I-Max Touch / I-Max Touch 3D – Ver. 4 Page: 210...
- Page 211 SERVICE MANUAL Circuit diagram CPU board A5 - Code 39079036 Rev. P - Page 4 of 9 I-Max Touch / I-Max Touch 3D – Ver. 4 Page: 211...
- Page 212 SERVICE MANUAL Circuit diagram CPU board A5 - Code 39079036 Rev. P - Page 5 of 9 I-Max Touch / I-Max Touch 3D – Ver. 4 Page: 212...
- Page 213 SERVICE MANUAL Circuit diagram CPU board A5 - Code 39079036 Rev. P - Page 6 of 9 I-Max Touch / I-Max Touch 3D – Ver. 4 Page: 213...
- Page 214 SERVICE MANUAL Circuit diagram CPU board A5 - Code 39079036 Rev. P - Page 7 of 9 I-Max Touch / I-Max Touch 3D – Ver. 4 Page: 214...
- Page 215 SERVICE MANUAL Circuit diagram CPU board A5 - Code 39079036 Rev. P - Page 8 of 9 I-Max Touch / I-Max Touch 3D – Ver. 4 Page: 215...
- Page 216 SERVICE MANUAL Circuit diagram CPU board A5 - Code 39079036 Rev. P - Page 9 of 9 I-Max Touch / I-Max Touch 3D – Ver. 4 Page: 216...
-
Page 217: Layout Microprocessor Board A6
SERVICE MANUAL Layout microprocessor board A6 11.7 Layout microprocessor board A6 - Code 58073042 Rev. 1 - Page 1 of 1 I-Max Touch / I-Max Touch 3D – Ver. 4 Page: 217... -
Page 218: Circuit Diagram Microprocessor Board A6
SERVICE MANUAL Circuit diagram microprocessor board A6 11.8 Circuit diagram microprocessor board A6 - Code 39079009 Rev. 1 - Page 1 of 4 I-Max Touch / I-Max Touch 3D – Ver. 4 Page: 218... - Page 219 SERVICE MANUAL Circuit diagram microprocessor board A6 - Code 39079009 Rev. 1 - Page 2 of 4 I-Max Touch / I-Max Touch 3D – Ver. 4 Page: 219...
- Page 220 SERVICE MANUAL Circuit diagram microprocessor board A6 - Code 39079009 Rev. 1 - Page 3 of 4 I-Max Touch / I-Max Touch 3D – Ver. 4 Page: 220...
- Page 221 SERVICE MANUAL Circuit diagram microprocessor board A6 - Code 39079009 Rev. 1 - Page 4 of 4 I-Max Touch / I-Max Touch 3D – Ver. 4 Page: 221...
-
Page 222: Layout And Circuit Diagram Rotation Arm Board A7
SERVICE MANUAL Layout and circuit diagram rotation arm board A7 11.9 Layout & circuit diagram rotation arm board A7 - Code 58073025 Rev. P - Page 1 of 1 I-Max Touch / I-Max Touch 3D – Ver. 4 Page: 222... -
Page 223: Layout Generator Cpu Board A9
SERVICE MANUAL Layout generator CPU board A9 11.10 Layout generator CPU board A9 - Code 58074037 Rev. P - Page 1 of 1 I-Max Touch / I-Max Touch 3D – Ver. 4 Page: 223... -
Page 224: Circuit Diagram Generator Cpu Board A9
SERVICE MANUAL Circuit diagram generator CPU board A9 11.11 Circuit diagram generator CPU board A9 - Code 39079040 Rev. P - Page 1 of 2 I-Max Touch / I-Max Touch 3D – Ver. 4 Page: 224... - Page 225 SERVICE MANUAL Circuit diagram generator CPU board A9 - Code 39079040 Rev. P - Page 2 of 2 I-Max Touch / I-Max Touch 3D – Ver. 4 Page: 225...
-
Page 226: Layout Generator Board A10
SERVICE MANUAL Layout generator board A10 11.12 Layout generator board A10 - Code 58074021 Rev. 6 - Page 1 of 1 I-Max Touch / I-Max Touch 3D – Ver. 4 Page: 226... -
Page 227: Circuit Diagram Generator Board A10
SERVICE MANUAL Circuit diagram generator board A10 11.13 Circuit diagram generator board A10 - Code 39079013 Rev. 5 - Page 1 of 3 I-Max Touch / I-Max Touch 3D – Ver. 4 Page: 227... - Page 228 SERVICE MANUAL Circuit diagram generator board A10 - Code 39079013 Rev. 5 - Page 2 of 3 I-Max Touch / I-Max Touch 3D – Ver. 4 Page: 228...
- Page 229 SERVICE MANUAL Circuit diagram generator board A10 - Code 39079013 Rev. 5 - Page 3 of 3 I-Max Touch / I-Max Touch 3D – Ver. 4 Page: 229...
-
Page 230: Layout And Circuit Diagram Ceph Arm Connection Board A12
11.14 + FOTOCEL. (+PHOTOCELL) - FOTOCEL. (-PHOTOCELL) + FOTOCEL. (+PHOTOCELL) - FOTOCEL. (-PHOTOCELL) Layout & circuit diagram board A12 - Code 58098150 Rev. 0 - Page 1 of 1 I-Max Touch / I-Max Touch 3D – Ver. 4 Page: 230... -
Page 231: Layout Power Hub Board A21
SERVICE MANUAL Layout power hub board A21 11.15 Layout power hub board A21 - Code 58073035 Rev. P - Page 1 of 1 I-Max Touch / I-Max Touch 3D – Ver. 4 Page: 231... -
Page 232: Circuit Diagram Power Hub Board A21
SERVICE MANUAL Circuit diagram power hub board A21 11.16 Circuit diagram power hub board A21 - Code 39079038 Rev. P - Page 1 of 1 I-Max Touch / I-Max Touch 3D – Ver. 4 Page: 232... -
Page 233: Layout Vdsib Board A22
SERVICE MANUAL Layout VDSIB board A22 11.17 Layout VDSIB board A22 - Code 58073031 Rev. P - Page 1 of 1 I-Max Touch / I-Max Touch 3D – Ver. 4 Page: 233... -
Page 234: Circuit Diagram Vdsib Board A22
SERVICE MANUAL Circuit diagram VDSIB board A22 11.18 Circuit diagram VDSIB board A22 - Code 39079042 Rev. P - Page 1 of 11 I-Max Touch / I-Max Touch 3D – Ver. 4 Page: 234... - Page 235 SERVICE MANUAL Circuit diagram VDSIB board A22 - Code 39079042 Rev. P - Page 2 of 11 I-Max Touch / I-Max Touch 3D – Ver. 4 Page: 235...
- Page 236 SERVICE MANUAL Circuit diagram VDSIB board A22 - Code 39079042 Rev. P - Page 3 of 11 I-Max Touch / I-Max Touch 3D – Ver. 4 Page: 236...
- Page 237 SERVICE MANUAL Circuit diagram VDSIB board A22 - Code 39079042 Rev. P - Page 4 of 11 I-Max Touch / I-Max Touch 3D – Ver. 4 Page: 237...
- Page 238 SERVICE MANUAL Circuit diagram VDSIB board A22 - Code 39079042 Rev. P - Page 5 of 11 I-Max Touch / I-Max Touch 3D – Ver. 4 Page: 238...
- Page 239 SERVICE MANUAL Circuit diagram VDSIB board A22 - Code 39079042 Rev. P - Page 6 of 11 I-Max Touch / I-Max Touch 3D – Ver. 4 Page: 239...
- Page 240 SERVICE MANUAL Circuit diagram VDSIB board A22 - Code 39079042 Rev. P - Page 7 of 11 I-Max Touch / I-Max Touch 3D – Ver. 4 Page: 240...
- Page 241 SERVICE MANUAL Circuit diagram VDSIB board A22 - Code 39079042 Rev. P - Page 8 of 11 I-Max Touch / I-Max Touch 3D – Ver. 4 Page: 241...
- Page 242 SERVICE MANUAL Circuit diagram VDSIB board A22 - Code 39079042 Rev. P - Page 9 of 11 I-Max Touch / I-Max Touch 3D – Ver. 4 Page: 242...
- Page 243 SERVICE MANUAL Circuit diagram VDSIB board A22 - Code 39079042 Rev. P - Page 10 of 11 I-Max Touch / I-Max Touch 3D – Ver. 4 Page: 243...
- Page 244 SERVICE MANUAL Circuit diagram VDSIB board A22 - Code 39079042 Rev. P - Page 11 of 11 I-Max Touch / I-Max Touch 3D – Ver. 4 Page: 244...
-
Page 245: Layout Dspu Board A14
SERVICE MANUAL Layout DSPU board A14 11.19 Layout DSPU board A14 - Page 1 of 1 I-Max Touch / I-Max Touch 3D – Ver. 4 Page: 245... -
Page 246: Spare Parts I-Max Touch
6207091900 Generator board A10 power supply cable X2-X70 6207092200 DSPU board – Touch screen connection cable J1-J2 / J3-J4 6207090600 CanBus cable X11 6207092000 Ethernet cable 5007090200 USB2 cable I-Max Touch / I-Max Touch 3D – Ver. 4 Page: 246... - Page 247 SERVICE MANUAL I-Max Touch / I-Max Touch 3D – Ver. 4 Page: 247...
-
Page 248: Head Assembly
Carriage belt model HTD 843-3M-15 6607303000 CPU board assy 5807303300 CPU board A5 6607302300 Microprocessor board A6 5807302500 Rotation group board A7 5807302900 Optical sersor board B1 / B2 / B3 I-Max Touch / I-Max Touch 3D – Ver. 4 Page: 248... - Page 249 SERVICE MANUAL 6 (B3) 6 (B1) 6 (B2) I-Max Touch / I-Max Touch 3D – Ver. 4 Page: 249...
-
Page 250: Rotation Arm
Temple clasps release knob (1x) 6606070300 Mobile sensor covers kit 6606070400 PAN only sensor covers kit for S/N ≤ 09070262 6606070900 PAN only sensor covers kit for S/N ≥ 09070263 I-Max Touch / I-Max Touch 3D – Ver. 4 Page: 250... - Page 251 SERVICE MANUAL 5 (B 6 / B 7 ) 5 (B 8 / B 9 ) I-Max Touch / I-Max Touch 3D – Ver. 4 Page: 251...
-
Page 252: Ceph Arm (S/N ≤ 10020532)
Ceph arm motor and signals cable X23 / X24 / X34 – X1 / X2 6207080800 Ceph arm cable J3 / J4 – X51 / X52 6207080900 Ground cable # 3 I-Max Touch / I-Max Touch 3D – Ver. 4 Page: 252... - Page 253 SERVICE MANUAL 1 (B11) 1 (B10) I-Max Touch / I-Max Touch 3D – Ver. 4 Page: 253...
-
Page 254: Ceph Arm (S/N ≥ 10020533)
Ceph arm motor and signals cable X23 / X24 / X34 – X1 / X2 6207080800 Ceph arm cable J3 / J4 – X51 / X52 6207080900 Ground cable # 3 I-Max Touch / I-Max Touch 3D – Ver. 4 Page: 254... - Page 255 SERVICE MANUAL 1 (B11) 1 (B10) I-Max Touch / I-Max Touch 3D – Ver. 4 Page: 255...
-
Page 256: Covers
Note 6606040205 Upper cover 5406201005 Tubehead cover 6607201205 Generator board A10 cover 5106094200 Generator board A10 cover I-Max Touch logo 5407201105 Rotation arm lower cover 5407011905 Temple clamp cover 6606070005 PAN / CEPH Sensor holder internal cover 6606160600 Console covers (upper + lower) - Page 257 SERVICE MANUAL I-Max Touch / I-Max Touch 3D – Ver. 4 Page: 257...
-
Page 258: Accessories And Service Tools
6607080900 CARPUS positioning plate 6107900100 Laser centring tool 5207900200 Symmetry check tool 5209900900 Digital sensor centring tool 5607900800 Copper filter for digital sensor 6606900200 Adjustment and calibration tools kit I-Max Touch / I-Max Touch 3D – Ver. 4 Page: 258... - Page 259 SERVICE MANUAL Symmetry check tool (P/N 5207900200) Copper filter for digital sensor (P/N 5607900800) Digital sensor centering tool (P/N 5209900900) I-Max Touch / I-Max Touch 3D – Ver. 4 Page: 259...
-
Page 260: Spare Parts I-Max Touch 3D
DSPU board – Touch screen connection cable J1 - J2 6207092200 / J3 - J4 6207090900 CanBus cable X18 6207090600 CanBus cable X11 6207092000 Ethernet cable 5007090200 USB2 cable I-Max Touch / I-Max Touch 3D – Ver. 4 Page: 260... - Page 261 SERVICE MANUAL I-Max Touch / I-Max Touch 3D – Ver. 4 Page: 261...
-
Page 262: Head Assembly
Microprocessor board A6 5807302500 Rotation group board A7 5807303500 Power HUB board A21 5807303100 VDSIB board A22 5807302900 Optical sensor board B1 / B2 / B3 4695444100 DSPU board I-Max Touch / I-Max Touch 3D – Ver. 4 Page: 262... - Page 263 SERVICE MANUAL 6 (*) 8 (B3) 8 (B1) 8 (B2) (*) Under CPU board support I-Max Touch / I-Max Touch 3D – Ver. 4 Page: 263...
-
Page 264: Rotation Arm
Fans power supply and temperature sensor board 6607070600 Upper fan assembly 6607070700 Lower double fan assembly 6606010100 Temple clamp centering device assembly 6607010308 Left temple clamp 6607010408 Right temple clamp 6607014100 Temple clamp support I-Max Touch / I-Max Touch 3D – Ver. 4 Page: 264... - Page 265 SERVICE MANUAL 5 (B8 / B9) I-Max Touch / I-Max Touch 3D – Ver. 4 Page: 265...
-
Page 266: Ceph Arm
Ceph arm motor and signals cable X23 / X24 / X34 - X1 / X2 6207080800 Ceph arm cable J3 / J4 - X51 / X52 6207080900 Ground cable #3 8506071100 Pan / Ceph mobile sensor assembly I-Max Touch / I-Max Touch 3D – Ver. 4 Page: 266... - Page 267 SERVICE MANUAL 1 (B11) 1 (B10) I-Max Touch / I-Max Touch 3D – Ver. 4 Page: 267...
-
Page 268: Covers
Note 6606040205 Upper cover 5406201005 Tubehead cover 6607201205 Generator board A10 cover 5106200000 Generator board A10 cover I-Max Touch logo 5407201105 Rotation arm lower cover 6607070505 Internal 3D sensor cover 6607070605 External 3D sensor cover 6606160600 Console covers (upper + lower) - Page 269 SERVICE MANUAL I-Max Touch / I-Max Touch 3D – Ver. 4 Page: 269...
-
Page 270: Accessories And Service Tools
Pan tool 5207900200 Symmetry check tool Pan tool 5209900900 Digital sensor centering tool Ceph tool 5607900800 Copper filter for digital sensor Ceph tool 6606900200 Adjustment and calibration tools kit I-Max Touch / I-Max Touch 3D – Ver. 4 Page: 270... - Page 271 SERVICE MANUAL Symmetry check tool (P/N 5207900200) Copper filter for digital sensor (P/N 5607900800) Digital sensor centering tool (P/N 5209900900) I-Max Touch / I-Max Touch 3D – Ver. 4 Page: 271...
-
Page 272: Appendices
72 kV Medium Medium 9 mA 9 mA 6 mA 6 mA 74 kV 68 kV 76 kV 74 kV Large Large 9 mA 9 mA 6 mA 6 mA I-Max Touch / I-Max Touch 3D – Ver. 4 Page: 272... - Page 273 60 kV Medium Medium 12 mA 10 mA 6 mA 6 mA 80 kV 76 kV 60 kV 60 kV Large Large 10 mA 10 mA 6 mA 6 mA I-Max Touch / I-Max Touch 3D – Ver. 4 Page: 273...
-
Page 274: Appendix B: Setup Parameters Table
The table also contains columns with blank cells; those cells must be filled in when during installation or during the life on the unit any of the listed parameters are modified (e.g. after replacing a motor or a positioning sensor). I-Max Touch / I-Max Touch 3D – Ver. 4 Page: 274... - Page 275 SERVICE MANUAL I-Max Touch / I-Max Touch 3D Unit code: _____________________________________________________ Unit S/N: _____________________________________________________ U.I.C.: _____________________________________________________ Pleora MAC address: _____________________________________________________ Factory Parameter setting setting setting setting setting Date Language (EN, FR, SP, IT, PO, DE, NL, Digital ceph status Off=disabled...
Need help?
Do you have a question about the i-max touch and is the answer not in the manual?
Questions and answers