TESTO 270 Instruction Manual
Deep-frying oil tester
Hide thumbs
Also See for 270:
- Instruction manual (32 pages) ,
- Short manual (4 pages) ,
- Instruction manual (31 pages)
Table of Contents
Advertisement
Advertisement
Table of Contents

Related Manuals for TESTO 270


Summary of Contents for TESTO 270
- Page 1 270 · Deep-frying Oil Tester Instruction manual...
- Page 3 You can order an ISO calibration from Testo's calibration subsidiary, Testo Industrial Services in Kirchzarten, using order number 0520 0028. This means your testo 270 will be calibrated at two points (at approx. 3% and at approx. 24% TPM) under precise laboratory conditions.
-
Page 4: Table Of Contents
1 Contents Pos: 2 /TD/Überschriften/1. Inhalt @ 0\mod_1177587817070_79.docx @ 1243 @ 1 @ 1 Contents Contents ....................4 Safety and the environment ..............6 2.1. About this document ............... 6 2.2. Ensure safety .................. 7 2.3. Protecting the environment ............. 7 Specifications .................. - Page 5 1 Contents Pos: 3 /TD/--- Seitenwechsel --- @ 0\mod_1173774430601_0.docx @ 283 @ @ 1...
-
Page 6: Safety And The Environment
2 Safety and the environment Pos: 4 /TD/Überschriften/2. Sicherheit und Umwelt @ 0\mod_1173774719351_79.docx @ 292 @ 1 @ 1 Safety and the environment Pos: 5 /TD/Überschriften/2.1 Zu diesem Dokument @ 0\mod_1173775252351_79.docx @ 346 @ 2 @ 1 2.1. About this document Pos: 6 /TD/Sicherheit und Umwelt/Zu diesem Dokument/Verwendung/Verwendung (Standard) @ 0\mod_1173775068554_79.docx @ 337 @ 5 @ 1 >... -
Page 7: Ensure Safety
Do not use any force. Pos: 18 /TD/Sicherheit und Umwelt/Sicherheit gewährleisten/testo 270/Gerät bei Beschädigungen nicht in Betrieb nehmen testo 275 @ 17\mod_1426754904684_79.docx @ 212237 @ @ 1 > Do not operate the instrument if there are signs of damage at the housing. -
Page 8: Specifications
Pos: 29 /TD/Überschriften/3.1 Verwendung @ 0\mod_1176211016437_79.docx @ 695 @ 2 @ 1 3.1. Pos: 30 /TD/Leistungsbeschreibung/Verwendung/testo 2xx/Verwendung (testo275) @ 15\mod_1407394154990_79.docx @ 194132 @ @ 1 The testo 270 is a handy measuring instrument for fast testing of cooking oils. The TPM value (total polar materials) enables a statement on the ageing of cooking oils due to the effects of heat. - Page 9 3 Specifications Feature Values Resolution Temperature: 0.1 °C / 0.1 °F TPM: 0.5% Power supply Batteries: 2x micro (type AAA) Battery (micro AAA) Designation according to IEC: LR03 Chem. composition: Zn-MnO2 (alkaline) Battery life at 20 °C Approx. 25 hrs continuous operation (corresponds to 500 measurements) without display illumination Temperature...
-
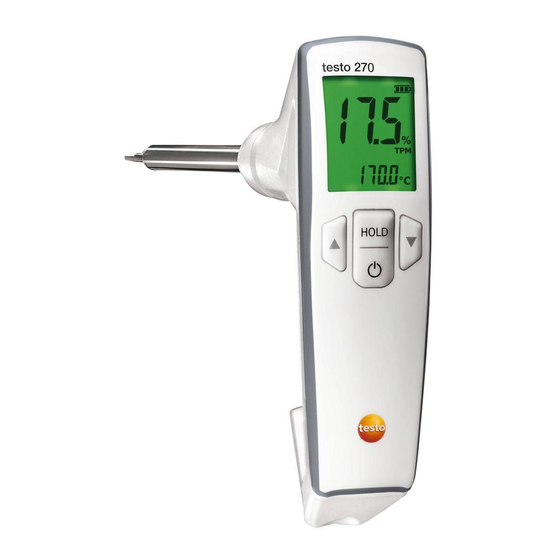
Page 10: Product Description
Pos: 34 /TD/Überschriften/4. Produktbeschreibung @ 0\mod_1173774846679_79.docx @ 310 @ 1 @ 1 Product description Pos: 35 /TD/Überschriften/4.1 Übersicht @ 0\mod_1176379946003_79.docx @ 733 @ 2 @ 1 4.1. Overview Pos: 36 /TD/Produktbeschreibung/Übersicht/testo 275/Übersicht (testo275) @ 15\mod_1407396818539_79.docx @ 194203 @ @ 1 1 Display 2 Control keys 3 Battery compartment 4 Probe shaft 5 Oil quality (%TPM) and temperature sensor 6 Min. - Page 11 Readings held (manually) Auto-Hold Readings held (automatically) °C / °F Temperature in °C or °F Pos: 38 /TD/Produktbeschreibung/Übersicht/testo 275/wichtige Displaymeldungen (testo 275) @ 15\mod_1407401135429_79.docx @ 194273 @ 5 @ 1 Important display messages Item shown on the Explanation display lights up Instrument is ready to measure, sensor is not in oil.
-
Page 12: Basic Properties
- Configure instrument • on/off; yes/no - Configure instrument Pos: 40 /TD/Produktbeschreibung/Übersicht/testo 275/Batteriefach (testo 275) @ 15\mod_1407401830742_79.docx @ 194343 @ 5 @ 1 Battery compartment Pos: 41 /TD/Überschriften/4.2 Grundlegende Eigenschaften @ 0\mod_1176380399692_79.docx @ 742 @ 2 @ 1 4.2. Basic properties Pos: 42 /TD/Produktbeschreibung/Grundlegende Eigenschaften/testo 270/Stromversorgung @ 2\mod_1206701354953_79.docx @ 13477 @ 5 @ 1... -
Page 13: First Steps
Pos: 45 /TD/Überschriften/5.1 Inbetriebnahme @ 0\mod_1185342823812_79.docx @ 1885 @ 2 @ 1 5.1. Commissioning Pos: 46 /TD/Erste Schritte/testo 275/Batterien einlegen (testo 275) @ 15\mod_1407402146449_79.docx @ 194379 @ 5 @ 1 Inserting batteries CAUTION Incorrectly inserted batteries can damage the instrument! >... - Page 14 The instrument switches to the measuring mode. lights up on the display, the instrument is ready for use. 7. If necessary, switch instrument off. Pos: 47 /TD/Erste Schritte/testo 275/Aufbewahrung @ 15\mod_1407407083273_79.docx @ 194414 @ 5 @ 1 For storage of the instrument Suspension attachment...
-
Page 15: Getting To Know The Product
Pos: 48 /TD/Überschriften/5.3 Produkt kennenlernen @ 0\mod_1185342901015_79.docx @ 1894 @ 2 @ 1 5.2. Getting to know the product Pos: 49 /TD/Erste Schritte/testo 275/Gerät ein-/ ausschalten (testo 275) @ 16\mod_1408009443923_79.docx @ 196896 @ 355 @ 1 5.2.1. Switching the instrument on/off To switch on >... -
Page 16: Setting The Tpm Limit Values
To activate/deactivate the alarm indicator, see Configuring the instrument, page 18. To set the TPM limit values, see Setting the TPM limit values, page Pos: 52 /TD/Erste Schritte/testo 275/TPM-Grenzwerte einstellen (testo 275) @ 15\mod_1407409482149_79.docx @ 194519 @ 355 @ 1 5.2.2.2. Setting the TPM limit values The TPM limit values can be between 0 and 40%. -
Page 17: Hold Function
To activate/deactivate the Auto-Hold function, see Carrying out the configuration, page 18 Pos: 55 /TD/Erste Schritte/testo 275/Auto off Funktion (testo 275) @ 16\mod_1408003278359_79.docx @ 196861 @ 4 @ 1 5.2.2.5. Auto-off function When the Auto-off function is activated, the instrument automatically switches off after a certain time •... -
Page 18: Configuring The Instrument
5 First steps Pos: 57 /TD/Erste Schritte/testo 275/Gerät konfigurieren (testo 275) @ 15\mod_1407410840205_79.docx @ 194589 @ 35 @ 1 5.2.3. Configuring the instrument Setting options in the configuration mode Configurations Setting options Setting the TPM limit values Lower TPM limit value... - Page 19 5 First steps If an incorrect PIN is entered, the instrument switches into measuring mode. When the configuration menu is not locked, you can gain access by setting the limit values. 2. Set the alarm limit values. Alarm lights up in the display. >...
-
Page 20: Locking / Unlocking Configurations
Selection of no: no reset, adjustment value is retained). Pos: 59 /TD/Erste Schritte/testo 275/Konfiguration verlassen / speichern @ 15\mod_1407412864655_79.docx @ 194659 @ 5 @ 1 Quitting configuration mode early and saving You can quit the configuration mode early. - Page 21 5 First steps If an incorrect PIN is entered, the instrument switches into measuring mode. The configuration mode is enabled for the duration of the settings being carried out. Deactivate PIN: > Go through the configuration mode with [Hold], until light up in the display.
-
Page 22: Using The Product
6 Using the product Pos: 62 /TD/Überschriften/6. Produkt verwenden @ 0\mod_1173774928554_79.docx @ 328 @ 1 @ 1 Using the product Pos: 63 /TD/Produkt verwenden/testo 275/Allgemeine Messhinweise (testo 275) @ 15\mod_1407491032301_79.docx @ 194774 @ 25555 @ 1 6.1. General measurement information The testo 270 enables several measurements to be carried out one immediately after the other without any waiting times. -
Page 23: Carrying Out Measurements
The results of this method are in most cases comparable with the % TPM value. PTG ≈ % TPM/2 Pos: 64 /TD/Produkt verwenden/testo 275/Messungen durchführen (testo 275) @ 15\mod_1407494268340_79.docx @ 194919 @ 255 @ 1 6.2. Carrying out measurements ATTENTION Avoid improper handling of the appliance. - Page 24 6 Using the product frying basket, pan walls), as these may affect the measurement result. Minimum distance from metal parts: 1 cm on each side. • Measurement in hot oil min. 40 °C, max. 200 °C. • Adhere to min. and max. marking when immersing in oil.
-
Page 25: Function Test
4. Read the measurement values. 5. To switch to the measuring mode: Briefly press [Hold] (< 1 sec). Pos: 65 /TD/Produkt verwenden/testo 270/Funktionstest @ 4\mod_1248176181060_79.docx @ 46233 @ 2 @ 1 6.3. Function test For a simple function test without adjustment (accuracy... -
Page 26: Maintaining The Product
7 Maintaining the product Pos: 67 /TD/Überschriften/7. Produkt instand halten @ 0\mod_1173789831362_79.docx @ 397 @ 1 @ 1 Maintaining the product Pos: 68 /TD/Produkt instand halten/testo 275/Batterien wechseln (testo 275) @ 15\mod_1407494908084_79.docx @ 194985 @ 2 @ 1 7.1. Changing batteries... -
Page 27: Cleaning The Housing
2. Allow sensor and probe shaft to cool until there is no longer a risk of burns. 3. Clean sensor before the oil residues cool down. Pos: 70 /TD/Produkt instand halten/testo 275/Gehäuse reinigen (testo 275) @ 16\mod_1408017834842_79.docx @ 196931 @ 2 @ 1 7.3. Cleaning the housing Requirement: The instrument is switched off. - Page 28 [Hold] during the display test for approx. 2 secs. When the is deactivated, Alarm lights up in the display. > when the PIN is activated: Enter PIN. typically, based on Testo in-house reference, at an ambient temperature of 25 °C.
- Page 29 7 Maintaining the product 2. Go through the configuration mode with [Hold], until light up in the display. 3. Switch on the calibration/adjustment function with (yes). 4. Confirm with [Hold]. light up in the display. There is a negative effect on the accuracy of the calibration/adjustment when the reference oil bottle is held by hand.
- Page 30 A maximum correction of +/-3% TPM is possible. If the TPM value displayed deviates by more than 3% TPM from the target value of the reference oil, a technical check of the instrument by Testo Service is recommended. 9. Save with [Hold] and carry out further settings in the configuration mode.
-
Page 31: Tips And Assistance
> Unlock configuration mode. see Locking / unlocking configurations, page 20 Err 1 lights up TPM sensor faulty > Contact Testo Customer Service or your dealer. Err 2 lights up Temperature sensor faulty > Contact Testo Customer Service or your dealer. -
Page 32: Accessories And Spare Parts
Testo Customer Service. If we have not been able to answer your question: please contact your local dealer or the Testo Customer Service. For contact details, see the back of this document or visit the website www.testo.com/service-contact. - Page 34 0970 2750 en 04...
Need help?
Do you have a question about the 270 and is the answer not in the manual?
Questions and answers