Table of Contents
Advertisement
Advertisement
Table of Contents

Related Manuals for Lutron Electronics RADIO RA2


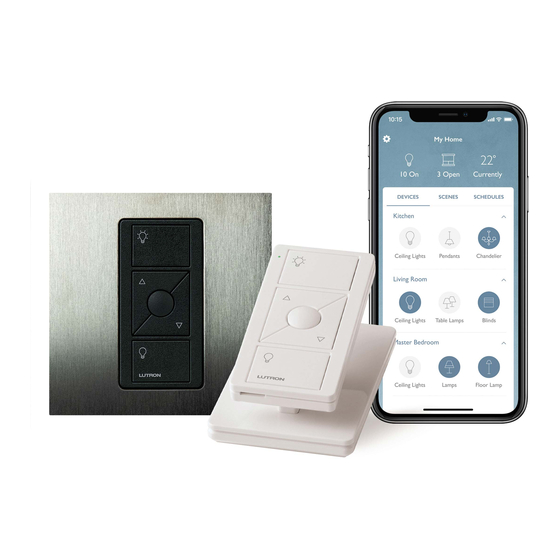
Summary of Contents for Lutron Electronics RADIO RA2
- Page 1 start here manual setup guide a step-by-step guide for manually setting up a complete Lutron RadioRAR 2 wireless control system ® please leave this setup guide with owner Lutron Technical Support Hotline 800.523.9466 U.S.A./Canada/Caribbean 24 hours, 7 days a week...
-
Page 2: Table Of Contents
table of contents read through all instructions before starting overview planning and design installing creating the system choosing room/scene buttons about programming programming buttons programming keypad columns programming Pico wireless controls ® programming shortcuts programming Visor Control Receiver optional: configuring VCRX inputs optional: testing RF signal quality optional: setting shade/drapery limits resetting devices to factory settings... -
Page 3: Overview
overview RadioRAR 2 is a wireless multi-room control system for lights and Shades/Draperies. Create the right ambiance for various activities, easily monitor and control your lights, reduce energy usage, and increase safety in and around your home. Manually programmed systems can have up to 100 devices (1 Main Repeater, 0 to 4 Auxiliary Repeaters, and 1 to 95 other devices). - Page 4 overview manual programming system components* Main Repeater Main Repeater Supports system setup, allows integration Repeater Status and PC connectivity (ethernet, RS-232), Communication Wired Setup Test and ensures error-free communication Power Repeater Link Integrate Program / Integrate RS232 Ethernet between system components. Main Repeater Auxiliary Repeater Auxiliary Repeater...
- Page 5 overview manual programming system components* (continued) Hybrid Keypad Replaces a standard light switch for dimming control. Buttons control lights and Shades/Draperies locally and Hybrid Keypad throughout the home. Visor Control Transmitter Controls lights throughout the home from the comfort of your car. Visor Control Receiver Visor Visor...
-
Page 6: Planning And Design
planning and design system planning A properly planned RadioRA 2 system is easy to use and provides ® the maximum benefits. Planning a system involves creating areas. An area is a group of lights and Shades/Draperies that are controlled together. Consider the following questions when designing your system: What areas do I want to control? •... - Page 7 planning and design Choose how the Keypads will control the areas. Note: This step does not apply to Pico Wireless Controls and ® Visor Control Transmitters. Ways to control the area Benefit Individual device control - Provides ability to turn an Control of a single Dimmer, individual light on/off and allows Switch, or Shade/Drapery.
-
Page 8: Installing
installing After planning and designing the layout of the system, install system components according to the installation instructions that came with each component. installing devices Dimmers, Switches, and Hybrid Keypads • Note: A Dimmer, Switch, or Hybrid Keypad in a 3-way or 4-way application must use RadioRA 2 Remote Dimmers or Remote ®... - Page 9 installing installing repeaters We recommend installing Repeaters in a location that is out of sight and will not be disturbed (i.e. cabinet, closet, etc.). Repeaters do not need to be placed in the open. Main Repeater • Auxiliary Repeater • All devices must be located within 30 ft (9 m) of a Repeater.
-
Page 10: Creating The System
creating the system system setup To set up a RadioRA 2 system, components must be added to the ® Main Repeater. First, add Auxiliary Repeater(s)*; then add all other system devices. adding Auxiliary Repeaters and devices Enter Add Mode Main Press and hold the Add button Main Repeater Repeater... - Page 11 creating the system Add devices When a device has been successfully added, the Repeater will beep. SivoiaR QS Wireless Shades/Draperies LUTRON LUTRON Tabletop Keypads must be Press and hold any button for LUTRON plugged in during 3 seconds, until the green LED set up and rapid-flashes for 2 seconds, then programming.
-
Page 12: Choosing Room/Scene Buttons
choosing room/scene buttons Keypad button LEDs can be configured to show the status of the lights or Shades/Draperies programmed to the Keypad button. They can be configured to provide Room Status (default) or Scene Status. Room Status * Scene Status Button LED is on when at least Button LED is only on when one of the devices assigned to... - Page 13 choosing room/scene buttons button configuration Enter Button Configuration RRD-W2RLD All other Keypads* VCRX Keypads (including Hybrid Only the Keypads) Tabletop Keypads “Keypad” must be plugged in during set up column and programming. can be configured on the Receiver. Press and Press and hold the Press and hold the hold the top...
-
Page 14: About Programming
about programming After all components have been added to the RadioRA 2 system and all Keypad buttons ® have been configured as Scene or Room Status, program the Keypads so that each button controls a device (i.e. Dimmer, Switch, Shade/Drapery, etc.) or a group of Tabletop Keypads must be plugged devices. -
Page 15: Programming Buttons
programming buttons Enter Program Mode Press and hold the top and bottom buttons of the rightmost column (top 2 buttons on RRD-W2RLD Keypad and VCRX Keypad column) for 3 seconds until the top button LED begins to normal-flash. Select the button to program Press and release the button to be programmed. - Page 16 programming buttons Steps 3 to 7 cover assigning devices to the selected button and setting the levels for those devices. To assign the devices, follow the step appropriate to that device: Hybrid LUTRON Step Step Steps Step Step Assign Dimmer/Switch and set level i.
- Page 17 programming buttons Assign Hybrid Keypad and set level i. Press and hold the raise and lower buttons on the Hybrid Keypad to be assigned for 3 seconds. When the Hybrid Keypad has been successfully assigned, the load connected to the Hybrid Keypad will turn on/off 3 times and the LEDs will normal-flash.
- Page 18 programming buttons Individual zones and single scenes can be assigned to buttons on GRAFIK Eye QS Wireless units, but not both to the same unit. ® Step 5 covers assigning zones to a button, and step 6 covers assigning a scene to a button. If assigning single scenes to buttons, skip ahead to step 6.
- Page 19 programming buttons Assign single scenes to a GRAFIK Eye QS Wireless unit ® and set levels Note: Both individual zones and single scenes can not be assigned to the same GRAFIK Eye QS Wireless unit. ® i. Press the OK button to enter the Scene menu.
- Page 20 programming buttons Assign Sivoia QS Wireless Shade/Drapery and set level ® A. Roller Shade/Drapery i. Press and hold the open button ( ) or close button ( ) on the Electronic Drive Unit (EDU) to be assigned for 3 seconds. When the Roller Shade/Drapery has been successfully assigned, the green LED on the EDU will rapid-flash.
- Page 21 programming buttons B. TriathalonR Shade i. Press and release the TriathalonR Shade button. When the TriathalonR Shade has been successfully assigned, the Shade LED will rapid-flash. Note: To unassign a TriathalonR Shade, press and release the Shade button. The LED on the Shade will flash twice in 2 seconds, then turn off for 8 seconds.
-
Page 22: Programming Keypad Columns
programming keypad columns "Shade" Keypad columns are shipped pre-configured from Lutron, and typically have engraving for Shades/Draperies (i.e. open, preset, close). GRAFIK Eye QS Wireless unit "Shade" columns are pre- ® configured as RadioRA 2 "Shade" Keypad columns. Only Shades/ ®... - Page 23 programming keypad columns Set presets for Shades/Draperies Tap the preset button you wish to program. Assigned devices will go to their preset level and the selected preset button LED will turn on solid. ii. Tap the Open button to wiggle the next Shade/ Drapery or tap the Close button to wiggle the previous Shade/Drapery.
-
Page 24: Programming Pico ® Wireless Controls
programming Pico wireless controls ® Pico Wireless Controls are available in “Light” and “Shade” ® versions. The “Light” version can control lighting and the “Shade” version can control Shades/Draperies. "Shade" versions are shipped pre-configured from Lutron, and typically have engraving for Shades/Draperies. - Page 25 programming Pico wireless controls ® B. Shade/Drapery ("Shade" version only) A Shade/Drapery can be assigned either at a Pico ® Wireless Control or locally at the Shade/Drapery. a. At the Pico Wireless Control: ® i. Tap the Open button to wiggle the next Shade Open Shade/Drapery or tap the Close button to...
- Page 26 programming Pico wireless controls ® Set presets for Shades/Draperies Shade Open i. Tap the preset button you wish to program. Assigned devices will go to their preset level. Close ii. Tap the Open button to wiggle the next Shade/ Drapery or tap the Close button to wiggle the Shade Open previous Shade/Drapery.
-
Page 27: Programming Shortcuts
programming shortcuts saving new levels on previously programmed Keypad buttons Select Keypad button Press and release the Keypad button to Shade be programmed. Assigned devices will go to Open their preset level. Close Adjust levels Use raise, lower, or tapswitch to adjust the level of assigned devices. - Page 28 programming shortcuts copy button programming Any previously programmed Keypad button in a Keypad column can be copied to another Keypad button. A Keypad button can be copied to a Keypad button on the same Keypad or to a Keypad button on a different Keypad. Buttons in a "Shade" Keypad column can not be copied.
-
Page 29: Programming Visor Control Receiver
programming Visor Control Receiver Enter Learn Mode Press and hold the Learn button on a VCRX for 3 seconds until Learn LED turns on solid. Learn a VCTX button to a VCRX i. Press and release any button on the VCRX that is to Learn a VCTX button. - Page 30 programming Visor Control Receiver Exit Learn Mode Press and release the Learn button on the VCRX until the Learn LED turns off. Note: When the VCRX button has learned the VCTX button, the LED next to selected VCRX button will turn off when the VCTX button is released.
-
Page 31: Optional: Configuring Vcrx Inputs
optional: configuring VCRX inputs The VCRX input contact closures can be configured to accept maintained or momentary contact closures. Maintained (toggle action) Open Close Open VCRX Switch Activate Release Open Switch Switch Momentary (single action) Open Close Open Switch Activate Release Open Switch... -
Page 32: Optional: Testing Rf Signal Quality
optional: testing RF signal quality Test Mode provides a method for identifying if system components are communicating properly. Use Test Mode to verify that all Repeaters (in systems with multiple Repeaters) and all devices are communicating effectively. An acceptable signal ensures error-free communication. - Page 33 optional: testing RF signal quality Verify Repeater location. Confirm that all Repeaters on the RF link are within 60 ft (18 m) of another Repeater. Consult the installing repeaters section on page 7. Check the Repeater Status LEDs to Main Repeater verify signal quality.
-
Page 34: Optional: Setting Shade/Drapery Limits
optional: setting shade/drapery limits The upper and lower limits of a Shade/Drapery can be adjusted from any "Shade" Keypad or Wireless Control that has been assigned to it. Shade Open Tabletop Keypads must be plugged in during set up and Close programming. -
Page 35: Resetting Devices To Factory Settings
resetting devices to factory settings Resetting a device to factory settings will remove it from the system and will clear its programming. After being reset to factory settings, the device will need to be reprogrammed as part of a RadioRA 2 ®... - Page 36 resetting devices to factory settings Sivoia QS wireless EDU ® Press and hold the close limit button ( ) on the EDU for 5 seconds. The green LED on the EDU will flash quickly for 2 seconds and then stay on. Press and hold the open limit button ( ) for 5 seconds.
-
Page 37: Repeater Troubleshooting
repeater troubleshooting Symptom Possible Cause Remedy After entering Add Mode, the Add LED on a Main or Auxiliary Repeater is: Rapid-flashing green Entering Add Mode. This is normal. Wait 10 (10 times per second) Repeater is listening for seconds for the LED to neighboring systems begin normal-flashing. -
Page 38: Device Troubleshooting
device troubleshooting Symptom Possible Cause Remedy After attempting to add The system is out of If the system has less a device, the Repeaters device addresses. than the maximum beep 3 times. number of devices, use the RadioRA 2 Design ®... - Page 39 device troubleshooting Symptom Possible Cause Remedy After entering Program Device has not been Assign the device to Mode, LEDs on a assigned to a button. a button following the Keypad, Dimmer/ instructions starting at Switch, or other device step 2 in programming are not normal-flashing.
- Page 40 Lutron, RadioRA, Sivoia, GRAFIK Eye, seeTouch, Pico, Triathalon, Softwitch, and are registered trademarks and RadioRA 2 is a trademark of Lutron Electronics Co., Inc. Worldwide Technical and Sales Assistance If you have questions concerning the installation or operation of this product, visit us on the web at www.lutron.com/radiora2 or call the Lutron Technical Support Center.
Need help?
Do you have a question about the RADIO RA2 and is the answer not in the manual?
Questions and answers