
Related Manuals for Audio Analogue maestro ANNIVERSARY


Summary of Contents for Audio Analogue maestro ANNIVERSARY
- Page 1 AUDIO ANALOGUE maestro ANNIVERSARY zero feedback integrated amplifier OWNER’S MANUAL MANUALE D’ISTRUZIONI Manual rev 1.1...
- Page 3 The Maestro Anniversary Integrated Amplifier is the latest arrival in the Audio Analogue family. After twenty years from the introduction of the first Maestro amplifier, Audio Analogue is proud to introduce you the new born. It has been designed by the Airtech Group to maximize the sound quality but keeping a good value for...
- Page 4 INTRODUCTION AF Group S.R.L., AUDIO ANALOGUE distributor, does not take any responsibility in the following cases: Whenever the operational procedures related to the use and the maintenance of the equipment as described in this manual are not respected. Whenever damage to the equipment occurs because of repairs and modifications made from non-authorized staff or because of normal deterioration of the system.
- Page 5 PREMESSA AF Group S.R.L, distributore AUDIO ANALOGUE, non accetta responsabilità nei casi in cui: Le procedure operative di utilizzo e manutenzione dell’apparato descritte nel manuale non siano rispettate. I danni si verifichino in seguito a riparazioni o modifiche dell’apparato eseguite da personale non autorizzato o a seguito di normale deterioramento dell’apparato.
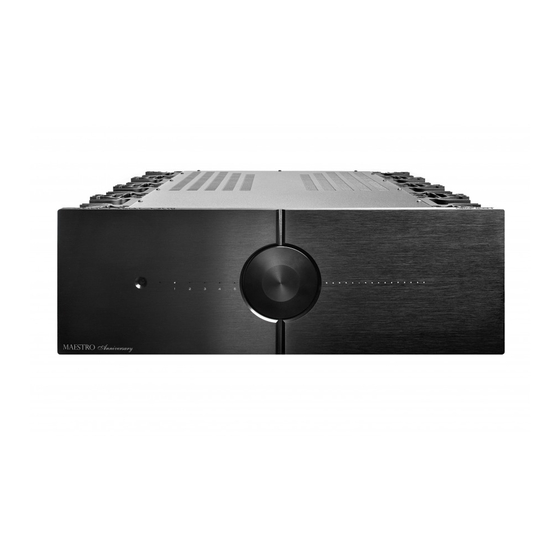
- Page 6 Front panel Standby LED (Red light indicates standby, off when the amplifier is working). Active channel indicator. ON/OFF (short push to power ON, five seconds push to power OFF), Volume Control (rotate) and channel selection (three seconds push to change) Volume level indicator IR receiver.
- Page 7 Back panel 1) RIGHT SPEAKER OUT. Right speaker out connector. 2) LEFT SPEAKER OUT. Left speaker out connector. 3) Balanced Inputs (See Note on Balanced Input) 4) RCA Input channels (unbalanced). 5) IEC standard power inlet and fuses. Connect here the provided power cord. If necessary, replace the fuses with others of the same kind and value (see back panel for details) 6) Full OFF switch.
- Page 8 Remote controller description Remote Amp functions The remote is dedicated only to yours Maestro Anniversary. There are seven buttons: • : Turn ON and OFF the amplifier STBY • SETUP : used for special functions, see further. • : activates/de-activates the mute function.
- Page 9 • 2 AAA batteries(already included in the remote control) • 1 instruction manual If one of the items listed above is missing, please contact your Audio Analogue retailer. After extracting the smaller items from the package, pull out the unit carefully. Separate the package from the anti-shock expanded-foam protection.
- Page 10 Integrated Amplifier inputs you want to use. Please use only high-quality cables. When this is done, connect the Maestro Anniversary Integrated Amplifier outputs to the speakers. At last, after checking that the power button is in the OFF position, plug the power cord into the Maestro Anniversary Integrated Amplifier inlet and into the wall outlet.
- Page 11 First of all put the switch on the rear to ON. The standby LED on the front must turn red. Push the central knob briefly or press the “STBY” button on the remote control. The Maestro Anniversary will begin the start sequence.
- Page 12 IN+ or IN- respectively. The Maestro Anniversary, between the change from one channel to another, waits the offset to be stable; this can take some time especially at high volume.
- Page 13 Configuration setting In this section the procedures to set the different Maestro Anniversary functions are described. The functions are accessed by pressing the remote “SET” button. When the amplifier is in “SET MODE” the input LED will show the function number: 1.
- Page 14 Volume scale selection In this mode the input LED number two will be ON and the volume LEDs will show the volume scale currently set. Four different volume scales are available. The four curves are: 1. Volume Scale #1 – This setting is thought for general loudspeaker (fig. 1) 2.
- Page 15 fig. 5 In fig. 5 the volume LEDs for each setting is shown. The default scale is the number 1. To modify the volume scale push the "VOL+" “VOL-“ button on the remote. The fifth setting is the DIRECT configuration. In this mode the amplificer behaves as a power amplifier and the preamplifier is locked.
- Page 16 BALANCE setting This function permits to balance the two channels. In this mode the input LED number three will be ON and the volume LEDs will show the balance currently set. To change the balance simply press “VOL+” or “VOL-“ The Volume LEDs will display the current settings of the balance according to the figure below (three examples).
- Page 17 Nel caso di condizioni di malfunzionamento il controllo dell'apparecchio provvederà a disconnettere i diffusori e a spegnere l’alimentazione degli stadi di potenza. Per la segnalazione degli allarmi il Maestro Anniversary utilizza i Led del volume che verranno accesi in particolari configurazioni.
- Page 18 Tecnichal information To have detailed technical information please visit the website: www.audioanalogue.com where you can also register for the newsletter service to be continually informed about all of Audio Analogue’s new products, news and all technical stuff published on the website.
- Page 19 Technical Data Parameter Measurement conditions Value Channels: Input impedance 47 kΩ Max input signal Power on 8Ω load: One channel working, 230V line 150W @ 1% THD + N Power on 4Ω load: One channel working, 230V line 300W @ 1% THD + N Power on 2Ω...
- Page 20 1W frequency response right plus left channel – Risposta in frequenza ad 1W canale destro e sinistro T.H.D.+N vs. Input Amplitude @ 8Ω (20kHz black, 1kHz green) T.H.D + N rispetto alla tensione di ingresso su 8Ω ( 20kHz curva nera, 1kHz curva verde)
- Page 21 T.H.D.+N vs. frequency @ 8Ω (1W black, 10W green, 150W yellow) T.H.D + N rispetto alla frequenza su 8Ω ( 1W curva nera, 10W curva verde e 150W curva gialla)
- Page 22 Il telecomando non funziona Eccessiva distanza dal pannello Avvicinarsi di più all’apparecchio o cambiare frontale dell’apparecchio angolo o angolo non corretto Se i rimedi suggeriti non dovessero funzionare oppure il problema non è riportato nella lista, contattate il vostro rivenditore Audio Analogue...
- Page 23 Please contact your Audio Analogue dealer who will inform you about the take-back and recycling. elettroniche insieme ai normali rifiuti Small products (and small amounts) might be taken back by your local collection facilities.
- Page 24 Audio Analogue Distributed by: AF GROUP srl www.audioanalogue.com info@audioanalogue.com...
Need help?
Do you have a question about the maestro ANNIVERSARY and is the answer not in the manual?
Questions and answers